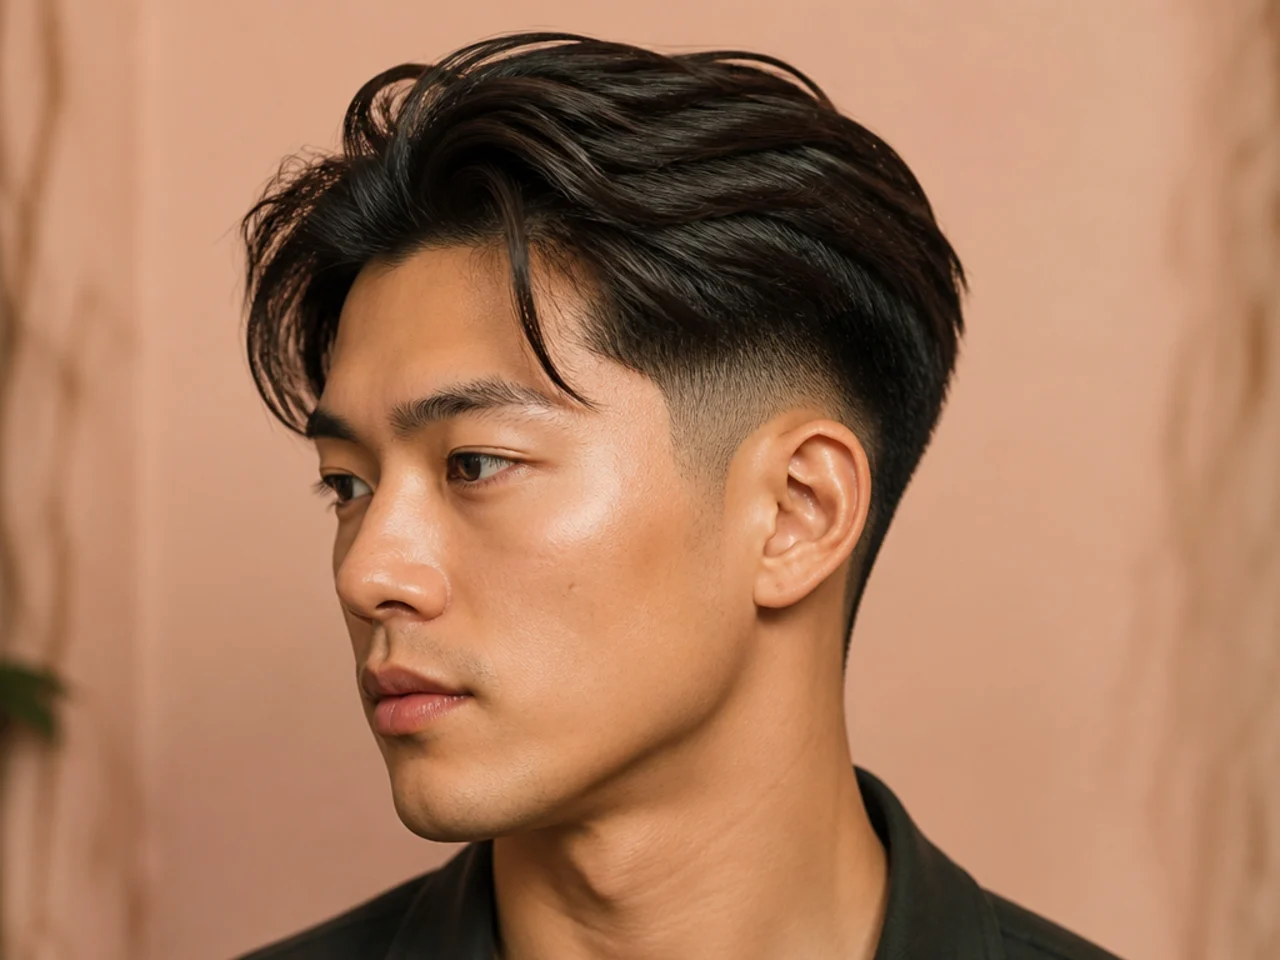
25 Blowout Taper Fade Haircuts for Men
A blowout taper fade pairs a big, rounded top with a clean faded taper below. Here are 25 variations, who each one suits, and how to ask for them.
In this article · 31
- What Is a Blowout Taper Fade?
- How to Choose Your Blowout Taper Fade
- 25 Blowout Taper Fade Variations Worth Trying
- 1. Low Fade Blowout with a Loose Front
- 2. Low Skin Fade Blowout for Straight Hair
- 3. Low Drop Fade Blowout
- 4. Low Fade Blowout with a Textured Fringe
- 5. Low Fade Blowout for Curly Hair
- 6. Low Fade Blowout with an Edgar Line
- 7. Low Fade Blowout for Fine Hair
- 8. Low Fade Blowout with a Middle Part
- 9. Mid Fade Blowout with a Full Round Crown
- 10. Mid Skin Fade Blowout
- 11. Mid Drop Fade Blowout for Wavy Hair
- 12. Mid Fade Blowout with a Hard Part
- 13. Mid Fade Blowout for Coily Hair
- 14. Mid Fade Blowout with a Quiff Front
- 15. Mid Fade Blowout for Asian Hair
- 16. Mid Fade Blowout with a Peaked Front
- 17. High Skin Fade Blowout
- 18. High Drop Fade Blowout
- 19. High Fade Blowout with an Afro Top
- 20. High Fade Blowout with a Sponge-Twisted Top
- 21. High Fade Blowout with a Broccoli Top
- 22. High Fade Blowout with a Line-Up
- 23. High Fade Burst Blowout
- 24. Blowout Taper Fade with a Mullet Back
- 25. Blowout Taper Fade with a Side-Swept Front
- How to Ask Your Barber for a Blowout Taper Fade
- Styling and Maintenance for a Blowout Taper Fade
- FAQ
The blowout taper fade is the fade-height version of the barbershop blowout — sides blended down to a #0 or skin, top left long and blown up and forward with a round brush. You get sharp contrast at the perimeter and a rounded, air-filled crown above it. This guide covers 25 variations across low, mid, and high fade heights, tells you who each one flatters, and hands you the exact language to say at the chair.
What Is a Blowout Taper Fade?
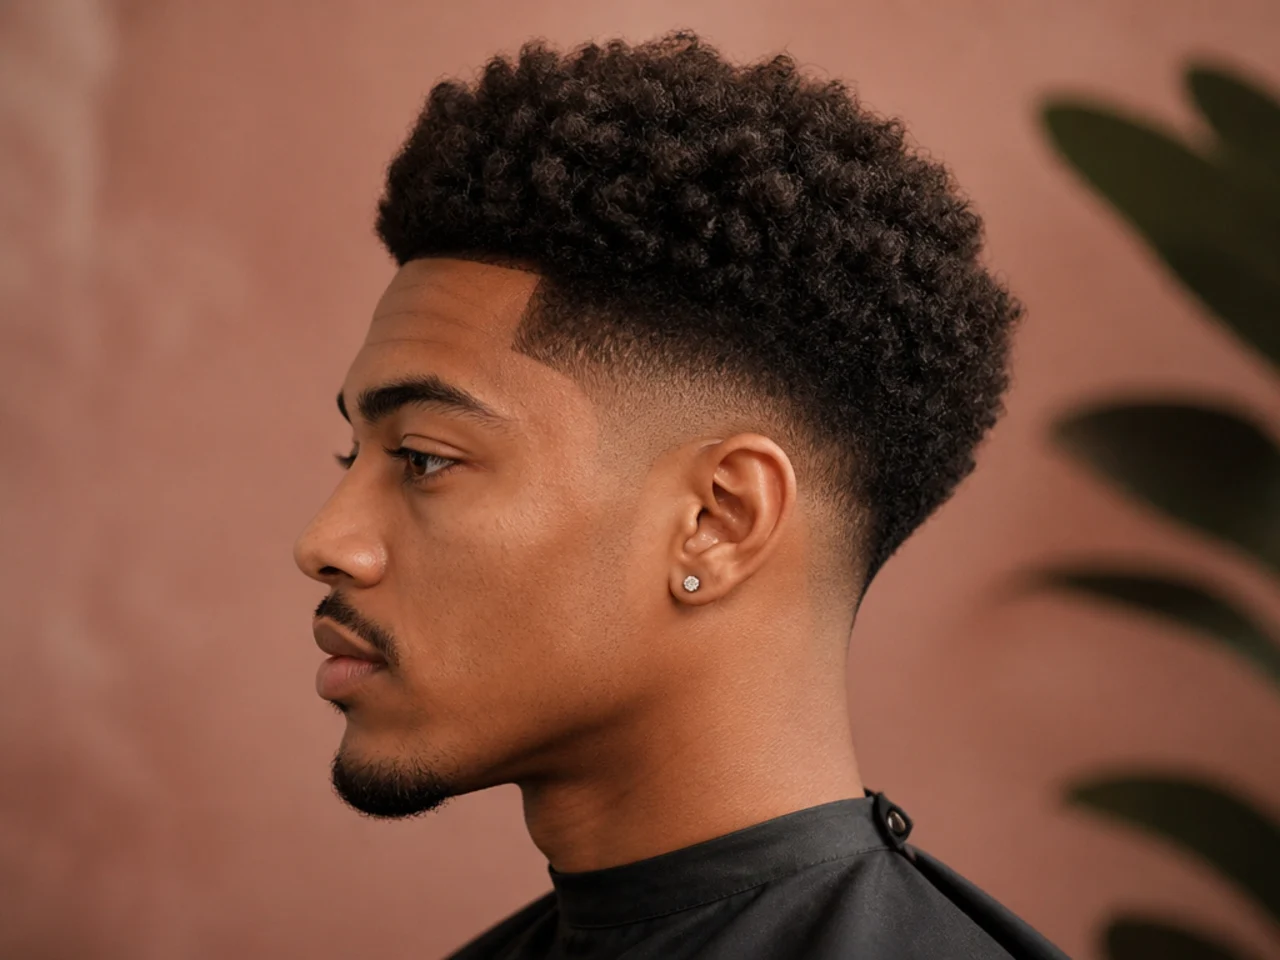
A blowout taper fade is a two-part cut. The bottom half is a faded taper — hair shrinks gradually through clipper guards (usually #3 → #2 → #1 → #0.5 → skin) somewhere on the head, then continues down to the neckline. The top stays long, usually four to six inches, and you round-brush it up and forward until it holds that domed silhouette.
The word "fade" separates this from a standard blowout taper. A regular blowout taper stops at a #0.5 or #1 — the sides still carry length. A blowout taper fade drops to a #0 or skin at the shortest point, so the contrast reads harder against the volume on top.
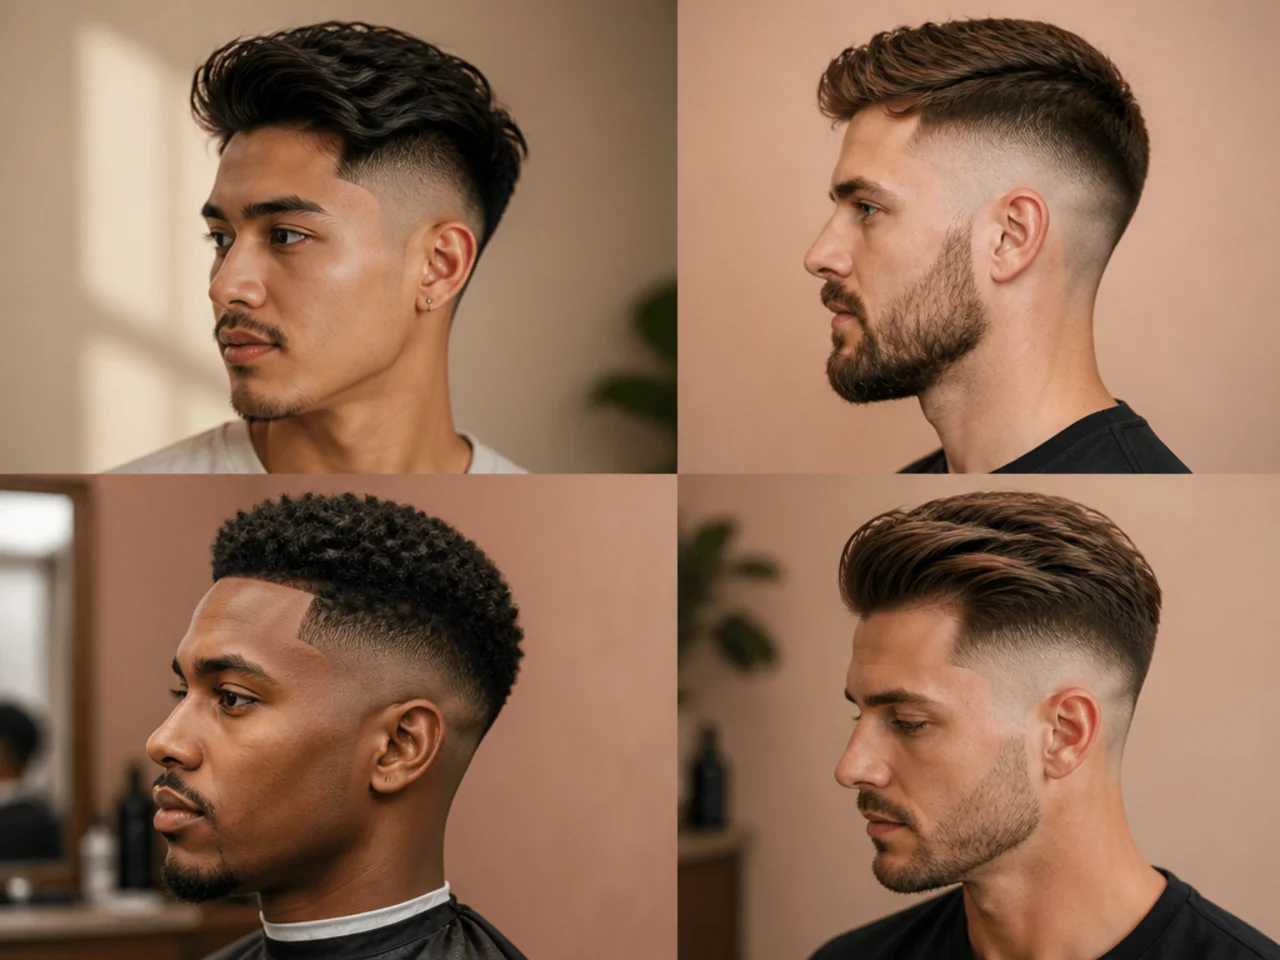
Fade height is the second variable. Low fades finish just above the ear, mid fades sit at the temple line, high fades start up near the parietal ridge. Same silhouette on top, three very different perimeter looks. The comparisons in low fade vs mid fade vs high fade go deeper on that call.
The blowout itself is styling, not cutting. Barbers who cut for blowout leave the length weighted forward and up, so the round brush has hair to move. Ask for the wrong shape and even a great fade sits flat.
How to Choose Your Blowout Taper Fade
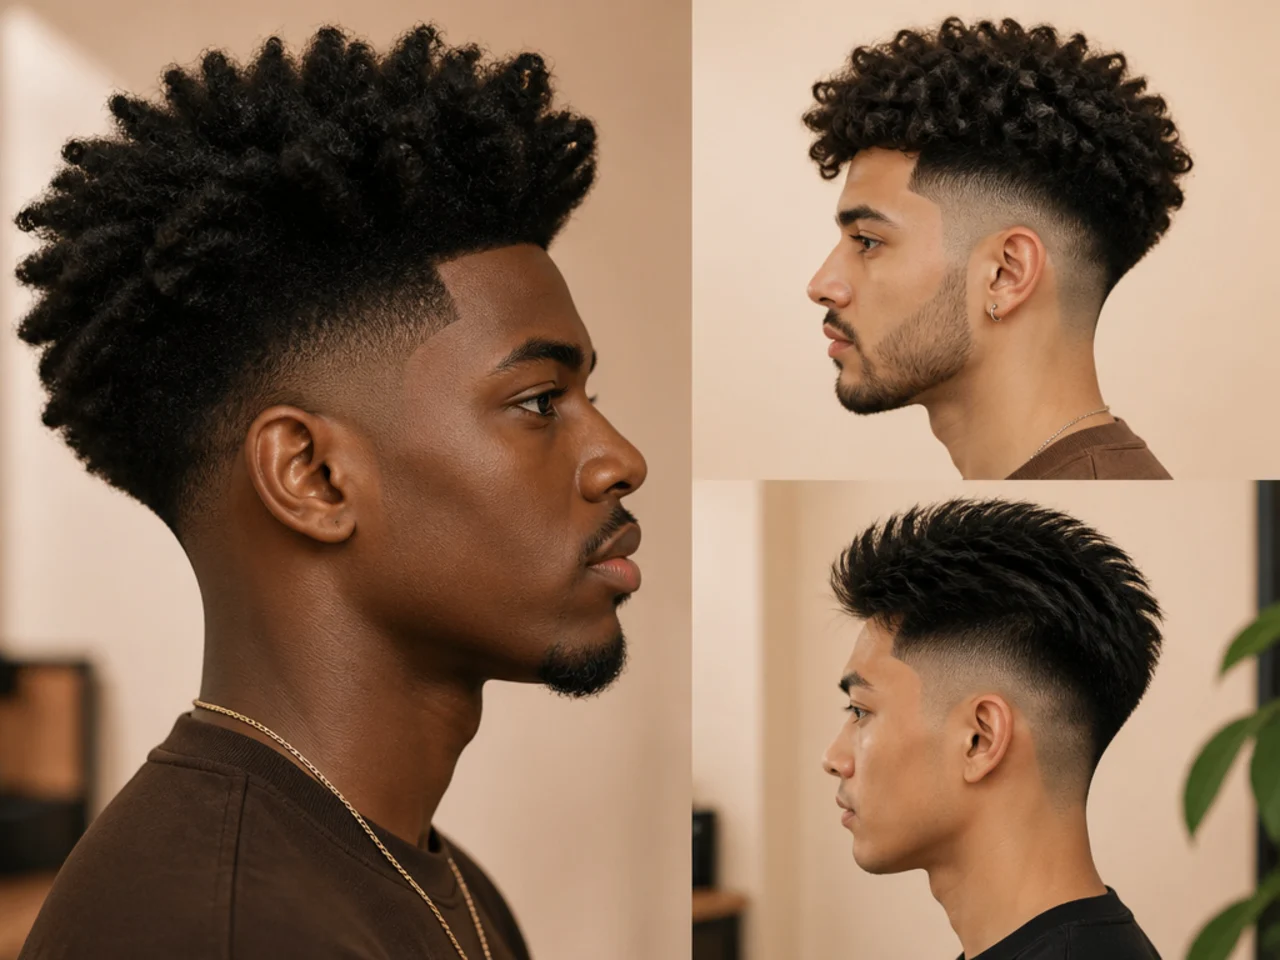
Three variables decide which version you should ask for. Get all three right and the cut works on the first appointment.
Face shape. Oval and square faces work with any fade height. Round faces want a mid or high fade with taller top volume — vertical lift lengthens the frame. Long or oblong faces should stay with a low fade and keep the top under four inches so the whole silhouette doesn't stretch further. Heart-shaped faces balance well with a mid fade and a full front.
Hair type. Wavy and thick straight hair are the sweet spot — natural body stacks with the round-brush shape and holds all day. Fine and thin hair needs mousse plus a shorter top (three to four inches) so it reads dense. Curly and coily hair skip the round brush entirely — a diffuser and a pick do the work, and the fade cleans up the perimeter without touching the curl.
Workplace and maintenance. A low fade blowout reads conservative enough for most offices. A mid fade sits in the safe middle. A high fade or skin fade reads bold and photographs sharpest but blurs by week two. Book every two to three weeks or the shape drops fast.
25 Blowout Taper Fade Variations Worth Trying
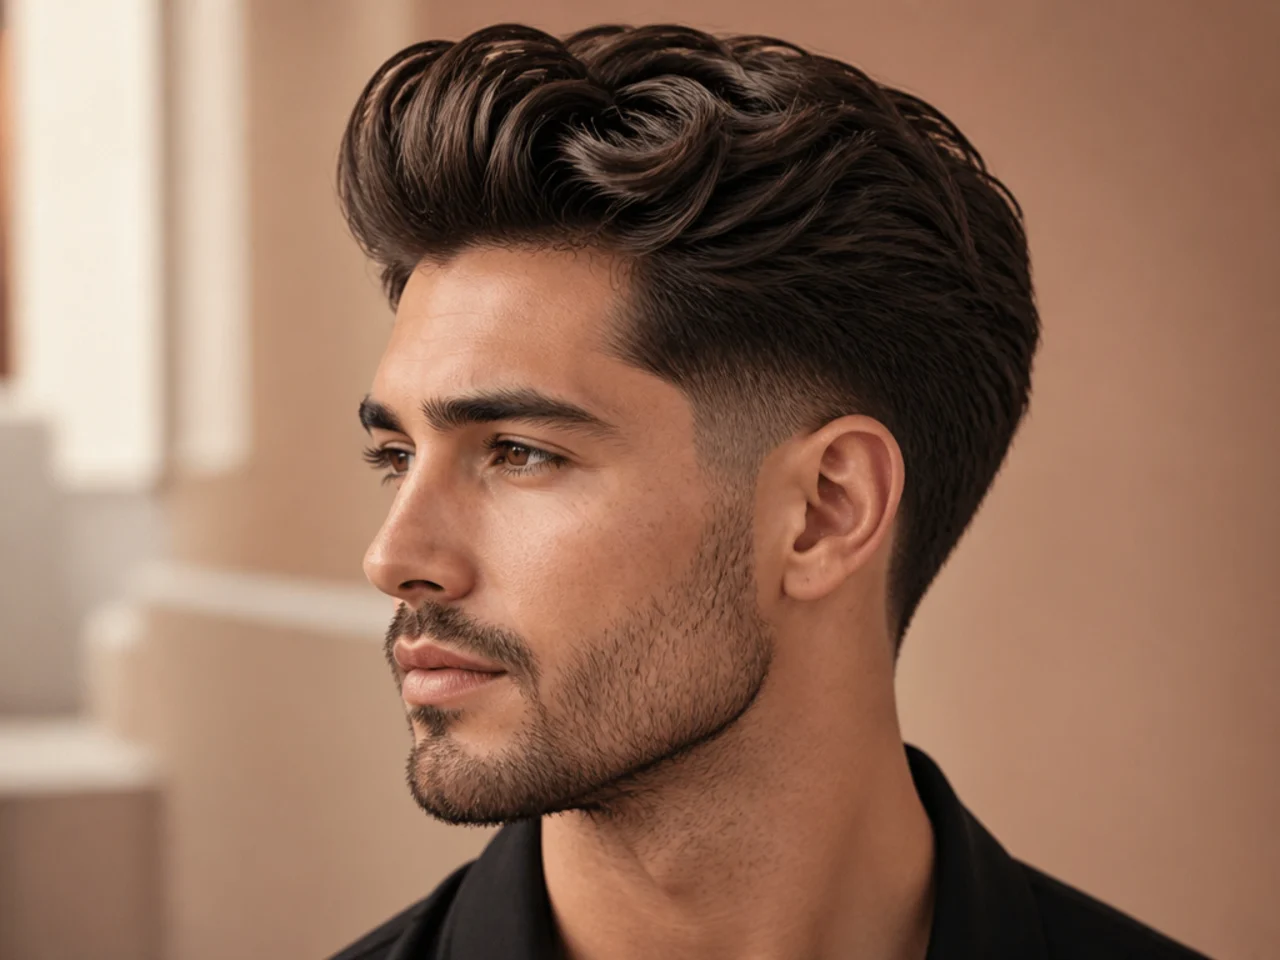
The variations below sort by fade height — low fades first, then mid, then high, then a few extras that mix in a mullet back or a comb-over front. Each entry tells you what makes it different, who it flatters, exactly what to ask for, and one styling move that locks the shape in.
1. Low Fade Blowout with a Loose Front
The low fade starts just above the ear, which keeps most of the sides intact and lets the volume on top take the spotlight. The front stays loose — a few strands break out of the shape instead of locking into a helmet. Best for guys with wavy or thick straight hair and oval or square faces.
Ask for: "Low fade blowout, 0.5 guard at the shortest, five inches on top, cut with weight in the front, leave the fringe loose." Say "blowout" out loud — that word tells the barber to leave length going up and back.
Styling tip: Blow-dry with a round brush going forward and up, then break the front with your fingers. Matte cream on the ends only. Zero product at the roots or the shape drops by lunch.
2. Low Skin Fade Blowout for Straight Hair
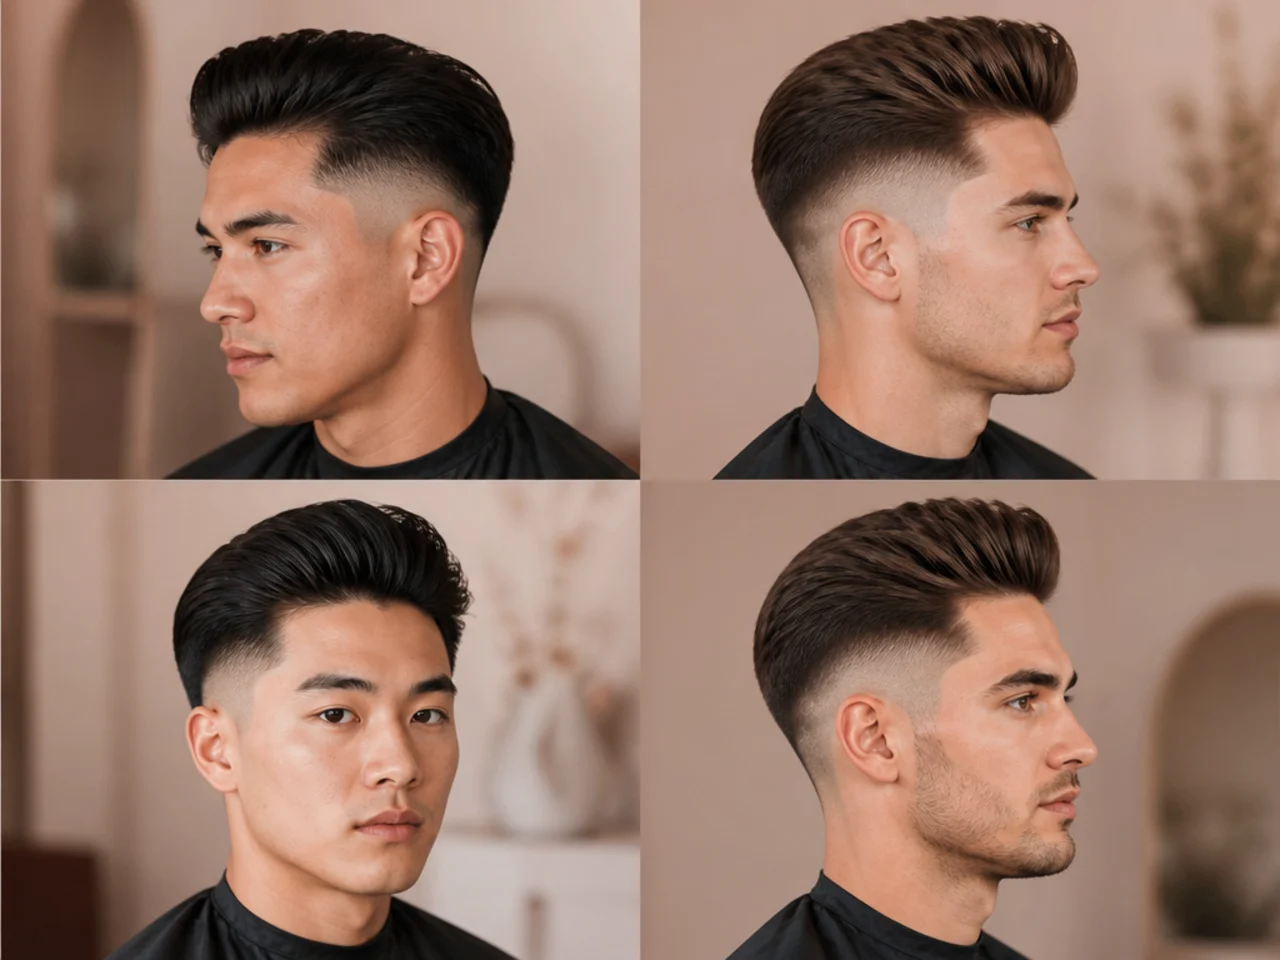
A skin fade takes the low fade all the way to bare skin at the sideburn — hardest possible contrast for a low finish. On straight hair, that clean base makes the engineered volume up top look intentional rather than accidental. Best for square and heart-shaped faces with medium-density straight hair.
Ask for: "Low skin fade, blowout on top, four to five inches of length, texturize the ends so the round brush has something to grip." Point at your sideburn so the barber sees exactly where you want the skin to start.
Styling tip: Root-lift mousse on damp hair, blow-dry upside down first, then flip up and shape with the round brush. Finish with texture powder — that's the trick for straight hair that refuses to hold height.
3. Low Drop Fade Blowout
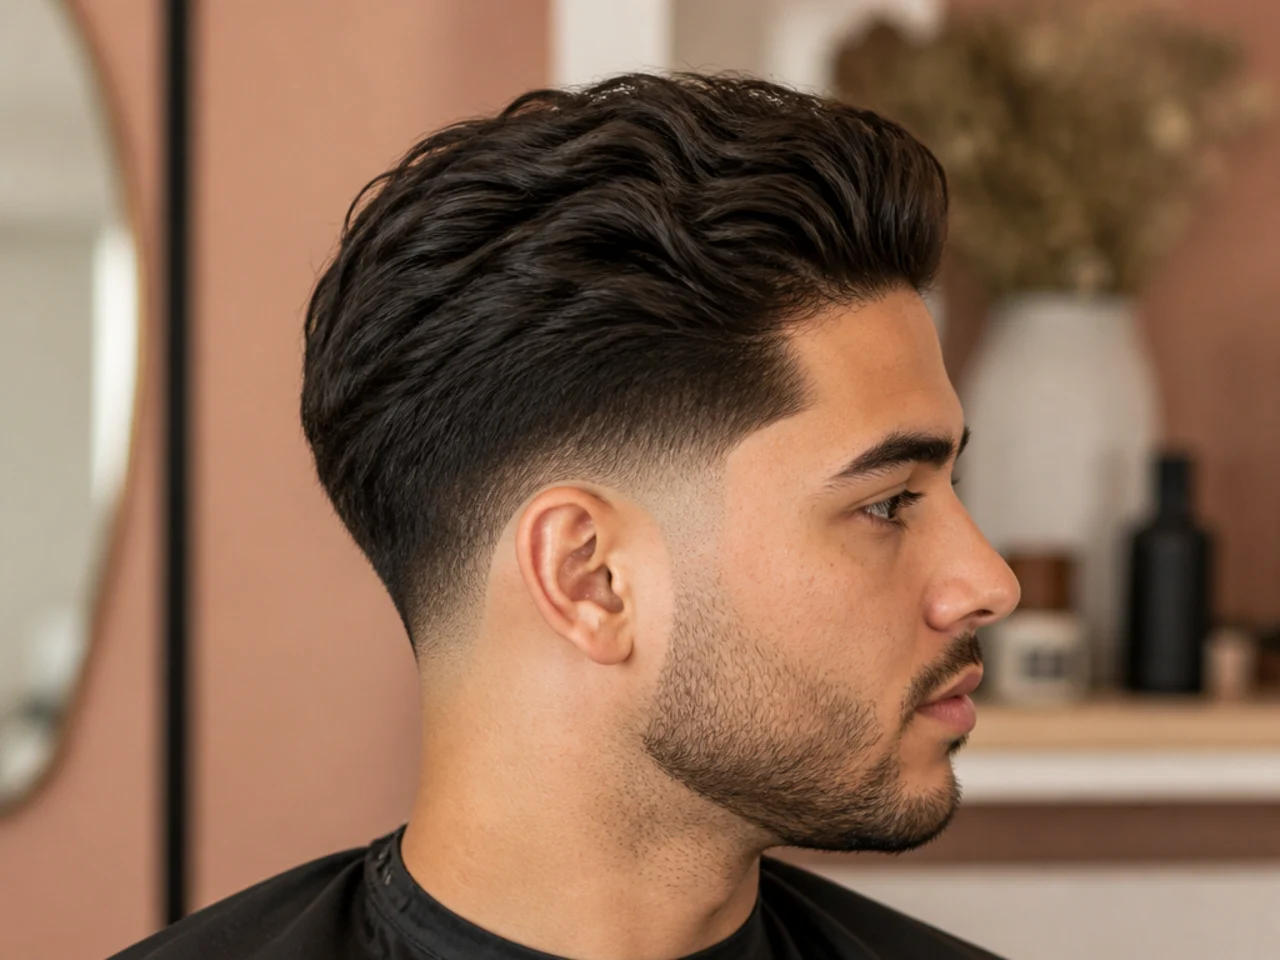
The drop fade curves down behind the ear instead of staying level with it. That arc gives the back of your head a rounder profile from the side, which balances a tall blowout on top perfectly. Best for guys with a flatter occipital bone or anyone whose head reads long from the profile view.
Ask for: "Low drop fade — arc down behind the ear, blowout on top, five inches of length, keep the crown full." Trace the drop curve with your finger so the barber sees the shape you want.
Styling tip: Blow-dry the back forward first, before the sides. That trains hair to lift up rather than fall flat against your neck. Cool shot at the end locks the shape.
4. Low Fade Blowout with a Textured Fringe
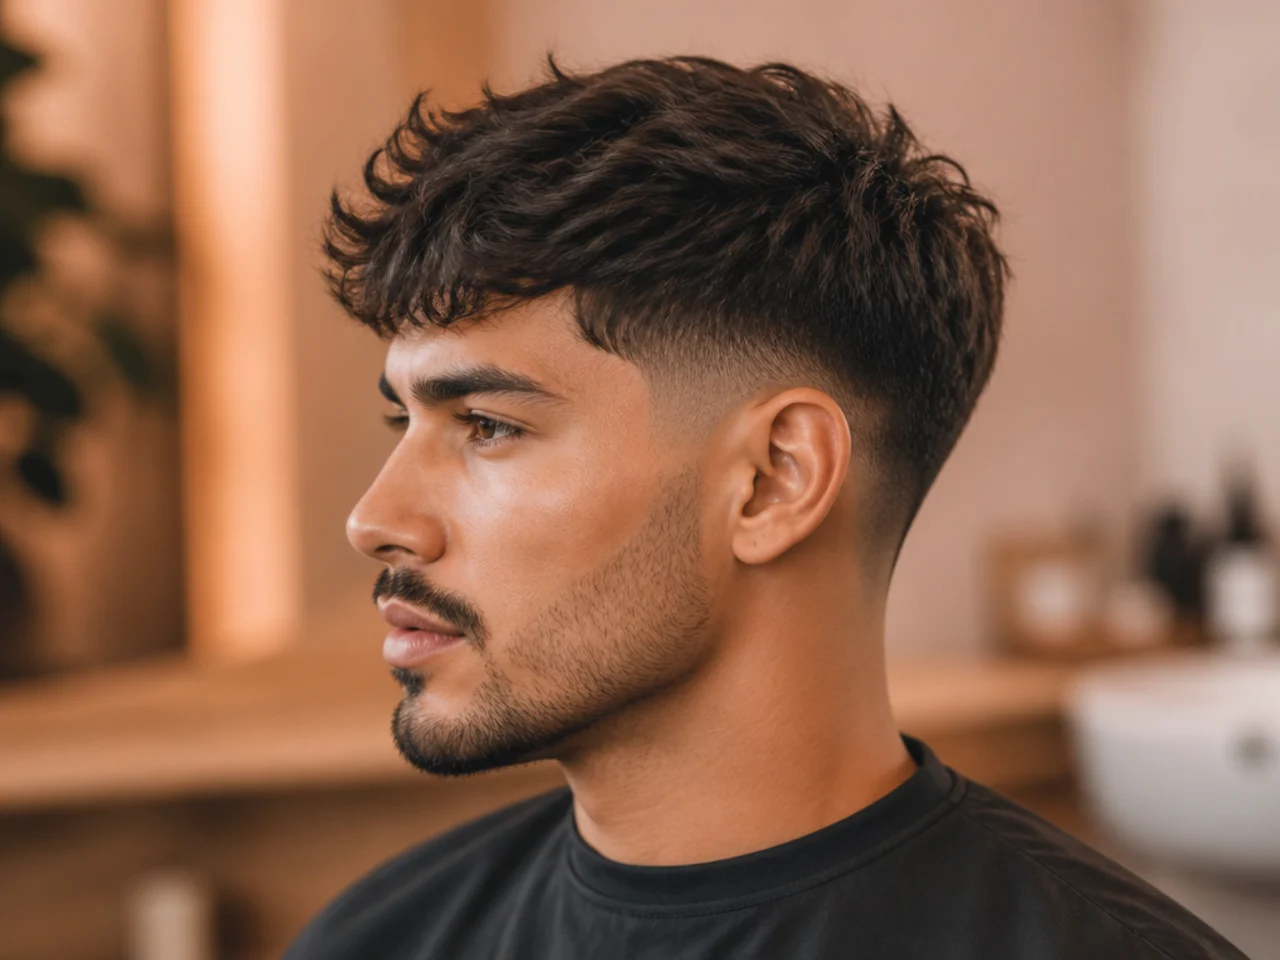
Trade the round-brushed front for a chopped, textured fringe pushed forward across the brow — the textured haircut treatment applied to a blowout base. The back and crown still get the round-brush volume, but the front reads casual and lived-in.
Ask for: "Low fade blowout, 0 guard at the shortest, four inches on top, point-cut the fringe for texture, keep it forward-falling." Bring a photo — textured fringe length varies shop to shop.
Styling tip: Sea salt spray on damp hair, blow-dry the back with a round brush going up, then rough-dry the fringe with your fingers so it stays choppy. Matte clay to finish.
5. Low Fade Blowout for Curly Hair
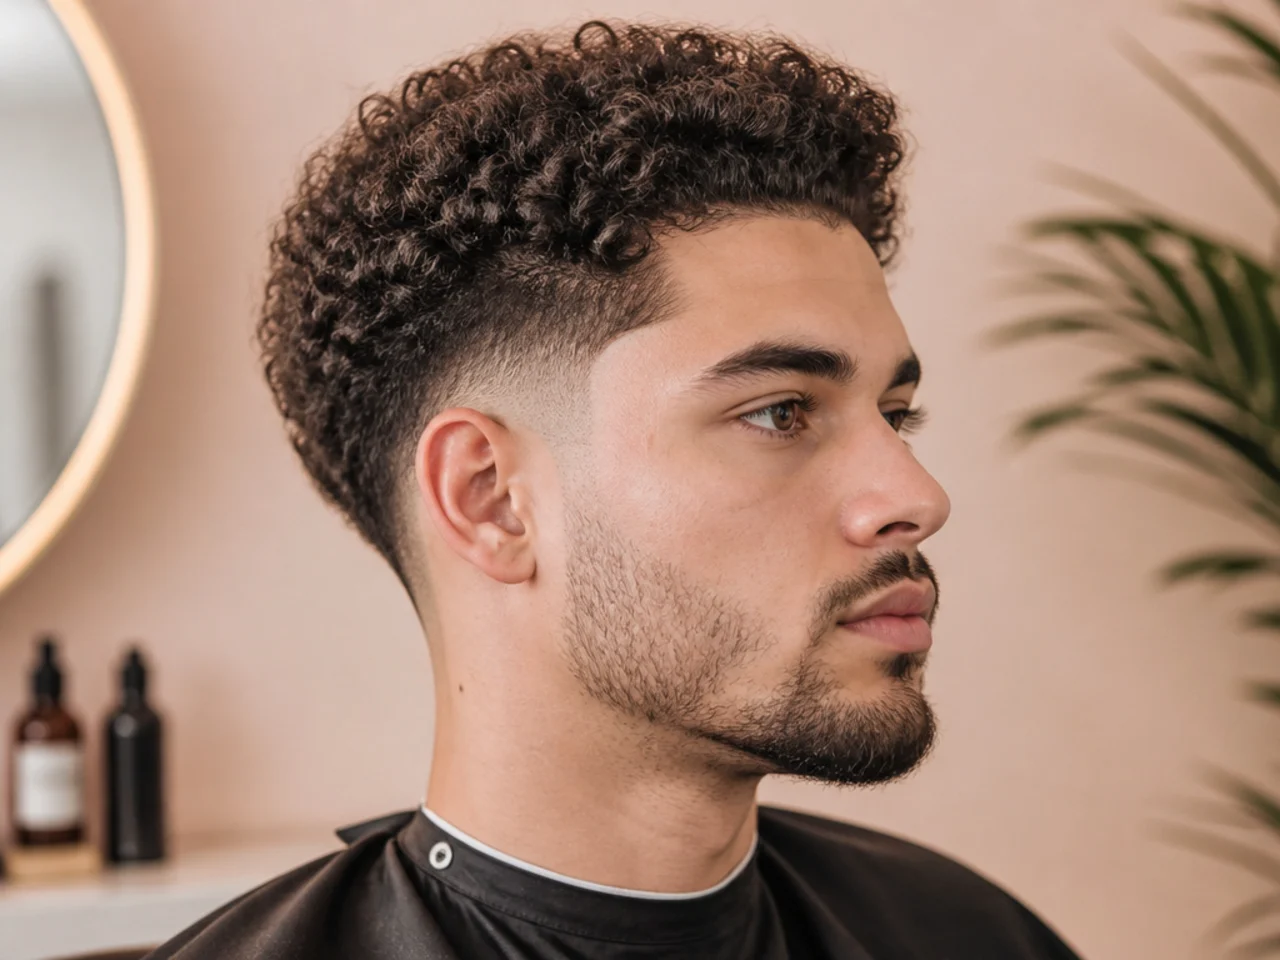
Curly hair on a low fade blowout gives you a full, naturally round crown with clean perimeter contrast. The curl handles the volume — you're really just shaping the outer edge. Best for 3a–3c curls with four to six inches of length grown out.
Ask for: "Low fade, blowout shape, scissor cut on top to keep the curl pattern intact, four to six inches, shape it round." Say scissor cut. Clippers on top flatten curls.
Styling tip: Curl cream on damp hair, diffuser on low heat, lift at the roots as you dry. Don't touch the curls after — every touch flattens the pattern. Refresh spray in the morning for day-two hair.
6. Low Fade Blowout with an Edgar Line
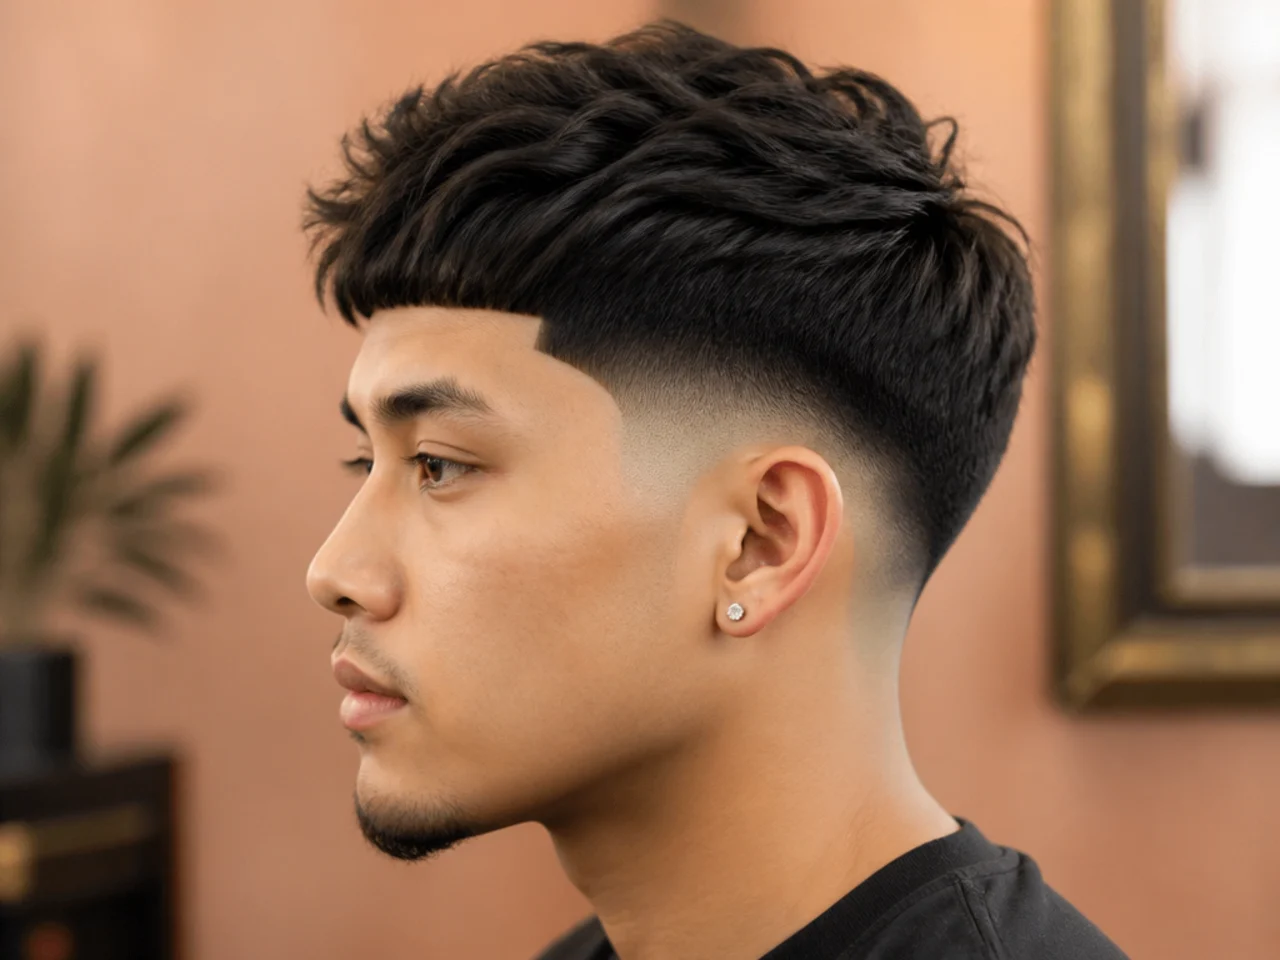
The Edgar haircut is the blunt straight-across fringe cut heavy at the forehead. Pair it with a low fade blowout and you keep volume behind the fringe while the front stays flat and geometric. Best for longer forehead heights.
Ask for: "Low fade blowout, Edgar fringe blunt across the brow, five inches through the crown, keep the back full." Bring a photo — Edgar fringe length is highly personal.
Styling tip: Blow-dry the back and crown forward, then comb the fringe flat across your forehead. Setting spray on the fringe holds the line all day.
7. Low Fade Blowout for Fine Hair
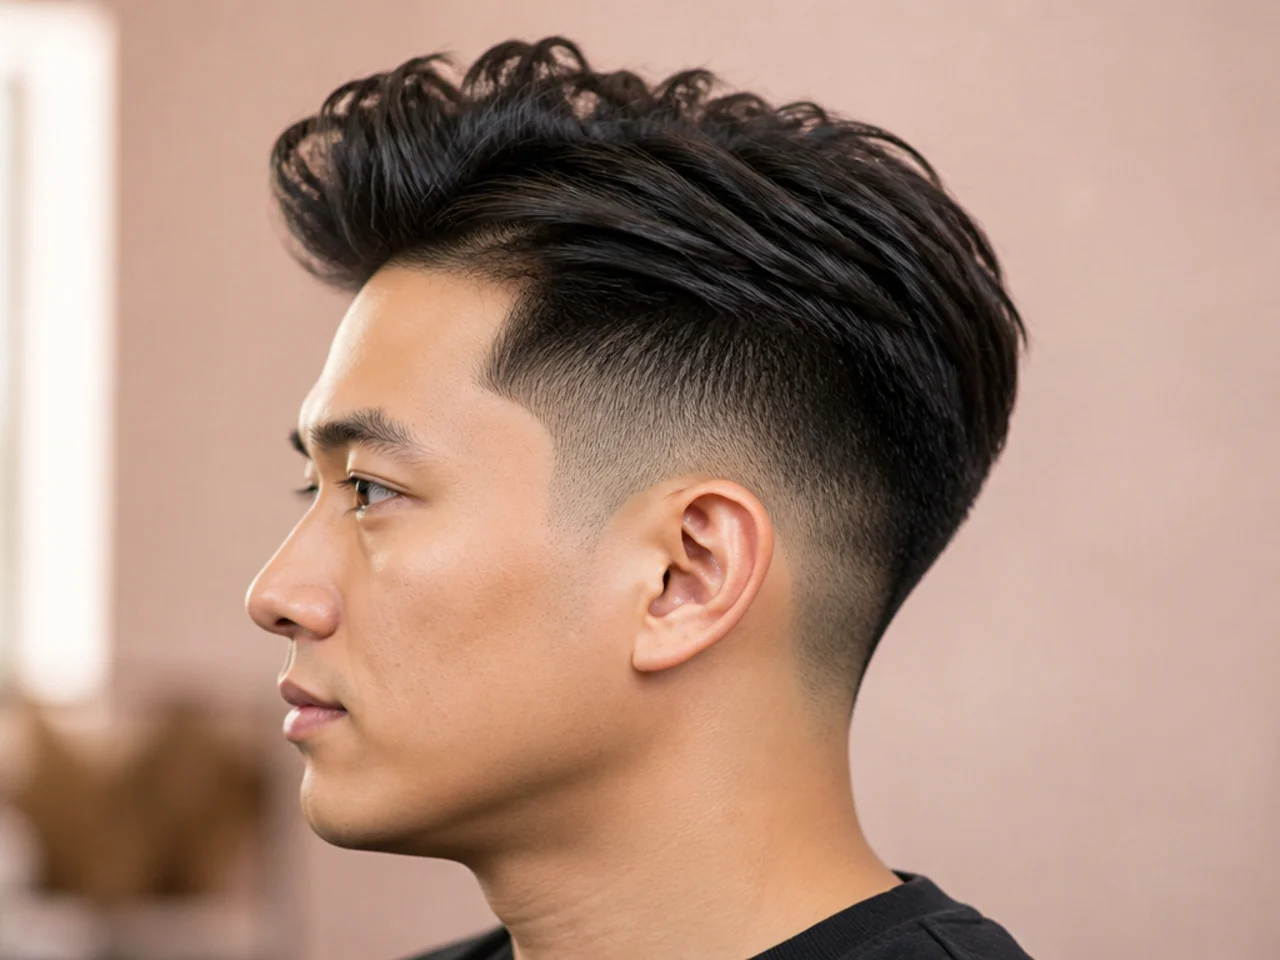
Fine hair reads denser when it's cut shorter and blown out with real lift at the roots. The low fade blowout is one of the best cuts for fine hair because volume is the whole point — and the low fade keeps enough length on the sides that scalp doesn't show through anywhere.
Ask for: "Low fade blowout, 1 guard at the shortest, three inches on top — no longer, cut to make the hair look denser." Shorter is fuller for fine hair. Length just exposes scalp.
Styling tip: Volumizing mousse at the roots on damp hair, blow-dry against the natural fall of your hair, finish with a fiber that doesn't clump. Zero shine — matte only for fine hair.
8. Low Fade Blowout with a Middle Part
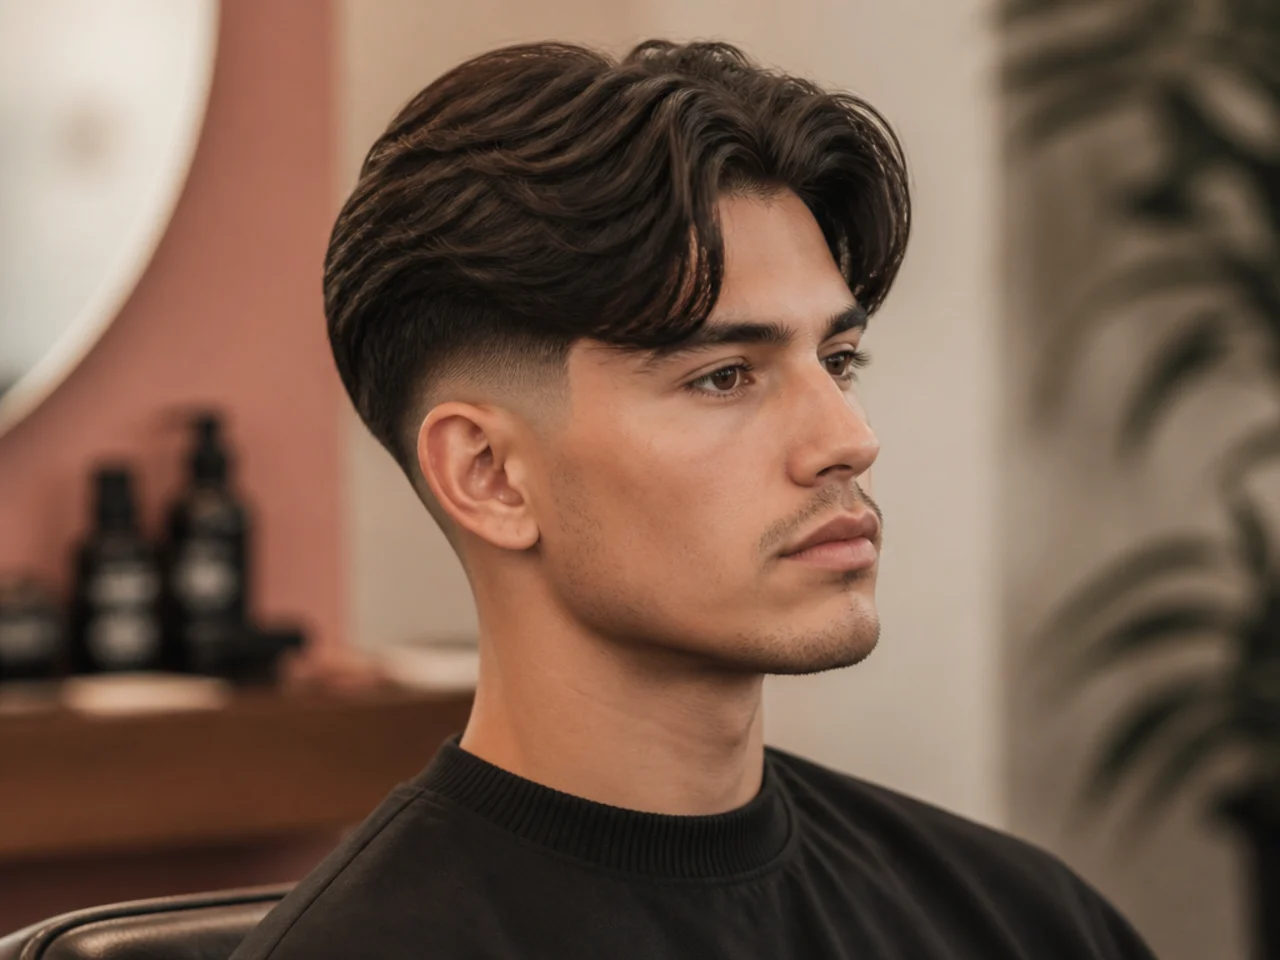
Split the volume down the middle instead of pushing it all forward and you get a softer, longer-looking silhouette — the middle part reads modern without going full curtain. The low fade below keeps the whole thing grown-up rather than teen-coded. Best for oval and long faces with wavy or thick straight hair.
Ask for: "Low fade blowout, soft middle part, five inches on top, cut with weight to both sides." Ask for the part to be scissor-carved so it holds without gel.
Styling tip: Blow-dry each side outward with the round brush, then set the part with a comb and lock with light-hold cream. Sea salt spray adds grit if the sides refuse to stay put.
9. Mid Fade Blowout with a Full Round Crown
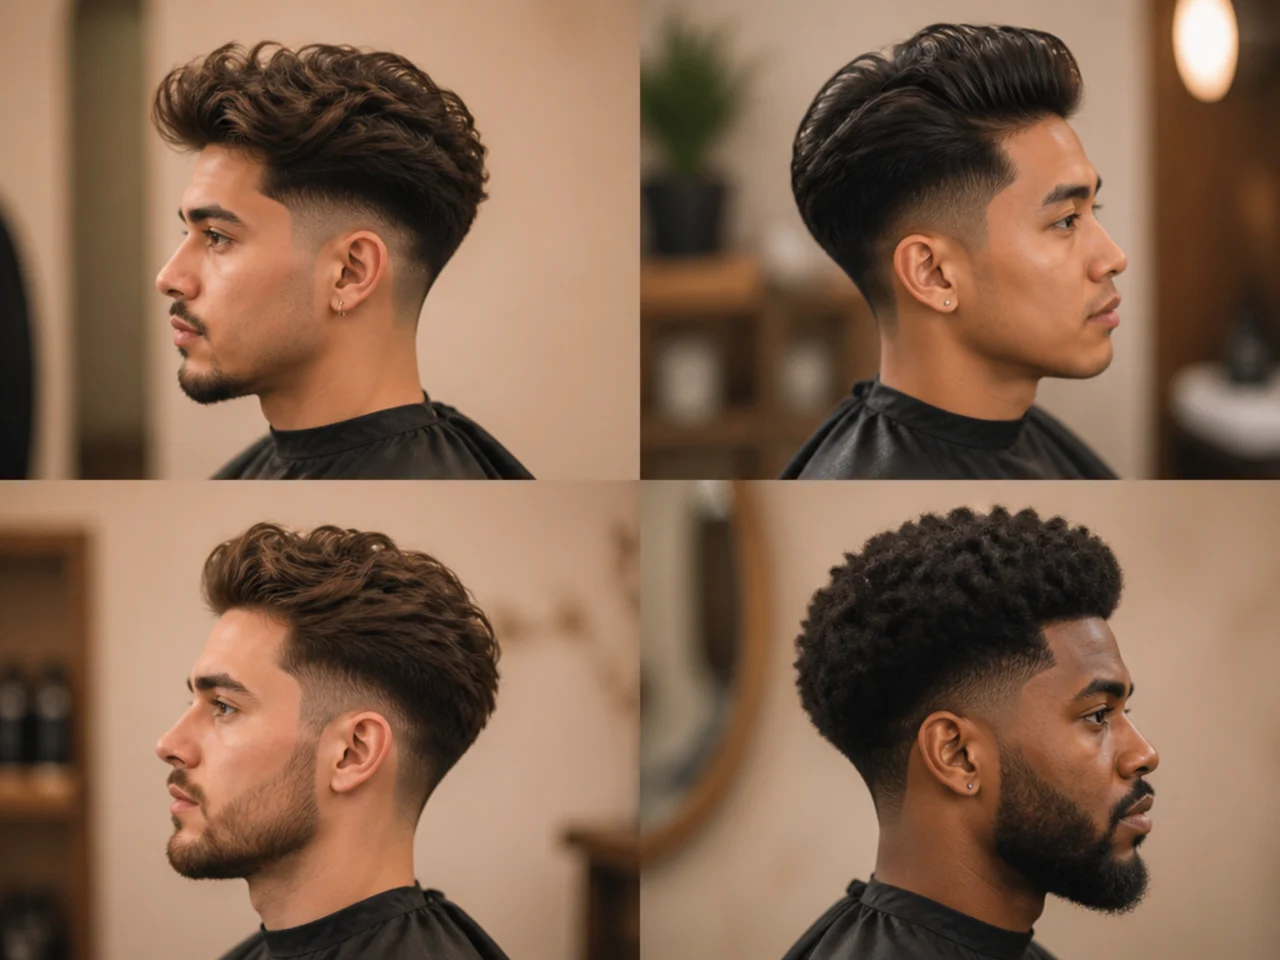
This is the classic — the mid fade sits at the temple line, and the crown gets the full round-brush treatment for that big domed silhouette. It's the version most photos of "blowout taper fade" default to on Pinterest. Best for oval and square faces with wavy or thick straight hair.
Ask for: "Mid fade at the temple, blowout on top, five inches through the crown, keep the shape rounded not peaked." Say rounded — otherwise some barbers default to a pointed pomp shape.
Styling tip: Blow-dry the crown up and forward first, then the sides. Round brush pulled outward from the root, cool shot at the end. Matte paste worked through the ends only.
10. Mid Skin Fade Blowout
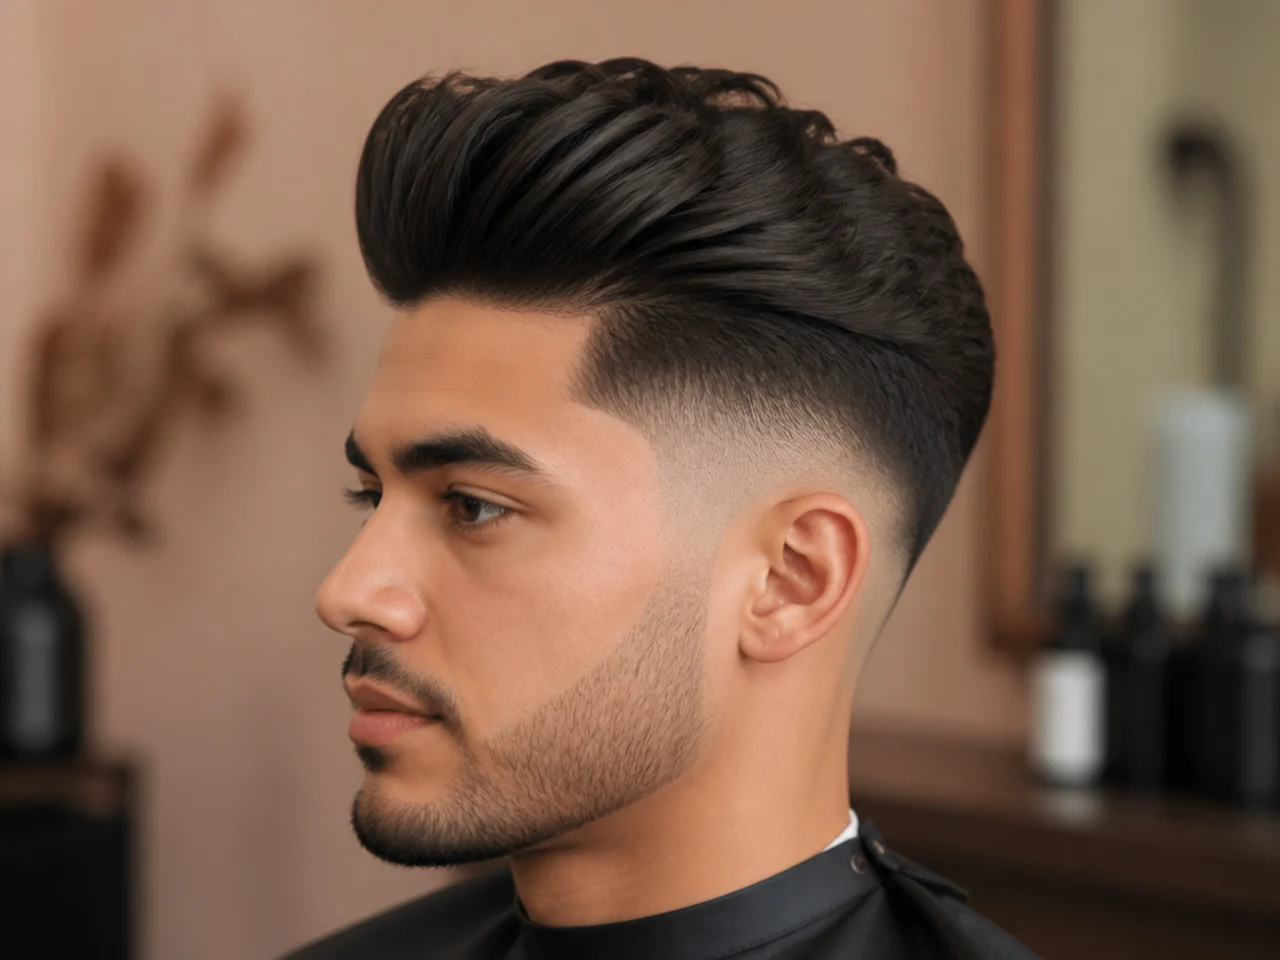
The mid fade taken to skin — hardest possible contrast at temple level. The blowout on top pops harder against a bare fade underneath, which is why this version reads sharp in photos. Best for guys with strong facial features and dark hair (contrast reads bigger on darker heads).
Ask for: "Mid skin fade, blowout on top, five inches of length, front-weighted." Front weight matters — that's where the round brush lifts hardest.
Styling tip: Prep with volumizing mousse at the roots before you blow-dry. No product on damp hair means no hold once the dryer's done. Matte cream to finish, never gel.
11. Mid Drop Fade Blowout for Wavy Hair
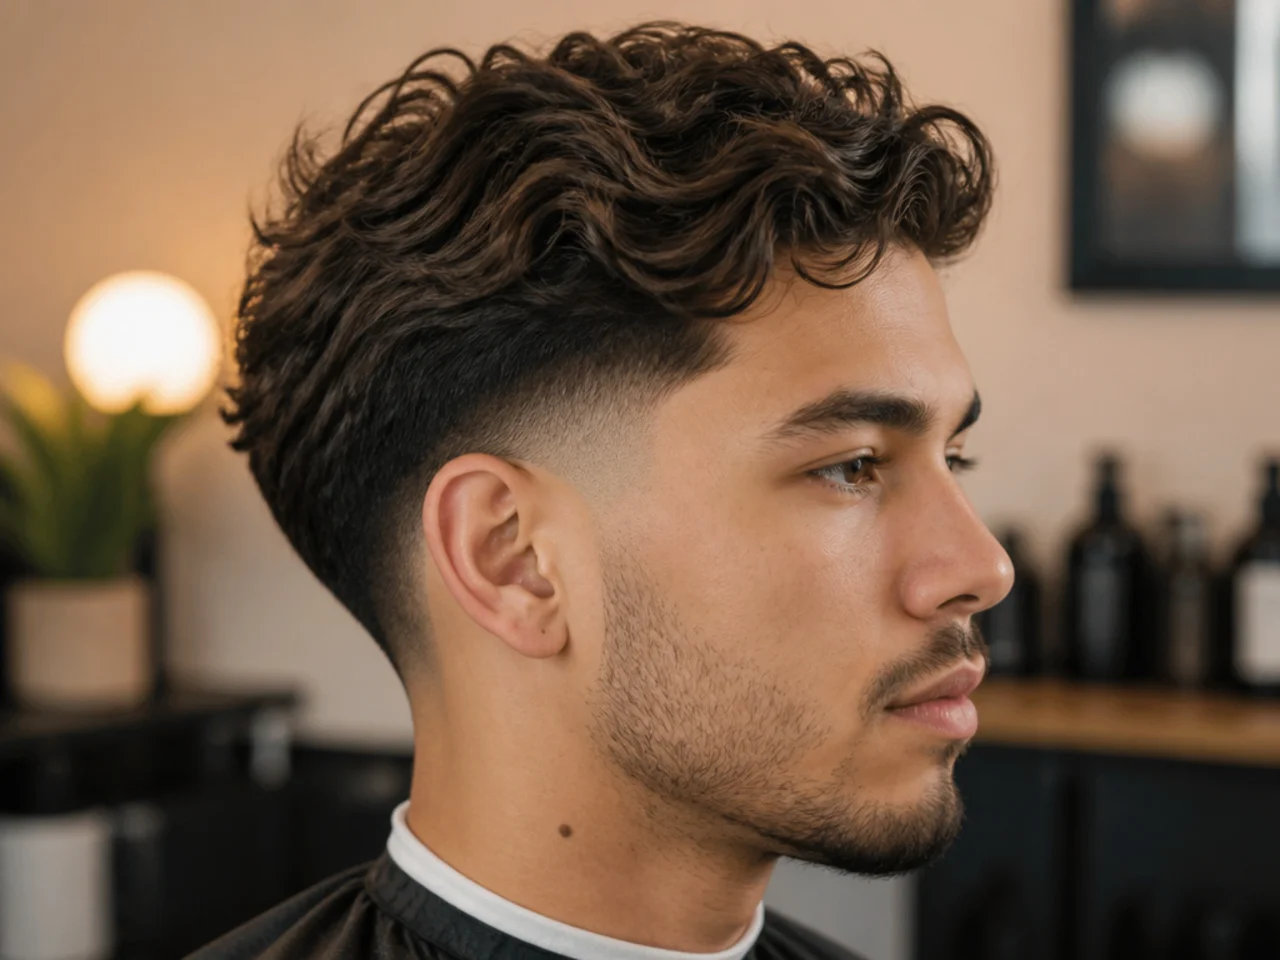
Wavy hair stacks with a blowout naturally — the wave adds movement, the round brush adds height. Add a mid drop fade underneath and the arc behind the ear gives the whole silhouette a rounder profile from every angle. Best for 2b–2c waves with four to six inches on top.
Ask for: "Mid drop fade, blowout on top, five inches of length, thin the crown so it doesn't sit heavy." The thinning matters — wavy hair gets bulky at the back if left alone.
Styling tip: Curl cream on damp hair, blow-dry with a round brush going backward, then break up the shape with your fingers. Don't over-brush or the wave flattens out.
12. Mid Fade Blowout with a Hard Part
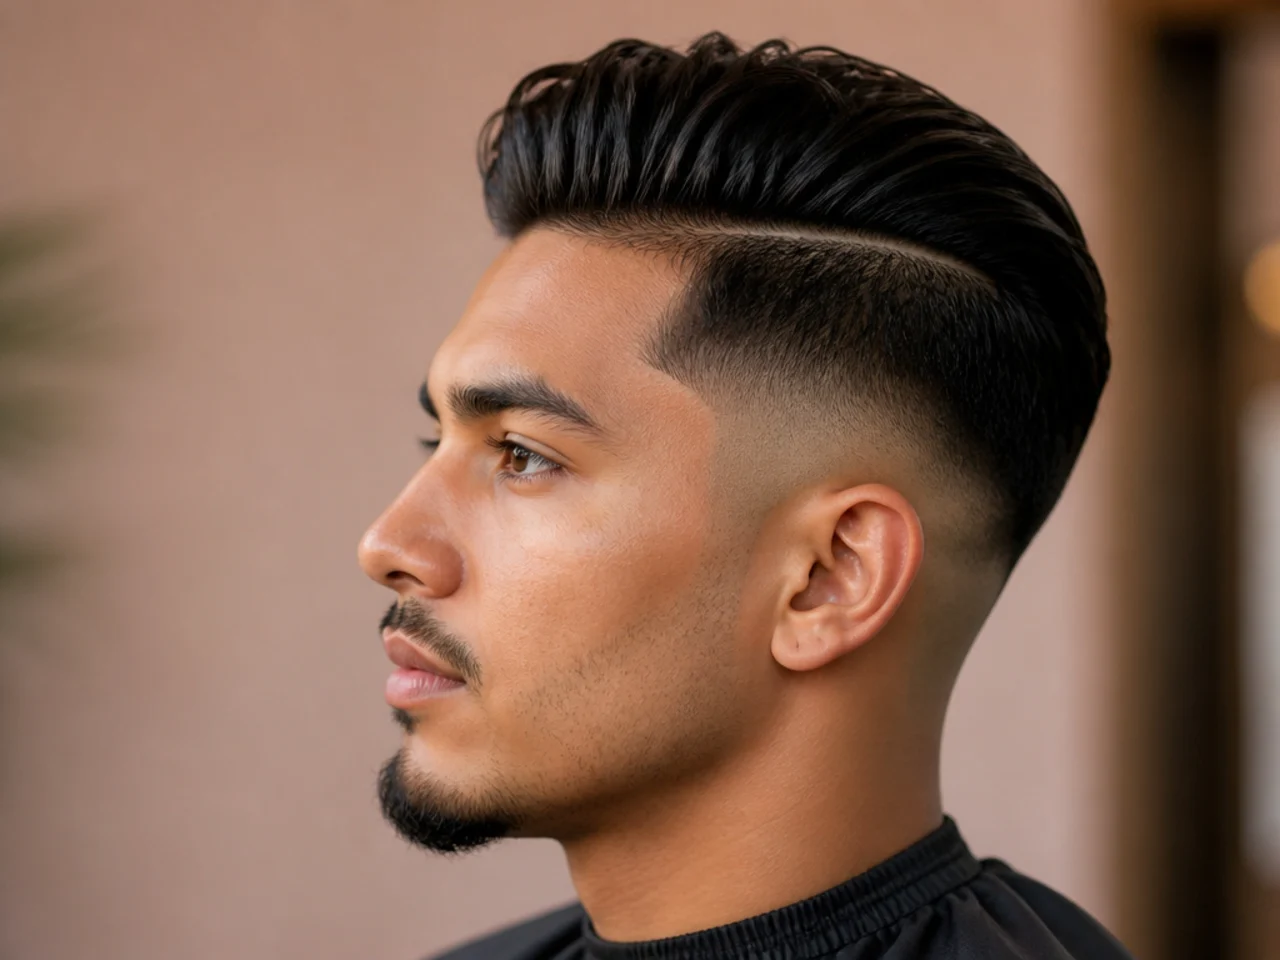
A hard part is a razor-carved line separating the top length from the fade below — a permanent parting that reads sharp for weeks. Add it to a mid fade blowout and the whole cut gets a design-line detail without going full pattern work. Best for guys who want the volume with an extra piece of geometry.
Ask for: "Mid fade blowout, hard part on the left side [or right], blowout on top, four to five inches." Point at where you want the line so it lands in the right spot.
Styling tip: Round-brush the top away from the hard part, so the line stays visible. Restart the part with a razor at week two if it starts closing up.
13. Mid Fade Blowout for Coily Hair
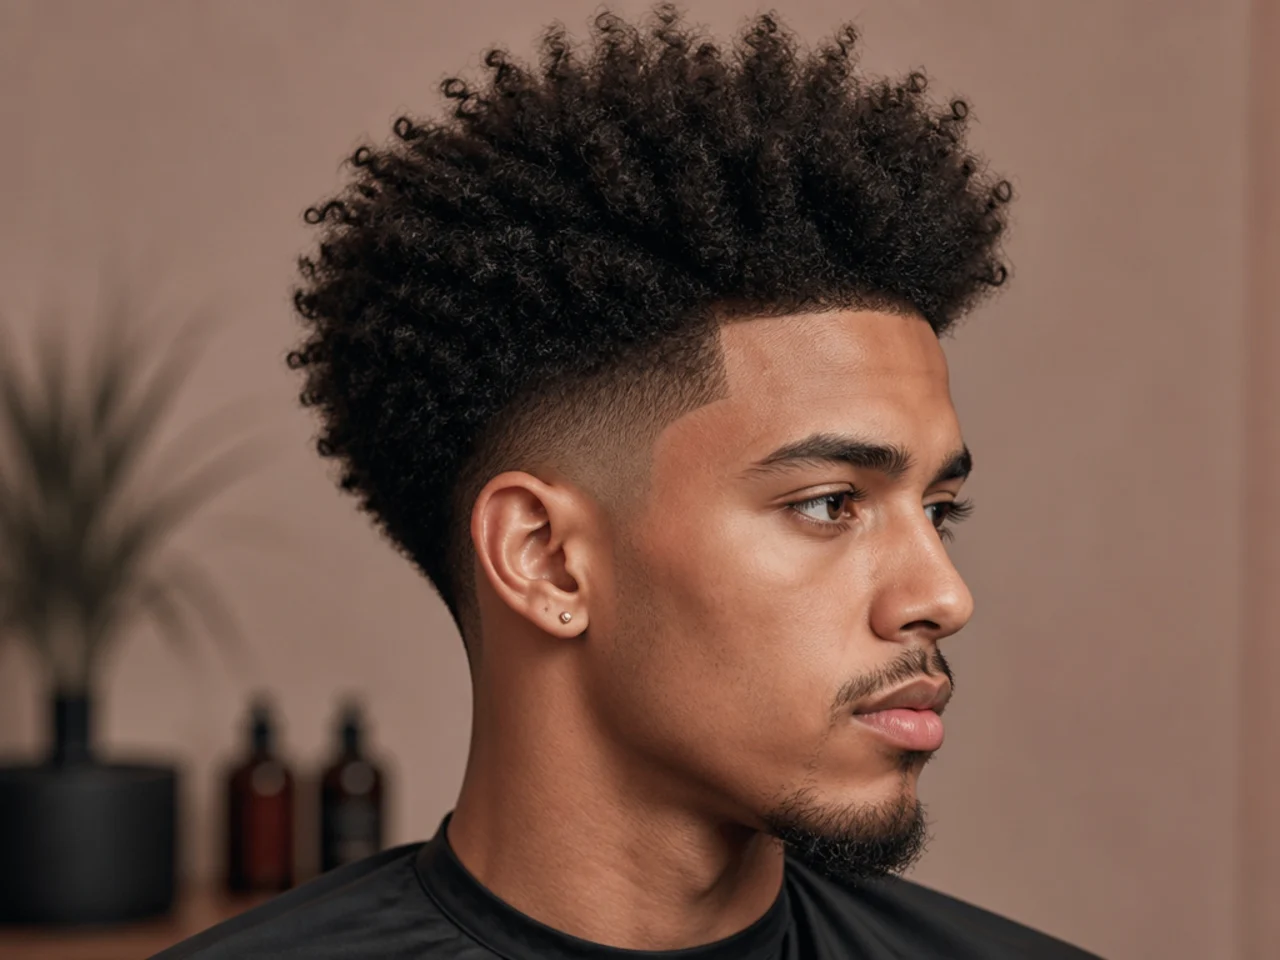
Coily hair (4a–4c) doesn't need a round brush — the coil pattern already carries the volume. The blowout in this variation is really about a "blowout shape" on top: full, round, picked out, with the mid fade doing the sharp perimeter work. Popular across barbershops that specialize in Black hair — see the deeper roundup on fade haircuts for Black men.
Ask for: "Mid fade, blowout shape on top, scissor cut to keep the coil pattern, three to five inches of length, shape it rounded." Scissor cut is non-negotiable — clippers flatten coil.
Styling tip: Pick out damp hair with a wide-tooth pick, then diffuser on low to set the shape. Light-hold spray to lock. Silk bonnet overnight preserves the shape for day two.
14. Mid Fade Blowout with a Quiff Front
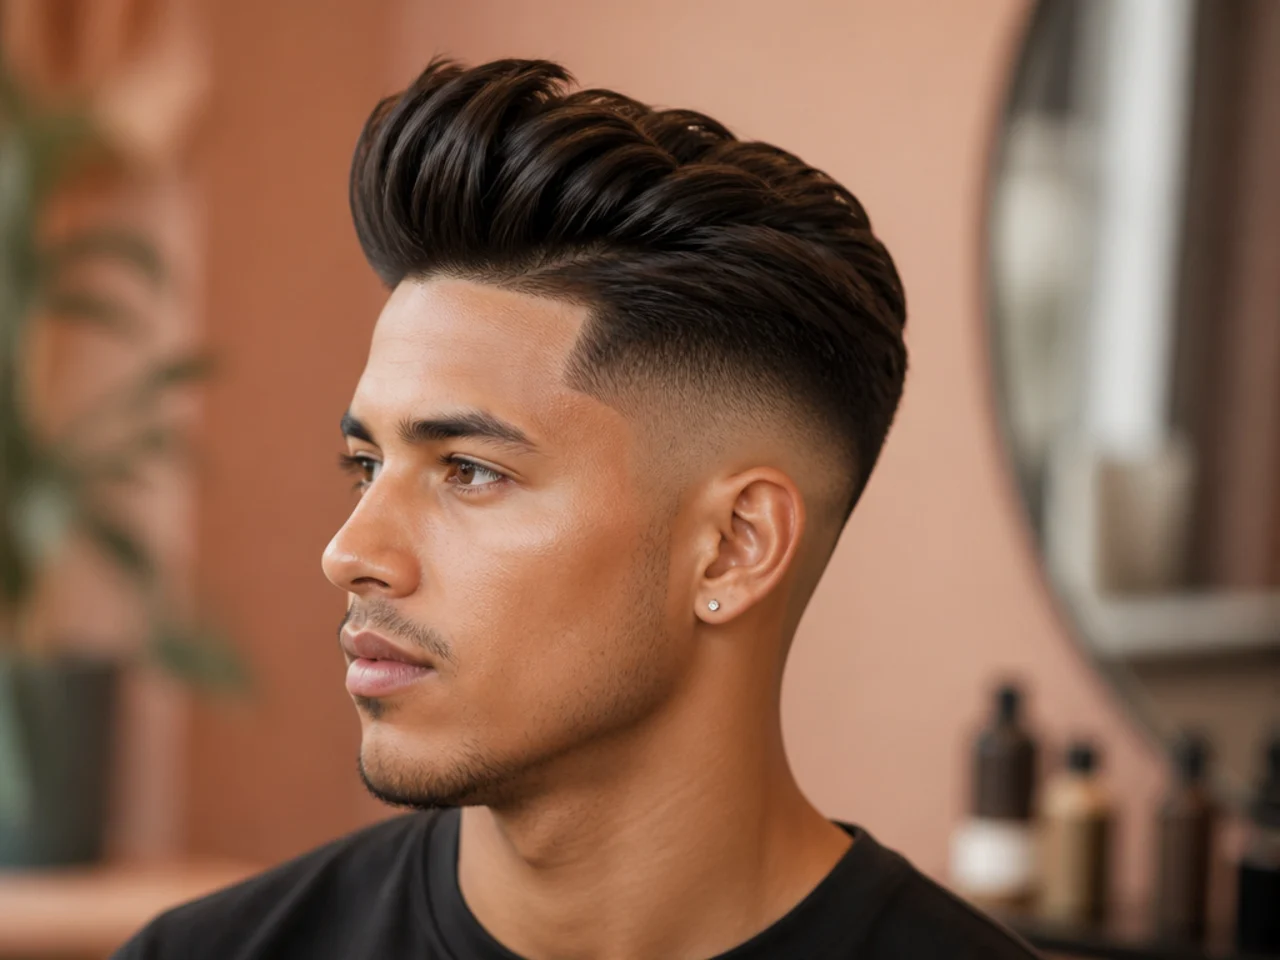
Add a quiff front to a mid fade blowout and the top angles up at the hairline into a tall lifted shape. It's the same silhouette with more attitude — reads more dramatic on-camera and photographs sharper. Best for square and oval faces with medium to thick hair.
Ask for: "Mid fade blowout, quiff at the front, five to six inches of length, keep the height in the first third." Bring a photo — quiff height is personal.
Styling tip: Blow-dry the front section up and back with a round brush pulled hard at the root. Strong-hold cream to lock the lift, matte finish so it doesn't read greasy.
15. Mid Fade Blowout for Asian Hair
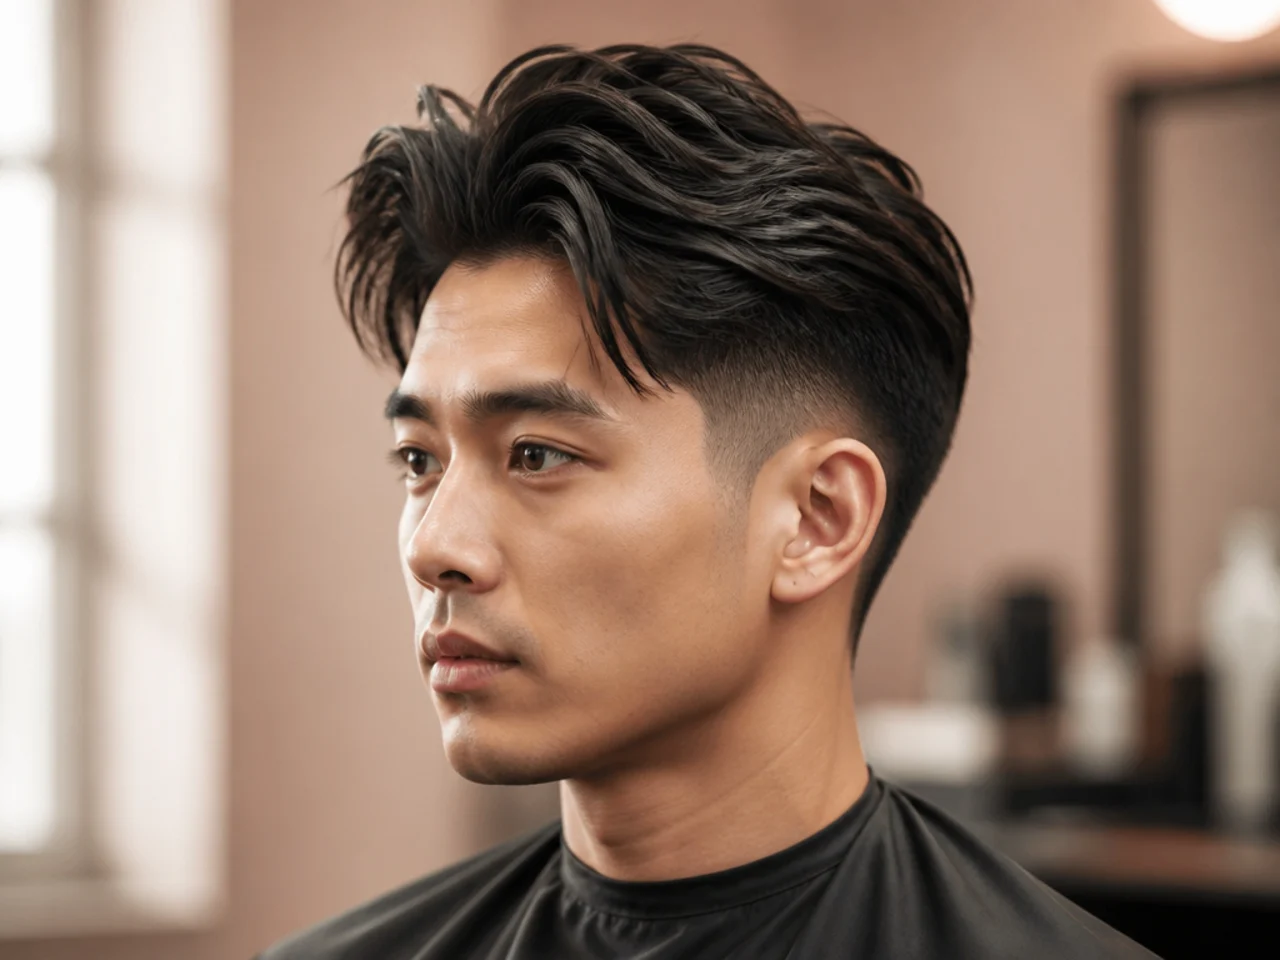
Coarse straight hair holds the blowout shape better than any other texture — density and thickness give the round brush real material to move. A mid fade blowout on this hair type reads clean, modern, and doesn't need retouching all day. Best for guys with medium to thick straight hair.
Ask for: "Mid fade blowout, four to five inches on top, texturize the ends, front-weighted." Texturizing keeps the dense hair from sitting like a helmet.
Styling tip: Rough-dry with a towel first, then round-brush the top going up and forward. Light-hold pomade with a matte finish. Coarse hair holds without much product.
16. Mid Fade Blowout with a Peaked Front
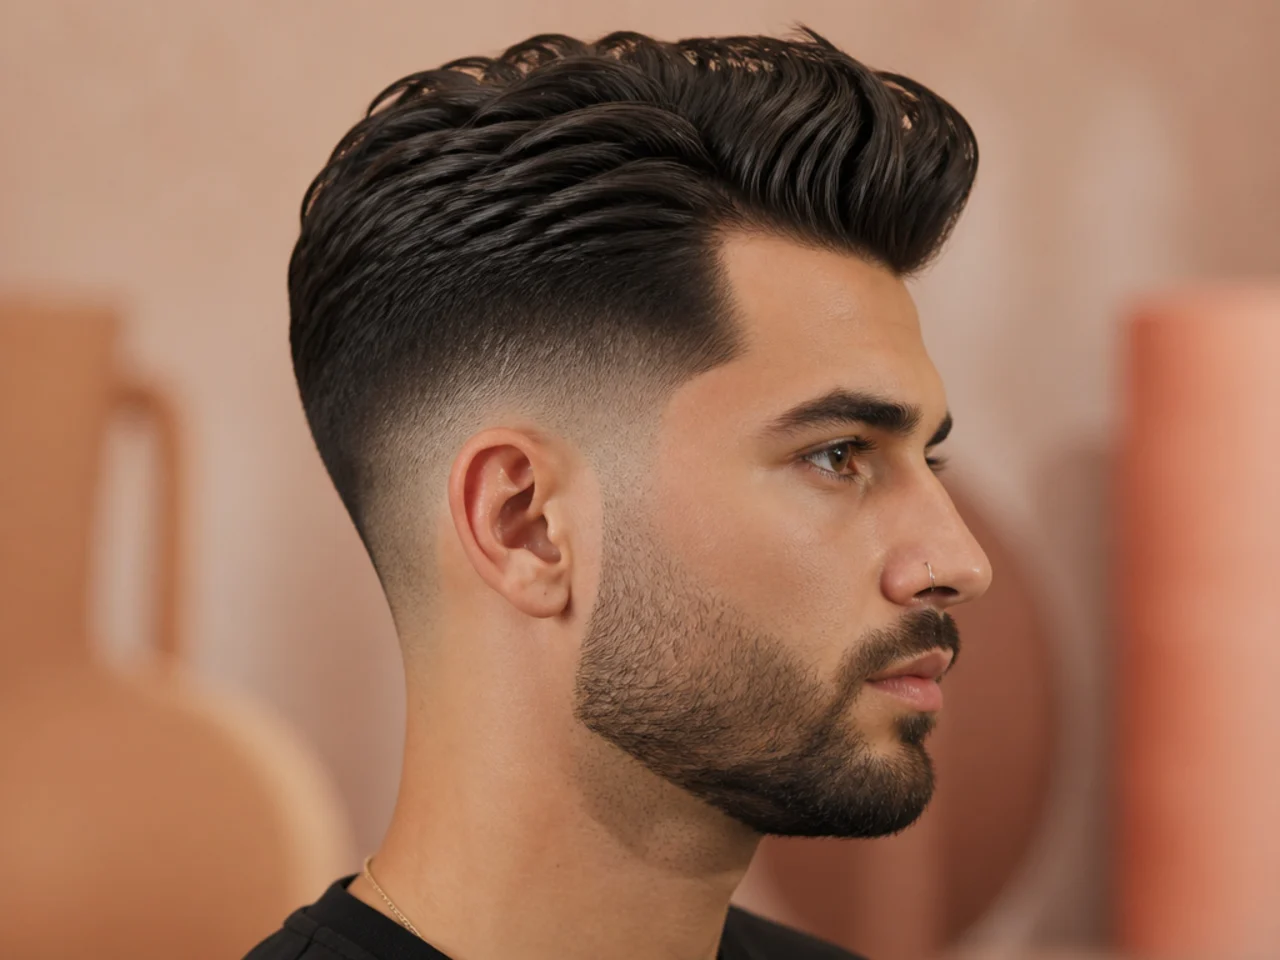
Swap the rounded crown for a pointed peak at the hairline and the silhouette turns dramatic — think pompadour peak on top of a fade. Reads bolder than the classic round shape. Best for square and oval faces with thick straight hair that can hold a point.
Ask for: "Mid fade blowout, peaked front at the hairline, six inches through the peak, keep the sides tight." Show a photo of the peak height — this one varies more than the round versions.
Styling tip: Blow-dry the front section straight up with a small round brush, then pinch the peak with strong-hold clay. Setting spray to lock. Reset with dry shampoo on day two.
17. High Skin Fade Blowout
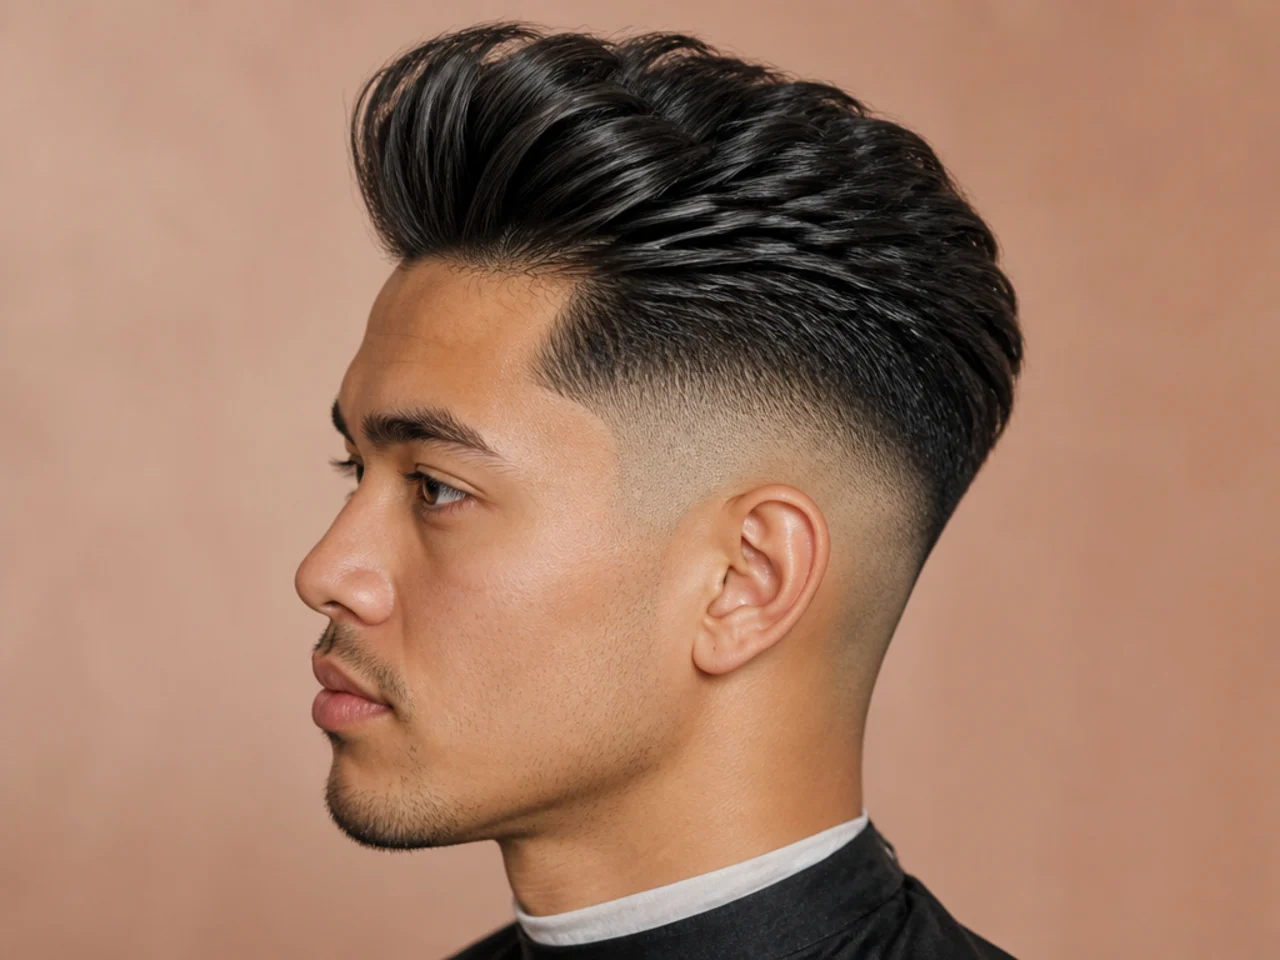
The high fade taken to skin — fade starts up near the parietal ridge, only a small band of length remains on the sides. That leaves the blowout on top reading enormous. Best for oval and diamond faces; round faces should skip this one — the sides shrink too much.
Ask for: "High skin fade, 0 guard at the shortest, blowout on top, six inches of length, weight forward." Length matters most — a big blowout needs hair to build the shape.
Styling tip: Heat protectant first, blow-dry with a round brush pulled hard from the root, strong-hold cream, then reapply the dryer over the shape until it locks. Cool shot at the end.
18. High Drop Fade Blowout
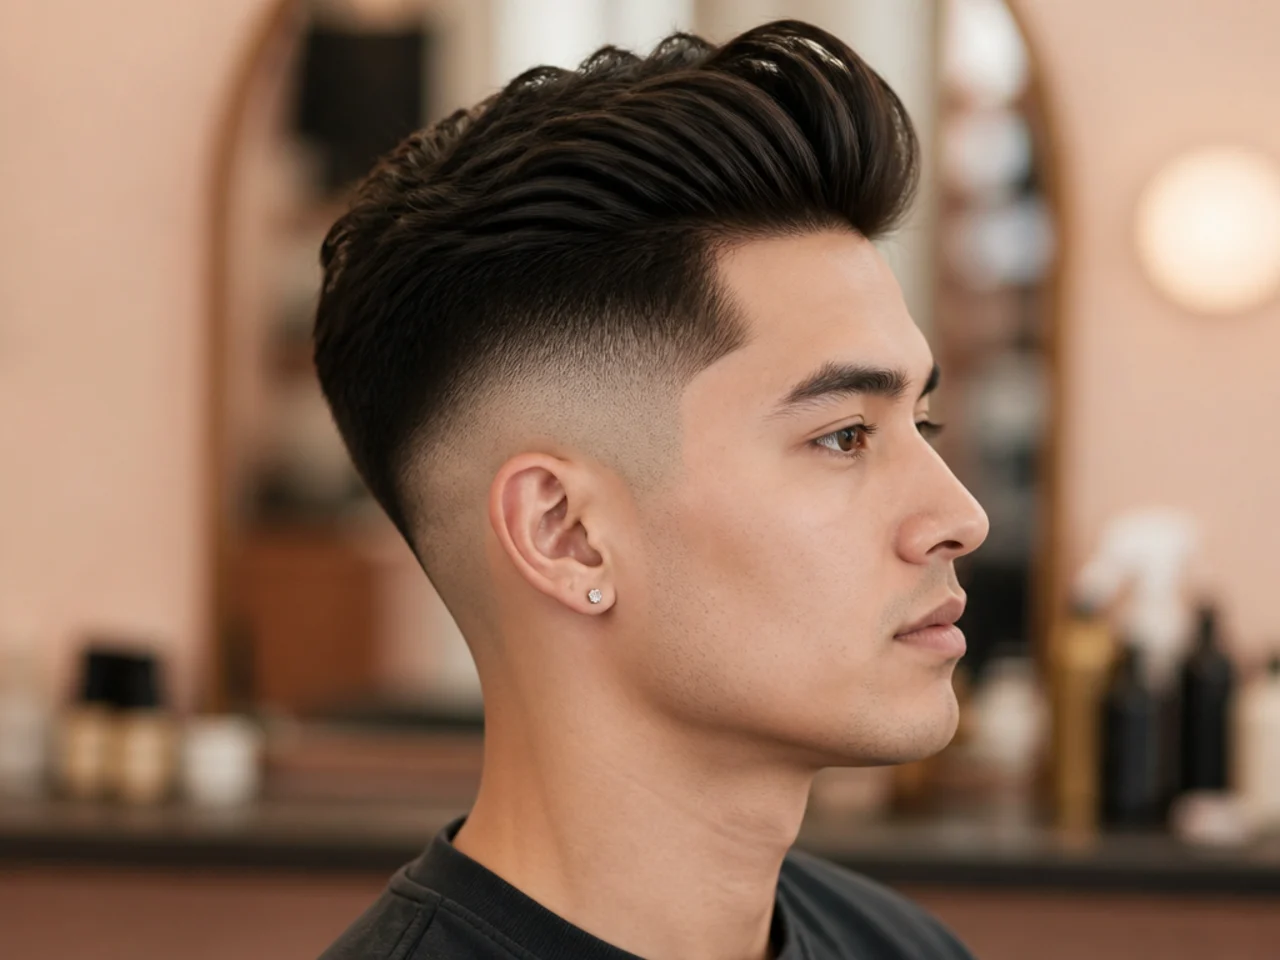
The drop applied to a high fade gives you the most dramatic possible arc — the fade starts high and curves down deep behind the ear. Reads architectural from the profile view. Best for guys who want the biggest visual statement without a design line or shave detail.
Ask for: "High drop fade, blowout on top, six inches of length, keep the arc pronounced behind the ear." Trace the curve with your finger.
Styling tip: Blow-dry the back forward first — the drop opens up more skin, and hair falling flat against the neck kills the shape. Cool shot to hold.
19. High Fade Blowout with an Afro Top
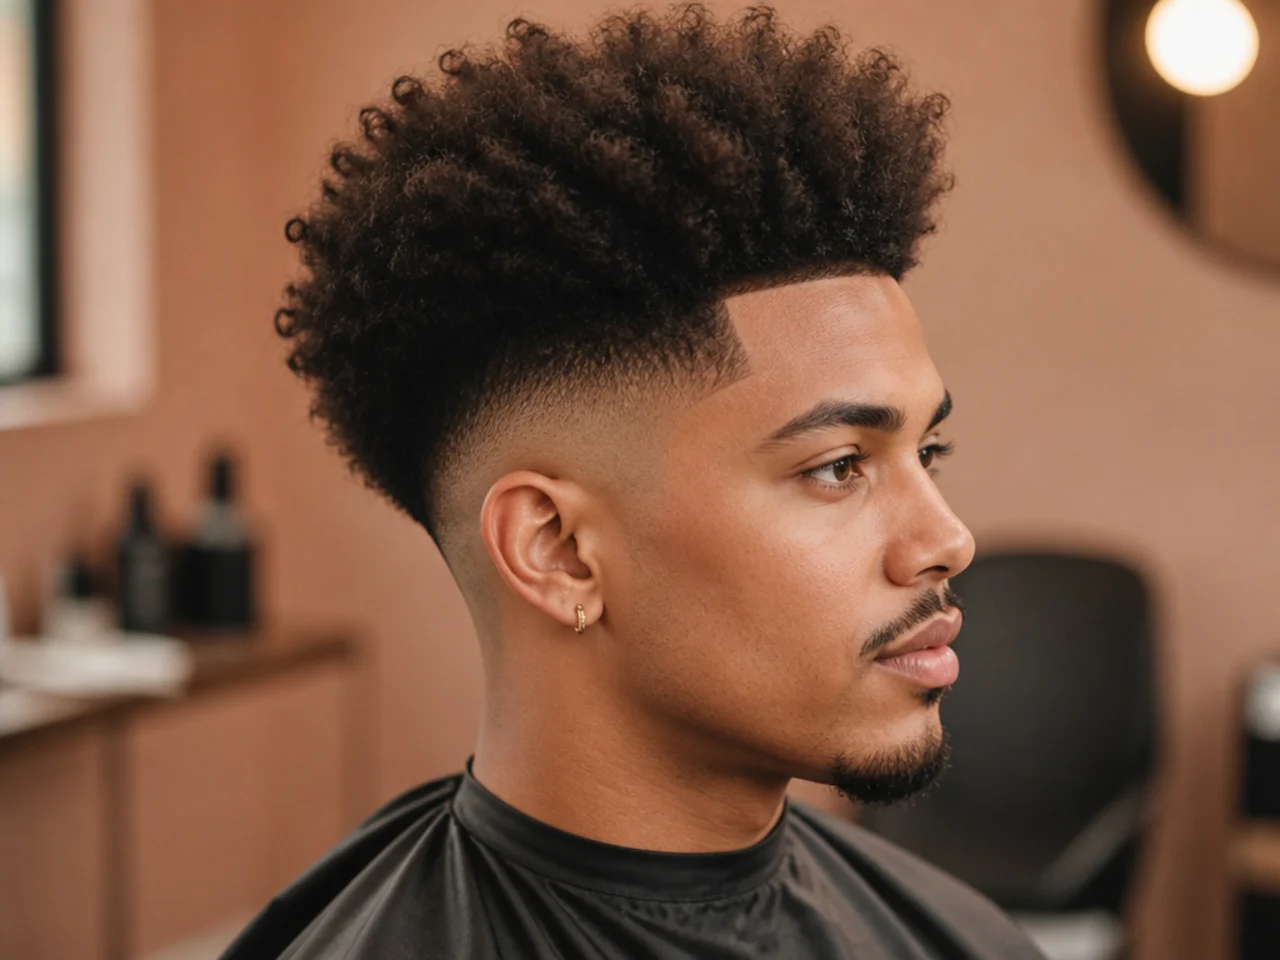
An afro blowout keeps a full coil pattern on top and lets the high fade handle the sides. Volume already lives in the curl. The high fade makes the contrast between skin sides and full afro top read as extreme as possible. Best for 4a–4c coils with four to six inches of length grown out.
Ask for: "High fade to skin, blowout afro on top, scissor cut to preserve the coil pattern, four to six inches, shape it round." Scissors matter. Clippers on top flatten the coil.
Styling tip: Pick out damp hair with a wide-tooth pick, diffuser on low to set, then shape with your hands. Never round-brush coils. Silk bonnet or pillowcase overnight.
20. High Fade Blowout with a Sponge-Twisted Top
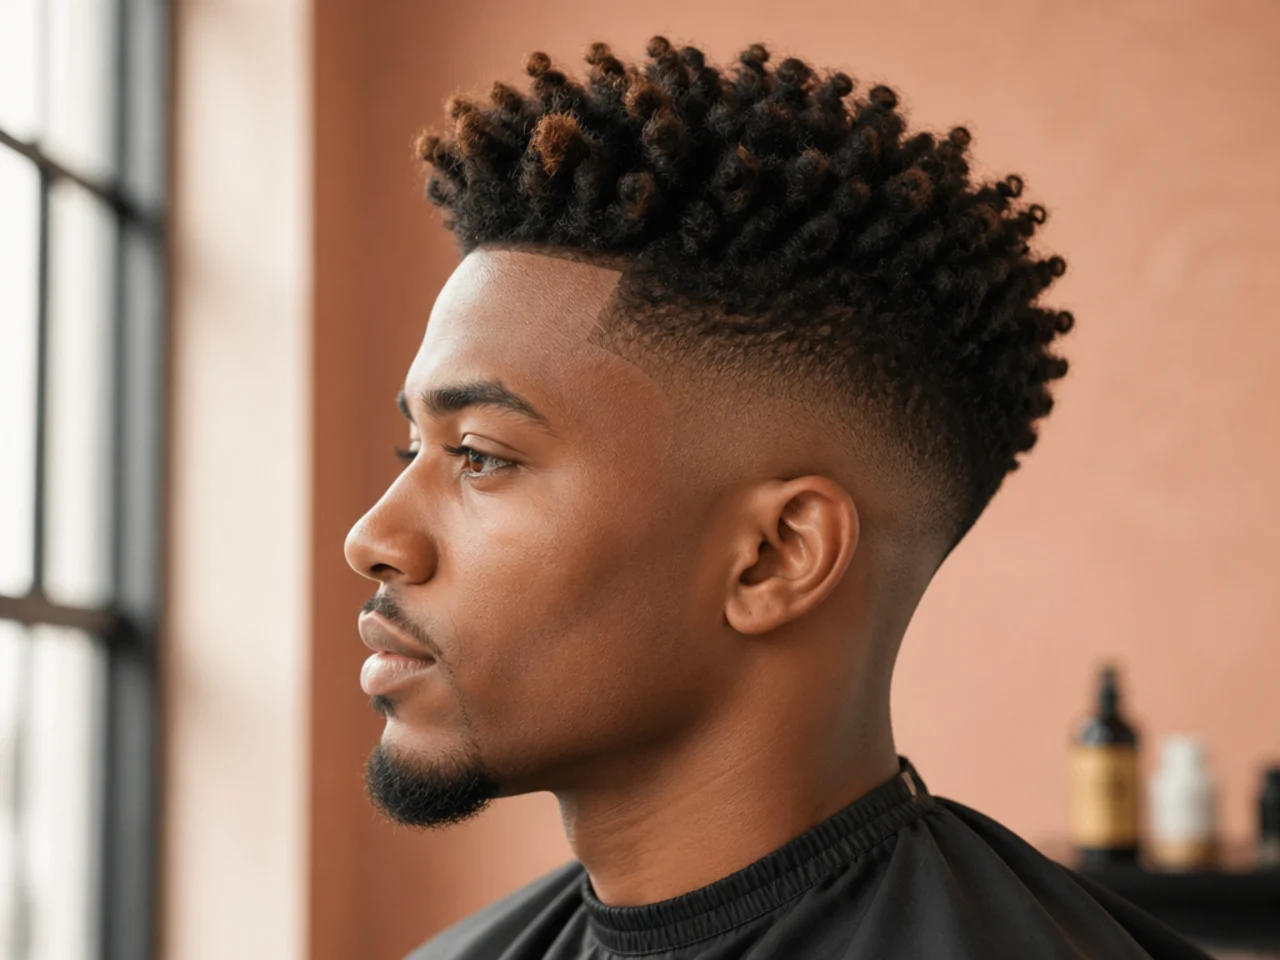
Sponge twisting uses a hair sponge to define coil pattern into individual twists — the top reads as a full, textured shape sitting on top of a clean high fade. Similar silhouette to the afro version but with more visible curl definition. Best for 4a–4b coils.
Ask for: "High fade, sponge-twisted top, three to four inches of length, scissor cut so the twists shape evenly." Ask if the shop offers sponge work — not every barber does it.
Styling tip: Sponge on damp hair after a light styling cream, work in small circles across the crown. Setting spray to lock. Refresh with water and cream every second day.
21. High Fade Blowout with a Broccoli Top
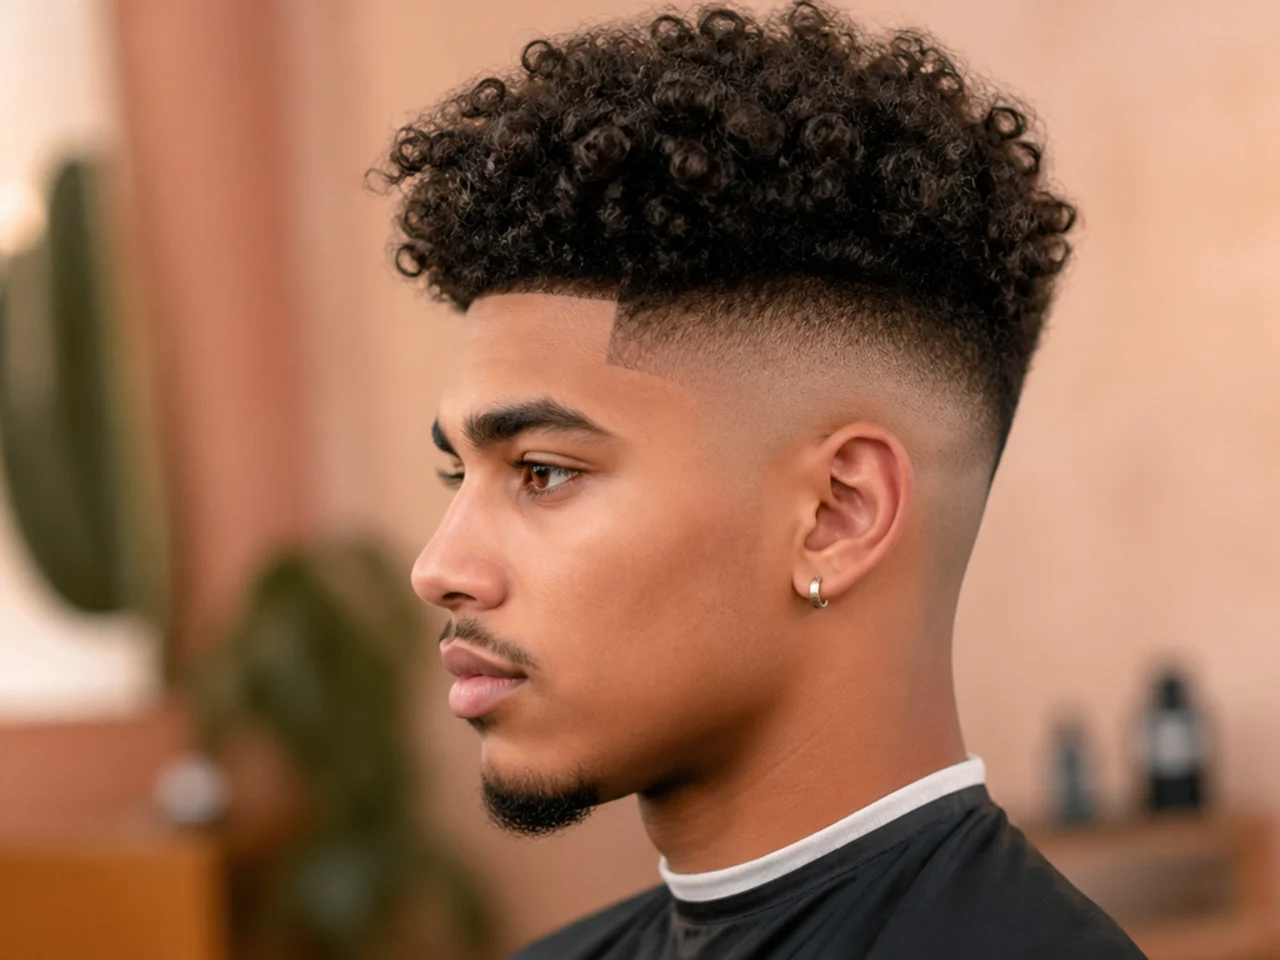
The broccoli haircut — chunky curly top styled to sit like a broccoli head. Add a high fade underneath and the contrast reads sharp for social. Popular with teens and college-age guys with wavy or curly hair (2c–3b).
Ask for: "High fade blowout, broccoli top, four to five inches of curly length on top, keep the shape rounded and full." Bring a photo — this one has a hundred versions on TikTok.
Styling tip: Curl cream on damp hair, diffuser on low with your head tipped forward, then flip up and shape with your hands. Zero comb — combing breaks the broccoli texture.
22. High Fade Blowout with a Line-Up
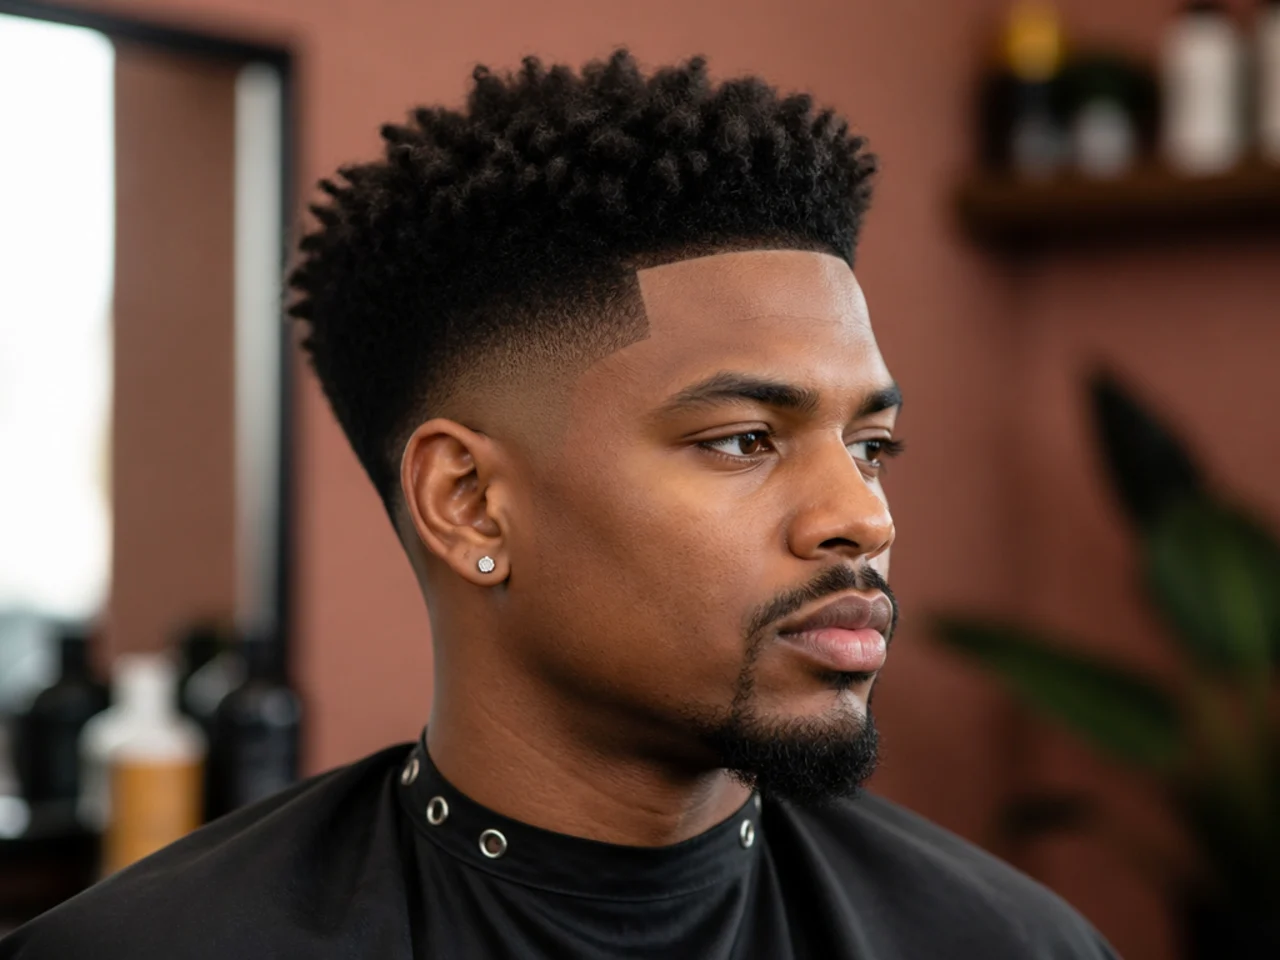
A line-up is a razor-sharp squared edge along the front hairline and temples. Combined with a high fade blowout, it gives you the sharpest possible finish — the top reads big, the perimeter reads surgical. Best for guys who want maximum sharpness in photos.
Ask for: "High fade blowout, five inches on top, razor line-up at the forehead and temples." Ask if the line-up is included or a separate charge — it varies.
Styling tip: Refresh the line-up with a trimmer or a hairline pencil at week two — that's when the edge starts blurring. Line-up work photographs better than it looks in person, so it's worth the touch-up before events.
23. High Fade Burst Blowout
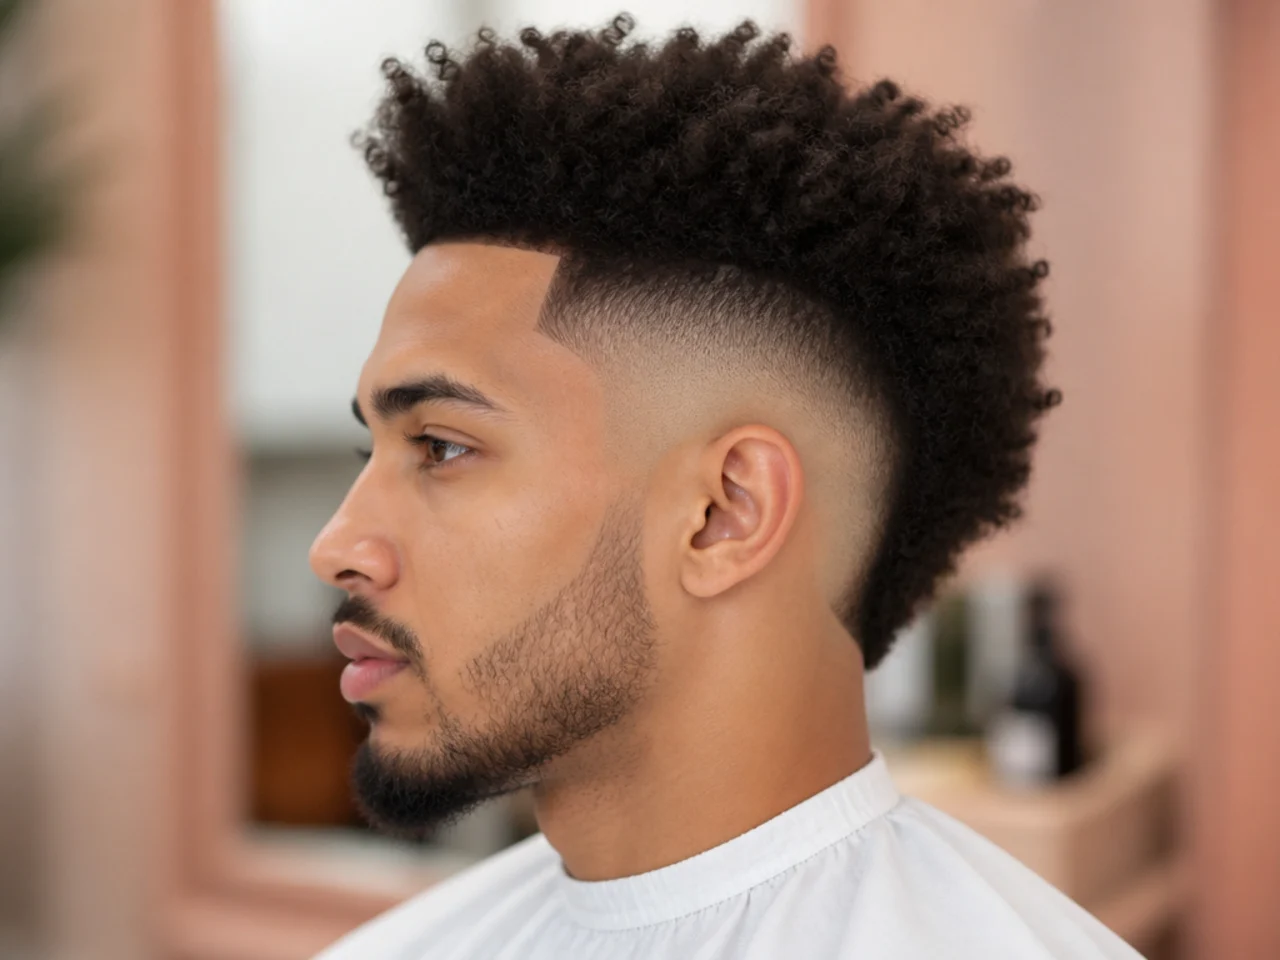
Blend the high fade with a burst fade — the fade curves around the ear in a semi-circle burst instead of a straight line, then lifts high above the temple. Top gets the full blowout treatment. Reads modern, works especially well with curly or wavy hair.
Ask for: "High burst fade, burst curve around the ear, blowout on top, five inches of length, keep the crown full." Point at the ear so the barber sees the burst radius.
Styling tip: Same blowout routine — round brush, matte cream, cool shot. The burst does the visual work on its own; the top stays a standard blowout.
24. Blowout Taper Fade with a Mullet Back
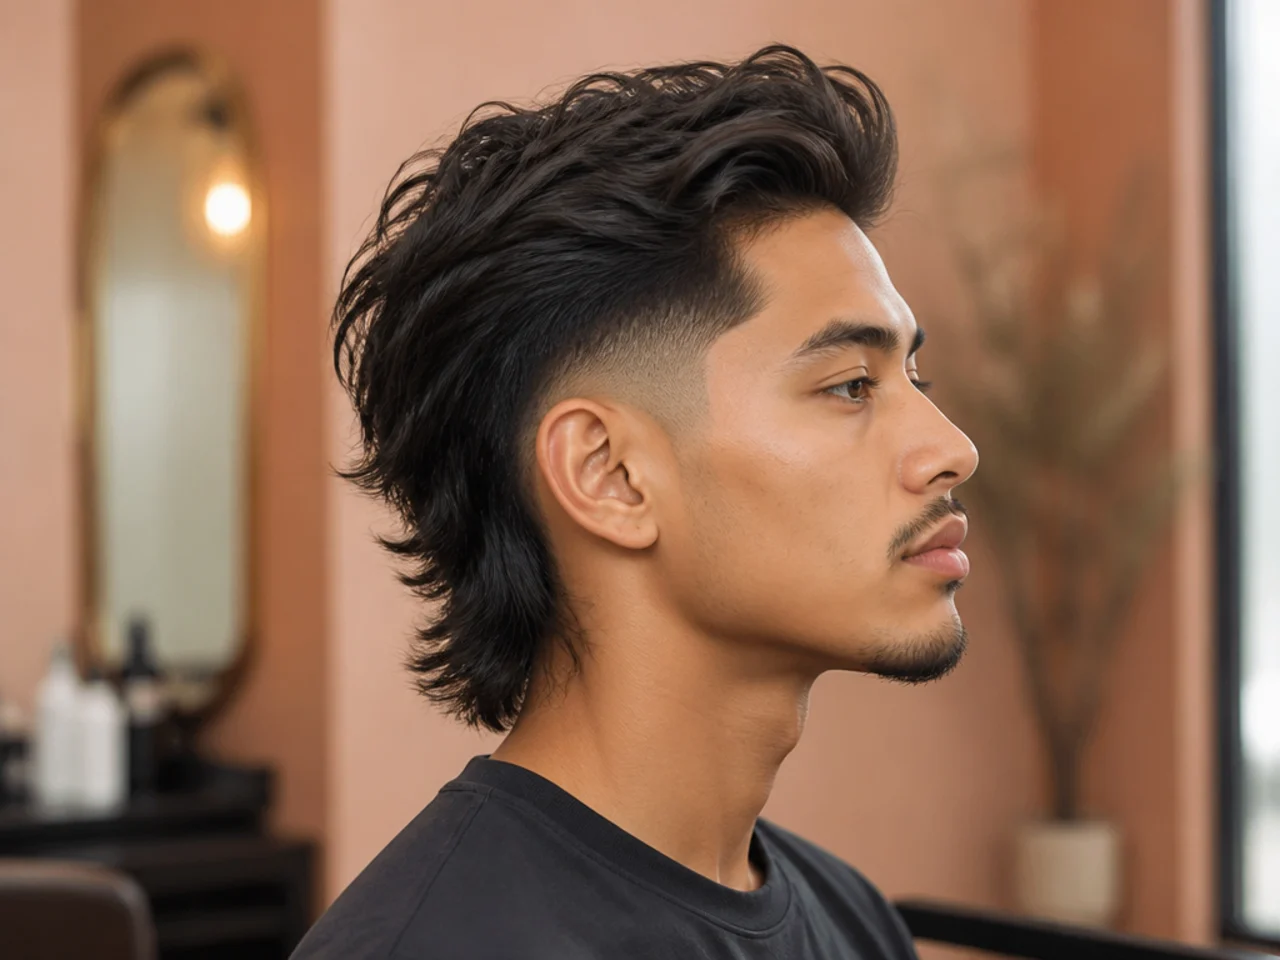
Leave length at the nape and you get a modern mullet with a blowout crown and faded sides. It's the "business in the front, party in the back" energy applied to a fade base. Best for wavy hair, oval faces, and guys who want to grow the back out without touching the volume up top.
Ask for: "Mid fade blowout, keep length at the nape for a mullet, five inches on top, four inches at the back." Say mullet or your barber will taper the back short.
Styling tip: Blow-dry the top up and forward as usual, then rough-dry the back with your fingers to keep it loose. Sea salt spray on the back for texture.
25. Blowout Taper Fade with a Side-Swept Front
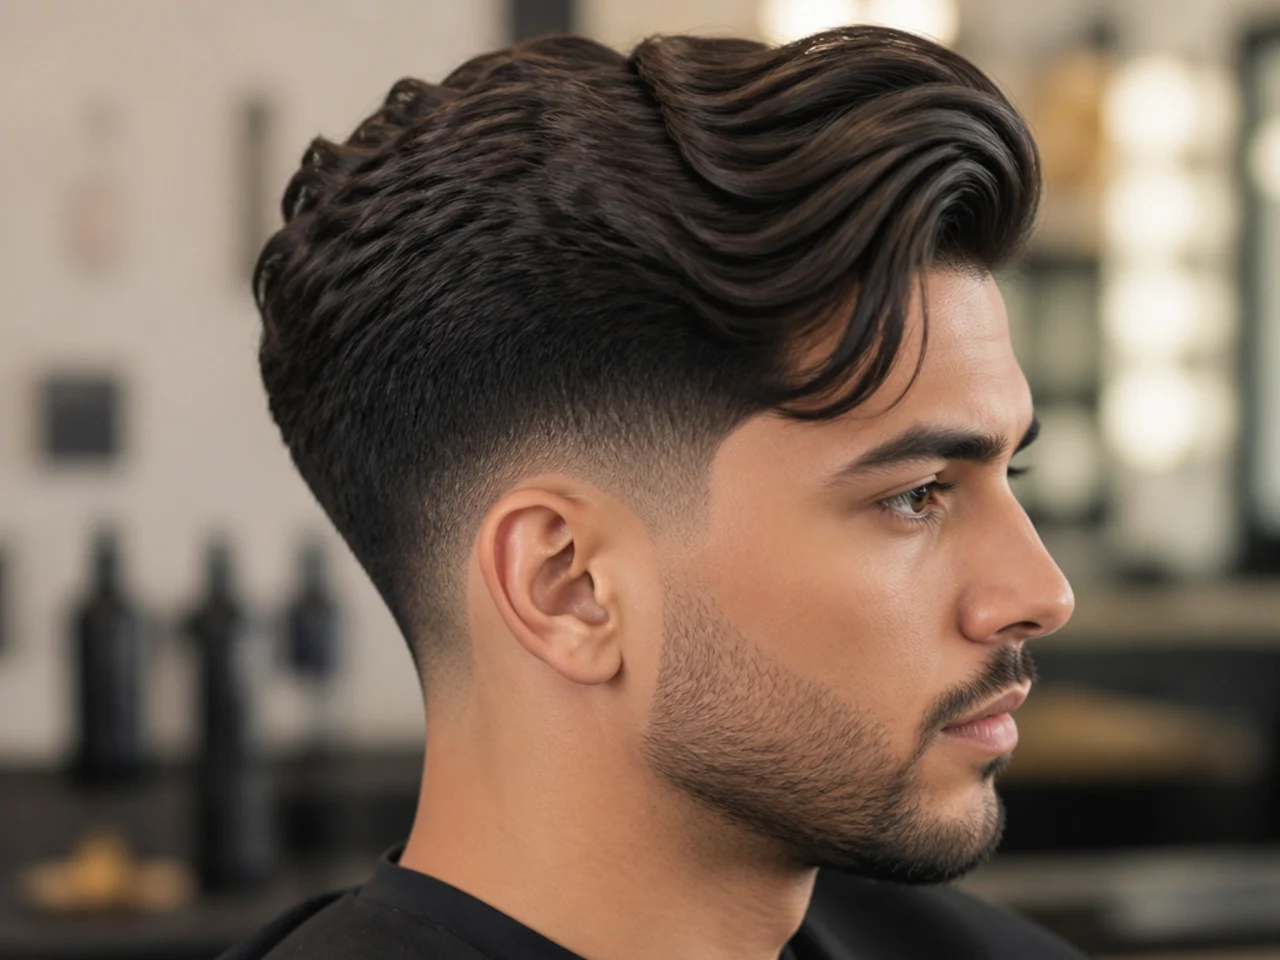
Instead of pushing the front up and forward, sweep it sideways over the temple — the volume stays but the direction shifts. Reads dressier than the classic pompadour blowout, closer to a soft side part with real height. Best for oval and square faces, and wavy or thick straight hair.
Ask for: "Low or mid fade blowout, five inches on top, cut with weight to one side, sweep the front over." Point at the side you want to sweep toward.
Styling tip: Blow-dry with the round brush pulling hair to the sweep side, low-shine pomade to hold. This is the one blowout variation that tolerates a hint of shine — a soft satin finish reads polished.
How to Ask Your Barber for a Blowout Taper Fade
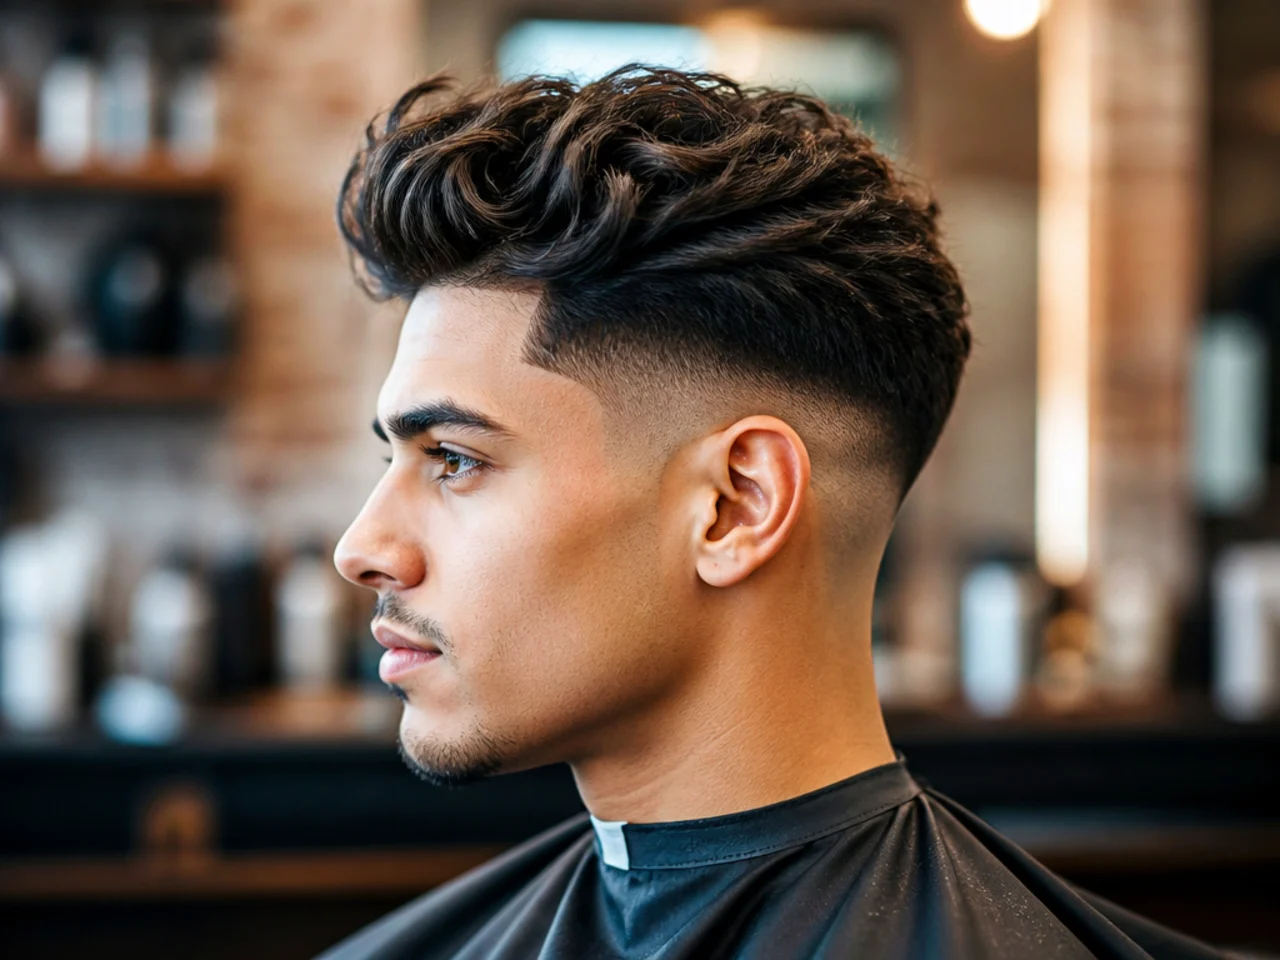
Show up with a photo and five numbers and you'll leave with the cut you actually wanted.
- Bring a photo. Any one from this article works. Even the best verbal description loses ten percent — a photo closes the gap. Save two: one for the perimeter, one for the top.
- State the fade height. Low, mid, or high. Point at your own head if the word gets fuzzy — sideburn level (low), temple (mid), parietal ridge (high).
- State the guard number at the shortest point. 0 (skin), 0.5, or 1. Skin means bald. 0.5 leaves a shadow. 1 keeps a hint of length. Fades below a 0.5 are fades. Above a 1 they're tapers.
- State the length on top in inches. Three to six inches is the working range. Under three, no hair to shape. Over six, the blowout gets floppy.
- Say the word "blowout." This is the styling instruction hidden in the ask. It tells the barber to leave length weighted forward and up so a round brush has hair to move. Skip this word and you'll get a taper without the shape you wanted.
- State the finish. Matte and textured, or sleek and shiny. For blowouts, matte reads modern. Shine reads dated on this silhouette.
- Book the next appointment before you leave. Every two to three weeks. Good blowout barbers book out — don't lose the chair.
Styling and Maintenance for a Blowout Taper Fade
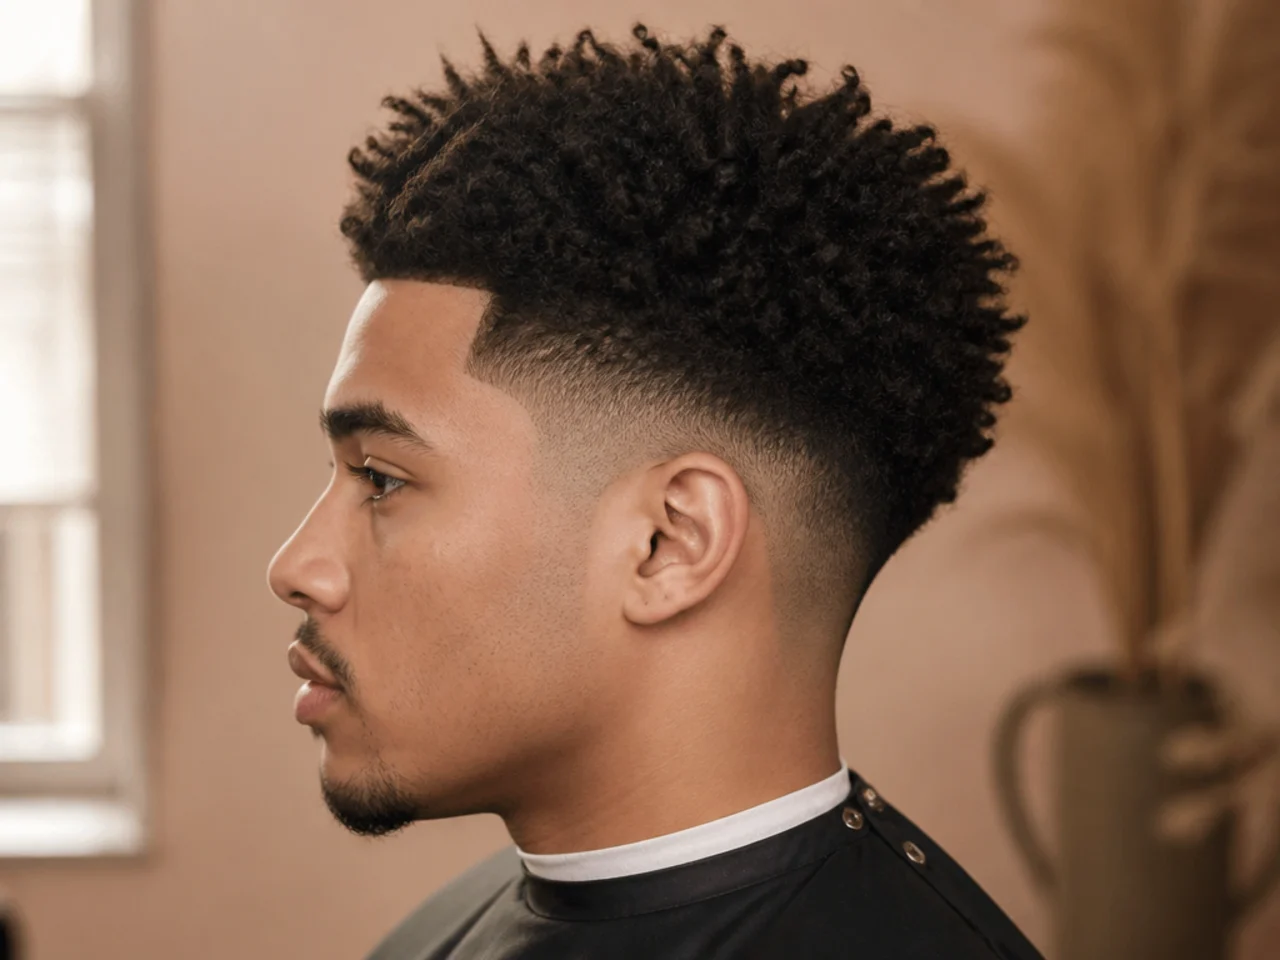
The cut is half the deal. Routine is the other half.
The daily routine (ten minutes):
- Towel-dry to damp. Not soaking. Squeeze the water out first.
- Prep product at the roots. Root-lift mousse for fine or straight hair. Curl cream for wavy or curly. Heat protectant either way.
- Round-brush the top. Medium heat, medium airflow. Pull hair from root outward and upward, opposite to how it falls naturally. That's what builds the lift.
- Cool shot at the end. Every dryer has one. Heat shapes, cool locks. Skip it and the shape drops by lunch.
- Finish with matte cream or paste. Work through the ends only. Roots need to breathe.
Between cuts:
- Wash every two to three days. Overwashing strips the natural oils that give hair body. Underwashing weighs it down.
- Condition the top, not the sides. Conditioner on the sides softens the fade edge. Keep it above the taper line.
- Sleep on silk. Cotton crushes the volume and pulls moisture out. A silk pillowcase or a bonnet holds the shape overnight.
- Trim your own neckline. Cheap trimmers keep the back clean between visits — one pass every four to five days.
- Refresh with dry shampoo on day two. A quick spray at the roots plus a re-brush revives most of the volume.
Skip the round brush and skip the cool shot and you have a taper fade, not a blowout taper fade. The styling is the cut here.
FAQ
Is the blowout taper fade still trending in 2026? Yes — Pinterest search volume is still climbing, and it's one of the most requested fades in barbershops right now. The modern version is softer at the base than the 2000s original, and drier at the top (matte, not gel), which is what's kept it fresh.
Can I get a blowout taper fade with thin hair? Yes — see variation #7. Keep the length shorter (three inches, no more) and blow-dry with mousse for maximum root lift. Thin hair actually reads denser on this cut than on flatter styles because volume is the entire point.
Do I need a blow-dryer for this haircut? Yes. This is the whole cut. Skipping the dryer isn't a shortcut — it's a different haircut. If you won't own a blow-dryer and a round brush, pick a low fade haircut or a taper haircut with air-dry styling instead.
How long does a blowout taper fade last between cuts? Two to three weeks at peak. The fade line blurs first — usually by day ten on a skin fade, day fourteen on a #0.5. Book every three weeks maximum or the shape falls off.
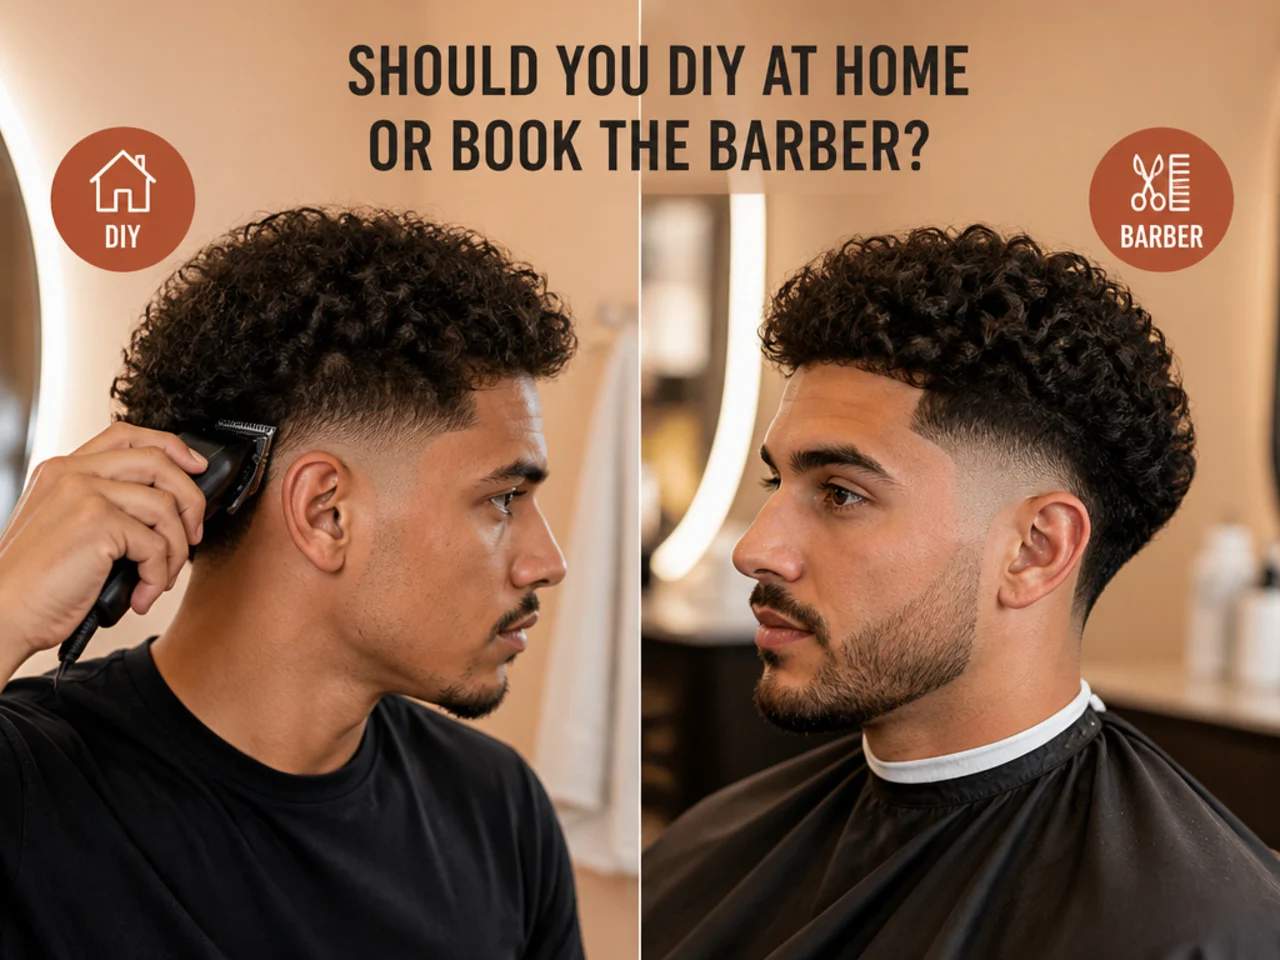
Can I do a blowout taper fade at home? The blowout styling, yes. The fade, no — a fresh fade needs clipper skill, mirror angles, and a steady hand you can't get on your own head. Leave the perimeter to the barber and handle the styling yourself.