20 Layered Haircuts That Add Volume to Thin Hair
Done well, layers make fine hair look twice as full and add movement to any texture. Done badly, they can strip weight from a shape that needed it. This guide covers the 20 layered haircuts that reliably deliver volume, movement, and shape — plus how to ask your stylist for the exact version you want.
In this article · 23
- Which layers actually add volume?
- Classic Layered Bob
- Textured Lob (Long Bob)
- Short Layers Around the Crown
- Choppy Inverted Bob Layered haircuts
- Shoulder-Length Hair with Feathery Layers
- Shag with Curtain Bangs
- Long Layers for Straight Hair
- V-Cut Layers for Long Hair
- 9\. A-Line Bob with Layers
- Blunt Cut with Internal Layers
- Razor Cut Layers
- Short Bob with Choppy Layers and Bangs
- Shoulder-Length Cut with Face-Framing Layers
- Long Bob with Wispy Ends
- Pixie Cut with Volume on Top
- Medium-Length Layers with Heavy Texture
- Layered Shag for Curls/Waves
- Bob with Subtle Layers and Highlights
- Undercut Pixie with Textured Top
- Layered Lob with Blunt Ends
- Why Thin Hair Lacks Volume?
- The Solution: Strategic Layering
Layered cuts don't automatically add volume — placement does. Cut in the wrong spot, layers thin fine hair further. This guide is written for fine to medium hair that reads flat by lunchtime. Twenty layered haircuts below, each with a stylist's note on who it suits, how to ask for it, and the one styling move that keeps the volume all day.
Which layers actually add volume?
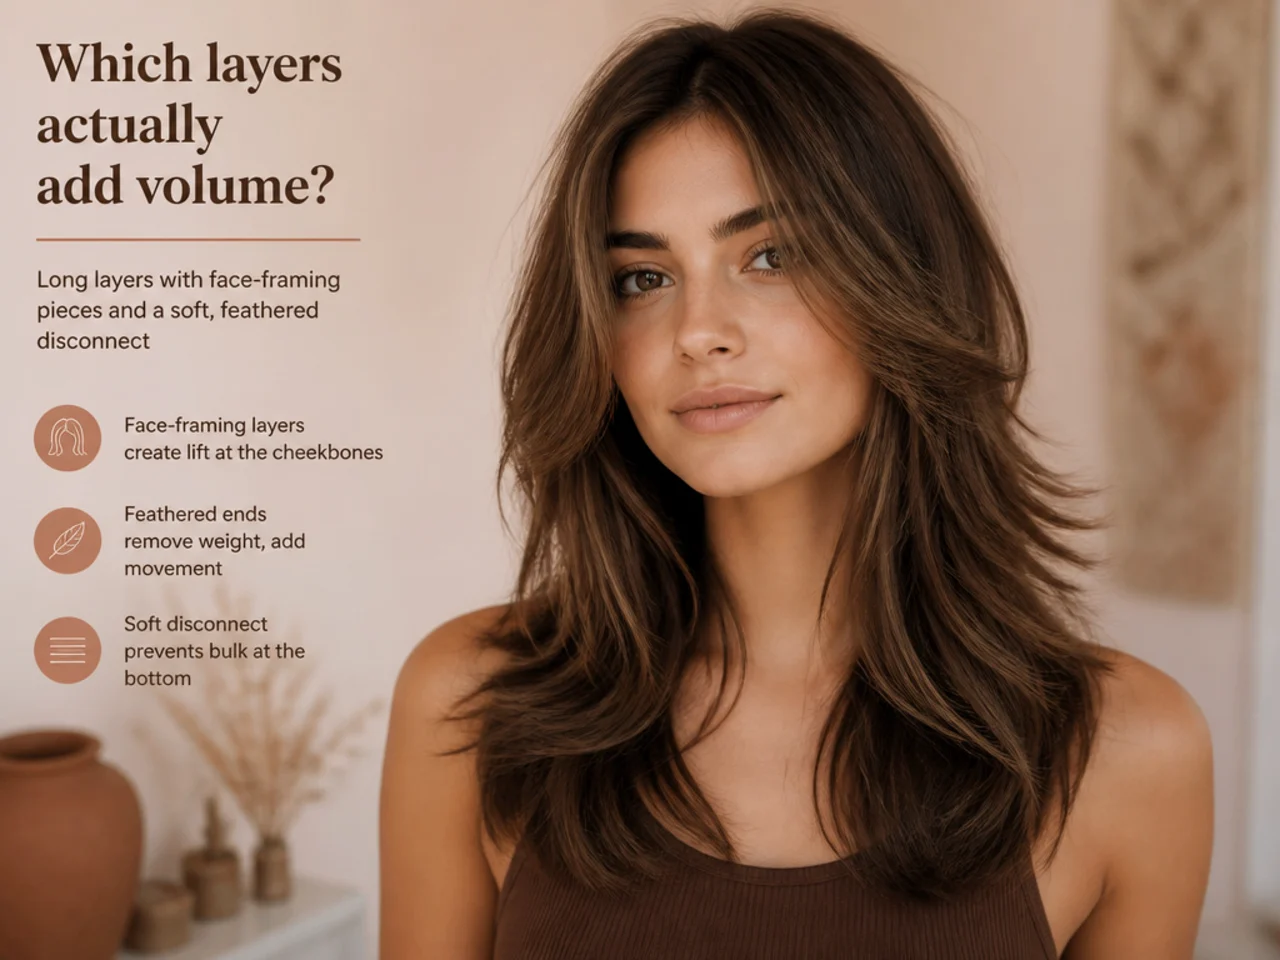
Not all layers lift. The rule most stylists work from: short layers stacked at the crown create lift, long face-framing layers create shape, and a blunt or near-blunt perimeter creates the illusion of density. The three work together.
Short crown layers — roughly the top two inches around your parietal ridge — act like scaffolding. When you dry them upward, the length beneath props up like a lifted skirt. Long face-framers do a different job. They move light and eye around your face without removing weight from the body of the hair. A blunt or near-blunt perimeter keeps the ends looking thick, so the layering above reads as fullness rather than sparseness.
If your hair is curly, always book a dry cut — a "curly cut" — so the layers land where the curls actually pattern. A wet cut on curls almost always sits too short and too flat once it dries.
Weight goes where you want density. Movement goes where you want lift. Learn to see the difference in a photo before you bring it in, and reference our full gallery of layered options for every face shape when you're gathering ideas.
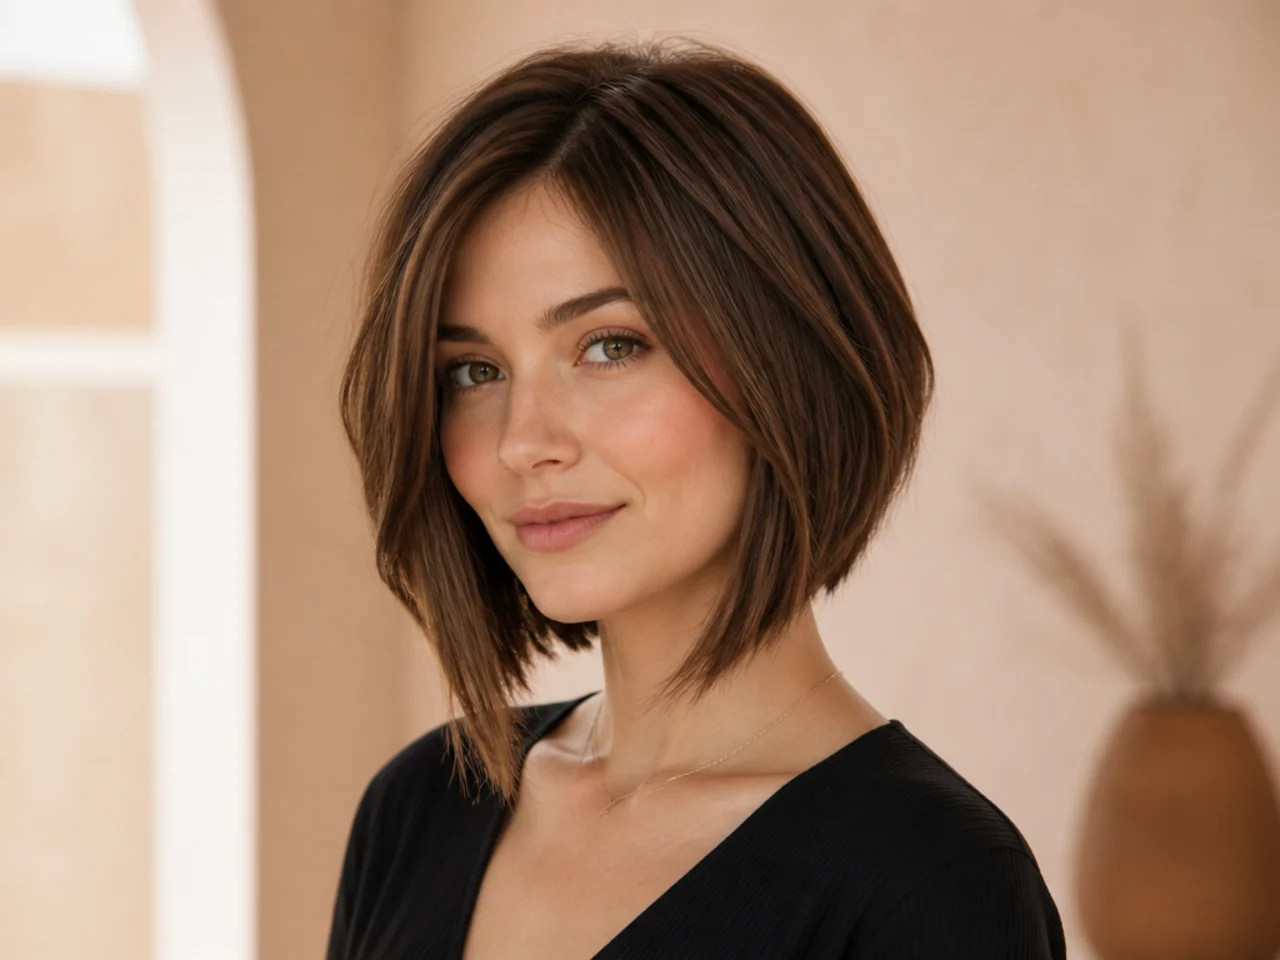
Classic Layered Bob
A classic layered bob is a timeless choice for thin hair. The blunt ends create a strong foundation, while subtle layering adds movement and prevents a heavy, flat look.
Ask your stylist for a chin-to-jaw perimeter cut straight across, with three or four soft layers built into the crown only — no feathering at the ends. This flatters oval, heart, and long faces, because the chin-length line adds width where the face narrows. Fine-to-medium straight or slightly wavy hair holds it best. Browse our layered bob gallery for length variations, and the classic bob guide for perimeter shapes.
The mistake to avoid: asking for layers throughout. On fine hair, that thins the perimeter and kills the illusion of thickness. Volume up top, weight at the bottom.
Styling note: rough-dry the roots upside down with a light mousse, then finish the crown with a small round brush lifted straight up. That's where the lift gets locked in.
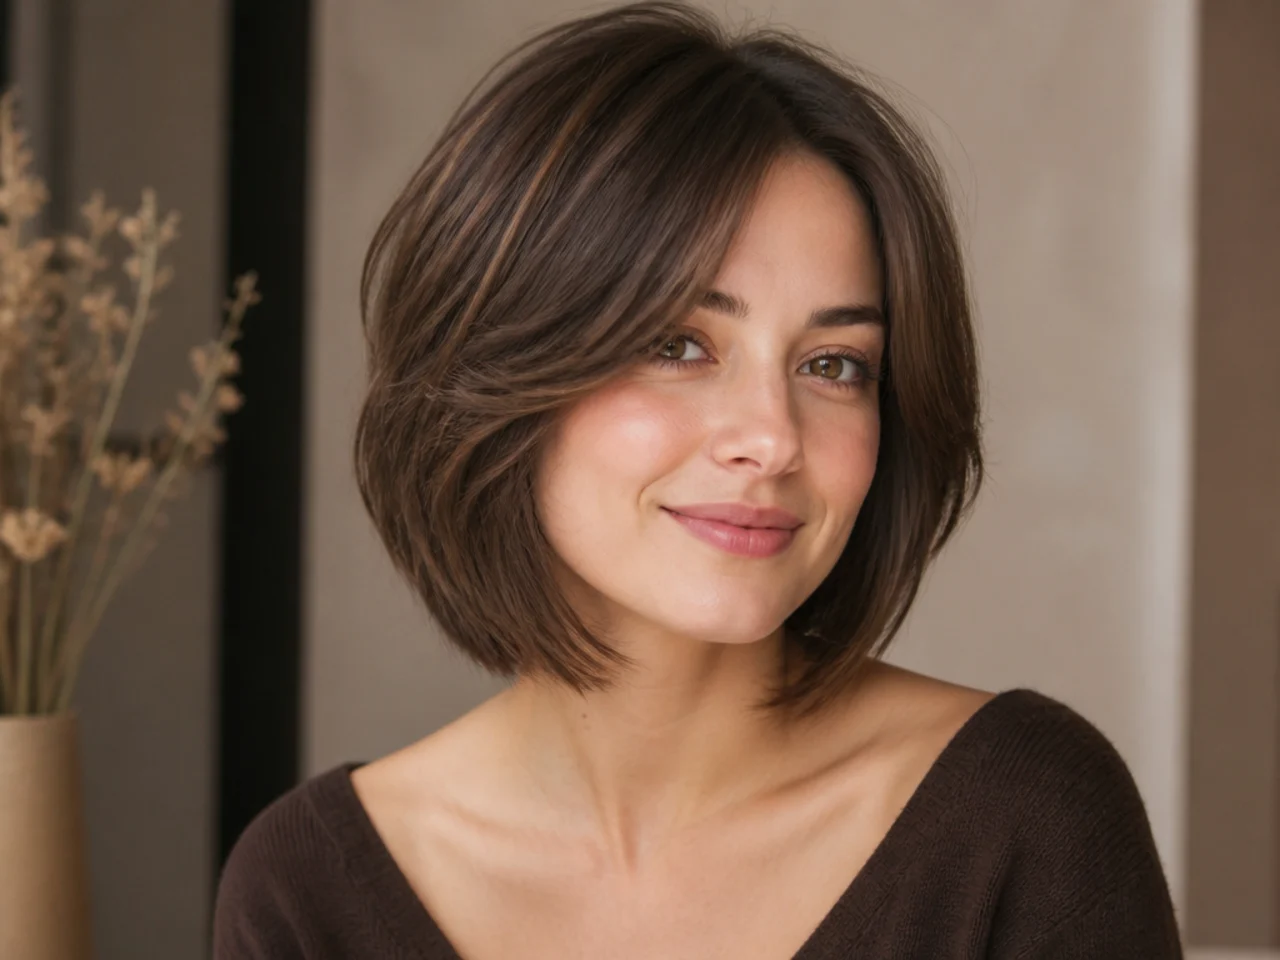
Textured Lob (Long Bob)
The lob, or long bob, is a versatile length that can be easily customized. Adding texture through choppier layers helps break up the length and create volume, making it perfect for fine strands.
Ask specifically for a "collarbone lob with texture layers, no thinning shears." The distinction matters — thinning shears remove weight from the ends, which is the opposite of what fine hair needs. Point-cutting delivers the same textured look without stripping density. This length flatters round, square, and oval faces. On longer face shapes, keep the perimeter closer to the shoulder so the length doesn't drag the face down.
The mistake to avoid: over-layering to shoulder level. Once your shortest layer sits above the collarbone on a lob, the underneath goes wispy. Keep the shortest layer at chin or jaw.
Styling note: mist a heat protectant, blow-dry with a paddle brush lifting from the roots, then bend the ends under with a 1.5-inch iron for that lived-in curve.
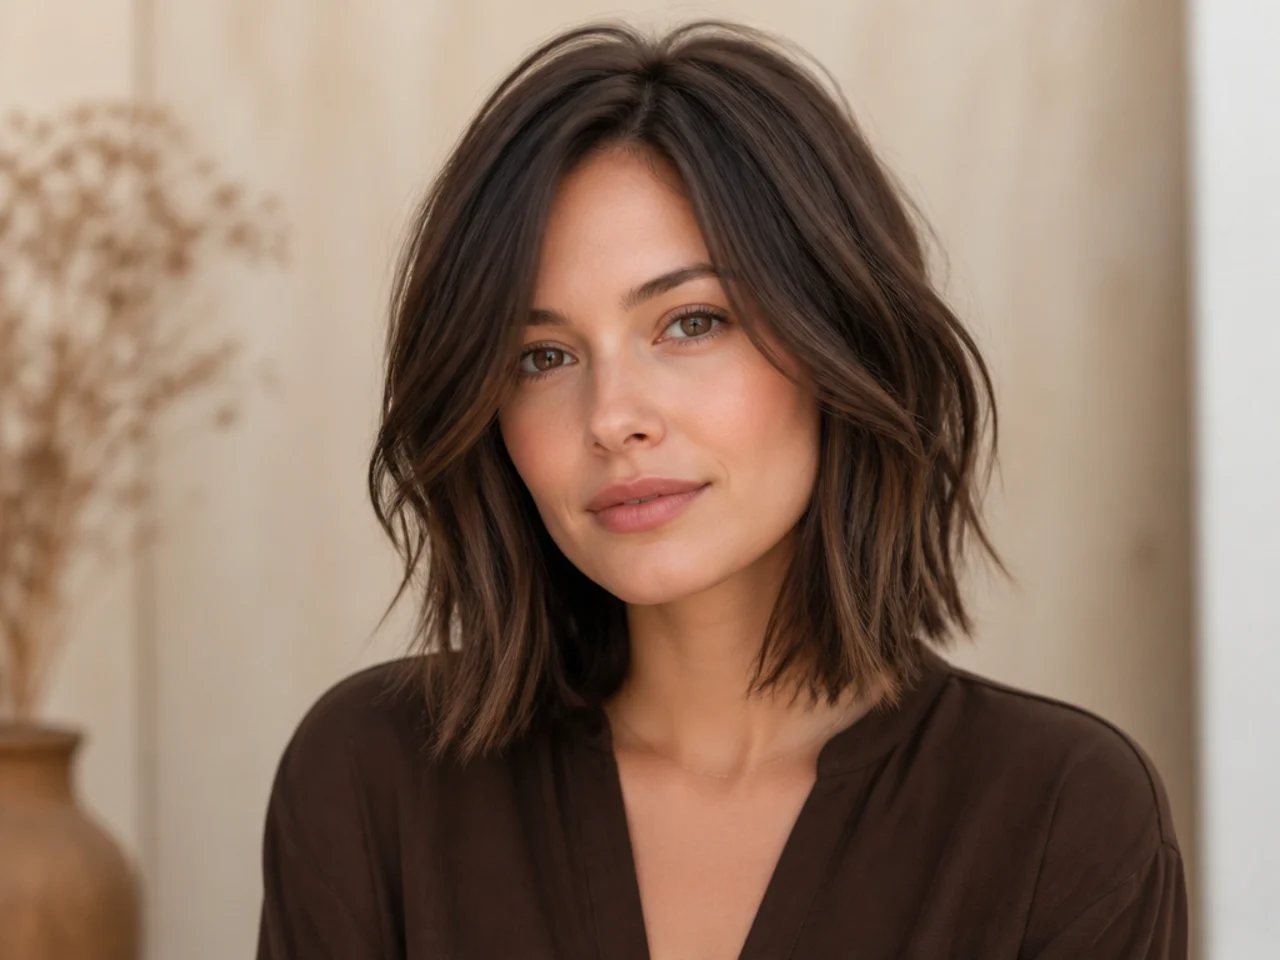
Short Layers Around the Crown
This haircut is all about lift at the roots. Shorter layers concentrated around the crown add instant volume and bounce, making thin hair look significantly thicker.
Ask for "internal crown layers, about two inches shorter than my length, kept above the occipital bone." Point to the exact spot with your fingers so nothing gets cut lower than the widest part of your head. This works on any face shape and almost any length — bob through mid-back. It's especially strong for straight fine hair that goes flat at the top by midday.
The mistake to avoid: letting layers travel down the sides of the head. Side layers on fine hair flatten within an hour and read as thinning rather than lift. Keep the shorter pieces contained to the crown circle.
Styling note: after towel-drying, spray a root-lift mist directly into the roots at the crown, tip your head forward, and blast with a diffuser or paddle-brush attachment on medium heat.
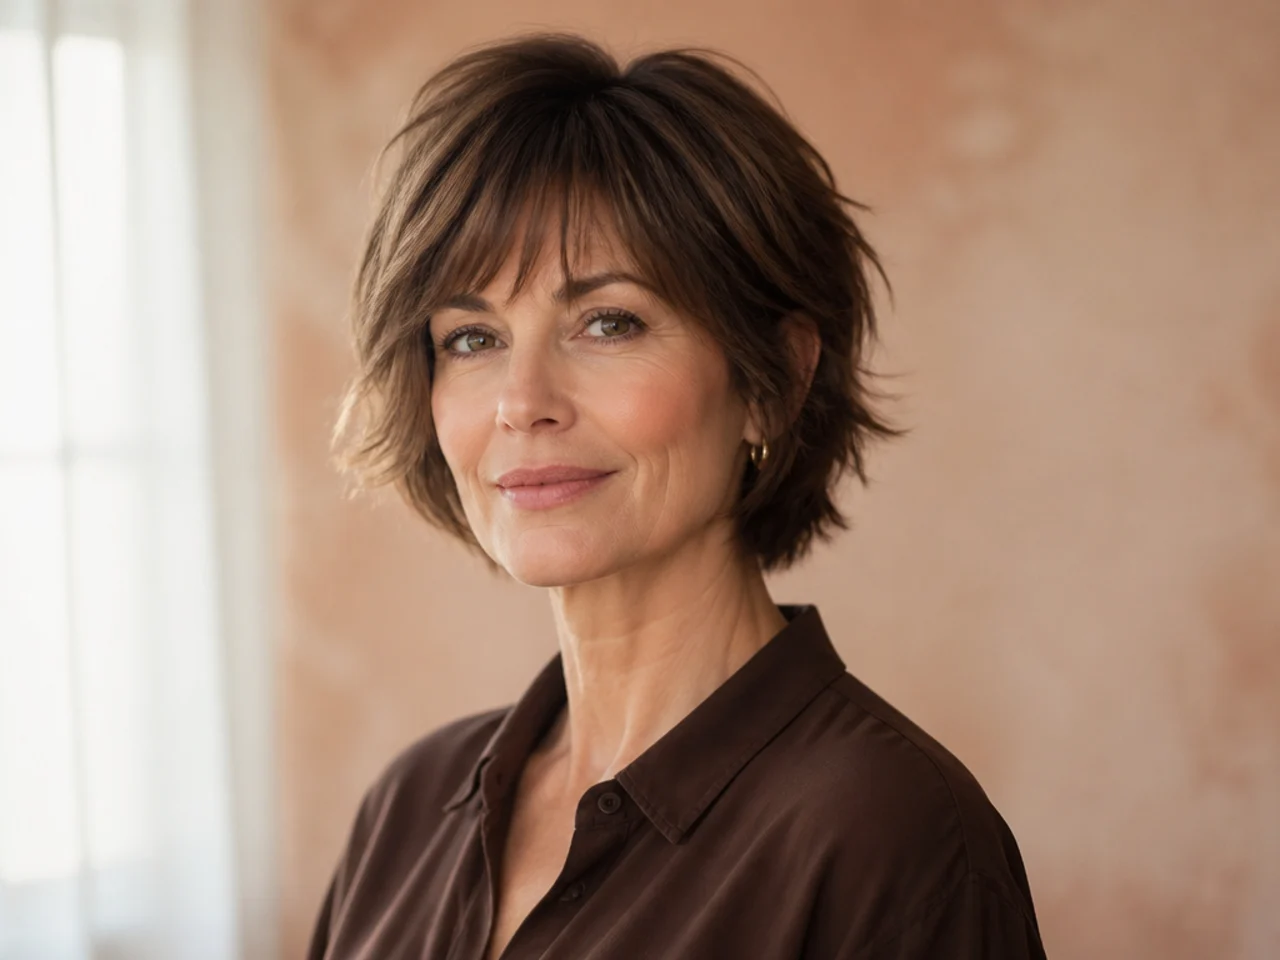
Choppy Inverted Bob Layered haircuts
The inverted bob is known for its stacking effect at the back, which naturally adds volume. Incorporating choppy layers enhances this effect, creating a modern, textured look that pumps up fine hair.
Ask for a graduated stack that peaks about two inches above the nape, with the front angled forward to chin length. The stack itself does most of the volume work — request that any layering on top stays inside the crown circle and gets cut with a straight blade rather than a razor. This flatters oval, square, and diamond faces; the angled front creates length that softens strong jawlines.
The mistake to avoid: choppy layers on the perimeter of an already short cut. Fine hair below the ear reads thinner when the ends are broken up. Keep the perimeter of the stack clean.
Styling note: blow-dry the nape flat first, then lift only the crown pieces with a round brush and hit them with a cool shot to set the volume.
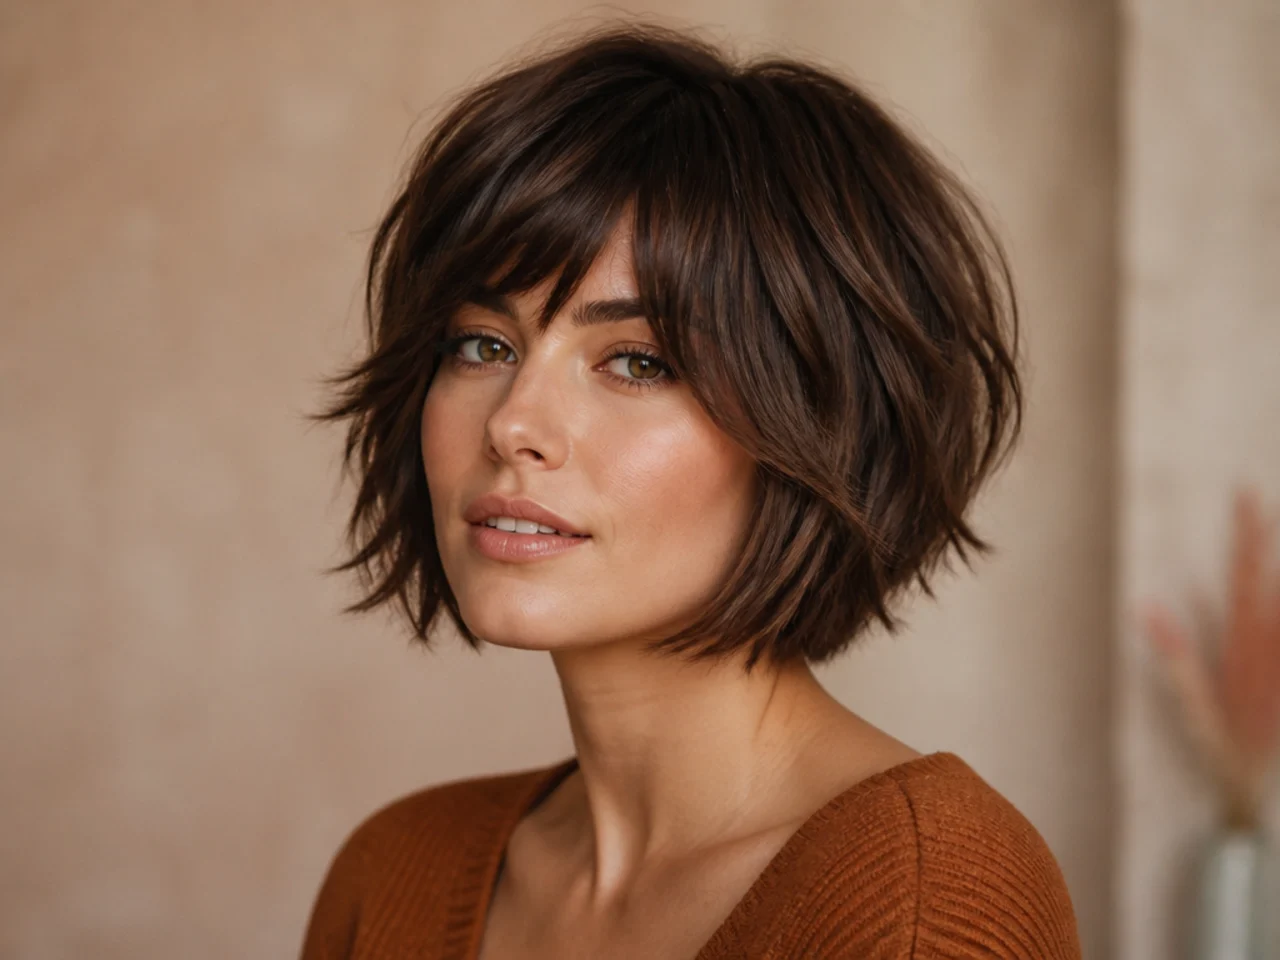
Shoulder-Length Hair with Feathery Layers
Feathery layers are wispy and delicate, perfect for adding texture and movement without bulk. This technique is ideal for shoulder-length hair, creating a soft, voluminous style that feels light and airy.
Ask for "feathered layers around the face only, starting at the cheekbone, plus a small amount of crown lift." Keep the back one-length or nearly so. This suits round and heart-shaped faces, and works on fine, straight, or lightly waved hair. Feathering adds airiness without the perimeter thinning that traditional razor cuts risk on fine strands.
The mistake to avoid: feathering the ends of the length. Feathery ends on already thin hair look damaged, not delicate. The feather effect should live at the face, not the perimeter.
Styling note: after blow-drying, run a dime of light styling cream through the face-framers, then twist small sections and shake them out. That twist-and-release is what gives feathering its softness.
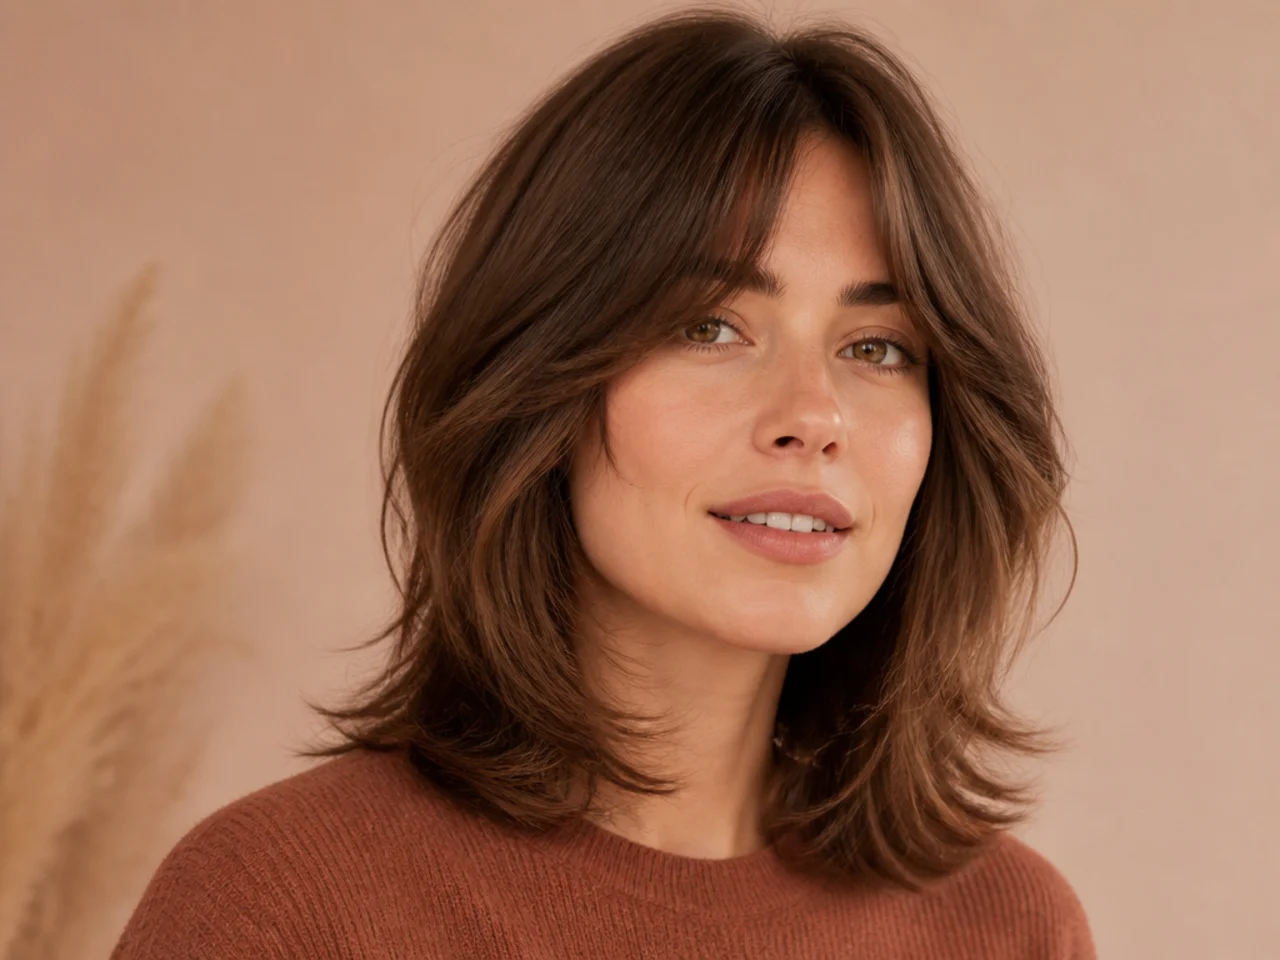
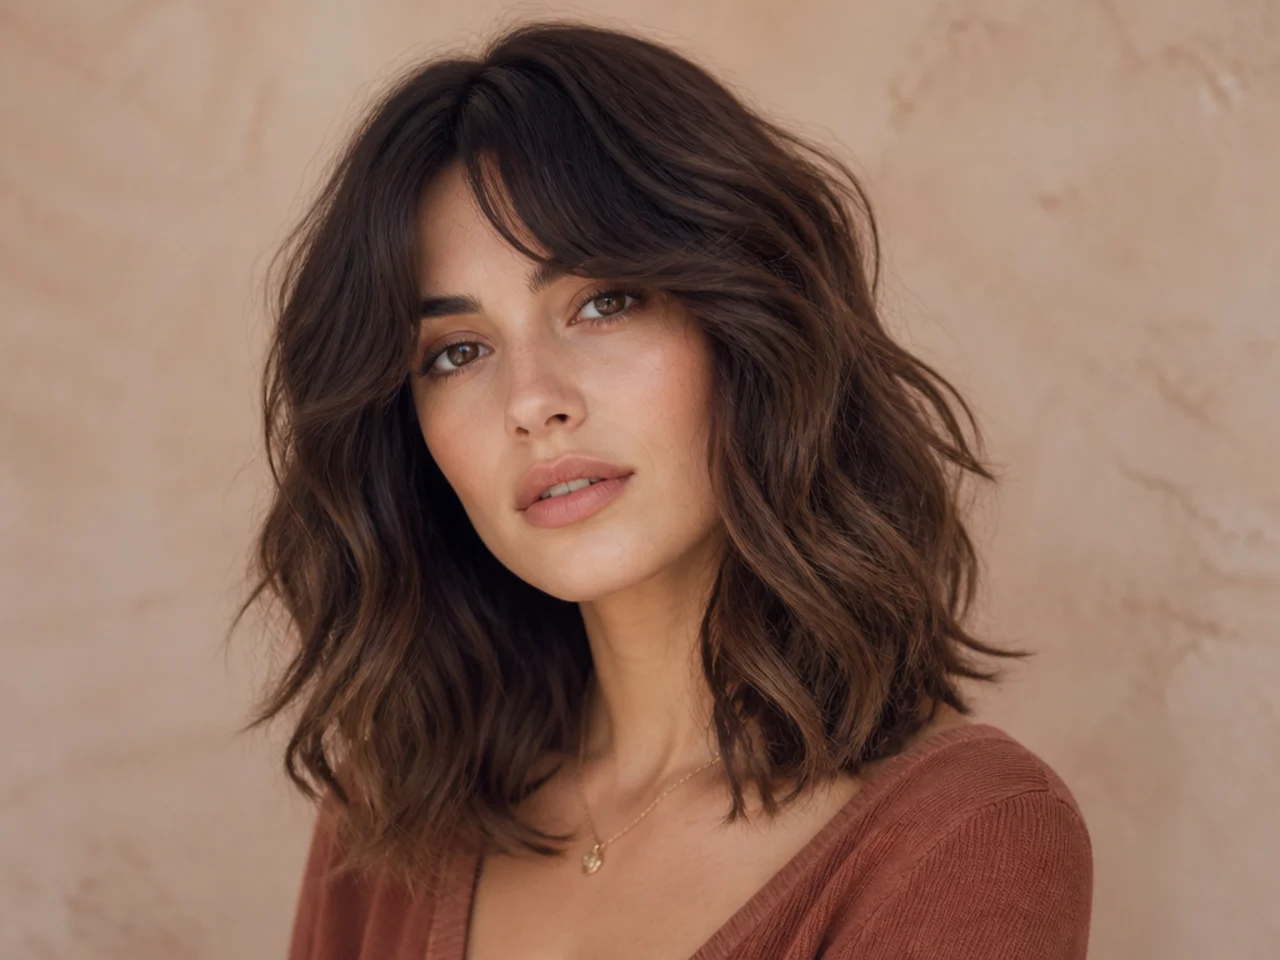
Shag with Curtain Bangs
The shag is back in a big way, and it's fantastic for thin hair. The heavy layering throughout creates maximum texture and movement, while curtain bangs add face-framing dimension and fullness.
Ask for a shag structure — shorter crown layers, mid-length body, longer perimeter — with curtain bangs that split at the middle and blend into the face-framing layer. Our full shag guide walks through the length variations and how each one styles. Best on oval, square, and heart faces. Wavy and lightly curly hair benefits most, because the layered structure gives every wave somewhere to break.
The mistake to avoid: booking a modern "wolf cut" when you actually want a soft shag. The wolf cut has aggressive disconnection that can leave fine hair looking chopped. A traditional shag has gradual layering — say "70s shag, not wolf cut" if that's the look you want.
Styling note: air-dry with a curl cream to a damp finish, then finger-scrunch. A blow-dry on a shag tends to flatten the very texture the cut was built for.
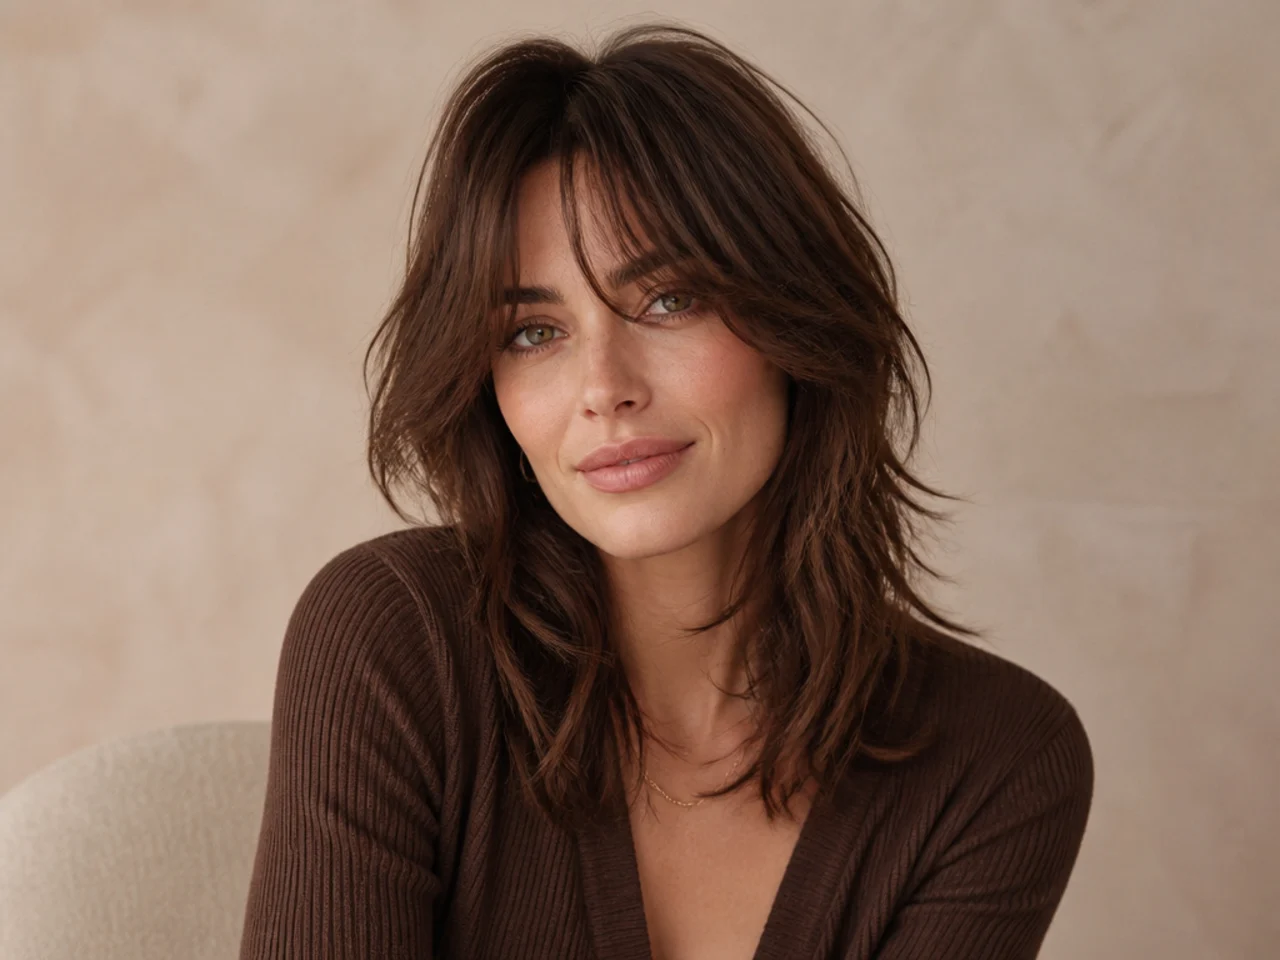
Long Layers for Straight Hair
Don't rule out long hair if you have thin strands. Long layers can be effective for creating the illusion of volume. The key is to start layers lower down (around the chin) and use techniques that add texture rather than removing bulk.
Ask for the shortest layer to land at your chin, with subsequent layers cascading down to your ends. Think of it as long, gentle steps rather than deep internal layering. The butterfly haircut uses this exact framework and reads as fuller than a one-length cut. Best on oval, long, and diamond faces. Fine and medium straight hair loves this structure.
The mistake to avoid: starting the shortest layer at the collarbone or below. On long hair, layers that begin that low don't cascade — they float, and the top of the head reads flat.
Styling note: blow-dry with a round brush, wrapping small sections up and over the barrel for a soft bend. That gentle bend is what makes long layers read as volume rather than length.
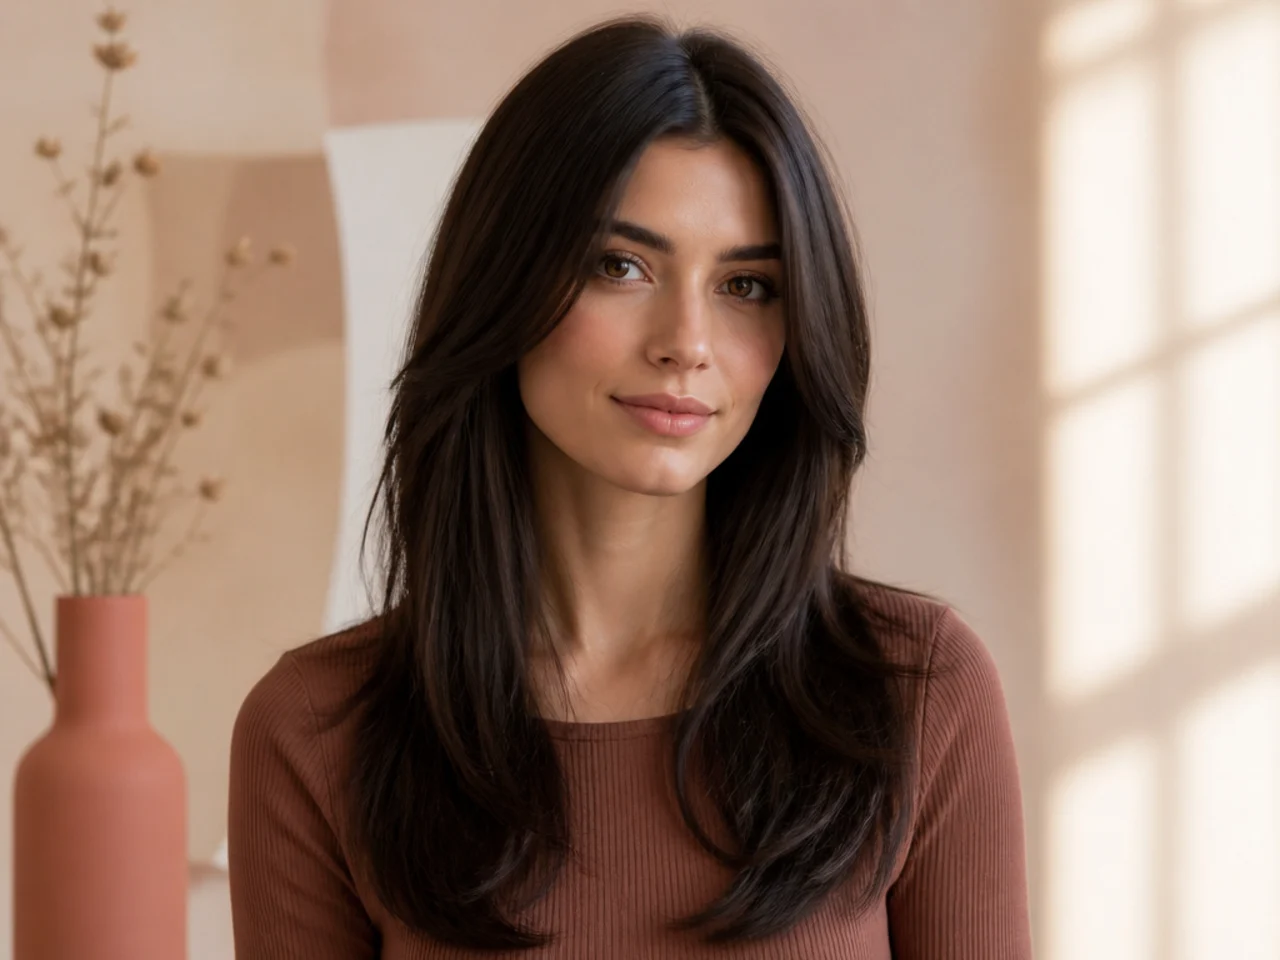
V-Cut Layers for Long Hair
A V-cut is another great option for long, thin hair. It creates a defined shape and adds dimension, with shorter layers naturally falling around the face and shoulders, preventing a 'weighed down' look.
Ask for a "V-shaped perimeter with face-framing layers starting at the cheekbone." The V-shape means the back sits longer than the sides, which optically pulls hair forward and makes the front look denser. This flatters oval, long, and heart faces. It works on fine, medium, and even coarse straight hair.
The mistake to avoid: a V so extreme the sides climb to the jaw. That leaves fine hair looking pointed and sparse at the perimeter. Keep the depth of the V modest — about two to three inches difference between the front point and the back point.
Styling note: part your hair on the deeper side and blow-dry the parting away from your face. That's how you get the sweep the V-cut is built for.
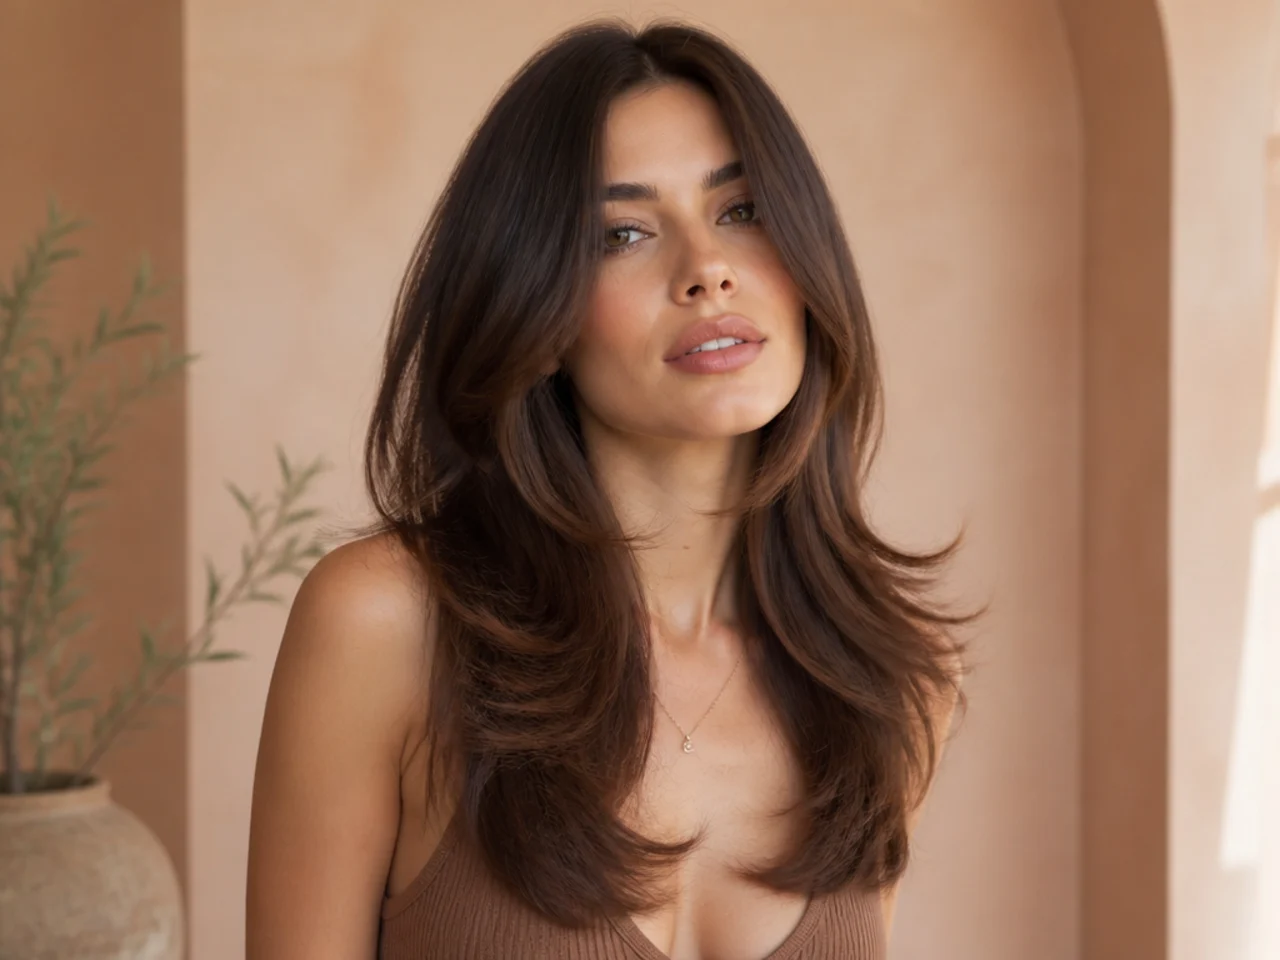
9. A-Line Bob with Layers
The angled shape of an A-line bob naturally builds volume at the back. Integrating soft layers throughout adds even more texture and lift, especially around the crown,
Ask for an A-line perimeter that angles from a shorter nape to a longer chin, with crown layers only — no perimeter feathering. The angle does the width work; the crown layers add the lift. Best for oval, square, and round faces, where the downward angle toward the chin softens the widest points of the face and adds a lengthening line.
The mistake to avoid: layering the length of the A-line. Once you break up that angled perimeter, the whole shape blurs and the volume effect gets lost.
Styling note: dry the perimeter smooth first, then work only the crown with a small brush pulled straight up. If you have a cowlick at the crown, dry against it before smoothing back — that's where the real lift lives.
Blunt Cut with Internal Layers
Wait, a blunt cut for thin hair? Yes, with a twist! A blunt cut provides structure, and adding internal layers (layers that are shorter inside the cut) creates hidden support and volume, giving the appearance of density without making the ends look wispy.
Ask for a "blunt perimeter with two invisible internal layers at the crown." The word "invisible" cues your stylist that the layers should never break the perimeter line — they live under the top layer, propping it up. Best for oval, square, and heart faces on straight to lightly wavy fine hair.
The mistake to avoid: any perimeter texturizing. The whole point is a strong, unbroken line at the ends. Ask that thinning shears stay away from the last two inches of length.
Styling note: blow-dry the top layer forward and over to the opposite side, then flip it back. That over-direction is what makes a blunt cut with internal layers look full rather than heavy.
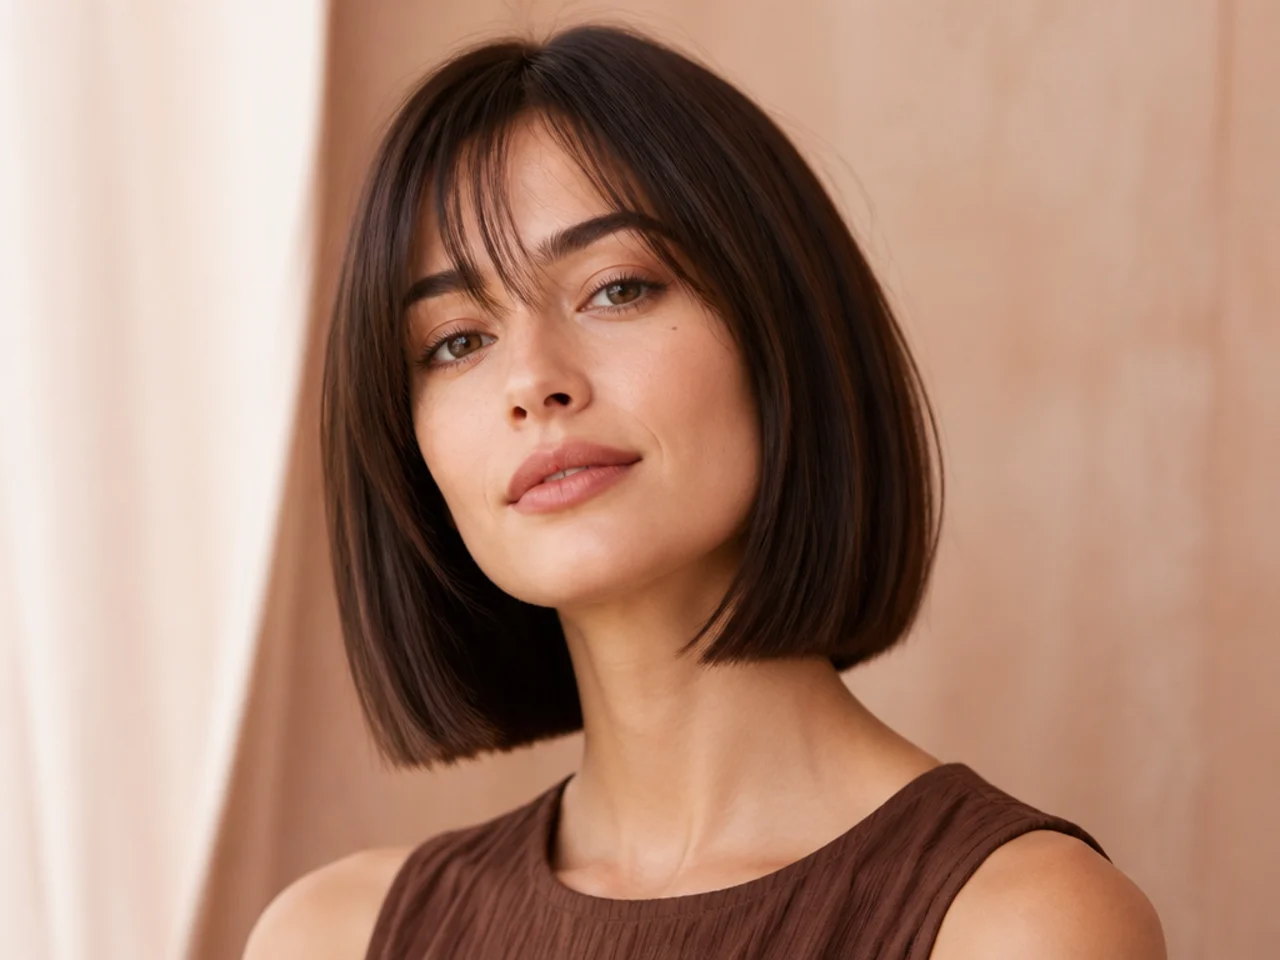
Razor Cut Layers
Razor cutting creates soft, textured ends that blend seamlessly. This technique is ideal for adding movement and a lightweight feel to thin hair, giving it a tousled, voluminous appearance.
Ask for razoring only through the mids and crown — not the ends. The razor is a movement tool, and used at the ends of fine hair, it thins the perimeter. Used on the middle third, it adds separation and lift. This suits oval, heart, and diamond faces. It's best on medium-density fine hair with a slight wave. Poker-straight fine hair can look stringy when razored, so wave or bend is important.
The mistake to avoid: booking a full razor cut without asking where the razor is going. If your stylist can't tell you which sections they'll razor, you're not on the same page yet.
Styling note: use a matte texture spray from mid-length down, then flip your head over and shake it out with your fingers. Razoring is designed to move — a stiff blowout works against it.
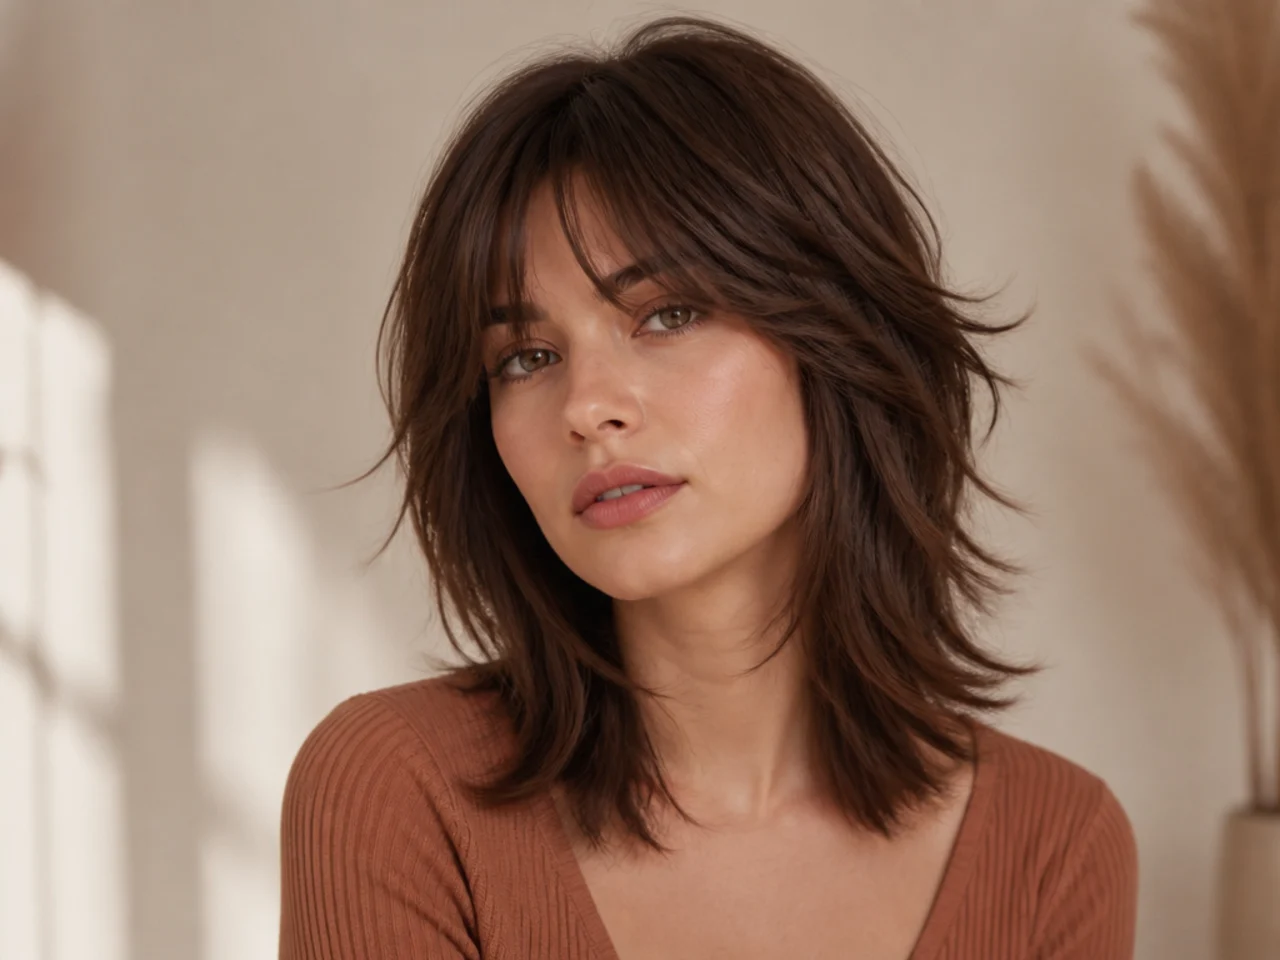
Short Bob with Choppy Layers and Bangs
This combination is a volume powerhouse. Short hair inherently has more lift, choppy layers add texture and movement, and bangs provide density around the face, creating a full and dynamic look.
Ask for a jaw-length bob with layers no shorter than the earlobe and full bangs that sit just above the brow. The bang density visually thickens the whole hairline. Best on oval, heart, and long faces; long faces benefit especially from the horizontal line of full bangs, which shortens the visual length of the face.
The mistake to avoid: micro-bangs on fine hair. They tend to separate and read as thin. Keep the bang line dense and full, with weight through the middle.
Styling note: blow-dry the bangs first — always — with a round brush and tension. Dry bangs sit better than air-dried ones on this length, and setting them first anchors the whole style.
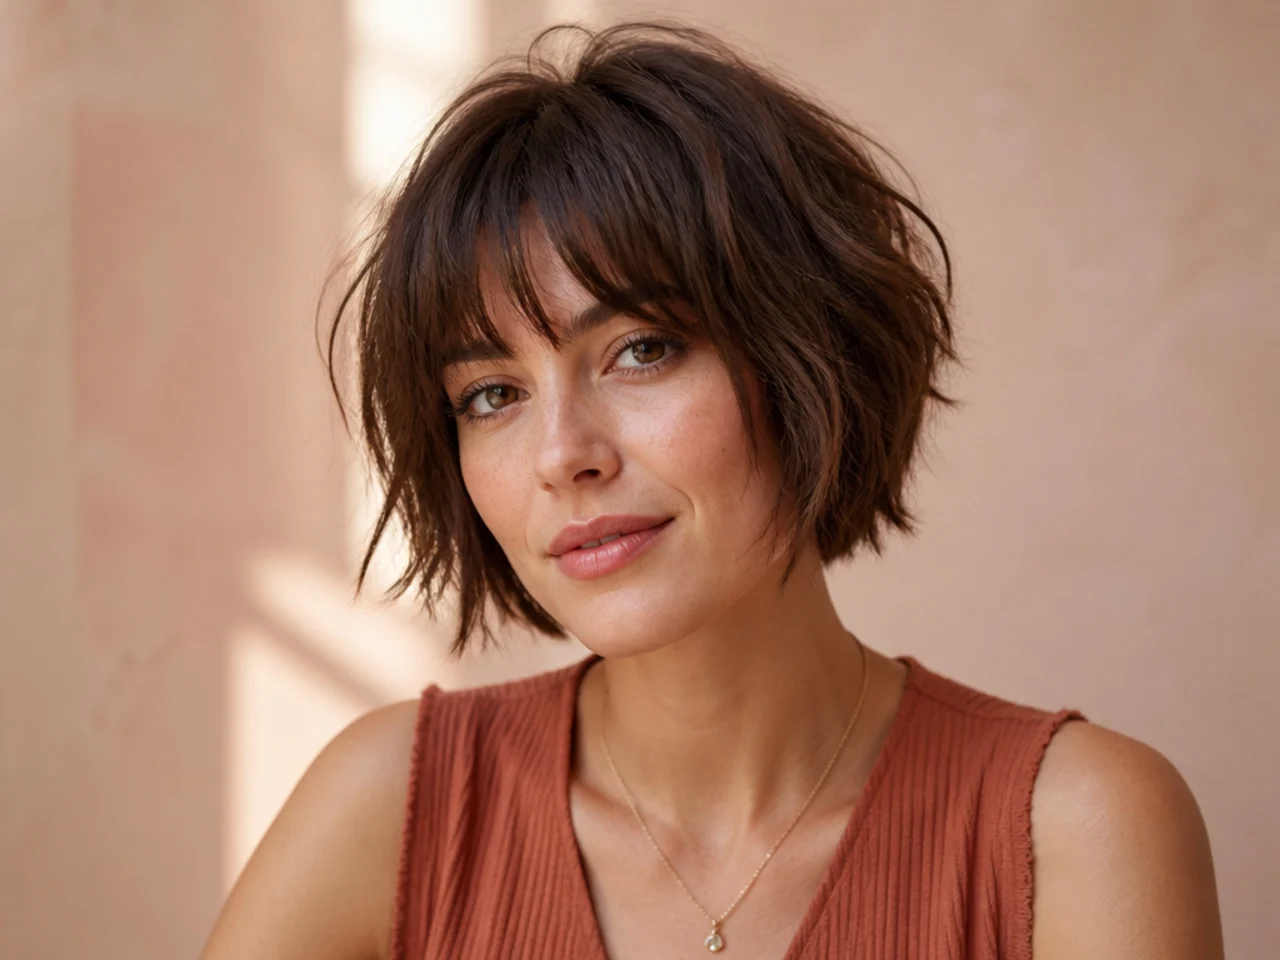
Shoulder-Length Cut with Face-Framing Layers
Framing the face with shorter layers is an easy way to draw attention upwards and create the appearance of more volume. This technique works exceptionally well with shoulder-length styles, adding structure and dimension.
Ask for face-framing layers that start at your chin, sweeping back and lengthening to blend into the shoulder-length perimeter. Keep the back one-length, or with a single soft internal layer at the crown. This suits every face shape — face-framing is universally flattering when scaled to the face. Round faces get a lengthening effect; long faces benefit from a shorter, curvier framer.
The mistake to avoid: framing that starts above the chin on medium-length hair. Layers that begin above the chin pull the eye up in a way that reads unfinished, not lifted.
Styling note: after drying, curl the face-framers away from your face with a 1-inch iron, one section on each side. That's the entire styling routine — those two pieces do all the visual work.
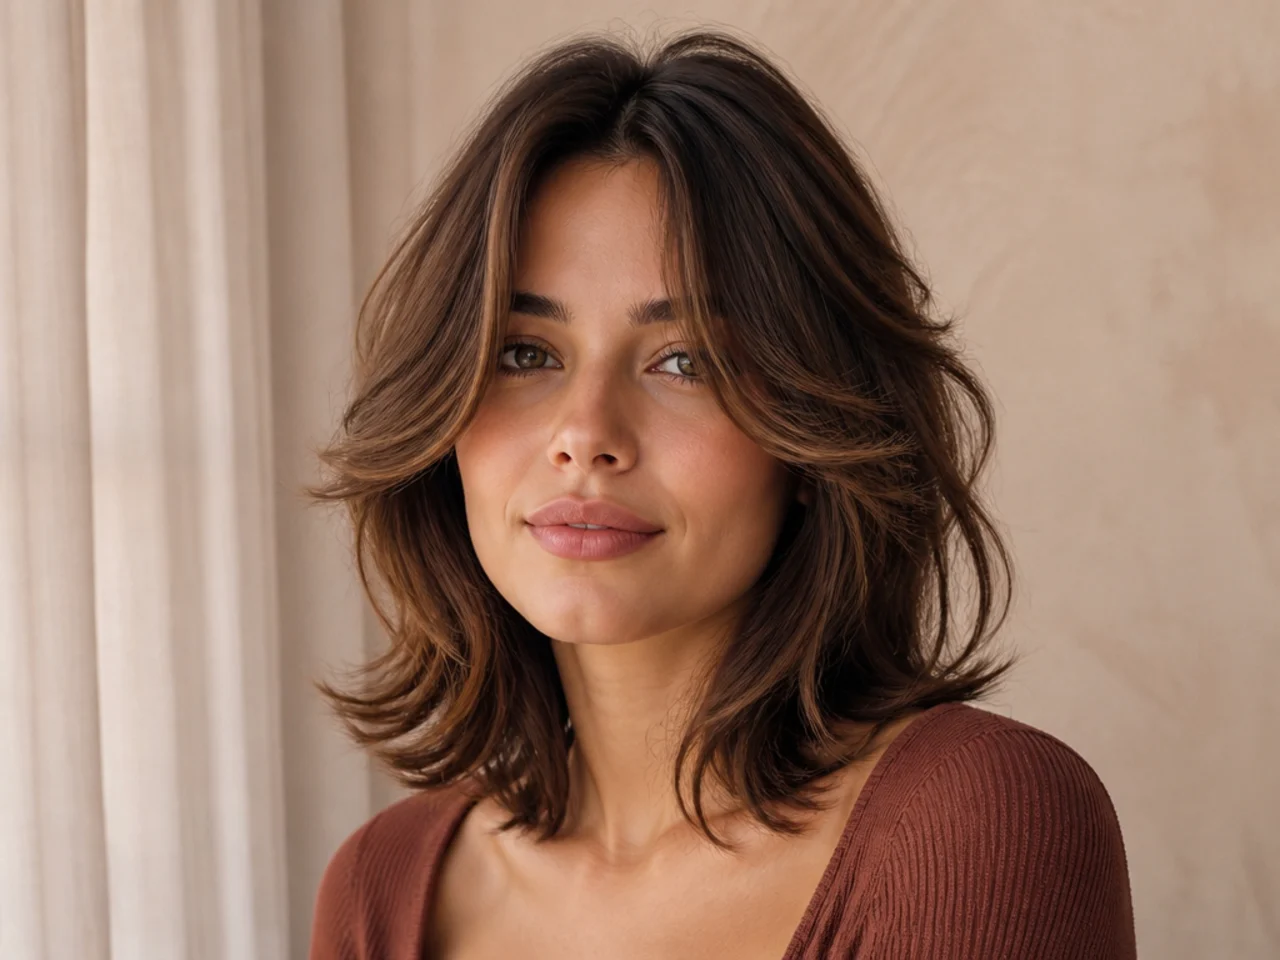
Long Bob with Wispy Ends
For a softer look, try a long bob with wispy ends. The layering is subtle and concentrated towards the bottom, where the ends are thinned slightly to add texture and movement without making the hair look thin or broken.
This one bends the "no perimeter texturizing" rule, with a caveat: it only works if your hair is medium-density fine (not truly sparse), and if the wispiness is minimal — call it a "softened, not thinned" edge. Ask for point-cutting on the last half-inch only, and no razoring. Suits oval, square, and round faces on medium-fine hair with a slight bend.
The mistake to avoid: asking for wispy ends when your hair is already truly fine or thin at the perimeter. In that case, skip this cut and go blunt — see the full thin-hair haircut roundup for alternatives.
Styling note: air-dry to damp, then use a 1.25-inch iron to bend the ends outward in alternating directions. The wispy effect is a styling choice as much as a cutting one.
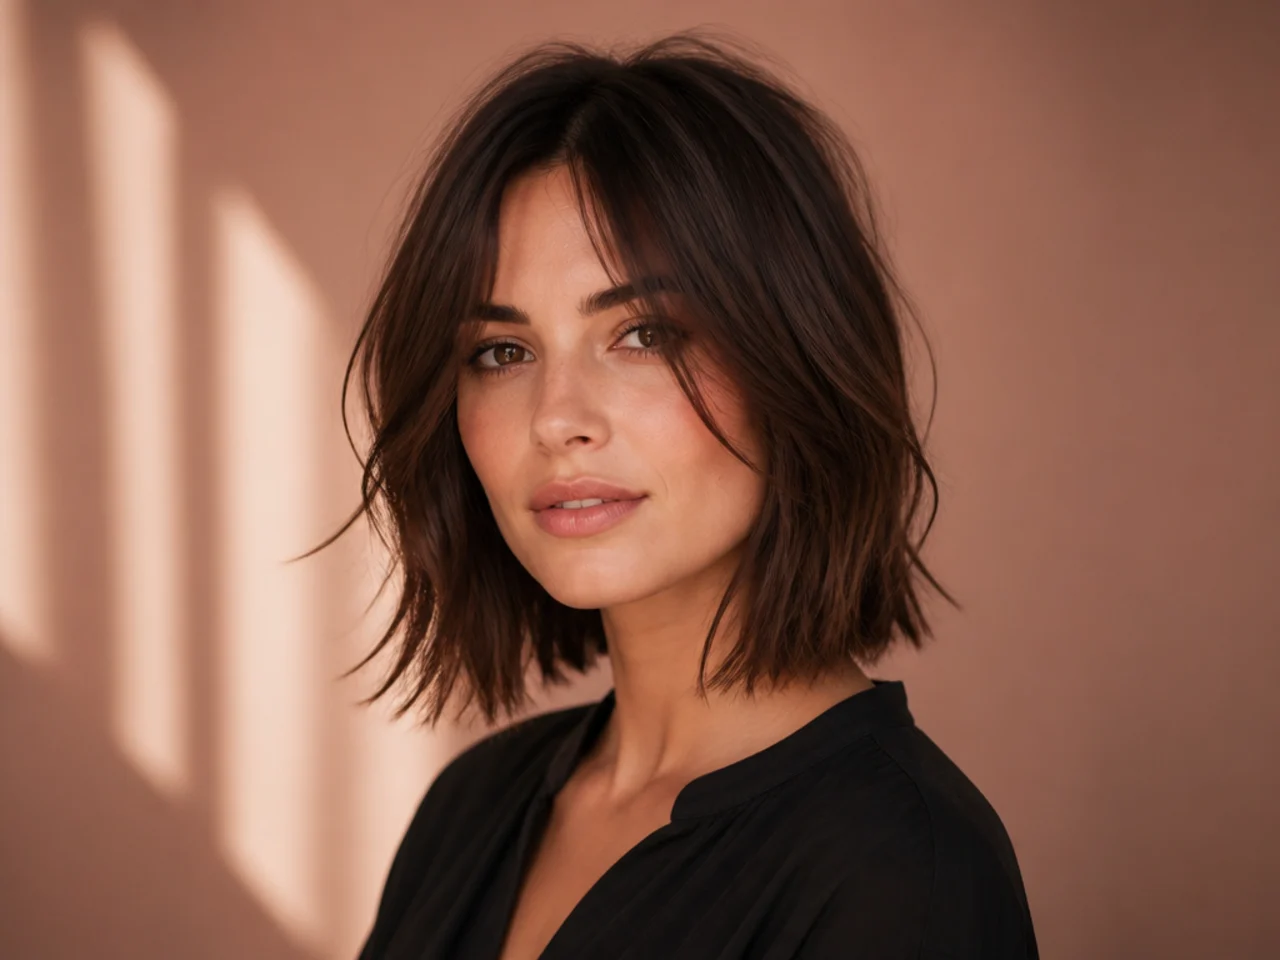
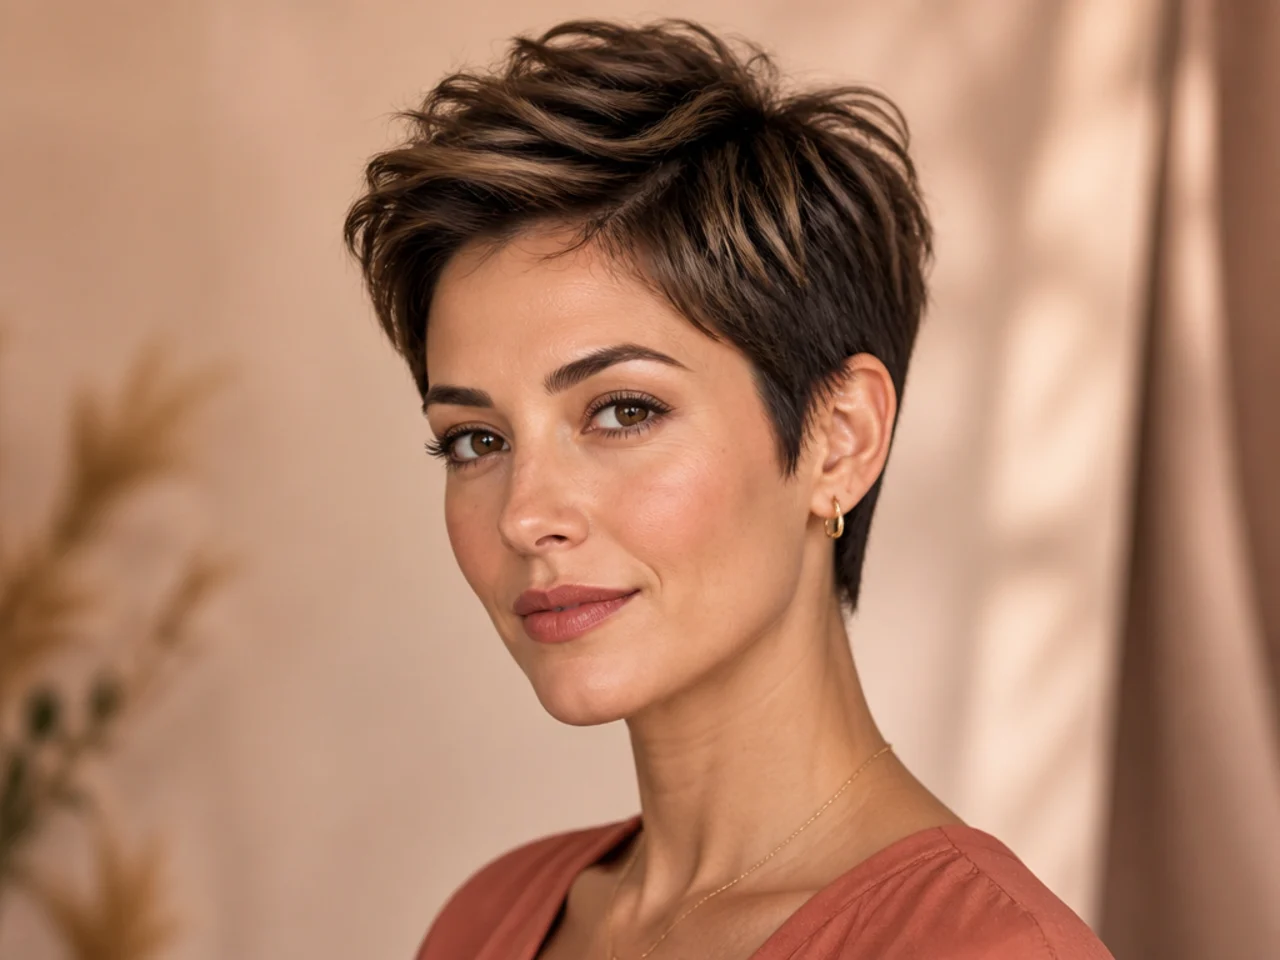
Pixie Cut with Volume on Top
The pixie cut is a brave but highly effective choice for thin hair. Keeping the sides and back very short and leaving more length and textured layers on top creates instant height and volume.
Ask for a graduated pixie with the crown left three to four inches long and the sides tapered close. That length differential is where the visual thickness lives. Best for oval, heart, and diamond faces, on any hair type. Fine hair especially shines here — there's simply less length for gravity to flatten, and the shorter shape holds shape all day.
The mistake to avoid: an even one-length pixie. Fine hair with no length variation on top has nothing to lift. You need contrast between the top and sides for the volume to read.
Styling note: apply a small amount of texture paste to dry hair (not wet), rubbed between palms first, then push forward from back to front. The paste gives the top the grit it needs to hold height.
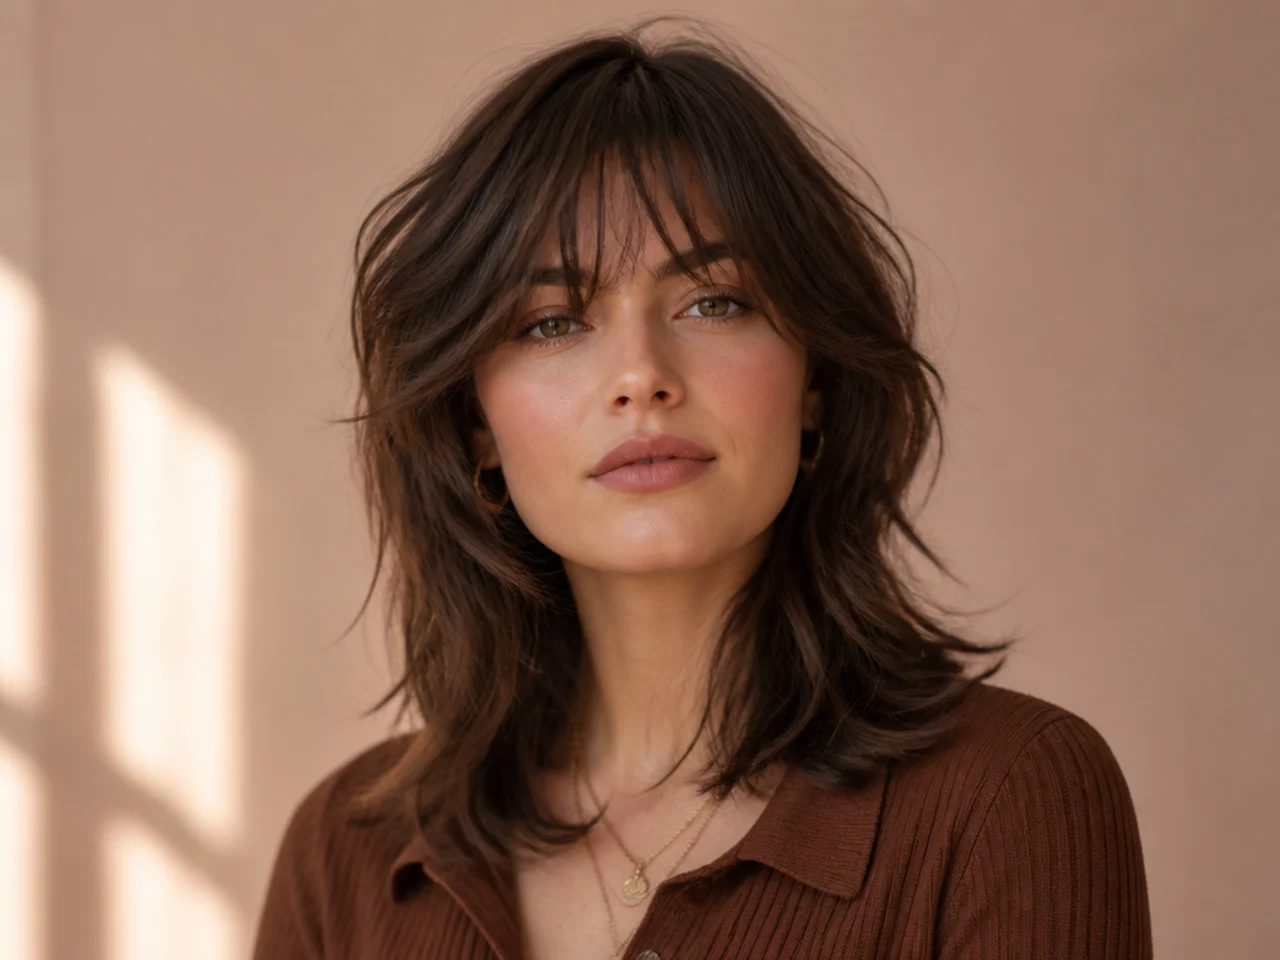
Medium-Length Layers with Heavy Texture
Embrace texture! This haircut features significant layering, with a focus on cutting shorter pieces throughout the style (both internally and externally) to maximize movement and the illusion of thickness.
Ask for a shag-adjacent shape with two distinct layer sets: a crown set two inches shorter than length, and a face-frame at the cheekbone. Point-cutting through the mids for movement, blunt at the ends for density. Best for oval, square, and heart faces on fine-to-medium hair with texture — waves and light curls specifically. If you love the layered-with-movement look, our butterfly haircut guide covers a related silhouette worth comparing.
The mistake to avoid: bringing a photo of thick, textured hair and expecting the same result on fine hair. Thick hair holds heavy layering because there's density to spare. On fine hair, the same technique thins the whole cut.
Styling note: apply a sea salt spray to damp hair and rough-dry with your fingers. If your hair is poker straight, bend sections with a 1-inch iron before running through with your hands — heavy texture layers need a wave to activate.
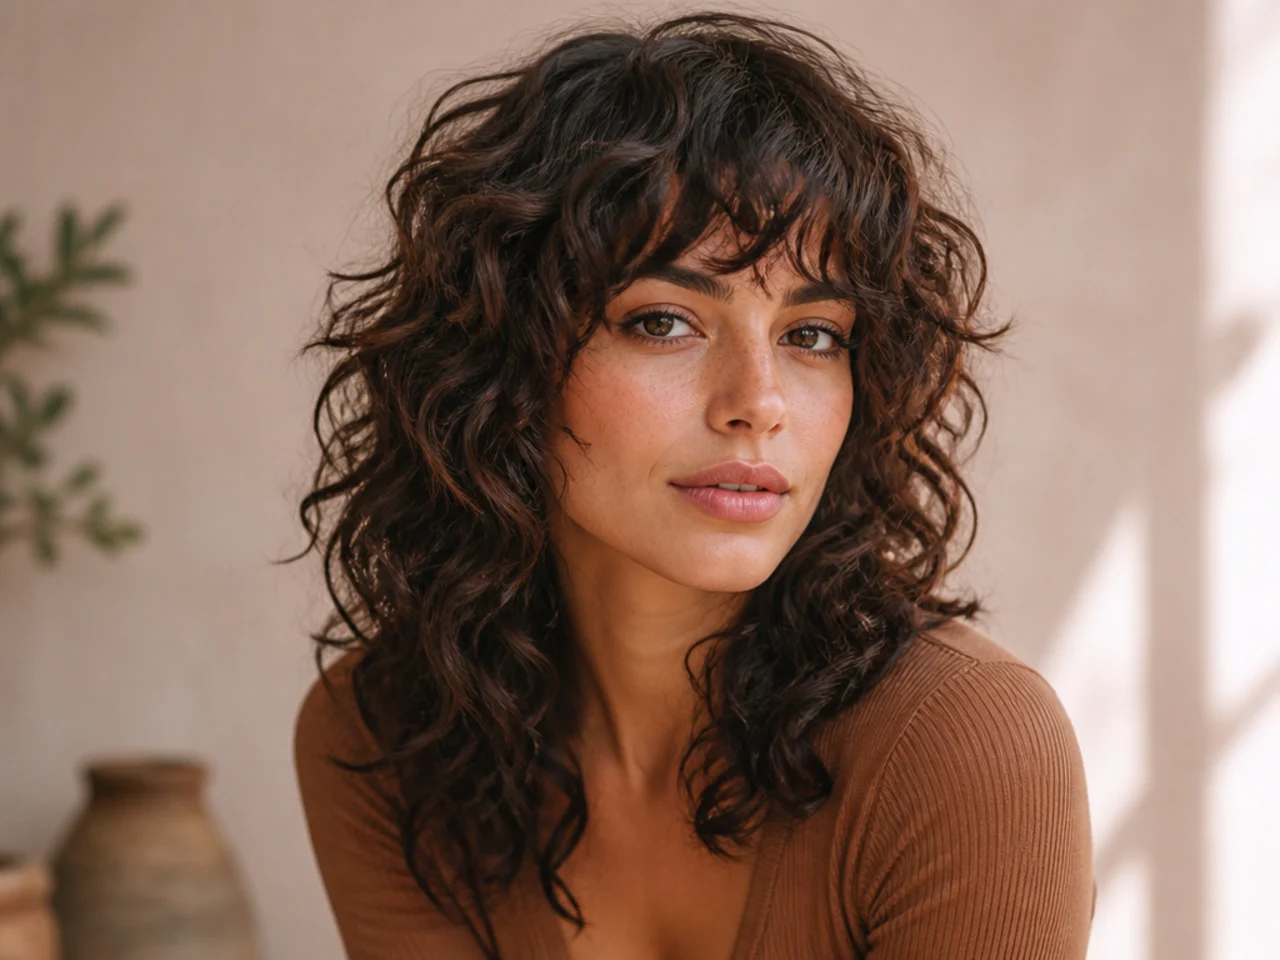
Layered Shag for Curls/Waves
If you have naturally curly or wavy thin hair, a shag is your best friend. Layers are essential for thin curls as they help define the texture, prevent the 'pyramid' shape, and encourage volume throughout the style.
Book this cut dry — not wet. A curly cut lets your stylist see where each curl sits and cut into the shape as it actually falls. Ask for layers that mirror your curl pattern: tighter curls need shorter, denser layers; looser waves benefit from longer, softer ones. Best for round and heart faces; the layering breaks up the pyramid width that curly hair often develops around the ears.
The mistake to avoid: a wet cut on curls. Wet curls stretch about a third longer than dry ones, and the layers land in the wrong spots once your hair dries and re-coils.
Styling note: refresh curls between washes by misting with water plus a leave-in, scrunching, and air-drying. Don't touch until fully dry — that's what causes frizz.
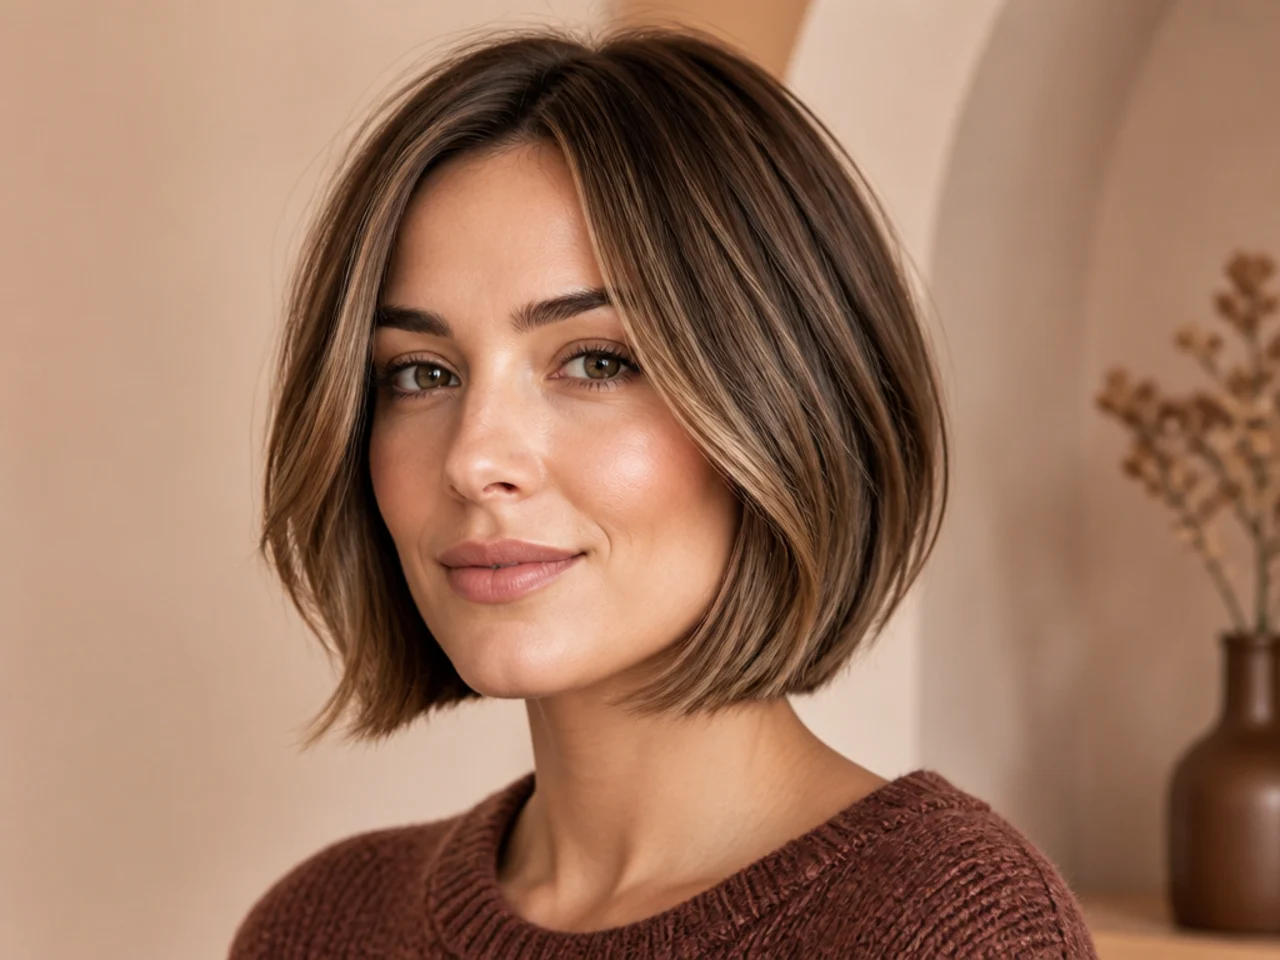
Bob with Subtle Layers and Highlights
Sometimes, subtlety is key. A few strategically placed layers can make a big difference without dramatically changing the look. Combining these layers with dimensional highlights further enhances the illusion of depth and thickness.
Ask for a chin-to-collarbone bob with a single soft internal layer at the crown and face-framers at the jaw. Highlights should be dimensional — a base color a shade darker than your natural, with lighter pieces threaded through the top and around the face. Best on all face shapes and fine-to-medium hair. This is the "I woke up like this but subtly upgraded" cut.
The mistake to avoid: an all-over single-process color on a fine layered bob. Solid color makes fine hair read as flat. Dimension is what creates the visual thickness.
Styling note: dry with a round brush section by section, then run a shine serum through the mids only. The shine amplifies the highlight dimension without weighing down the roots.
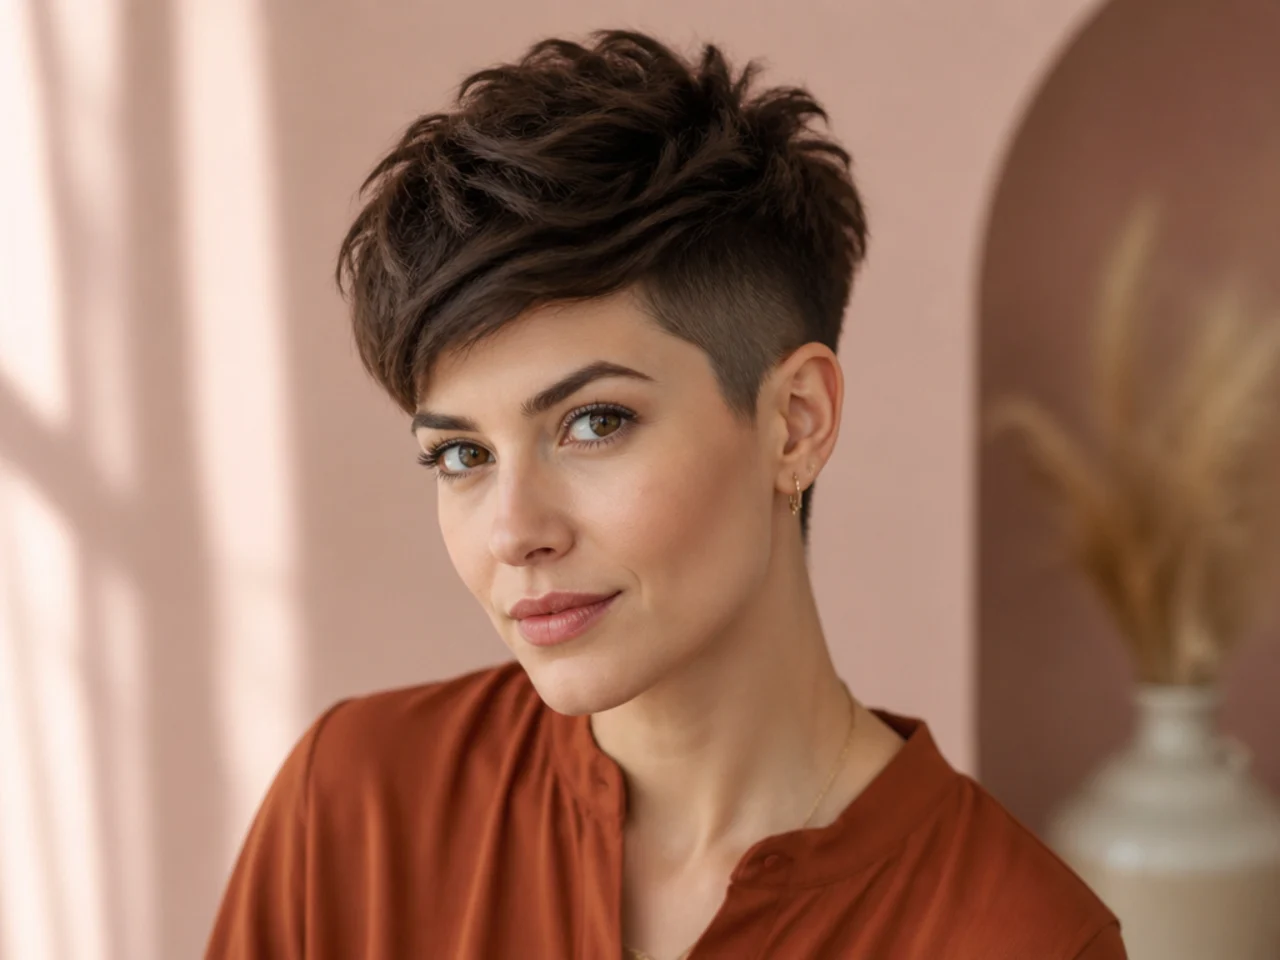
Undercut Pixie with Textured Top
This modern take on pixie is both edgy and practical. The undercut removes weight and bulk from the sides and back (which can often lay flat), allowing the longer, heavily textured layers on top to pop with volume and styling versatility.
Ask for the undercut at 1/2 to 3/4 inch, kept below the parietal ridge — nothing shaved above the widest part of your head. The top stays four to five inches for maximum styling range. Suits oval, heart, and diamond faces on any hair type. Fine hair especially benefits because the undercut removes exactly the areas that tend to go flat first.
The mistake to avoid: an undercut that climbs too high on the side. Once the shaved area sits above the temple, styling the top over it gets awkward, and the whole cut looks unbalanced.
Styling note: work a small amount of matte paste through the top with your fingers, pulling forward or to the side depending on the day. The undercut means you never have to worry about the sides.
Layered Lob with Blunt Ends
This style offers the best of both worlds. The layered length adds significant movement and volume to the main body of the hair, while the strong, blunt cut line at the very bottom provides a solid foundation and prevents the thin hair from looking wispy at the perimeter.
Ask for a collarbone-length lob, blunt across the bottom, with two soft internal layers — one at the crown, one at the cheekbone. Nothing textured through the ends. Best on oval, square, and long faces on fine-to-medium straight or wavy hair. The blunt perimeter is what makes this cut thick-looking; the internal layers keep it from feeling heavy.
The mistake to avoid: point-cutting the blunt perimeter to soften it. The strength of this cut is the sharp line. Softening the perimeter defeats the purpose.
Styling note: blow-dry with a paddle brush from mid-shaft down for a smooth line, then curl only the top layer away from the face with a 1.25-inch iron.

Why Thin Hair Lacks Volume?
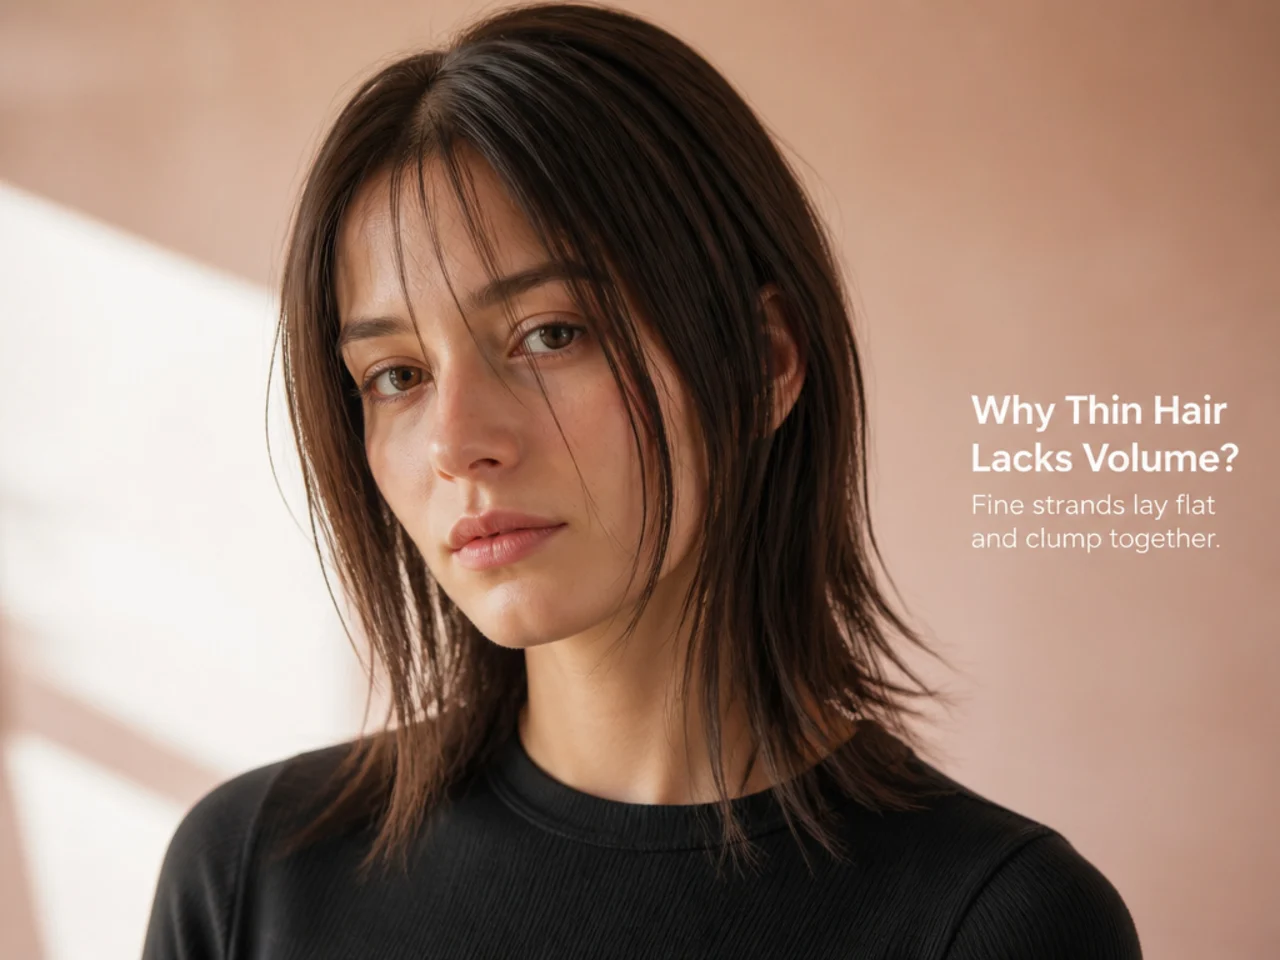
Fine hair has a smaller strand diameter than medium or coarse hair. Smaller strands weigh less, drape flatter against the scalp, and give gravity less to work against. Density (how many strands you have per square inch) is a separate variable — you can be fine and dense, or coarse and sparse. Most people with what they call "thin" hair are actually a combination: finer strand diameter plus lower density in specific spots, typically the crown and temples.
Understanding both variables matters, because they call for slightly different cuts. Fine strands respond best to blunt perimeters and internal layering that props up the top. Low density needs weight-preserving techniques — no thinning shears, no razoring at the ends, and heavier layers stacked at the crown for visual bulk. If you have both, the cuts in this guide are built for you.
The Solution: Strategic Layering
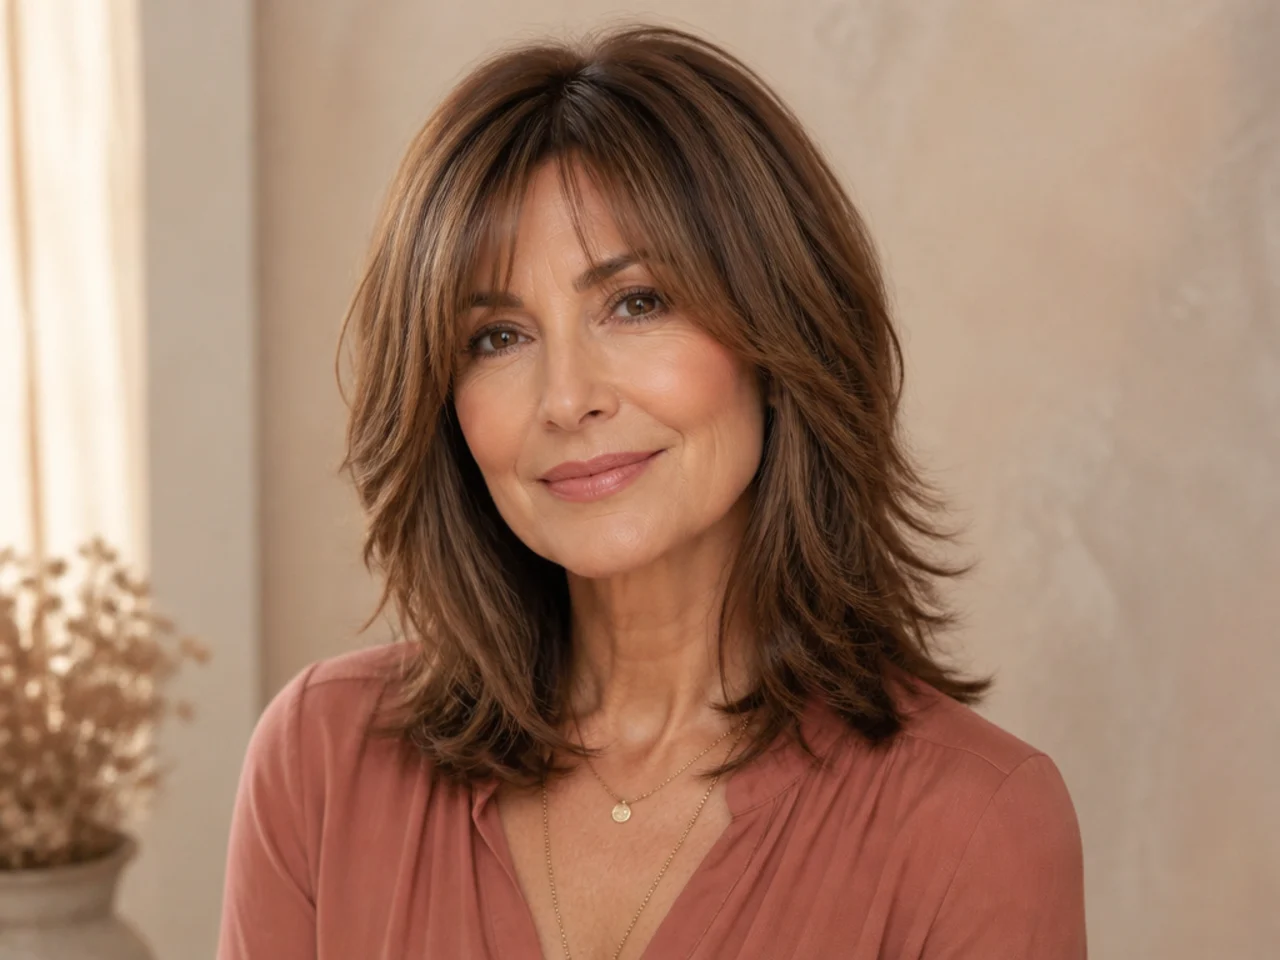
Layering isn't a one-size-fits-all solution. For thin hair, specific techniques work best:
- Short Layers: These add instant lift and texture, especially around the crown.
- Internal Layers: These are hidden layers that create support and volume from within.
- Choppy Layers: This technique adds a textured, modern look while increasing movement.
- Framing Layers: Layers around the face draw attention upwards and add dimension.
Beyond the technique, the biggest lever is the conversation you have in the chair. Bring two or three photos. Point to the shortest layer in each. Say out loud: "I want layers for volume, not thinning." That single sentence rules out the razor-heavy, thinning-shear-heavy approach that leaves fine hair worse off. And if you want more inspiration by face shape and length, our complete layered haircut collection for every face is the next click.
Frequently asked questions
Related posts
See all posts
17 Best Curly Hair Haircuts for Ultimate Style in 2026
Read more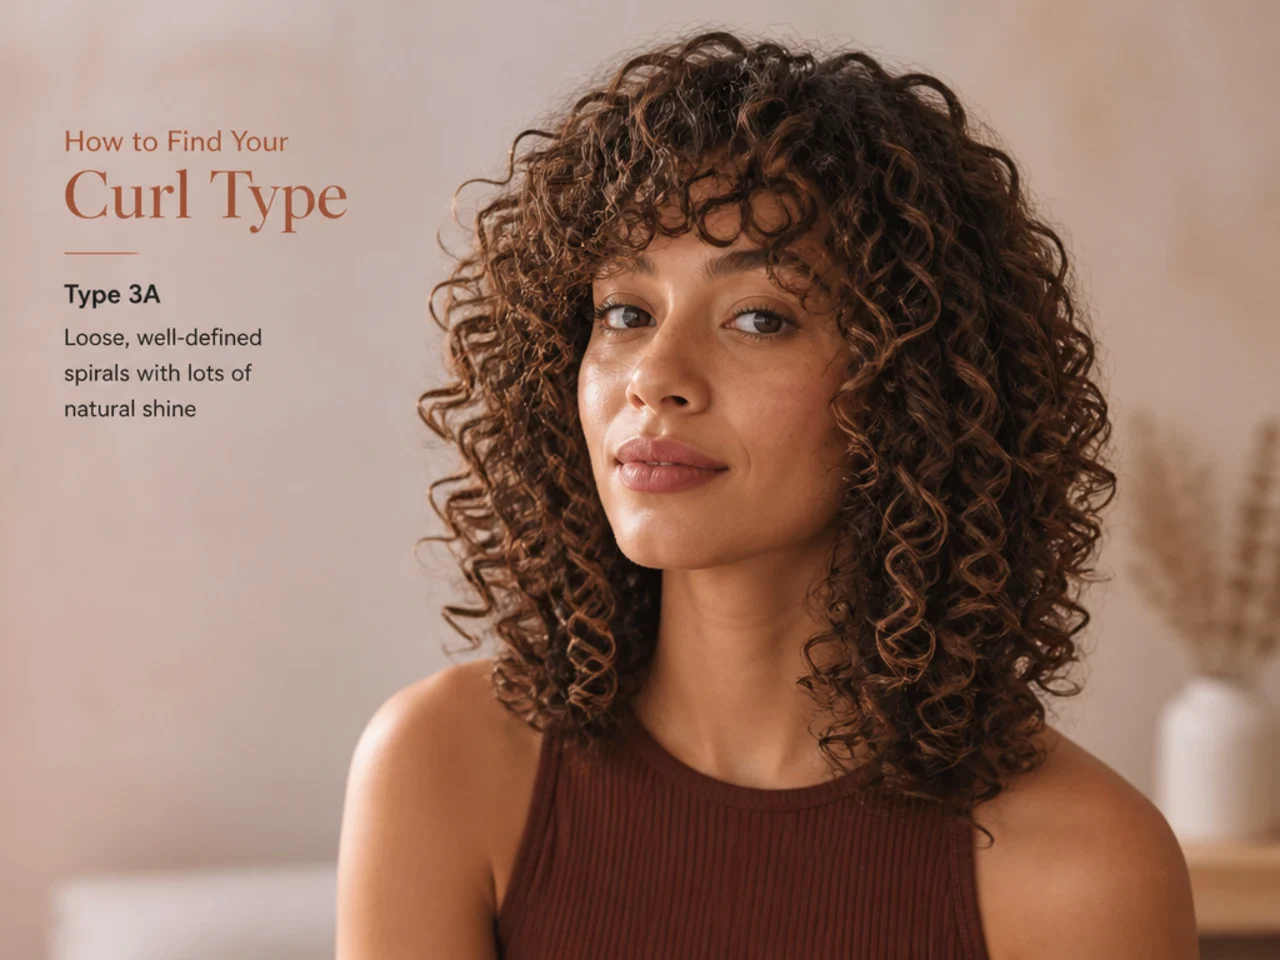
This Is the Simplest Way to Figure Out Your Curl Types: 2026
Read more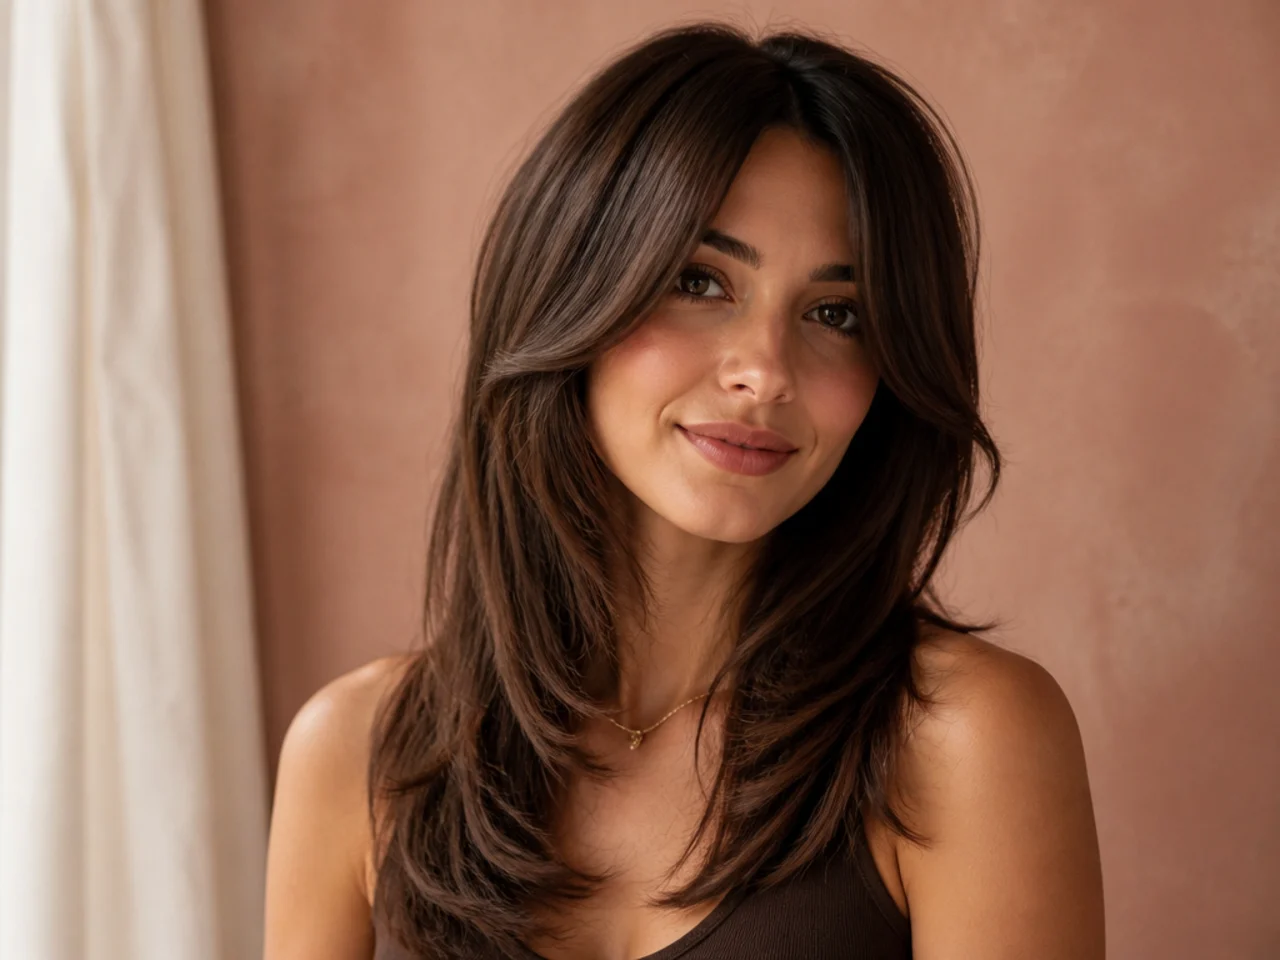
15 Stunning Layered Haircuts for Every Face Shape
Read more