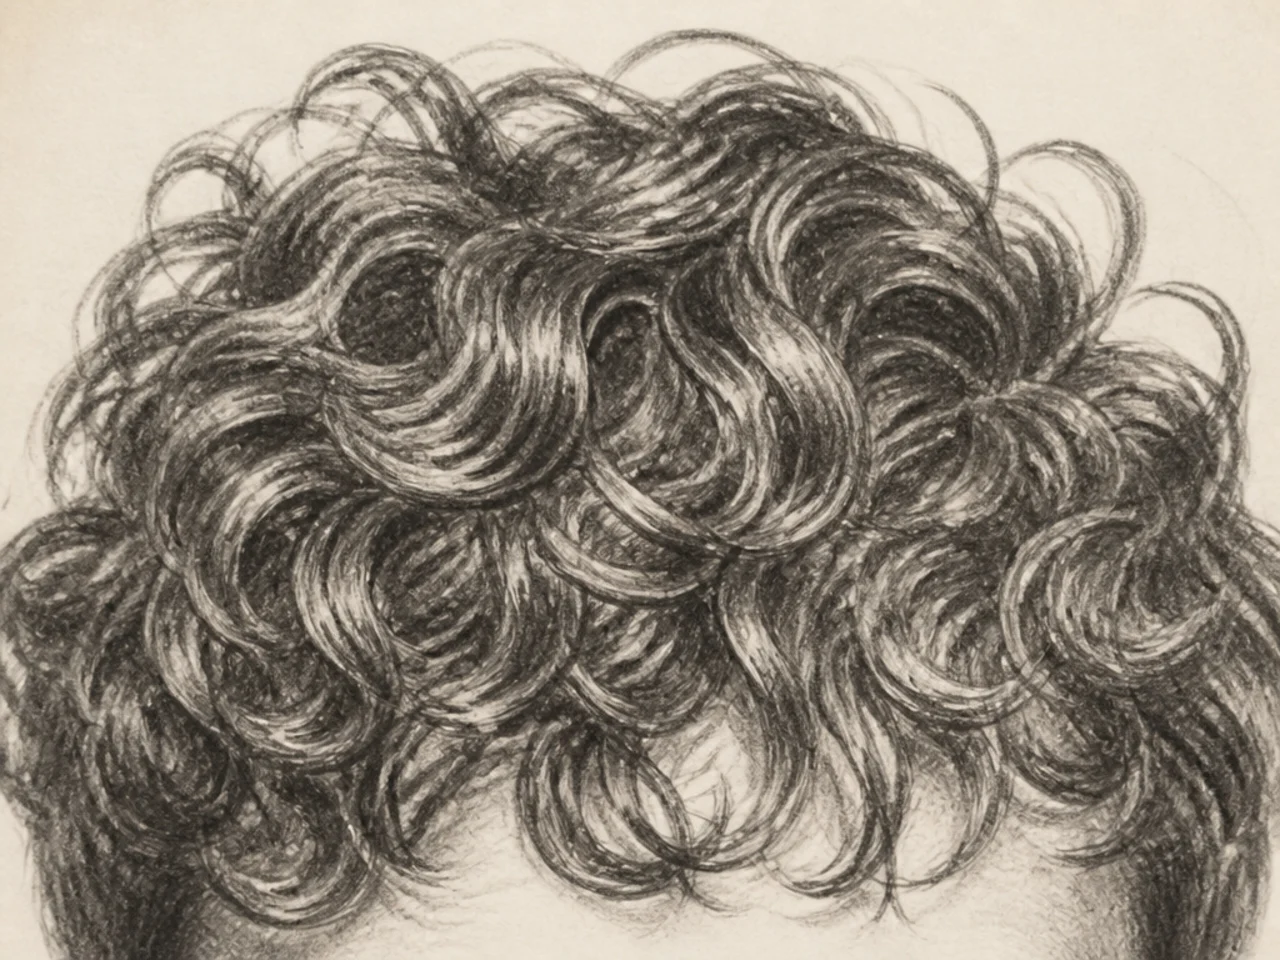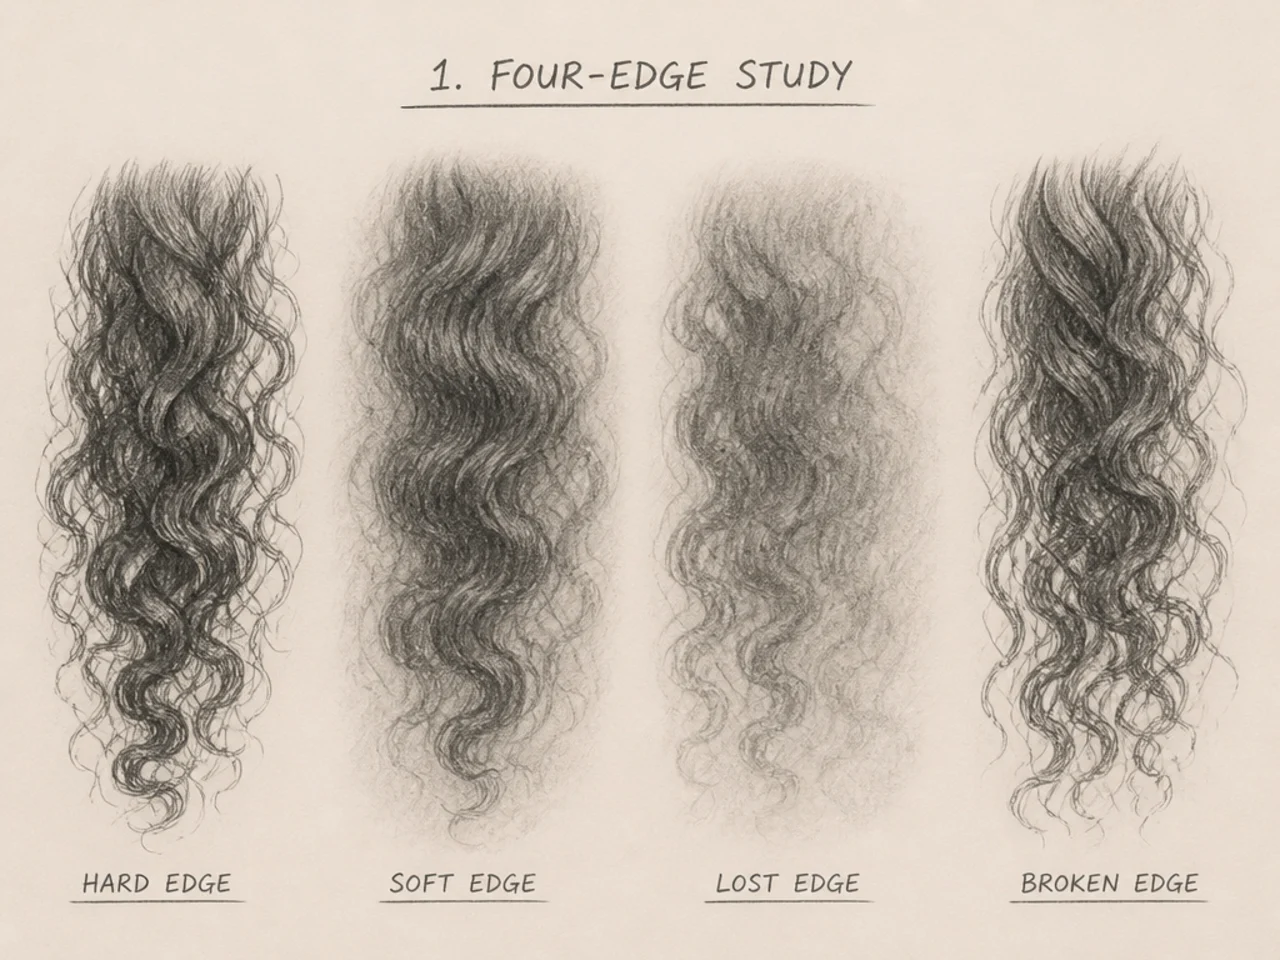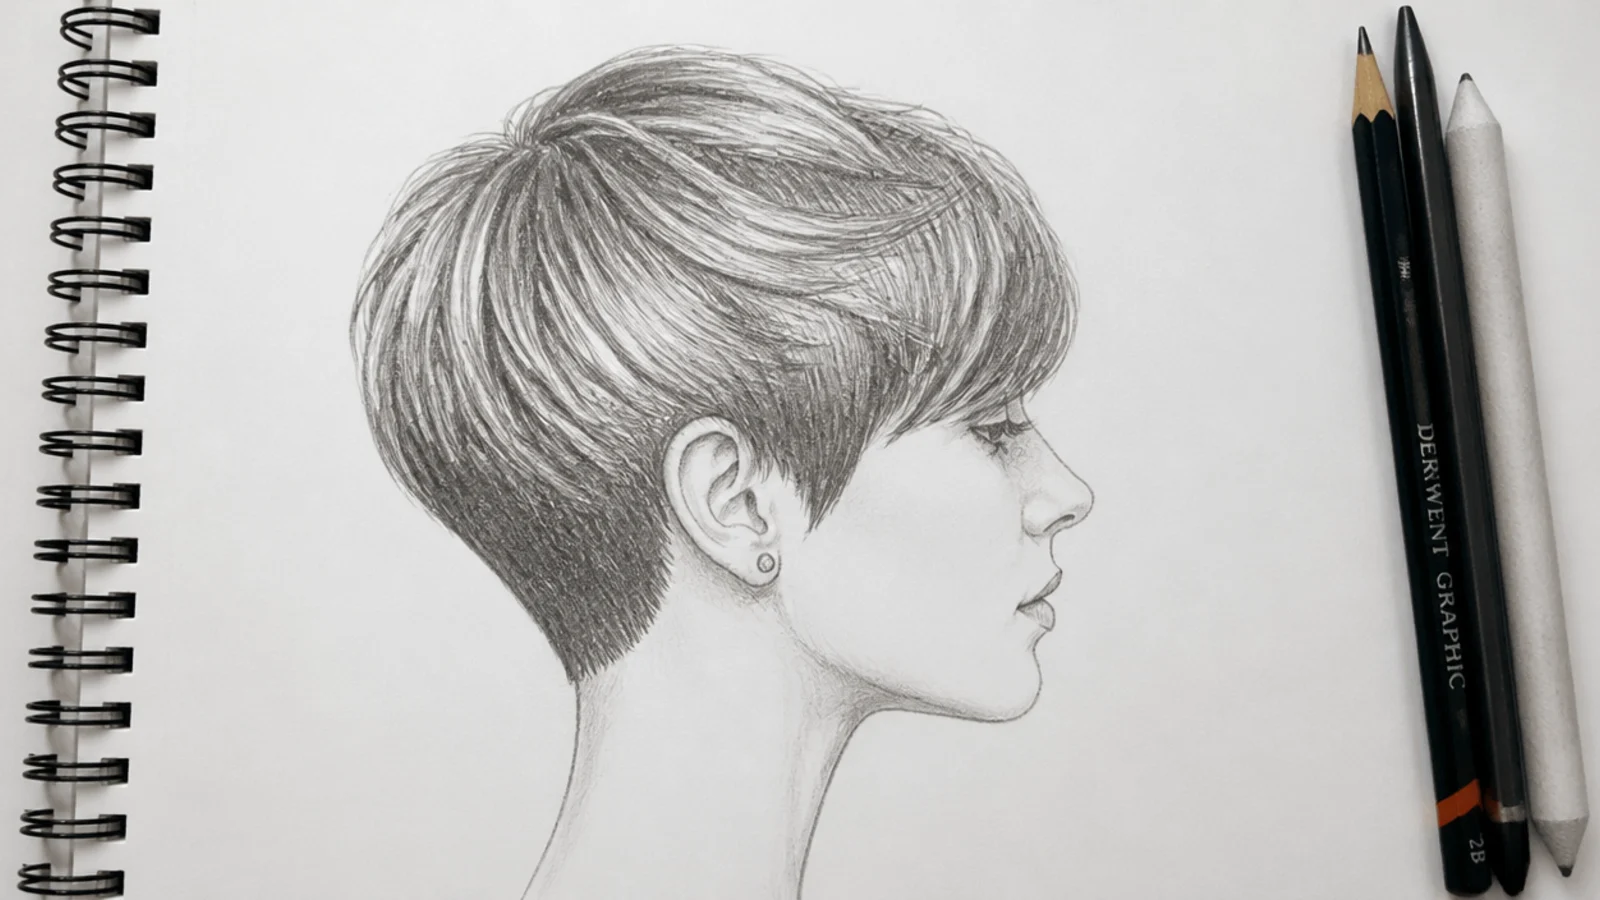
20 Steps to Draw Curly Hair Like a Pro
A twenty-step method for drawing curly hair from blank page to finished render — building the mass, carving the clumps, and the rule that stops it going wrong at step fifteen. Detail last, and less of it than you think.
In this article · 27
- What You Will Need
- Before You Start
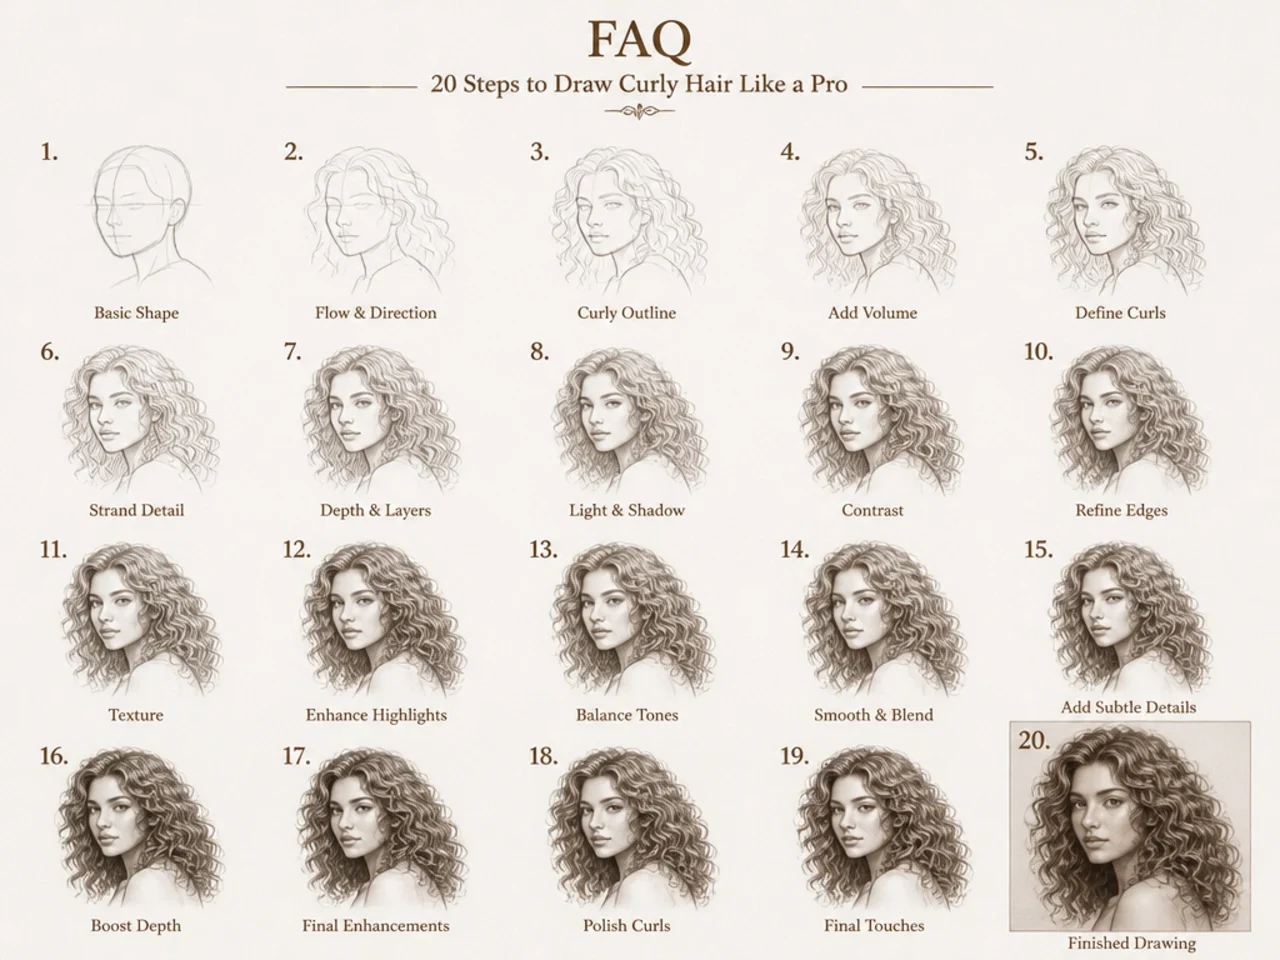
- The 20 Steps
- 1. Draw the Skull
- 2. Mark the Hairline
- 3. Draw the Volume Gap
- 4. Establish the Silhouette
- 5. Break the Outline
- 6. Block the Darkest Mass
- 7. Block the Mid-Tone
- 8. Leave the Lit Plane Clean
- 9. Check It Squinted
- 10. Identify the Clumps
- 11. Carve Between the Clumps
- 12. Vary the Clump Sizes
- 13. Lift Highlights With the Eraser
- 14. Keep Highlights Broken
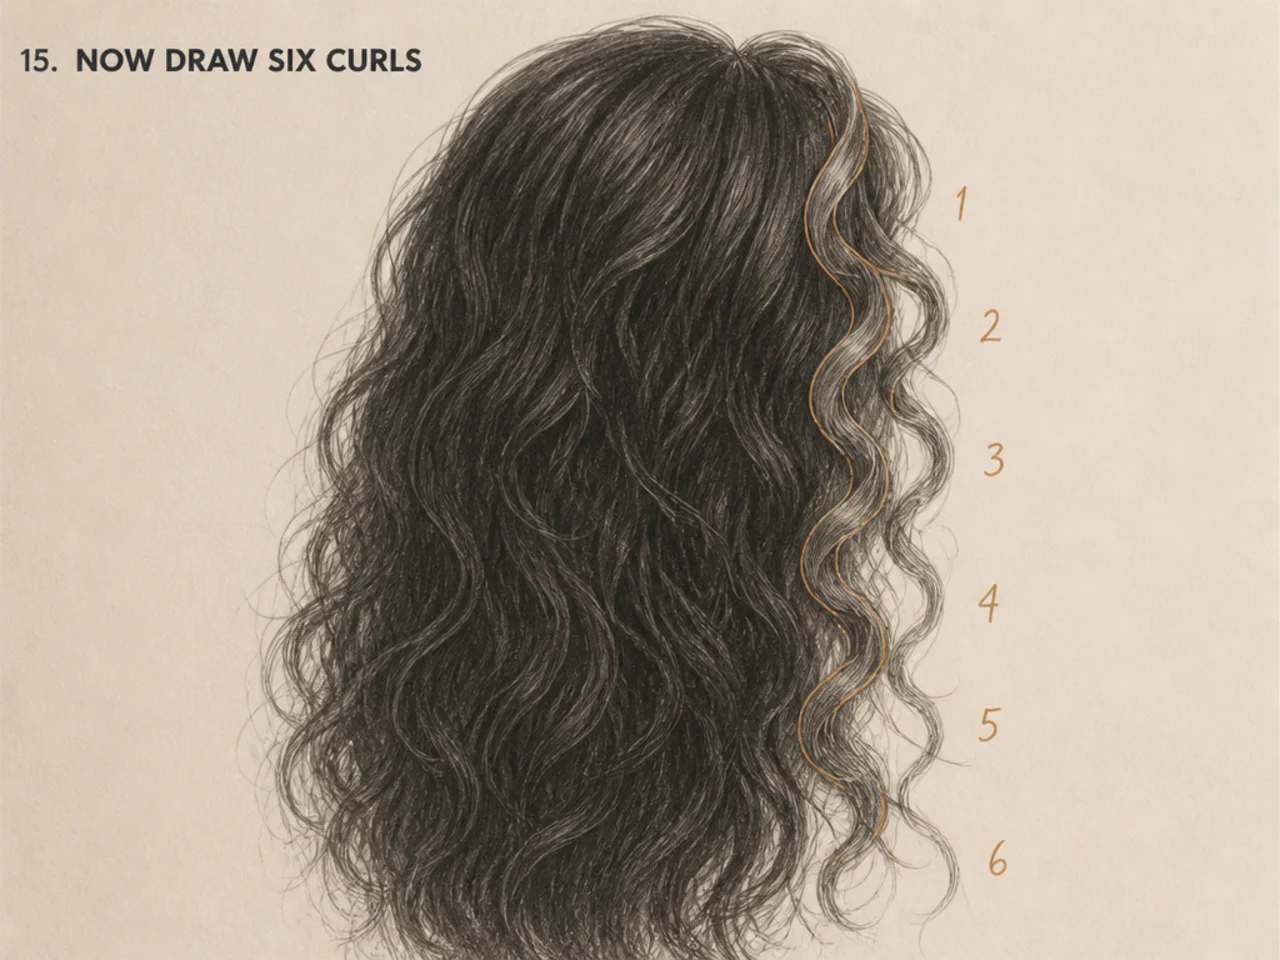
- 15. Now Draw Six Curls
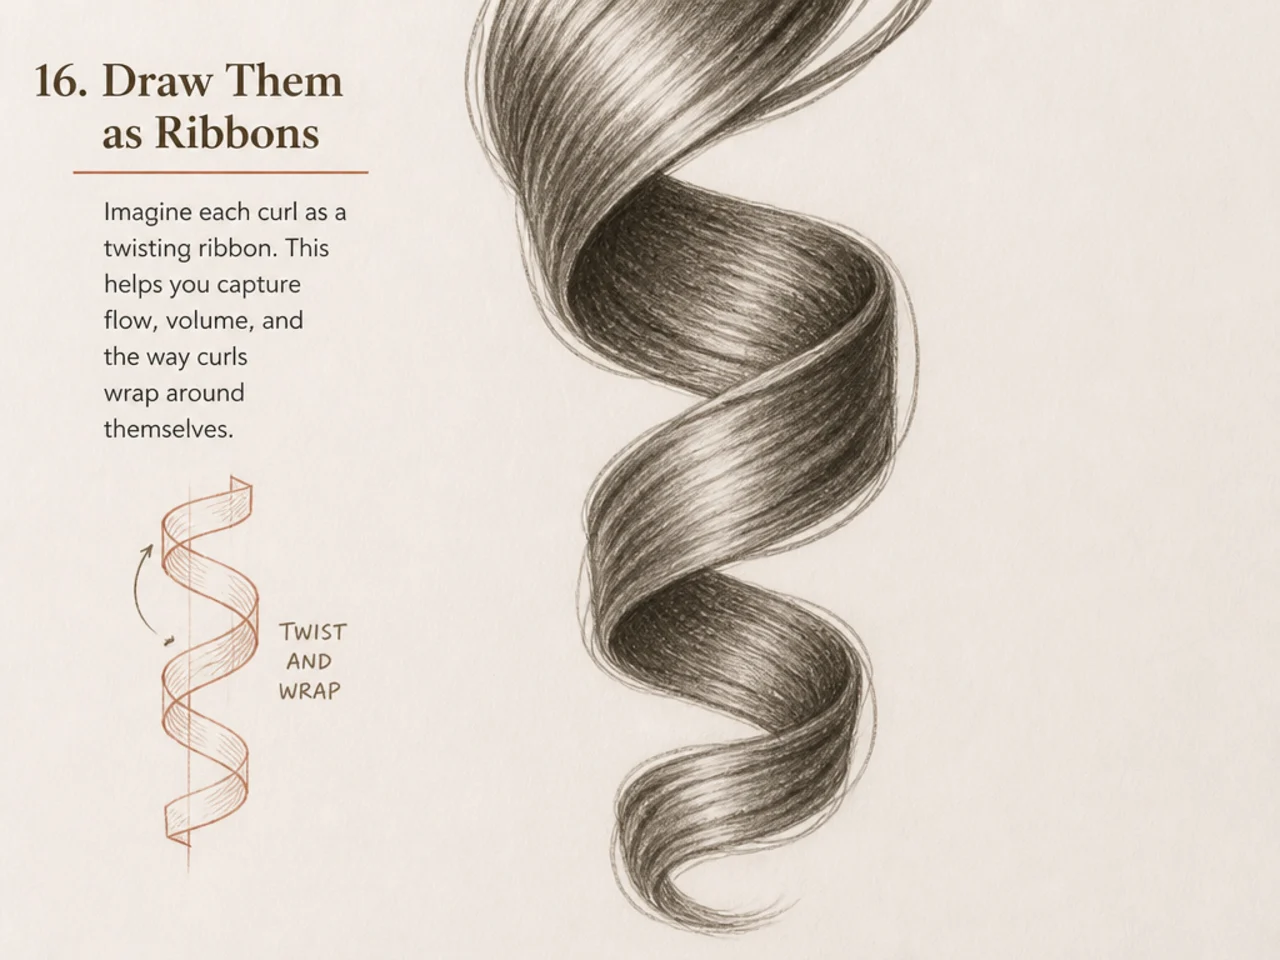
- 16. Draw Them as Ribbons
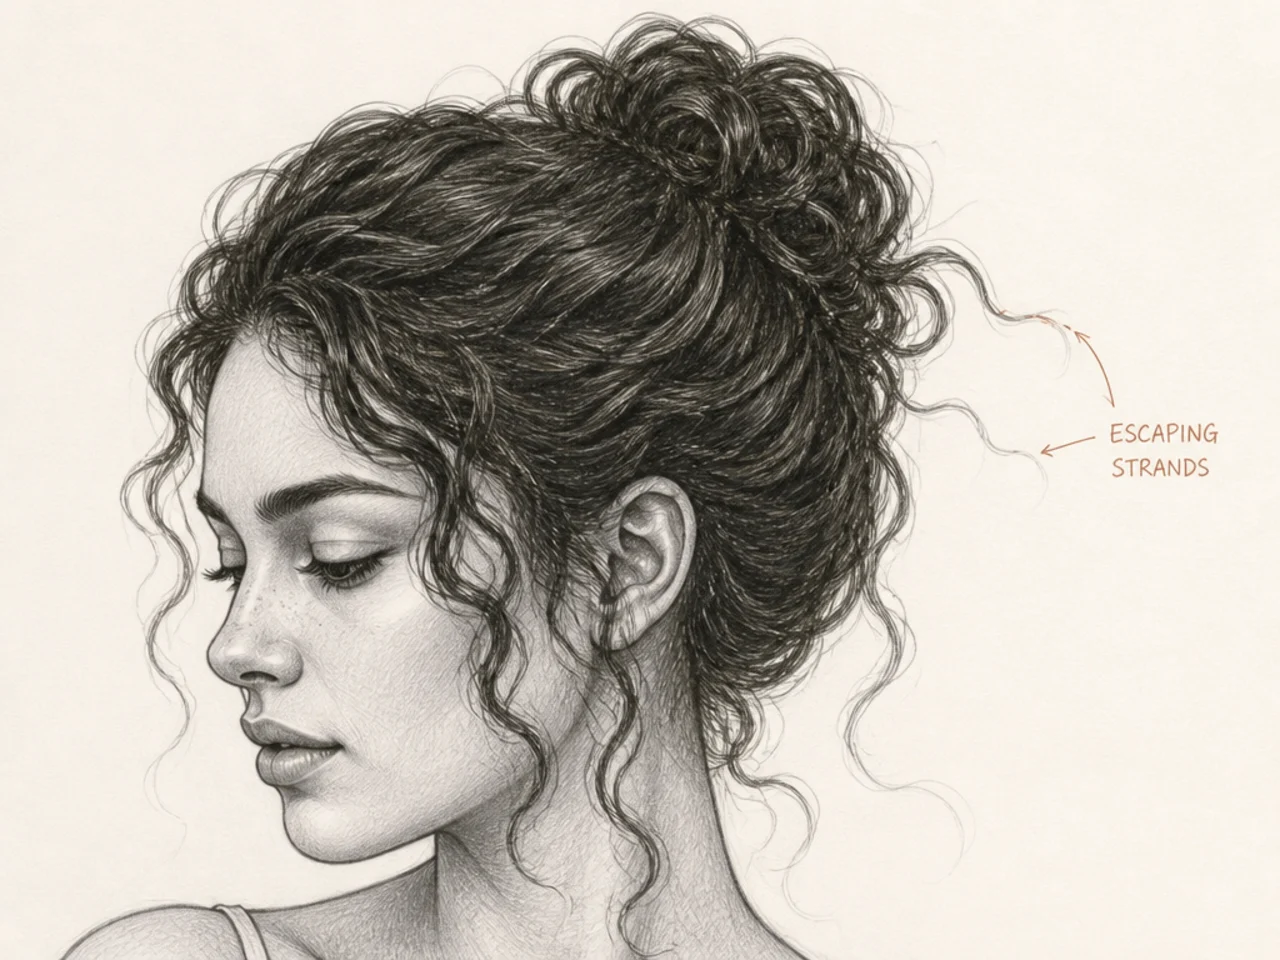
- 17. Add Two or Three Escaping Strands
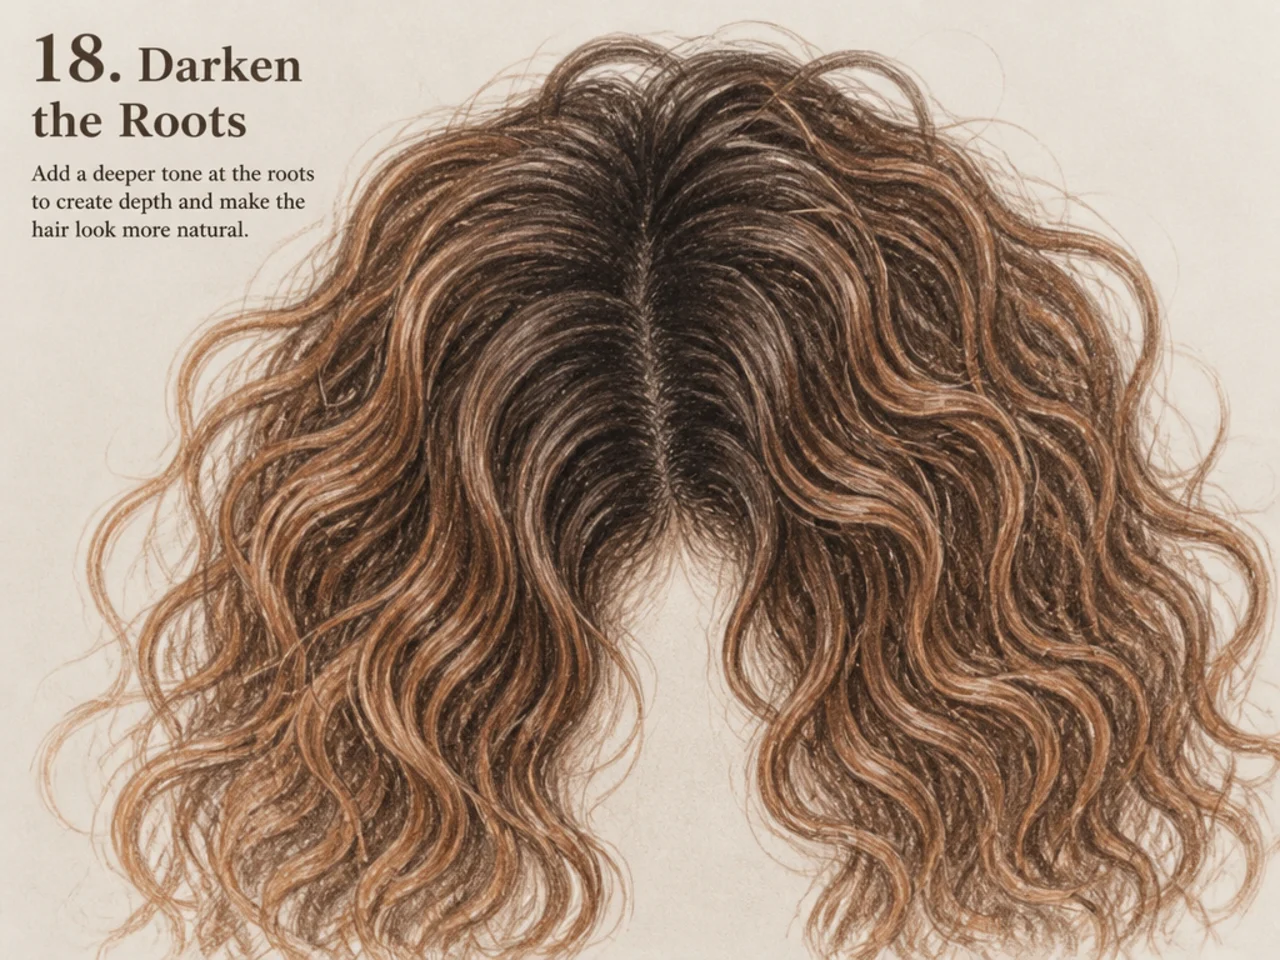
- 18. Darken the Roots
- 19. Soften the Interior
- 20. Stop
- Troubleshooting
- Mistakes to Avoid
- FAQ
- Final Thoughts
This is the whole process in order, from a blank page to a finished drawing. It works for any curl type, and the sequence matters more than any individual technique in it.
The short version: build up, then carve down, then detail almost nothing.
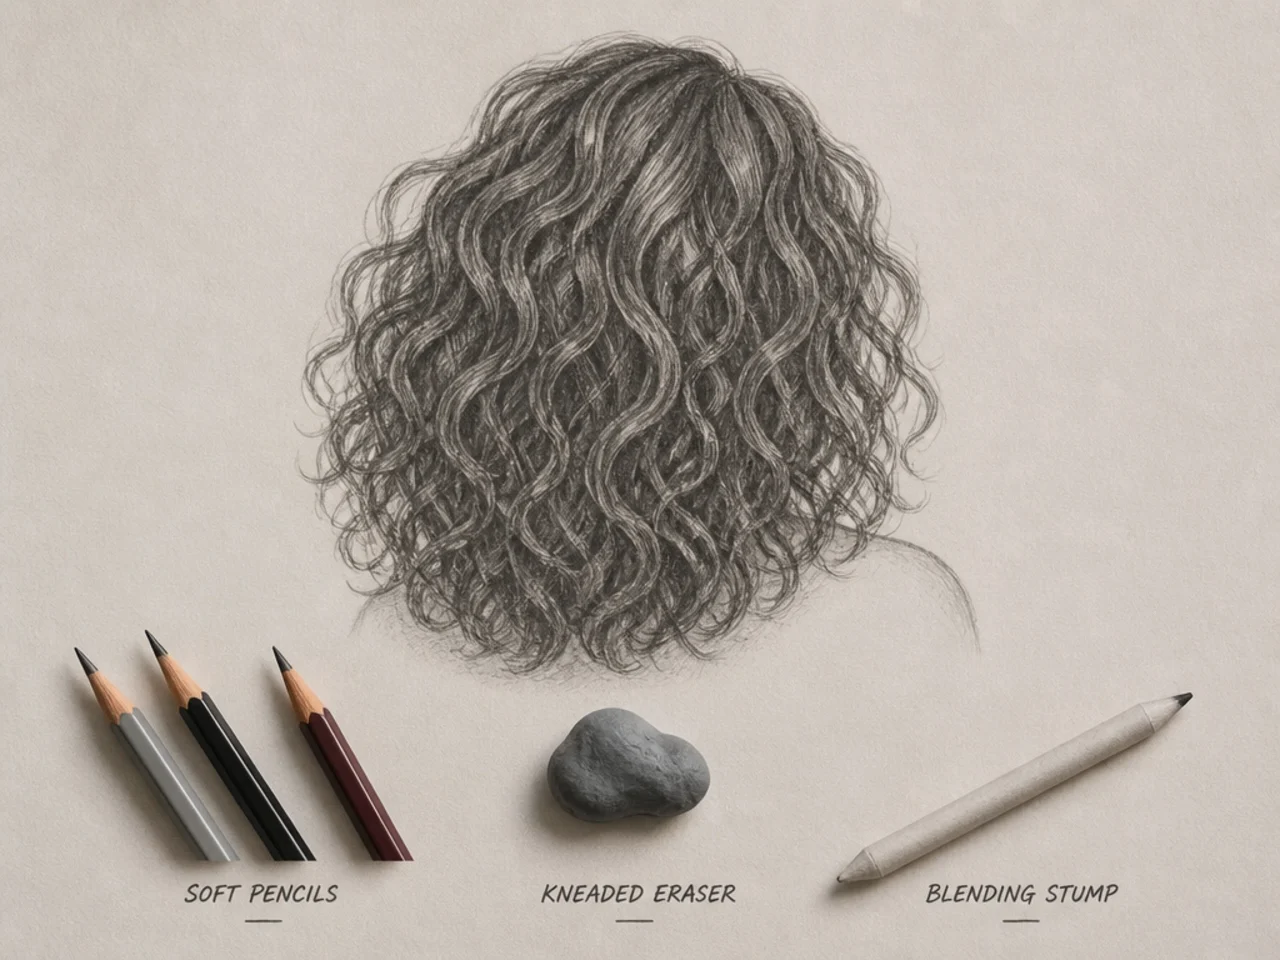
What You Will Need
A soft pencil for tone — 4B or softer — and a harder one for edges.
A kneaded eraser, which is a drawing tool here rather than a correction tool. Most of the light in curly hair gets lifted out rather than left blank.
A blending stump, optional but useful for the interior mass.
A reference photo, and one where you can see the silhouette clearly against a plain background.
Before You Start
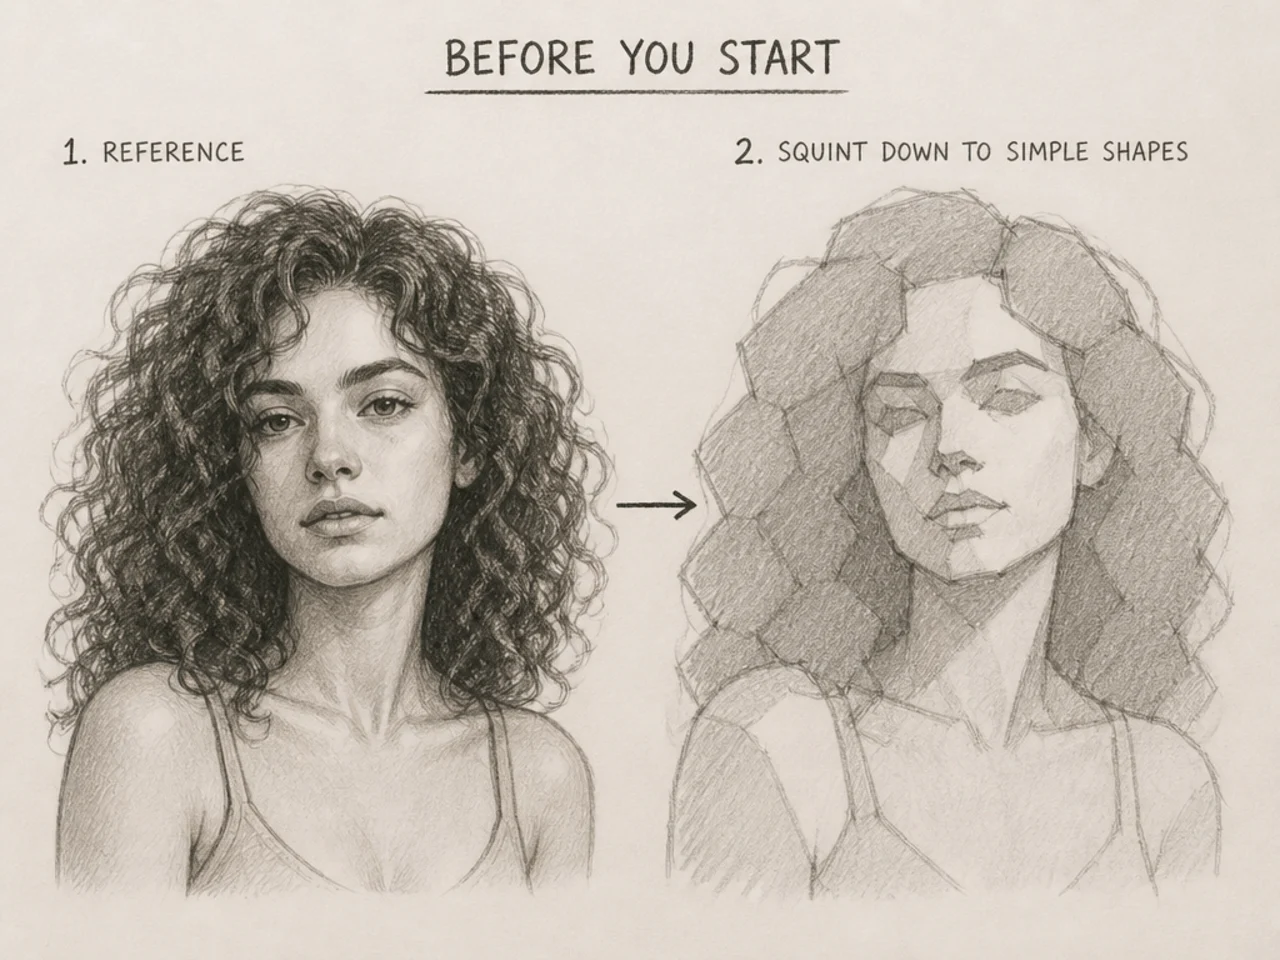
Squint at your reference until the curls disappear. What is left is the shape you are about to draw. If you can still see individual curls, squint harder.
Find the light direction and commit to it. Curly hair has a strong lit plane and a deep shadow mass, and drawings without a clear light source read as flat regardless of how well the curls are drawn.
Decide where the six rendered curls will go before you start. Usually along the top lit edge and one or two around the face.
The 20 Steps
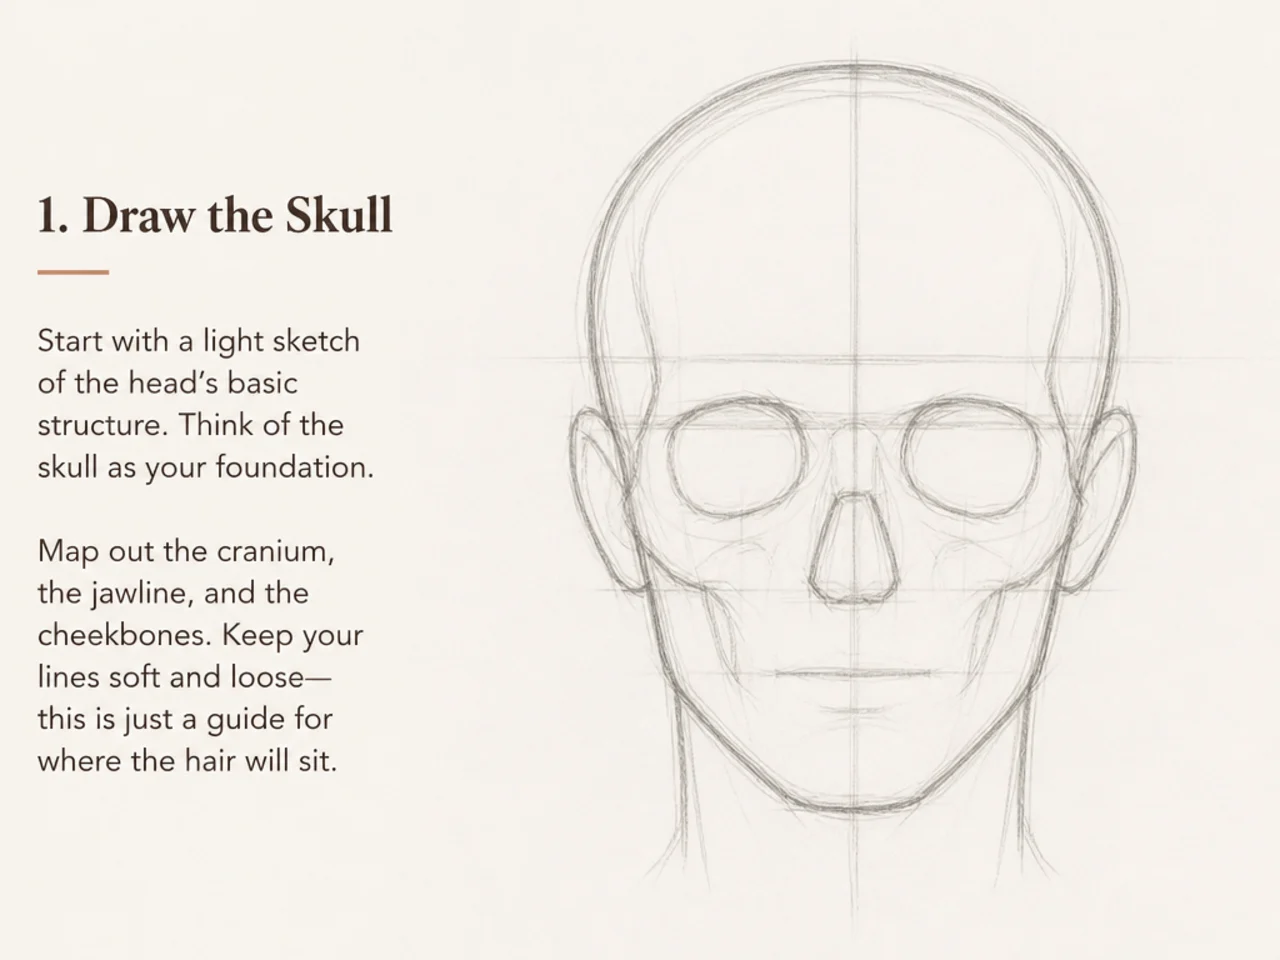
1. Draw the Skull
Lightly. Everything sits on this, and skipping it is why hair looks stuck on.
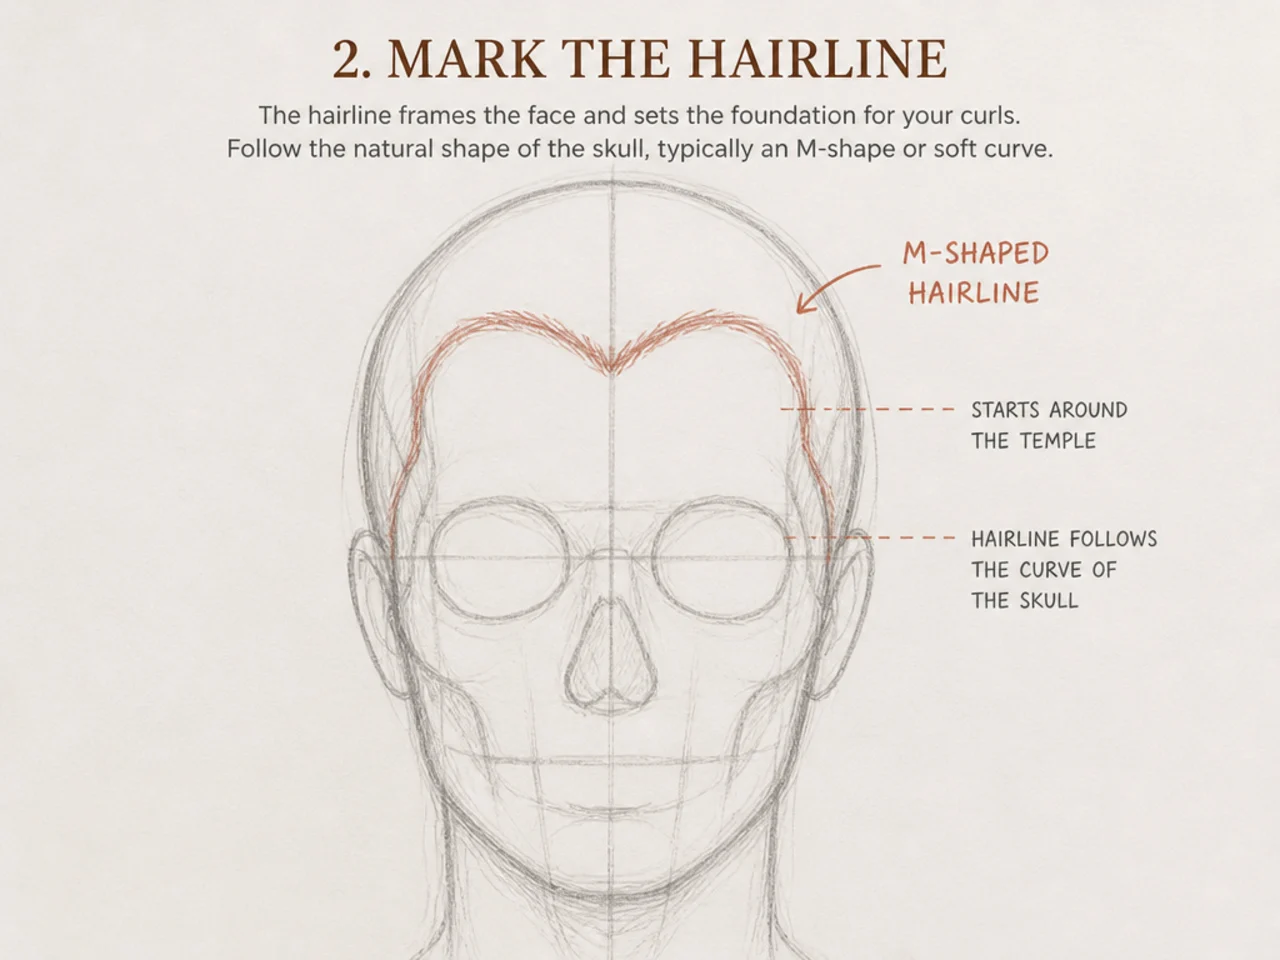
2. Mark the Hairline
Where hair actually starts, not where you imagine it does.
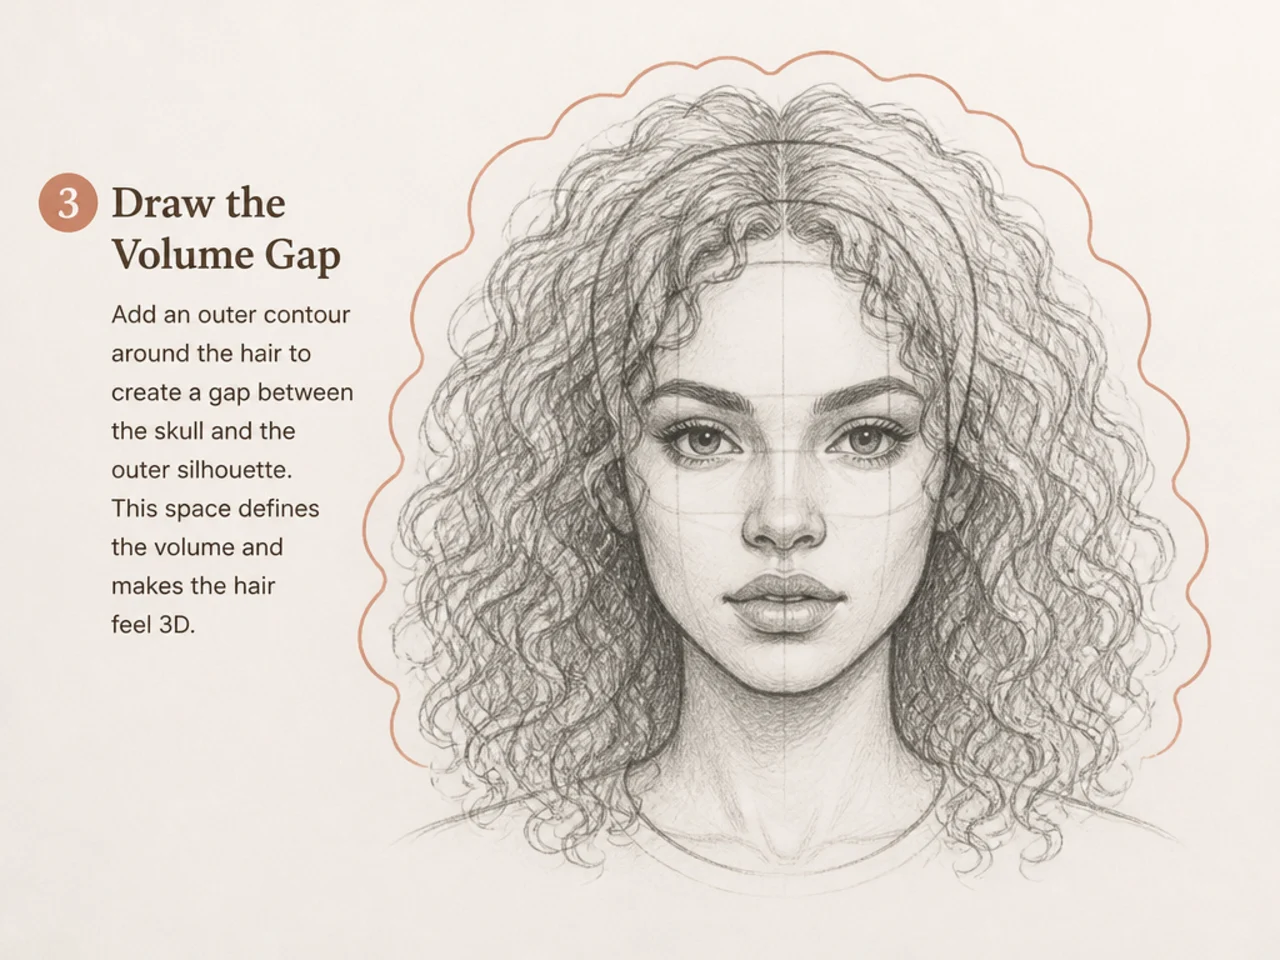
3. Draw the Volume Gap
Curly hair sits away from the skull. Draw a second, larger outline around it.
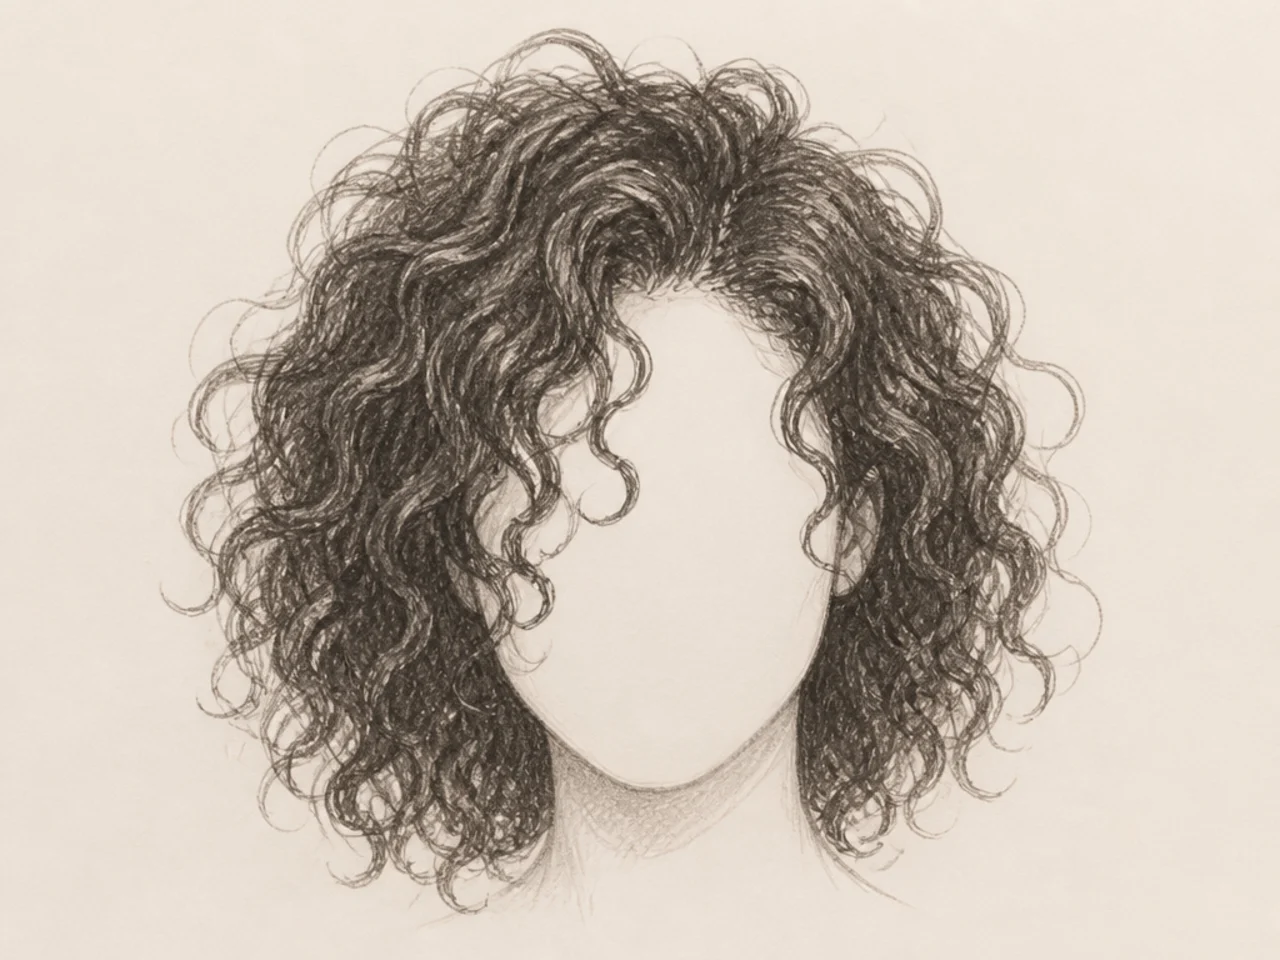
4. Establish the Silhouette
One irregular, bumpy outline. No interior lines yet.
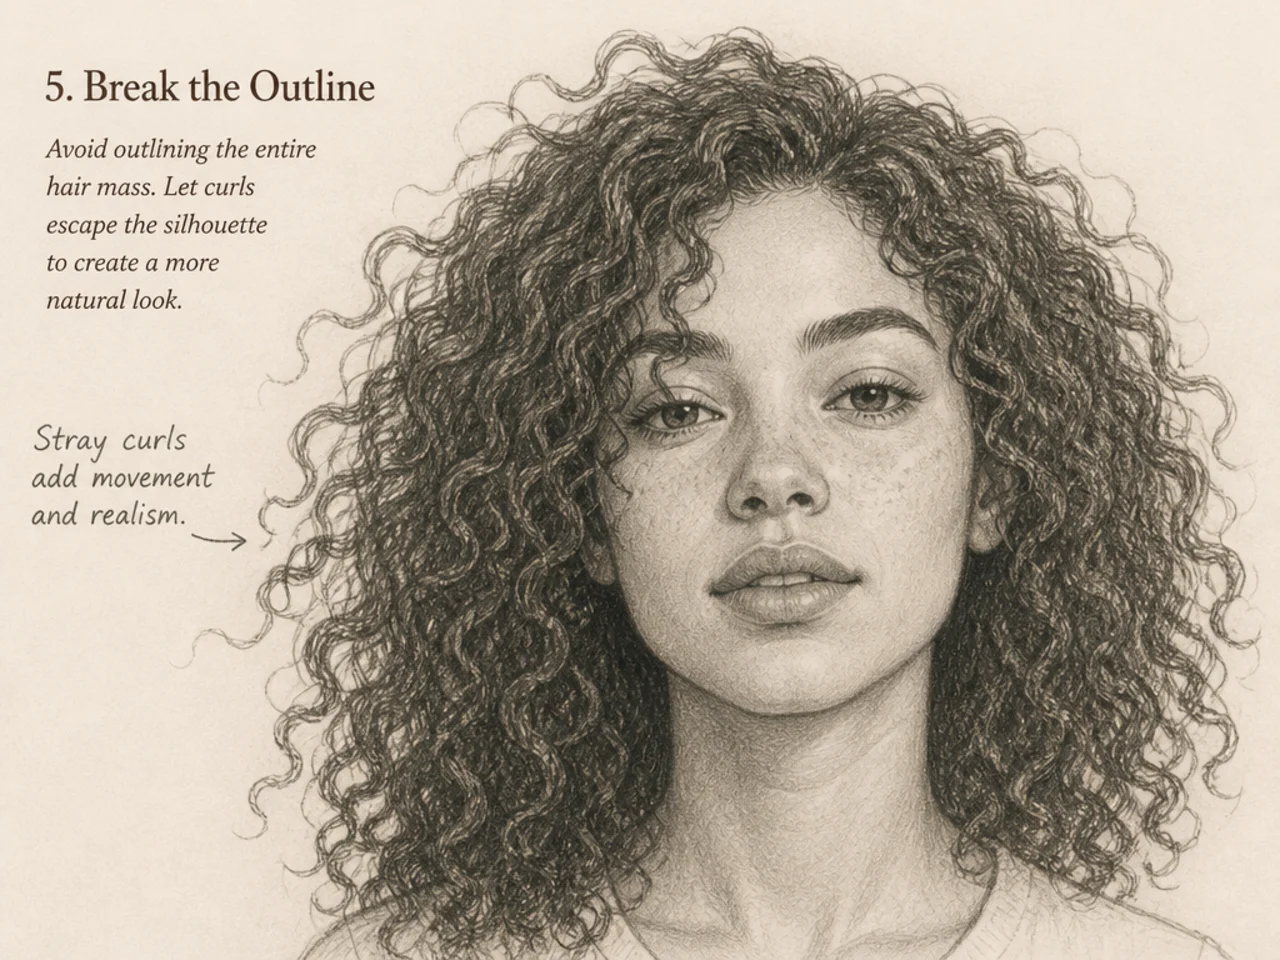
5. Break the Outline
Add small escaping curls and gaps. A smooth outline never reads as curly.
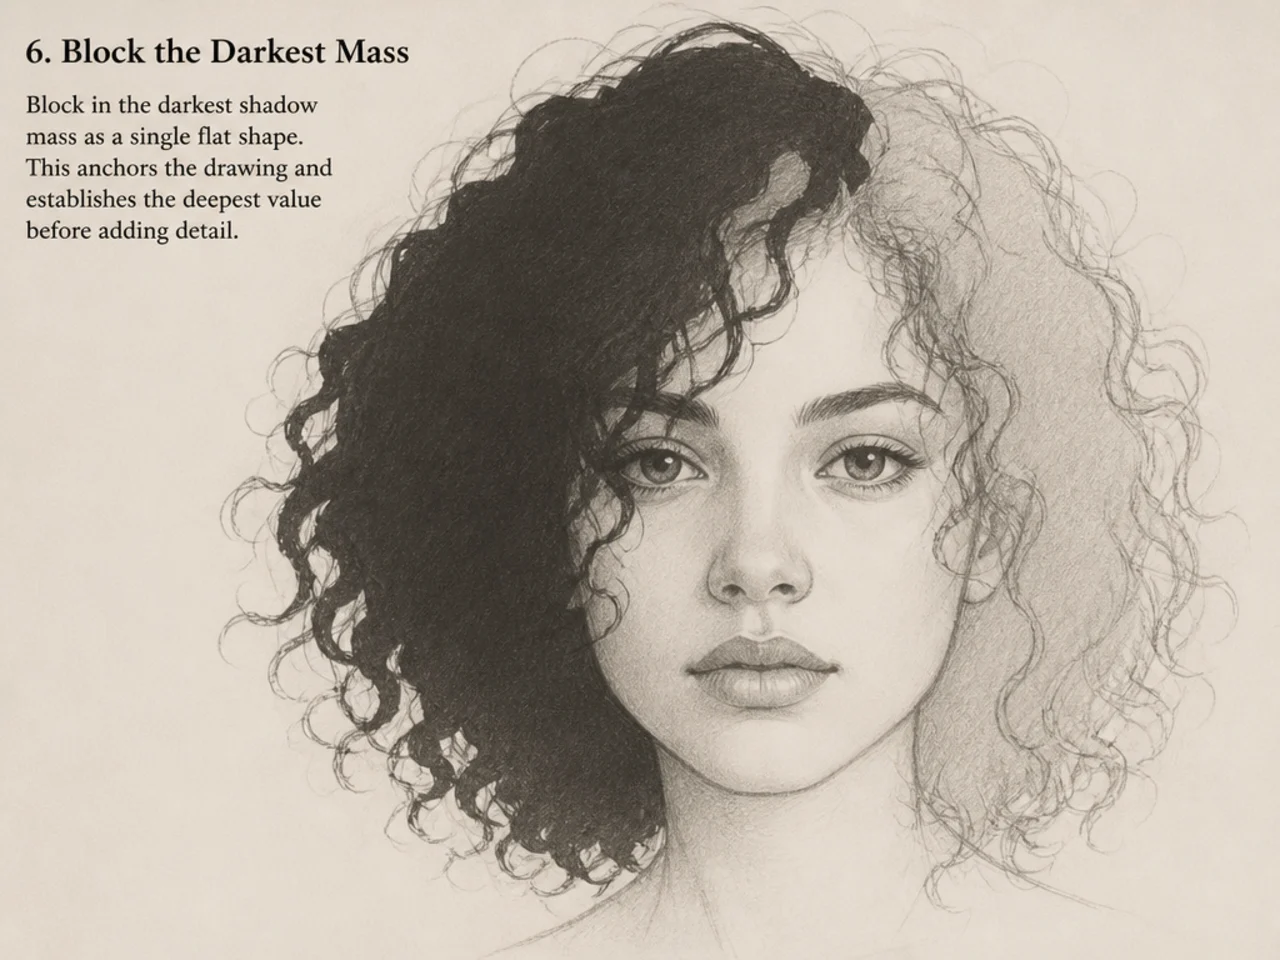
6. Block the Darkest Mass
Fill the whole shadow region flat. Do not shade around curls.
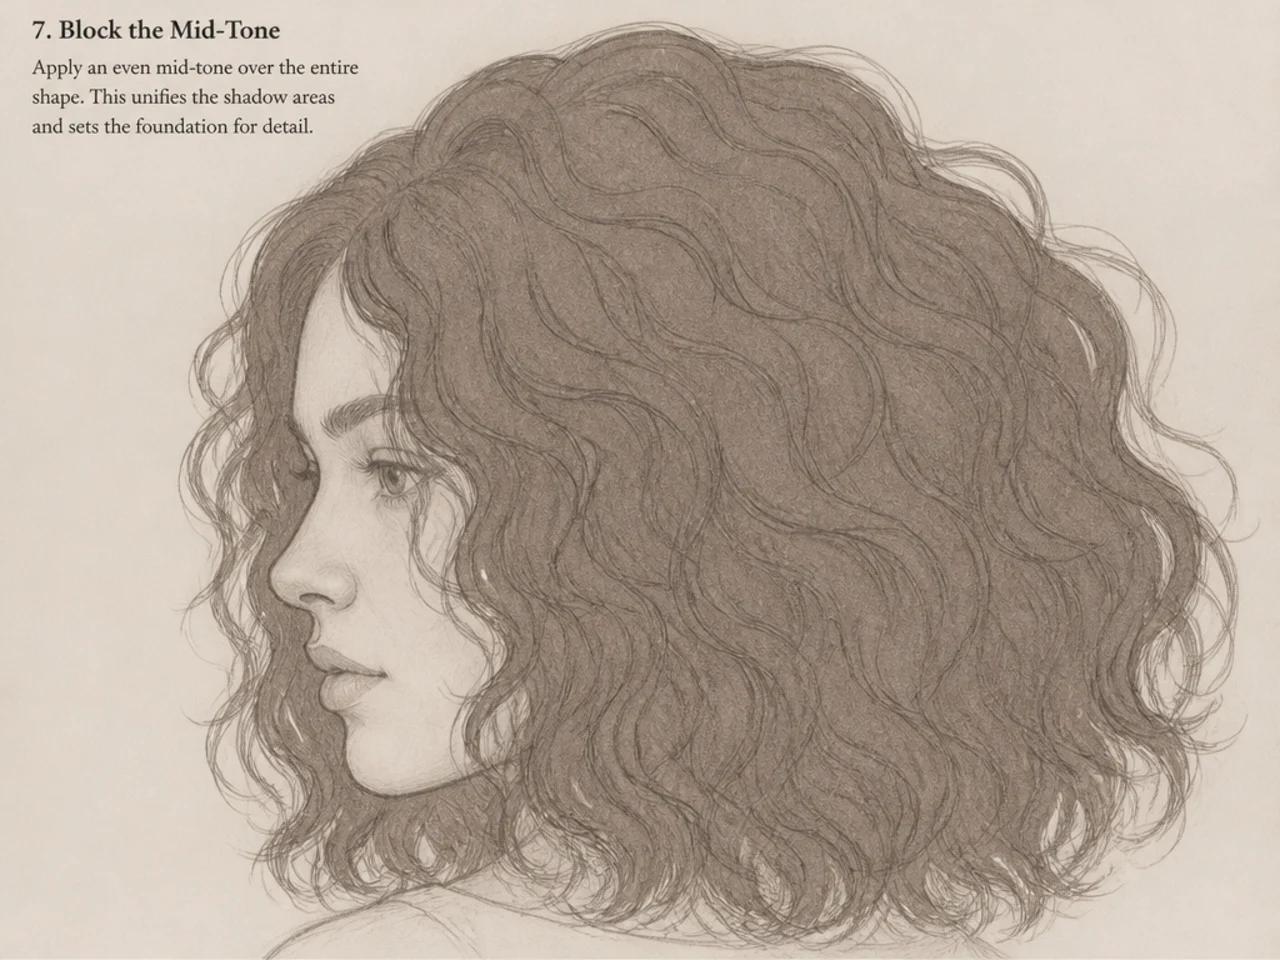
7. Block the Mid-Tone
The second value, covering most of the remaining shape.
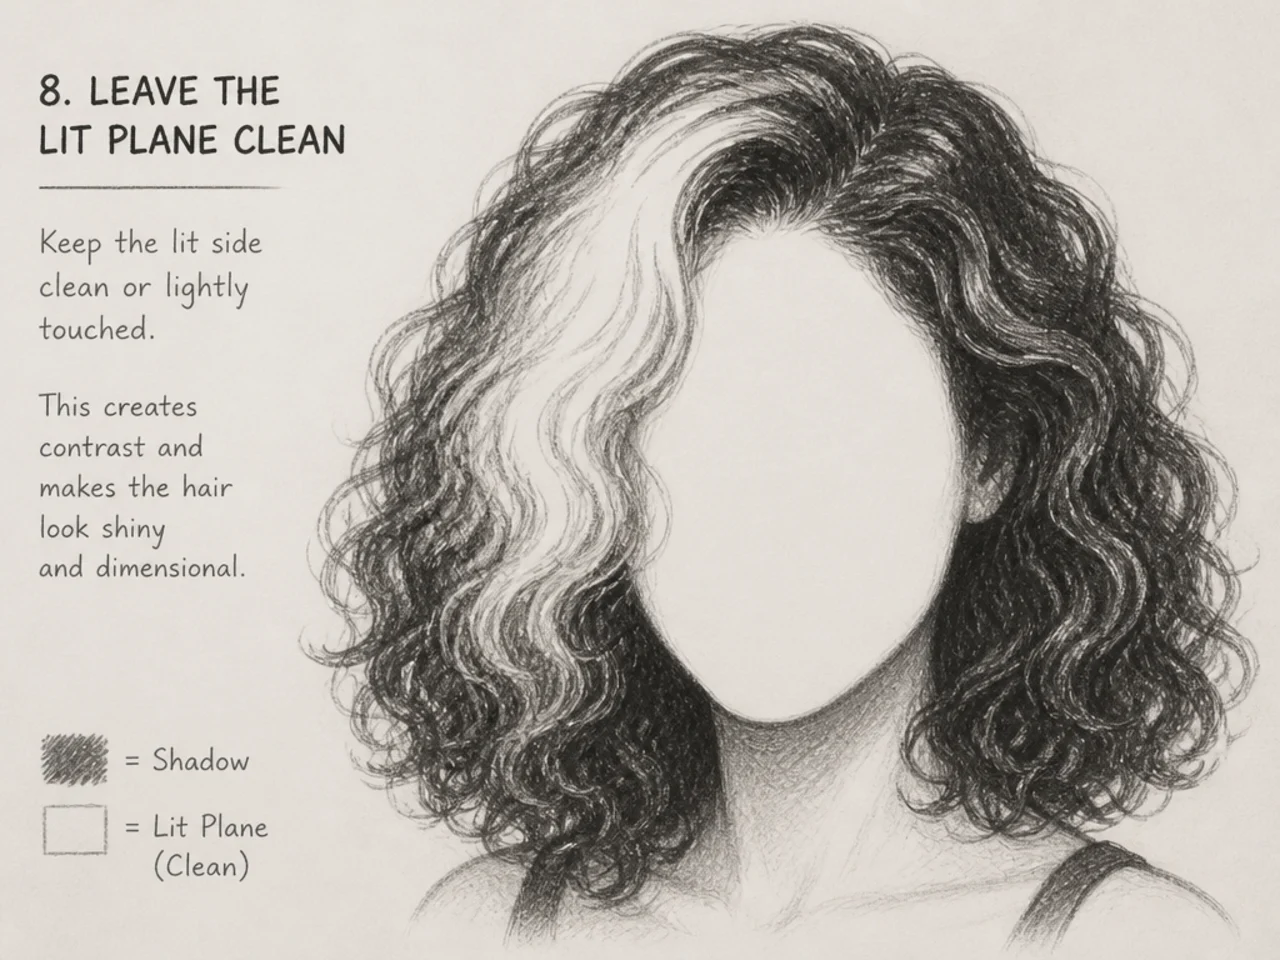
8. Leave the Lit Plane Clean
The lightest area stays paper-white for now.
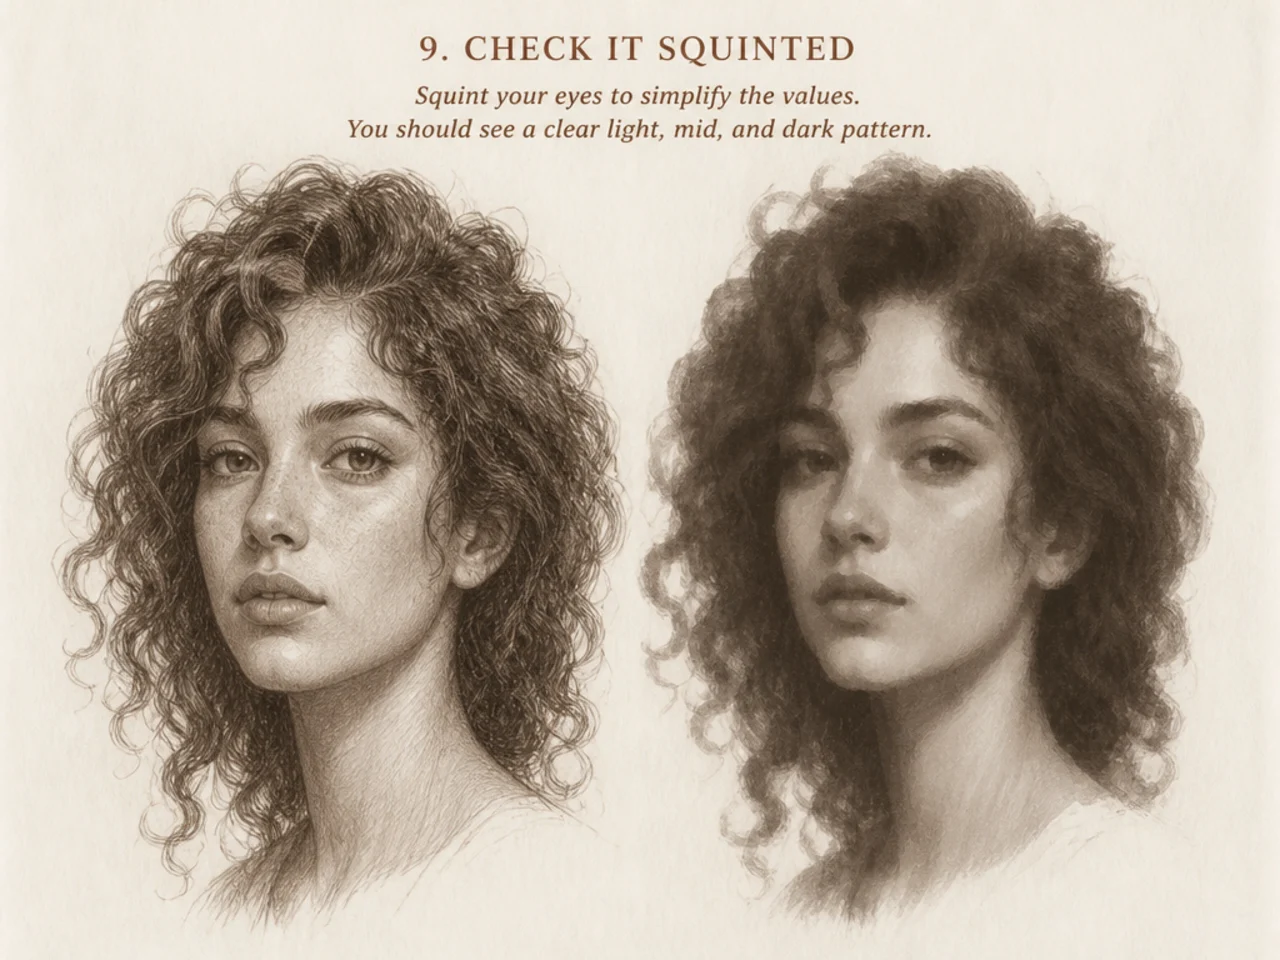
9. Check It Squinted
Squint at your drawing. It should already read as curly hair with no curls drawn.
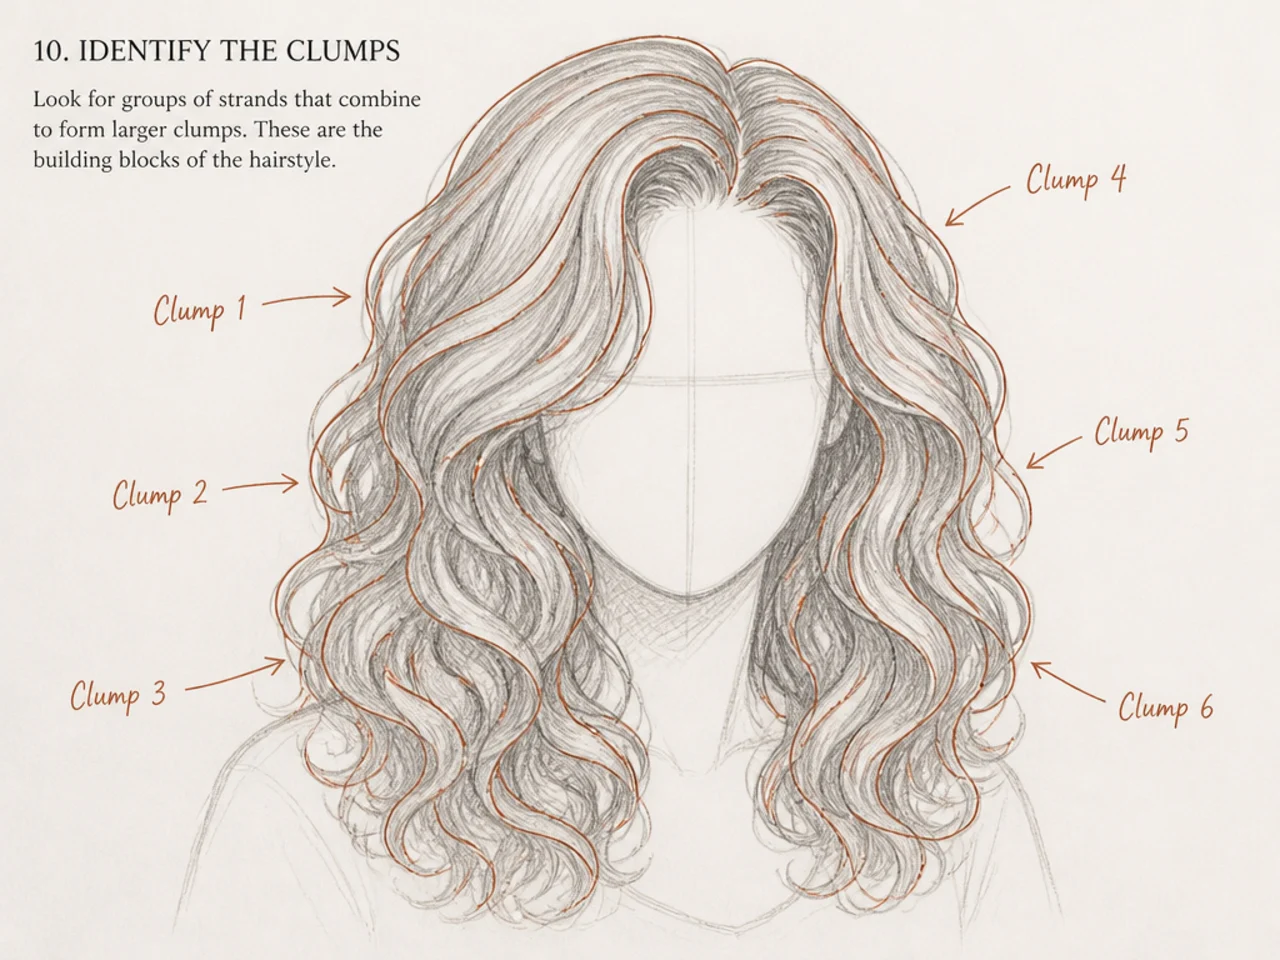
10. Identify the Clumps
Curly hair groups into perhaps five to eight visible clumps. Find them.
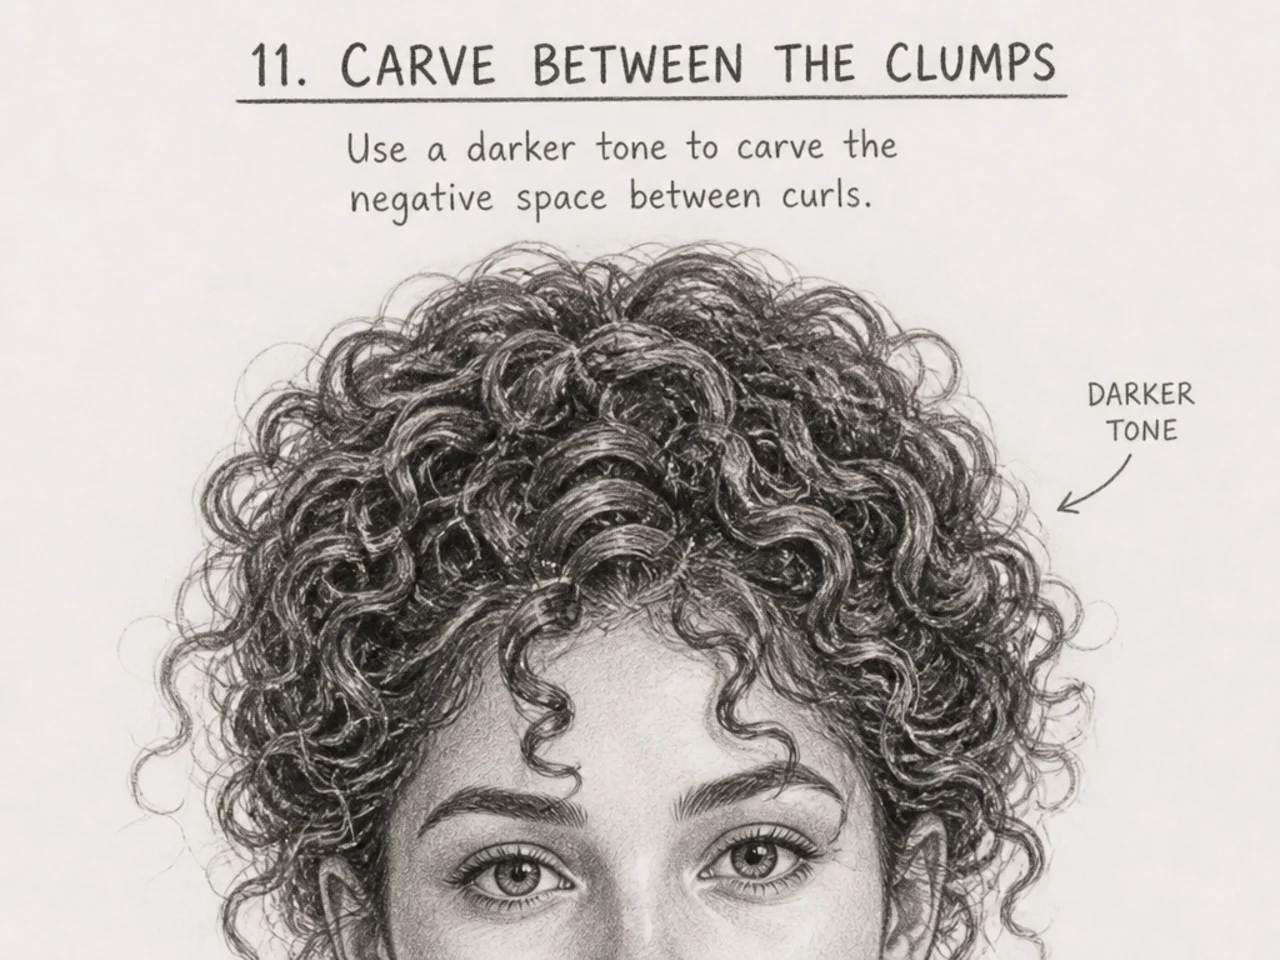
11. Carve Between the Clumps
Push darker tone into the gaps. Subtract to separate rather than drawing outlines.
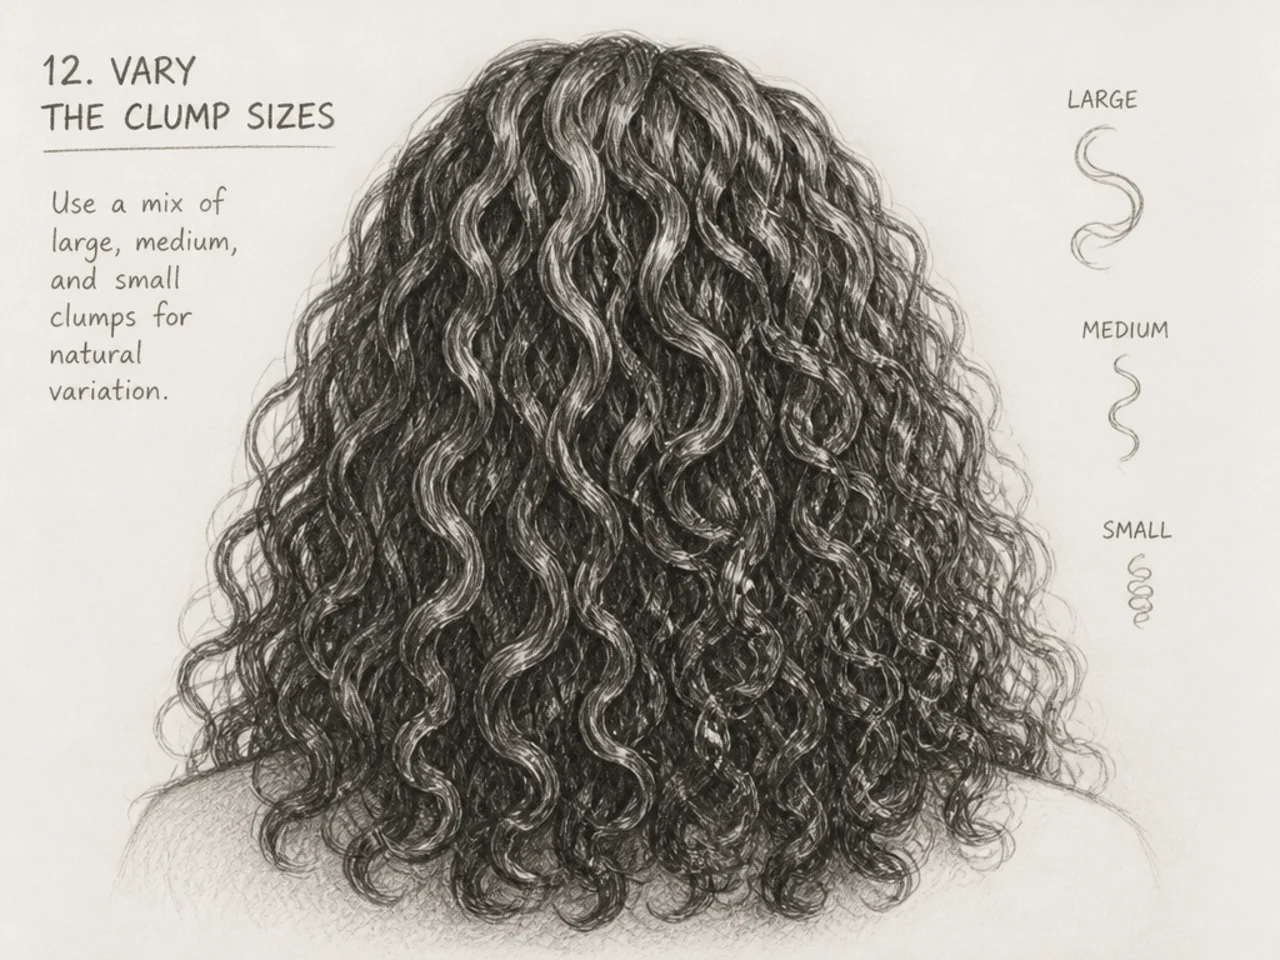
12. Vary the Clump Sizes
Equal clumps look artificial. Some large, some small, none identical.
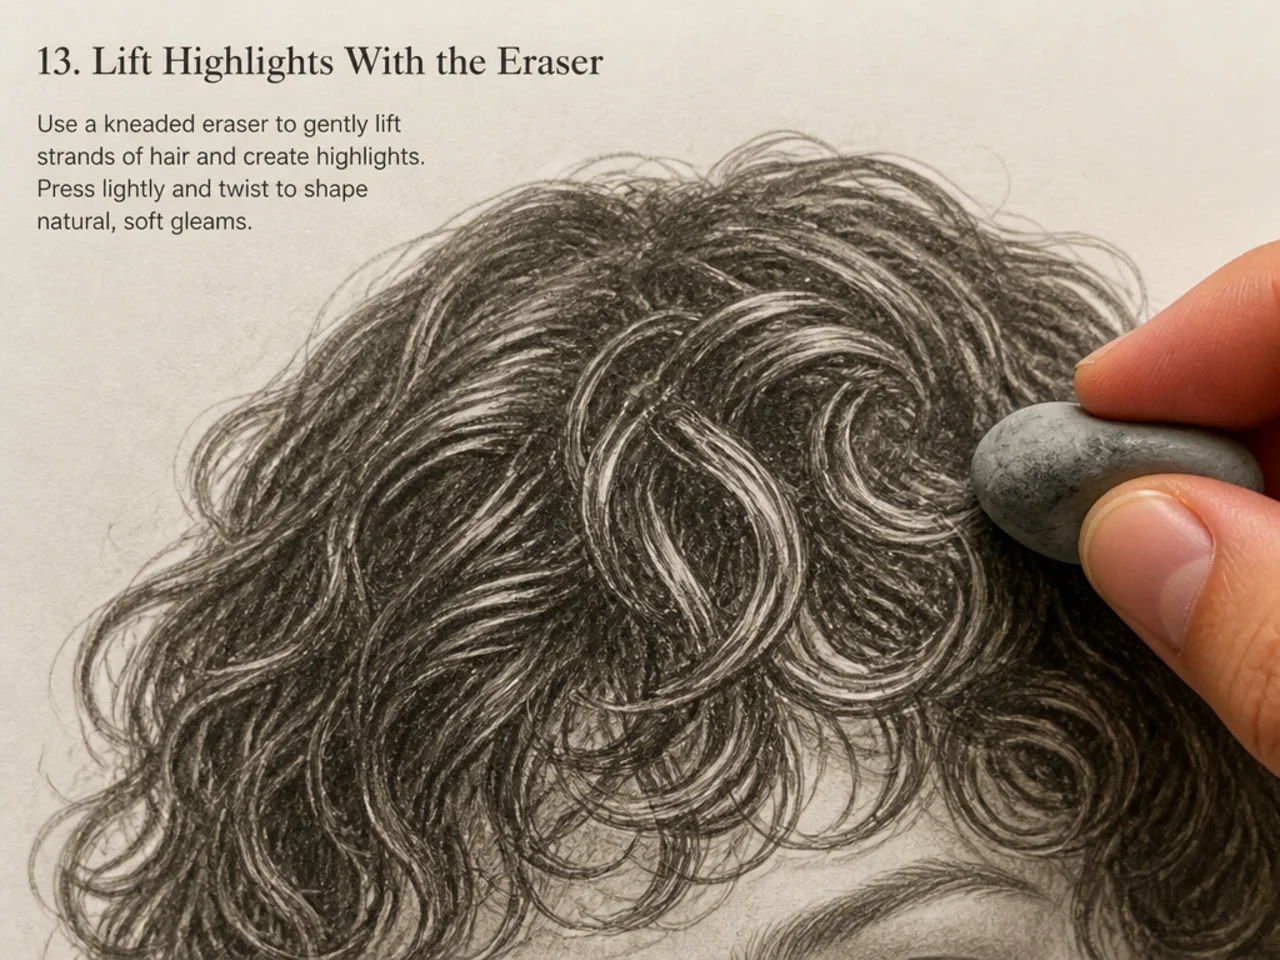
13. Lift Highlights With the Eraser
Pull light out along the lit plane. This is where hair starts to shine.
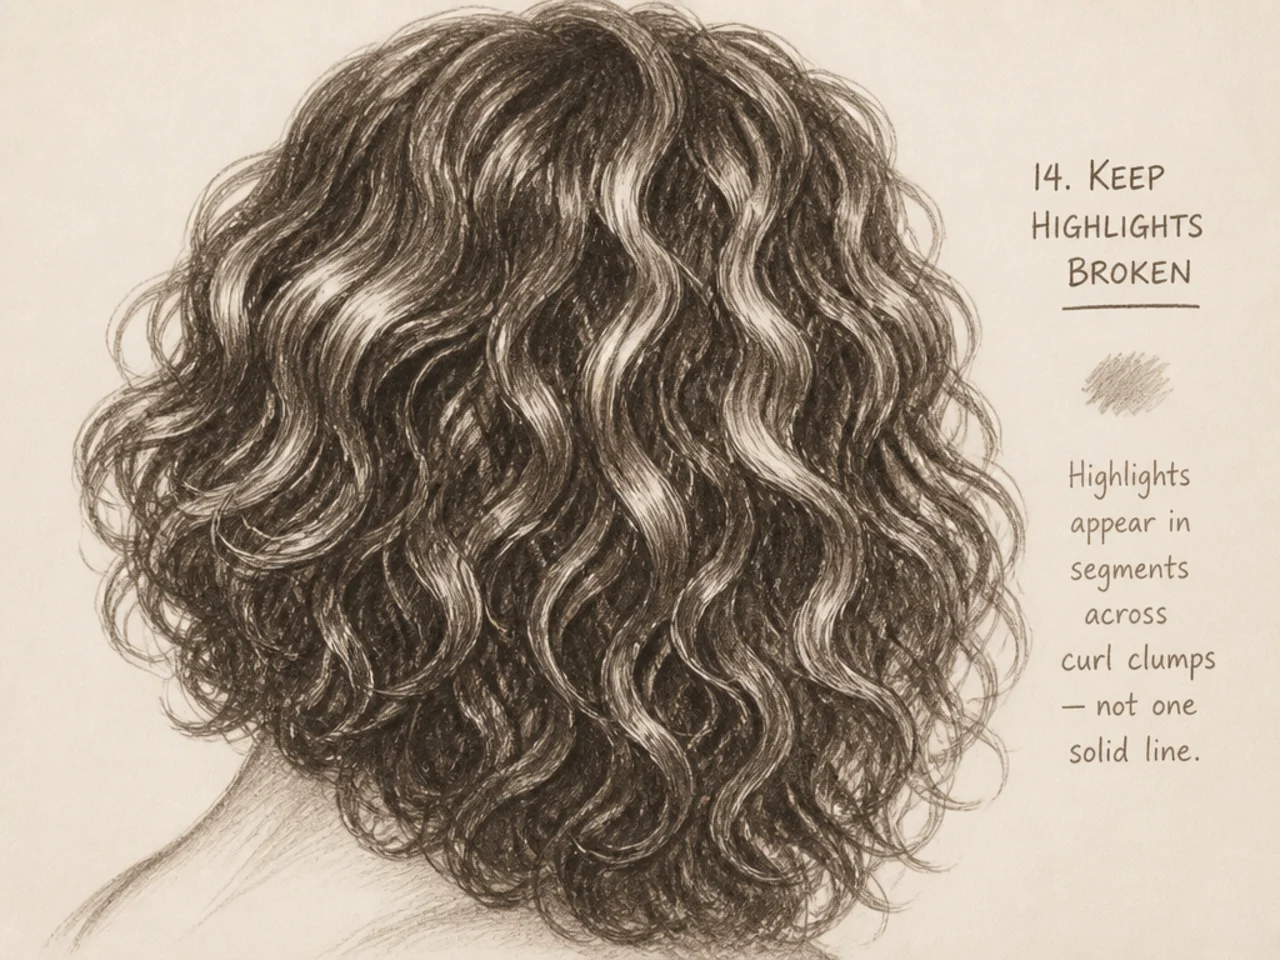
14. Keep Highlights Broken
A continuous highlight looks like plastic. Break it into pieces along the clumps.
15. Now Draw Six Curls
Fully render only the ones on the lit edge. This is the step that goes wrong if it comes earlier.
16. Draw Them as Ribbons
Wide where the ribbon faces you, narrow where it turns edge-on.
17. Add Two or Three Escaping Strands
Single fine lines leaving the silhouette. Two or three only.
18. Darken the Roots
Hair is darkest where it meets the scalp. This one change adds instant depth.
19. Soften the Interior
Blend anything in the shadow mass that is competing for attention.
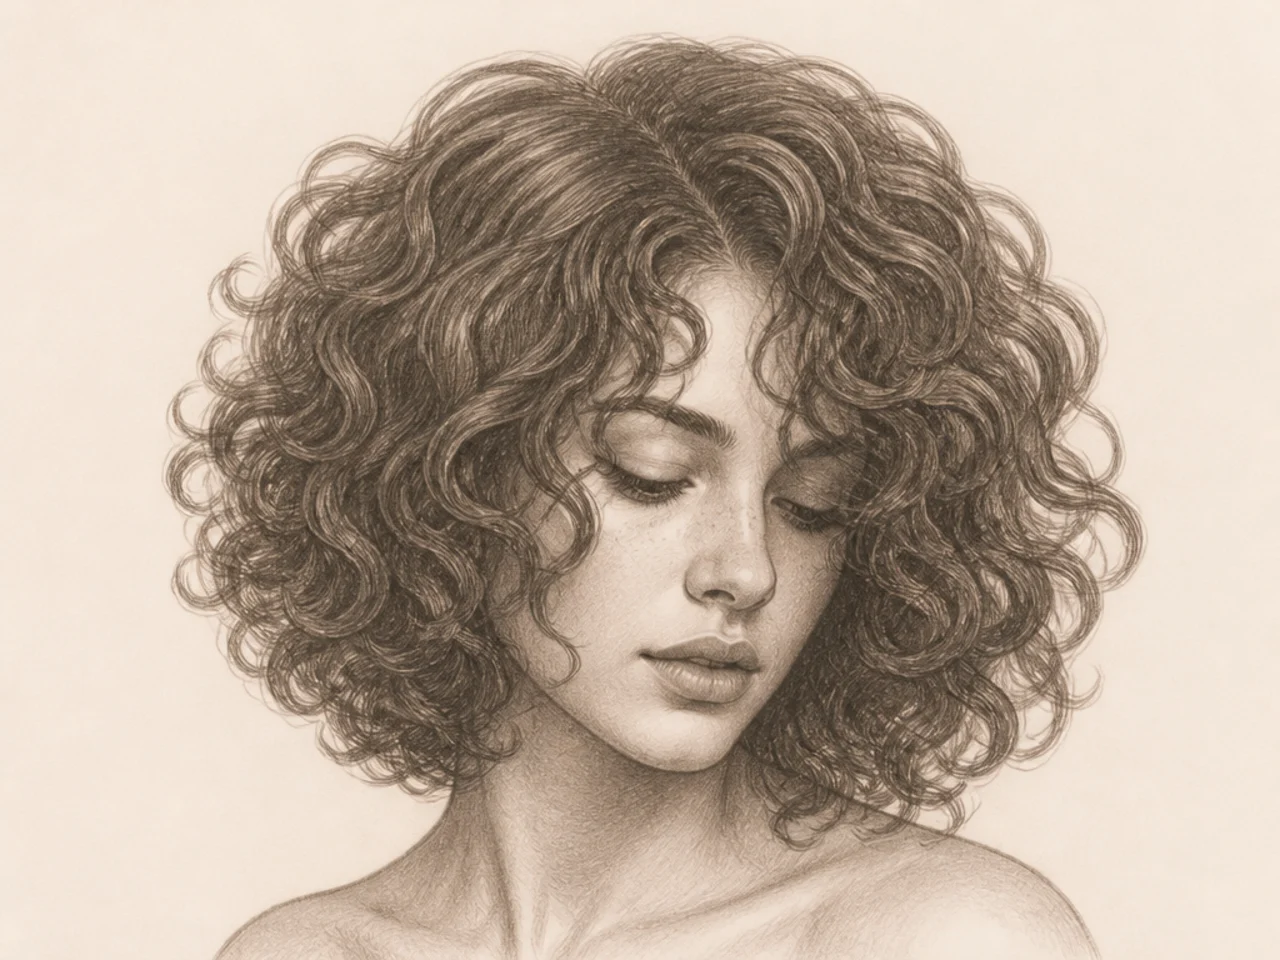
20. Stop
The commonest failure after step fifteen is continuing. Put the pencil down.
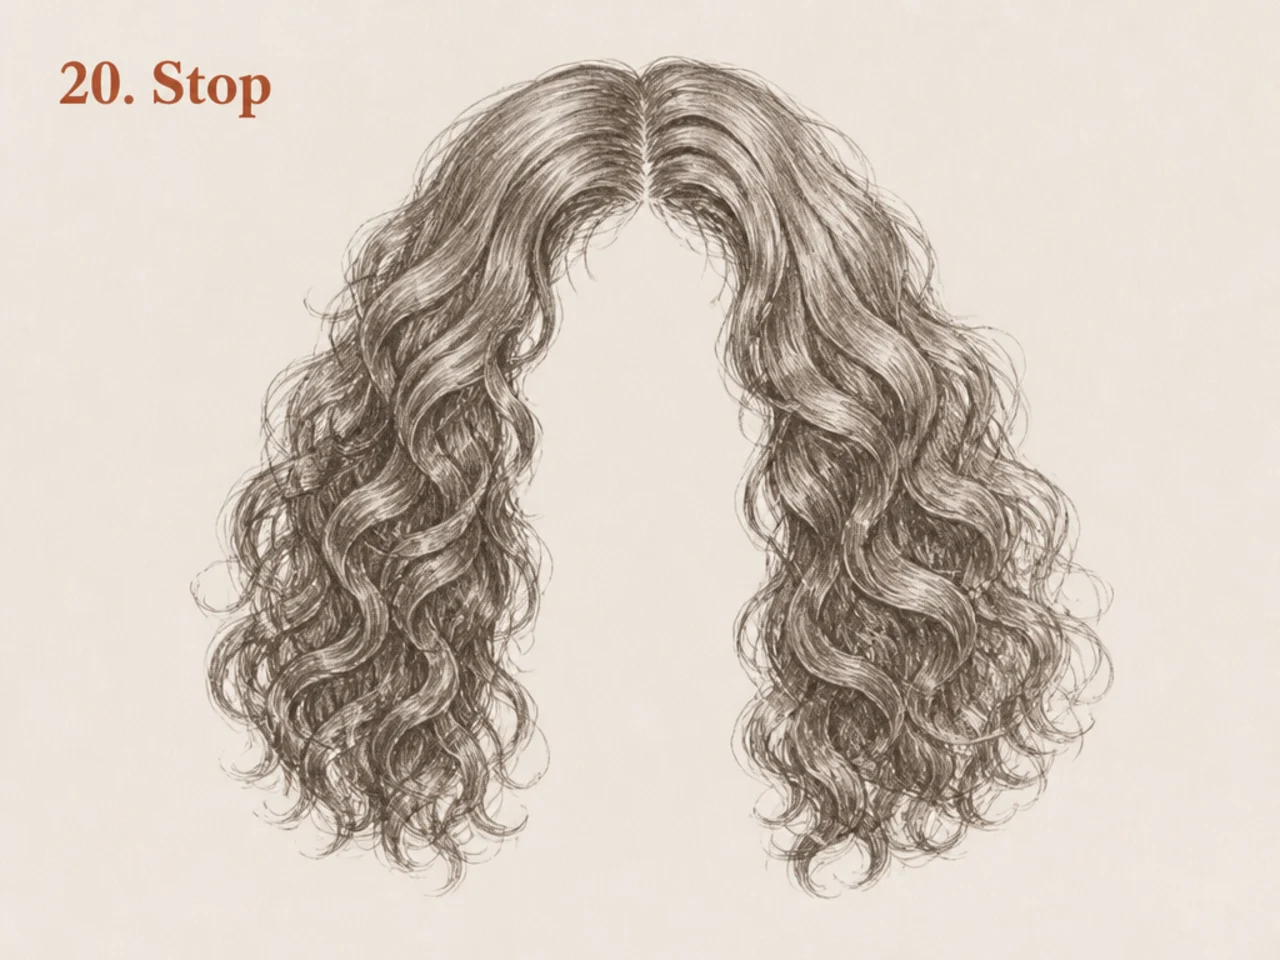
Troubleshooting
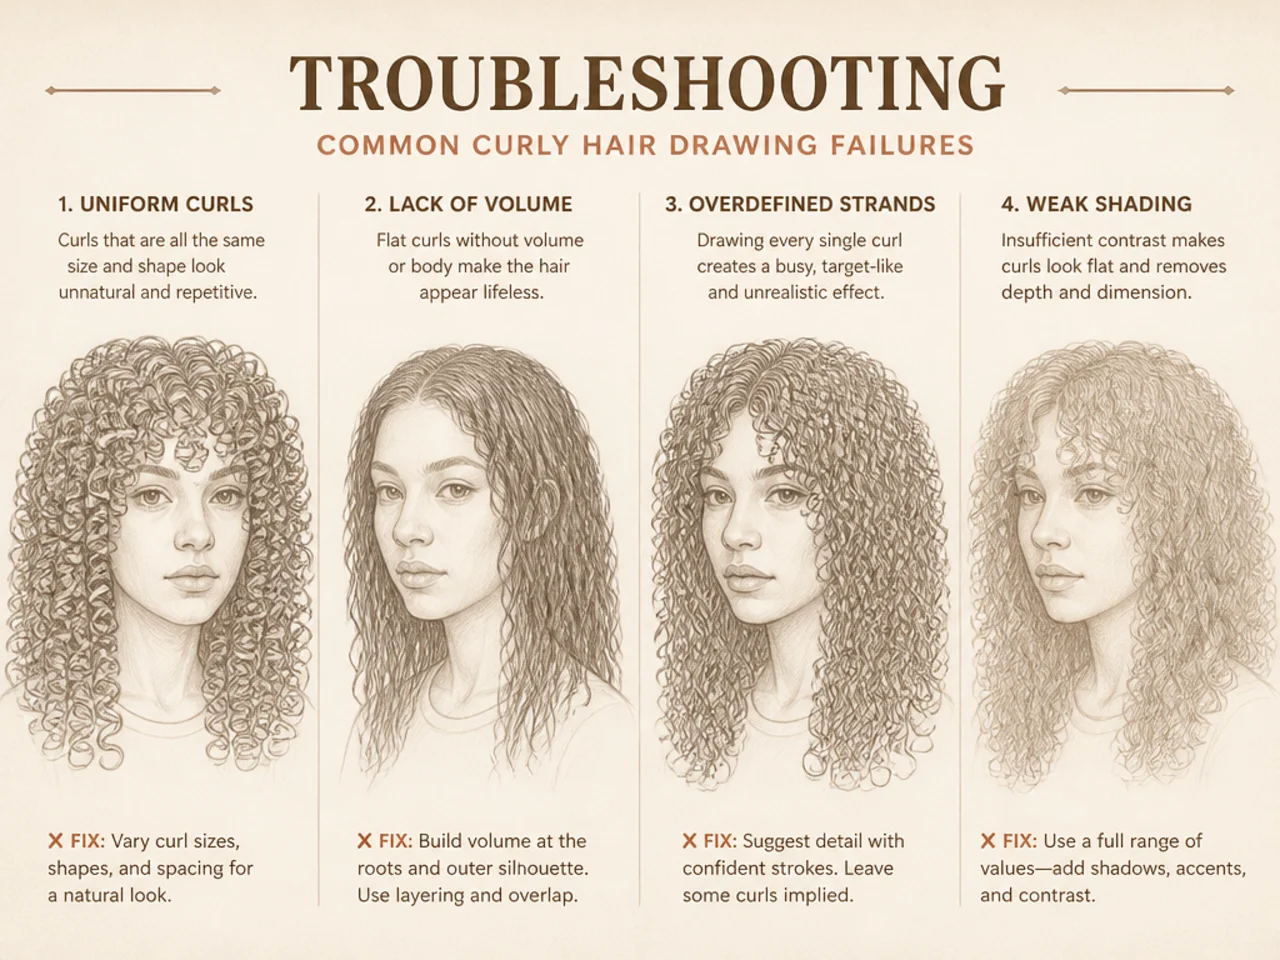
It looks like noodles. Too many curls drawn at equal detail. Blend the interior back and keep only the lit-edge curls.
It looks flat. No clear light direction, or the highlight is continuous. Break the highlight and deepen the shadow mass.
It looks like a helmet. The silhouette is too smooth. Break the outline with gaps and escaping curls.
It looks stuck on. The skull step was skipped, or the volume gap is even all the way round. Curly hair is deeper at the sides and back than at the forehead.
It looks busy but empty. Detail is spread evenly. Concentrate it at the lit edge and clear the rest.
The curls look like springs. They are drawn as even-width tubes. Vary the width as the ribbon turns.
Mistakes to Avoid
Starting with curls. Skull, silhouette, masses, carving — curls come fifteenth.
Outlining every clump. Carve with tone instead of drawing boundaries.
One continuous highlight. It reads as plastic.
Even volume all round the head. Curly hair is deeper at the back and sides.
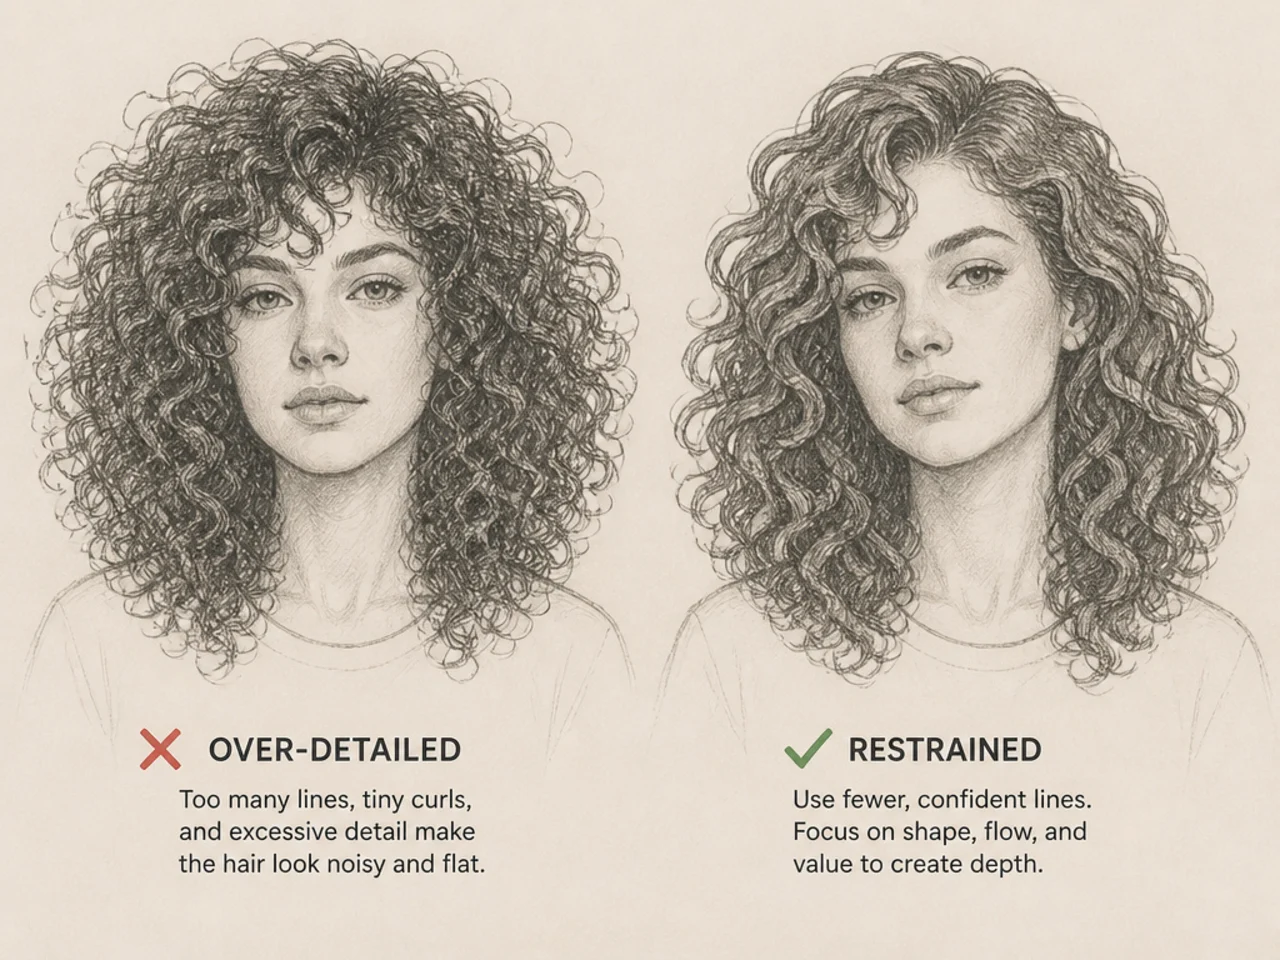
Not stopping. More detail after step fifteen makes it worse, not better.
FAQ
Where do you start? The skull underneath — everything else sits on it.
How do you shade it? Block masses first, then carve between clumps. Never shade curl by curl.
When do you add curls? Last, and only about six.
Final Thoughts
If your drawing already reads as curly hair at step nine — before a single curl is drawn — the rest is straightforward. If it does not, adding curls will not save it, and that is the check worth doing every time.
For quicker sketching see 15 ways to sketch curly hair easily, and for ideas see 25 easy curly hair drawing ideas. More in Hair Drawing & Art.