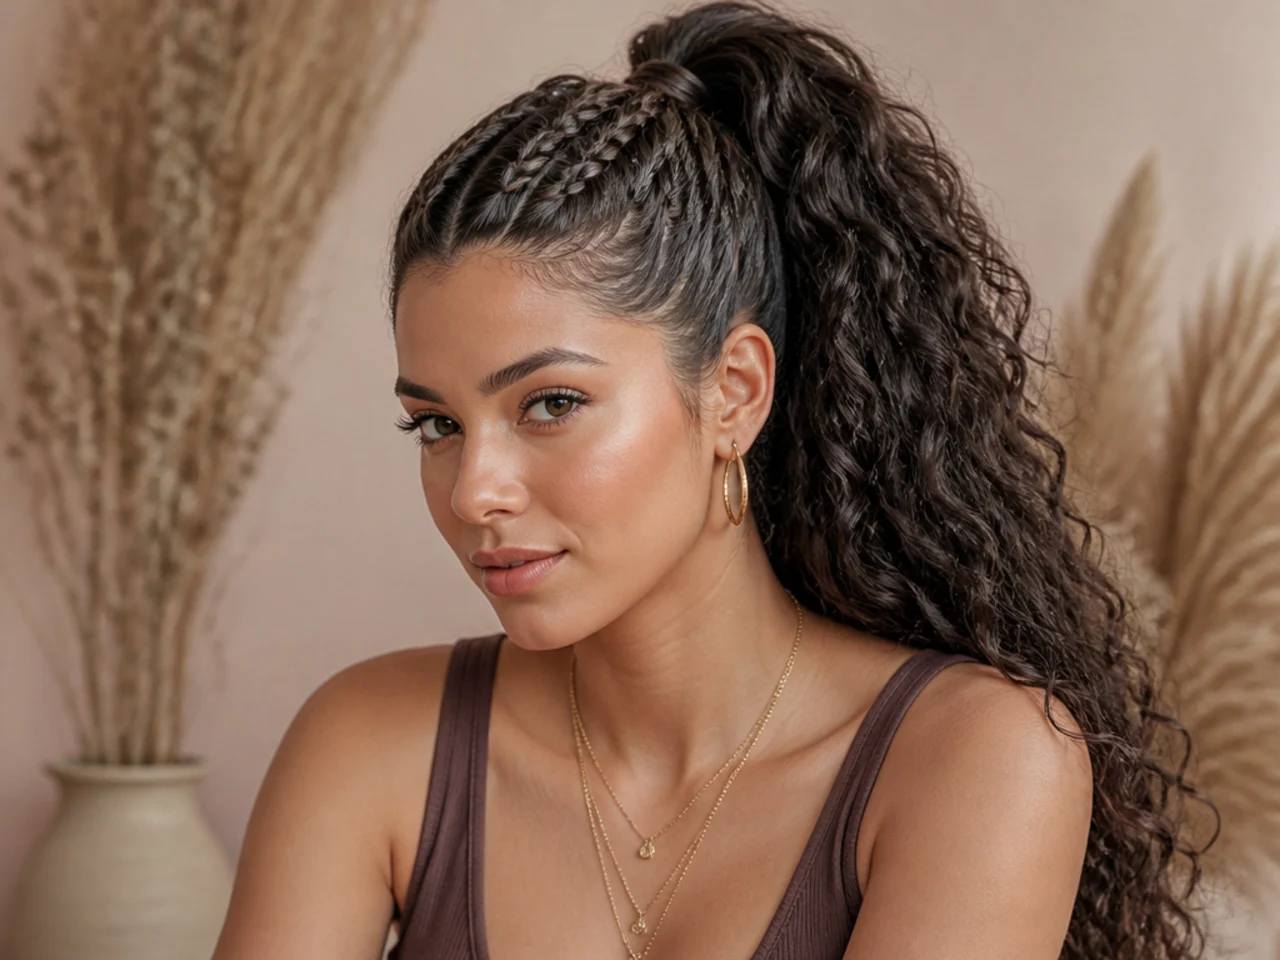
20 High Ponytail Hairstyles With Braids
High ponytail hairstyles with braids — French, Dutch, fishtail, jumbo, box, and cornrow-fed. Twenty stylist-tested variations with placement, tension, and product picks.
In this article · 31
- What Is a Braided High Ponytail?
- How to Choose Your Braided High Ponytail
- 1\. Classic French Braid Feed-In High Pony
- 2\. Dutch Braid Mohawk Pony
- 3\. Fishtail Tail High Pony
- 4\. Jumbo Single Braid Pony
- 5\. Cornrow-Fed High Pony
- 6\. Box Braid High Pony
- 7\. Double Dutch Braid High Pony
- 8\. Halo Braid Around the Base
- 9\. Fulani-Inspired Braided High Pony with Beads
- 10\. Bubble Braid High Pony
- 11\. Waterfall Braid Into a High Pony
- 12\. Micro Braid High Pony
- 13\. Rope Twist Braid Pony
- 14\. Pull-Through Braid Pony
- 15\. Reverse French Braid Pony
- 16\. Faux Loc High Pony
- 17\. Braided Wrap Base Pony
- 18\. Feed-In Braid High Pony with Extensions
- 19\. Half-Up Braided Crown Pony
- 20\. Cornrow Front + Curly Puff Pony
- How to Ask Your Stylist for a Braided High Pony
- Styling and Maintenance
- FAQ
- Which braided high pony holds the longest?
- Do I need long hair for these styles?
- Which braid works best on fine hair?
- Can I sleep in a braided high pony?
- What's the fastest braided high pony?
- How do I keep a braided high pony from giving me a headache?
A braided high ponytail marries the polish of a snatched crown to the personality of a plait. It works on every texture — silk-pressed straight, wavy, curly, coily, box-braided, wig-installed — and reads gym to gala once you pick the right braid to lead the look. Here are 20 high ponytail hairstyles with braids, with the exact technique, tension notes, and one stylist tip for each version worth pinning.
What Is a Braided High Ponytail?
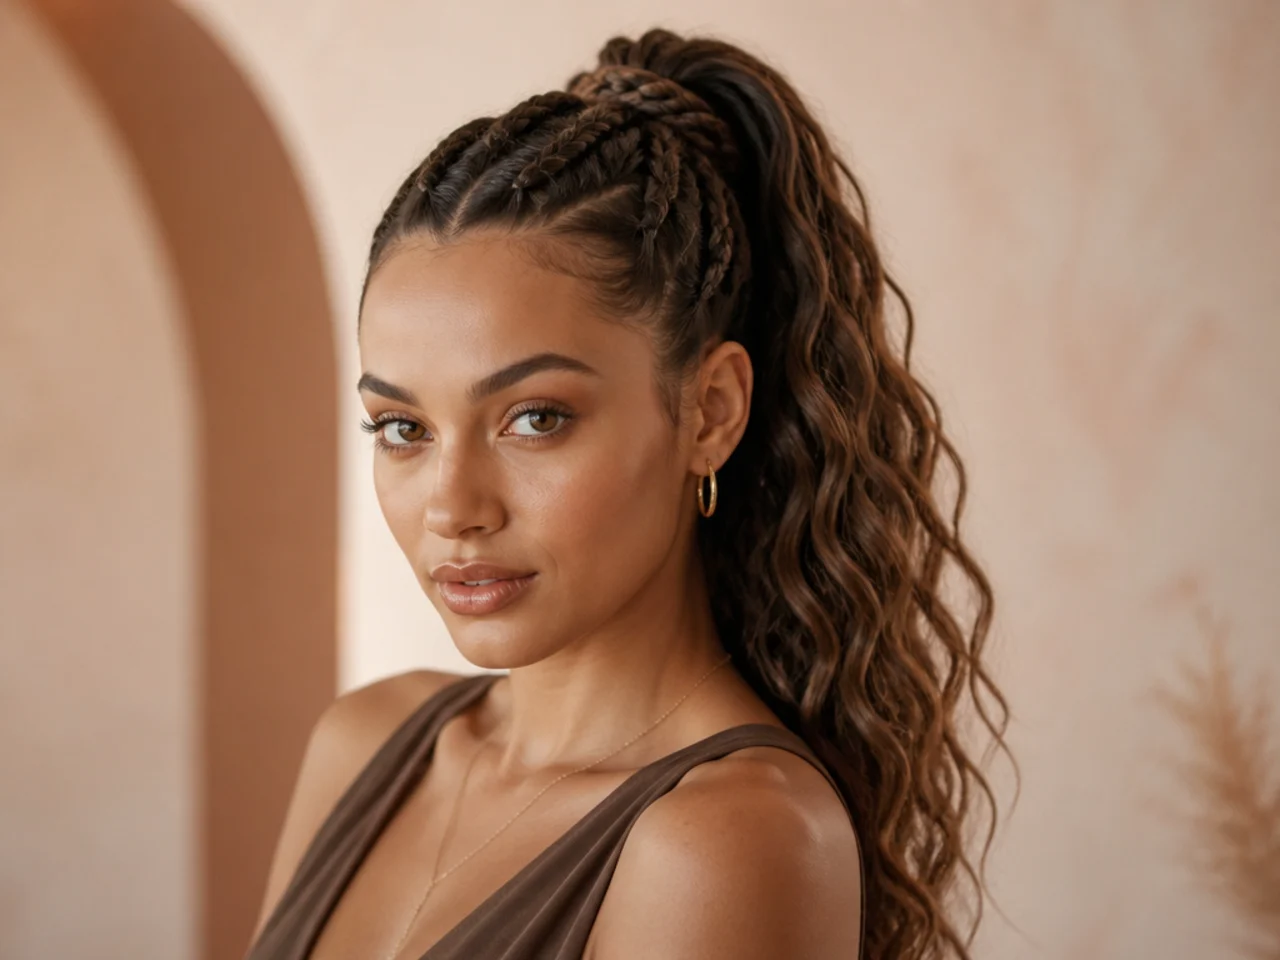
A braided high ponytail is any high pony where a plait is worked into the style — either feeding hair into the base, wrapping the elastic, or replacing the loose tail. The base sits at or above the crown, and the braid is the styling feature that turns a plain pony into something the eye reads twice.
The braid can be one strand or twenty, sit at the perimeter or run down the length, and use your own hair or installed extensions. What every version shares is placement — the pony stays high, the plait stays intentional, and the tension gets rotated so the same follicles aren't pulled every day.
How to Choose Your Braided High Ponytail
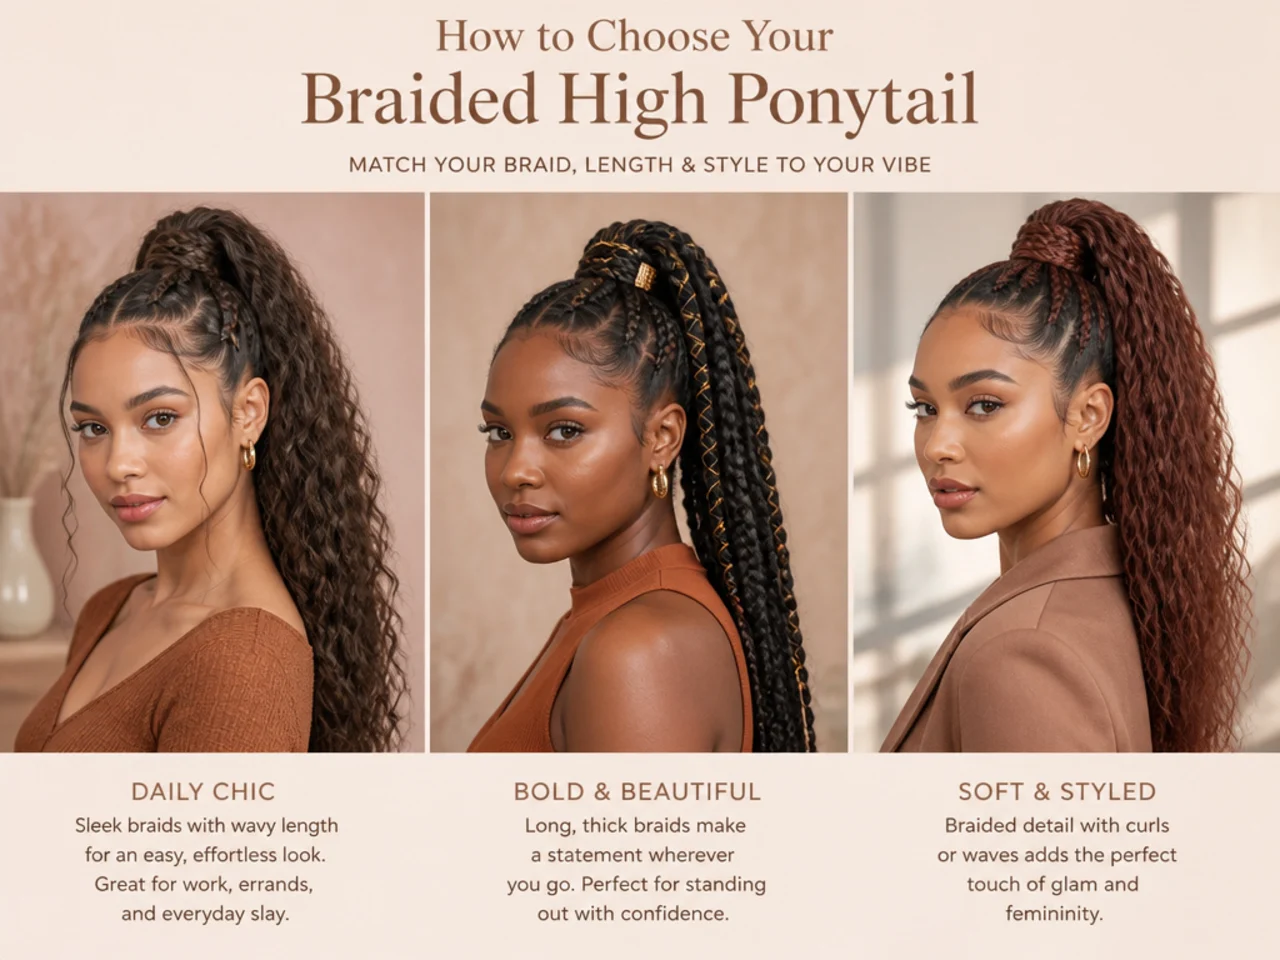
Four things pick your version — your hair texture, the occasion, your braid skill, and your tension budget for the week.
If you're new to braiding, start with the wrap-around base or fishtail down the tail. Both need a single plait and finger memory rather than the mid-air weave of a French or Dutch. Comfortable braiders can jump to Dutch mohawks, halo braids, and double side-fed plaits.
Match the moment. A single French braid feeding into a sleek pony reads office to dinner. A Fulani-inspired braided pony with beads reads wedding and cultural event. A jumbo box-braid pony travels three weeks of gym, travel, and errands.
Match your texture. Straight and wavy hair holds French and Dutch cleanly with a smoothing cream. Curly and coily textures shine in feed-in, jumbo, faux loc, and cornrow-based versions. Fine hair benefits from a pancaked braid to fake density; thick hair benefits from a segmented plait so the braid doesn't read bulbous.
1. Classic French Braid Feed-In High Pony
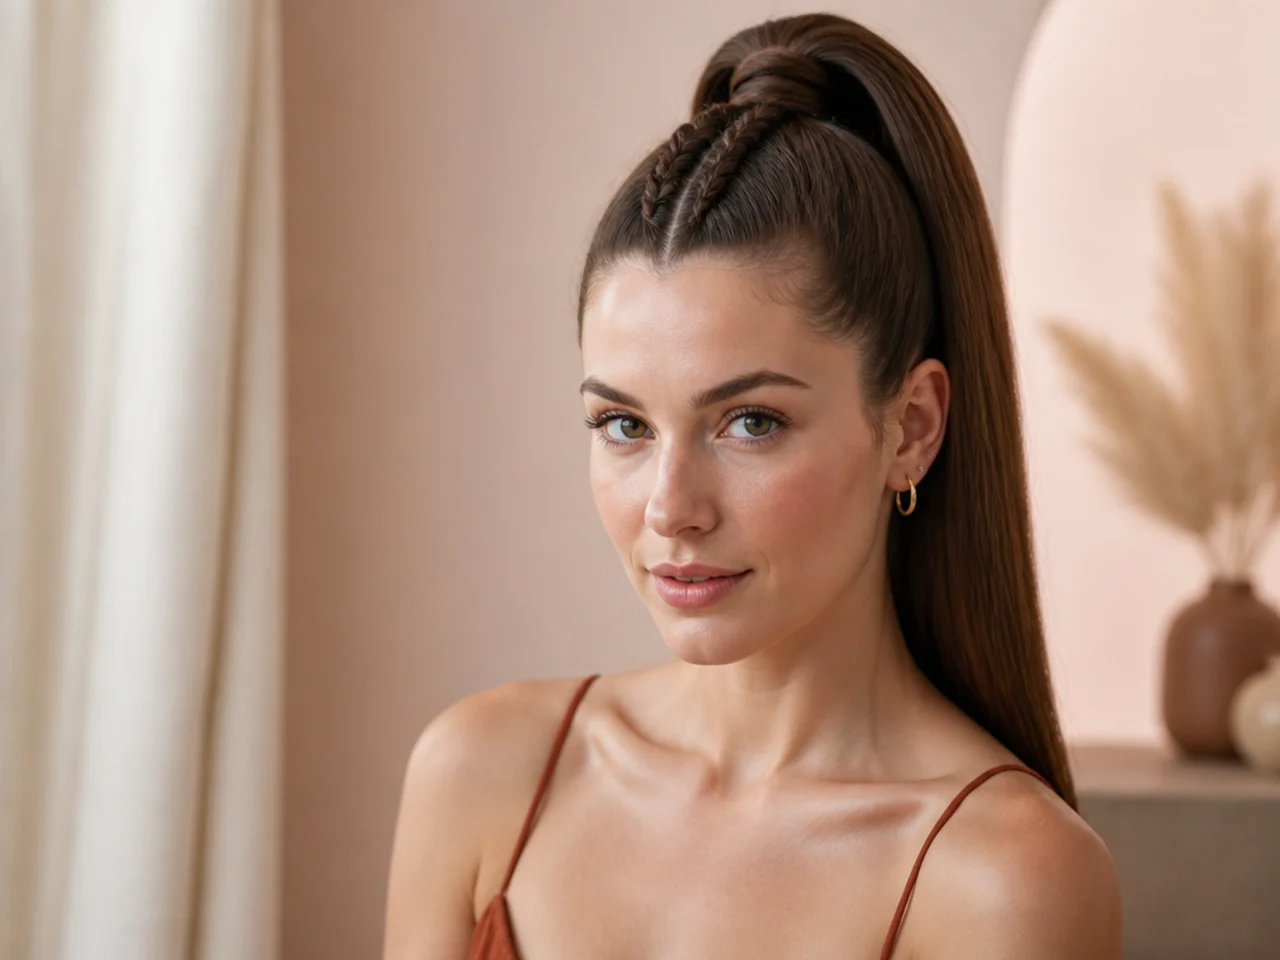
The clean reference version. A single French braid starts at the front hairline, follows the top of the head, and feeds into the base of a high pony — a straight sleek tail falls behind. It suits every face shape and reads polished for office, dinner, and any brief that isn't overtly casual.
Start with a triangular section at the front hairline. Split into three. Add hair from each side of the section on every pass as you work toward the crown. When you reach the base of the pony, gather all remaining hair and secure over a satin scrunchie. Wrap the base with a small tail section.
Stylist tip: braid on hair that's been misted with a smoothing spray, not gelled. Wet gel makes the strands slippery and the French braid loosens by lunch. A dry-touch cream keeps grip.
2. Dutch Braid Mohawk Pony
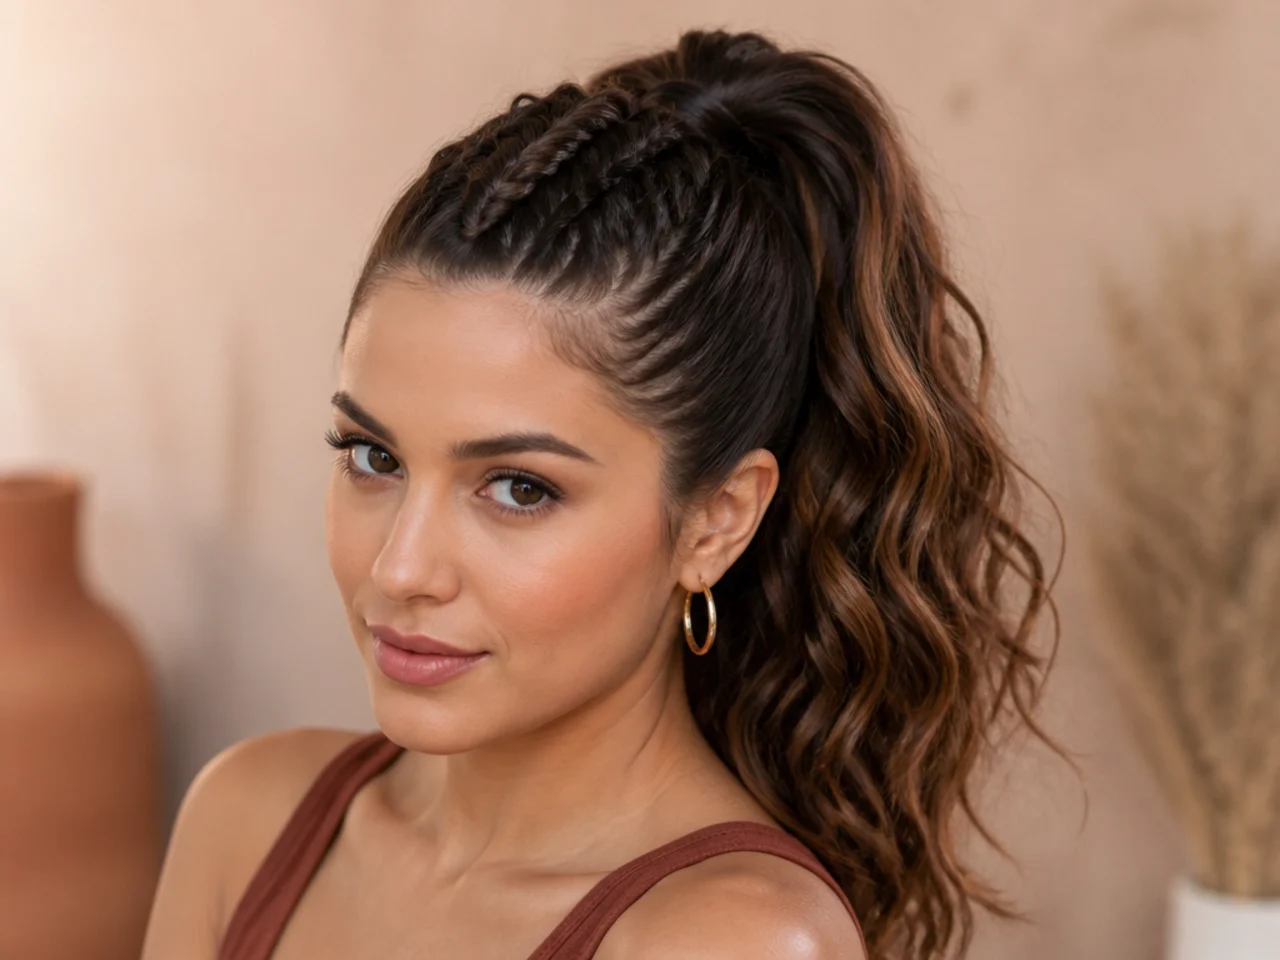
The mohawk-inspired Dutch braid sits proud on top of the head instead of tucking inside like a French. A single Dutch runs from the forehead down the center to the crown, feeding into a high pony. It suits long, oval, and heart faces because the central column lifts the eye upward.
Section a narrow strip from the front hairline back to the crown. Divide into three. Cross each outer strand under the middle strand — the opposite of a French — adding hair from each side of the strip on every pass. Secure the pony at the crown. Pancake the Dutch by pulling the loops outward for a chunky rope.
Stylist tip: dry-shampoo the crown before you braid. It gives the plait grip and makes the pancake step exaggerate cleanly. Slippery hair snaps back into a flat braid within an hour.
3. Fishtail Tail High Pony
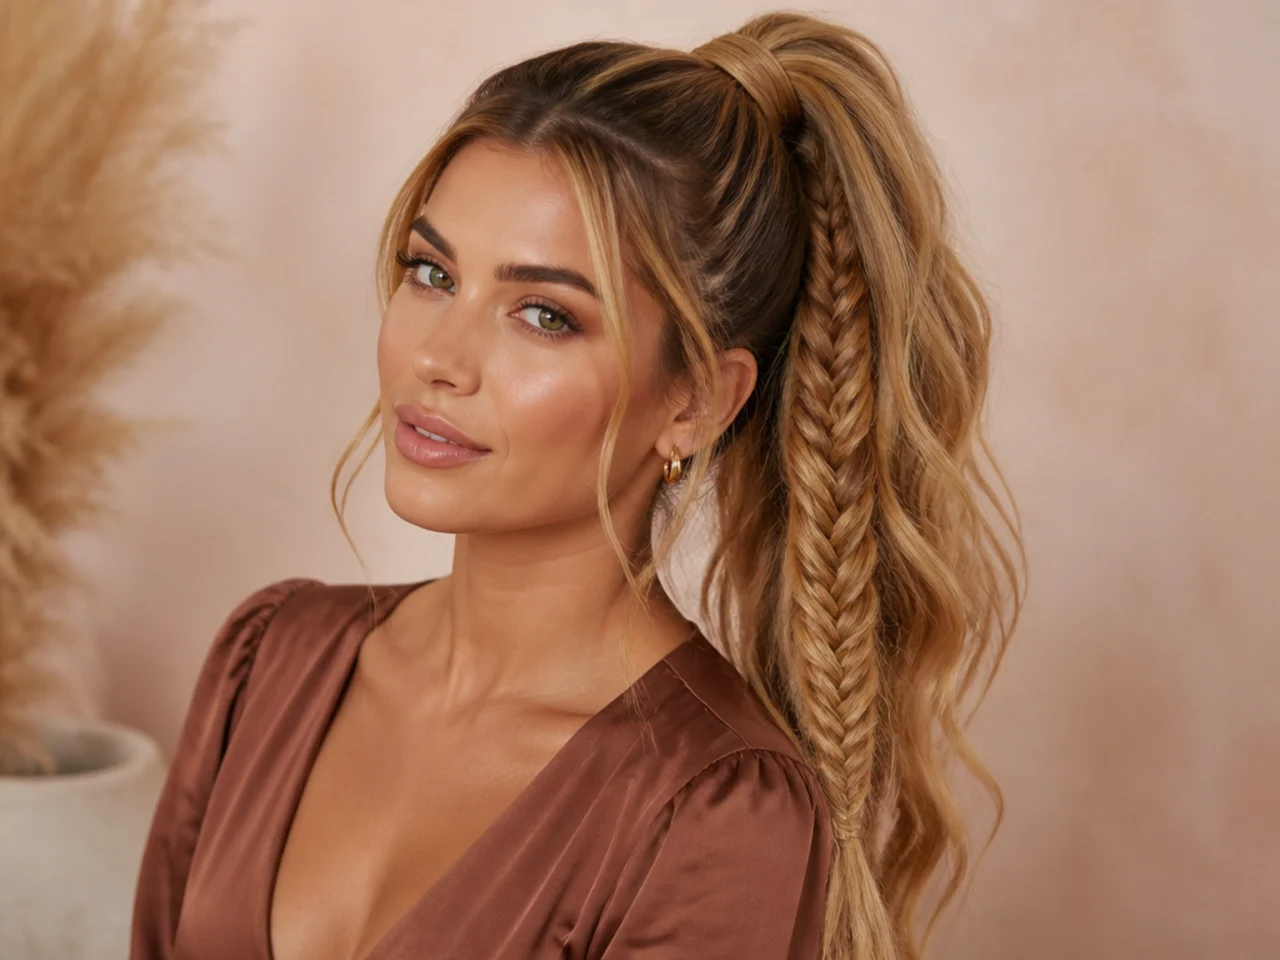
The base stays clean; the tail becomes a sculpted fishtail. It suits medium to long hair — anything shorter unravels before you finish the plait — and reads romantic without going full boho.
Tie a snatched high pony first. Split the tail into two. Take a small strand from the outside of the right section and cross it over to join the left. Repeat from the left. Keep each strand small for a tight, scaly finish. Secure the end with a clear elastic and mist with medium-hold hairspray.
Stylist tip: pancake the fishtail once secured. Pinch each loop with your fingers and tug outward gently. It reads twice as full in photos and doesn't lose the crisp scale pattern.
4. Jumbo Single Braid Pony
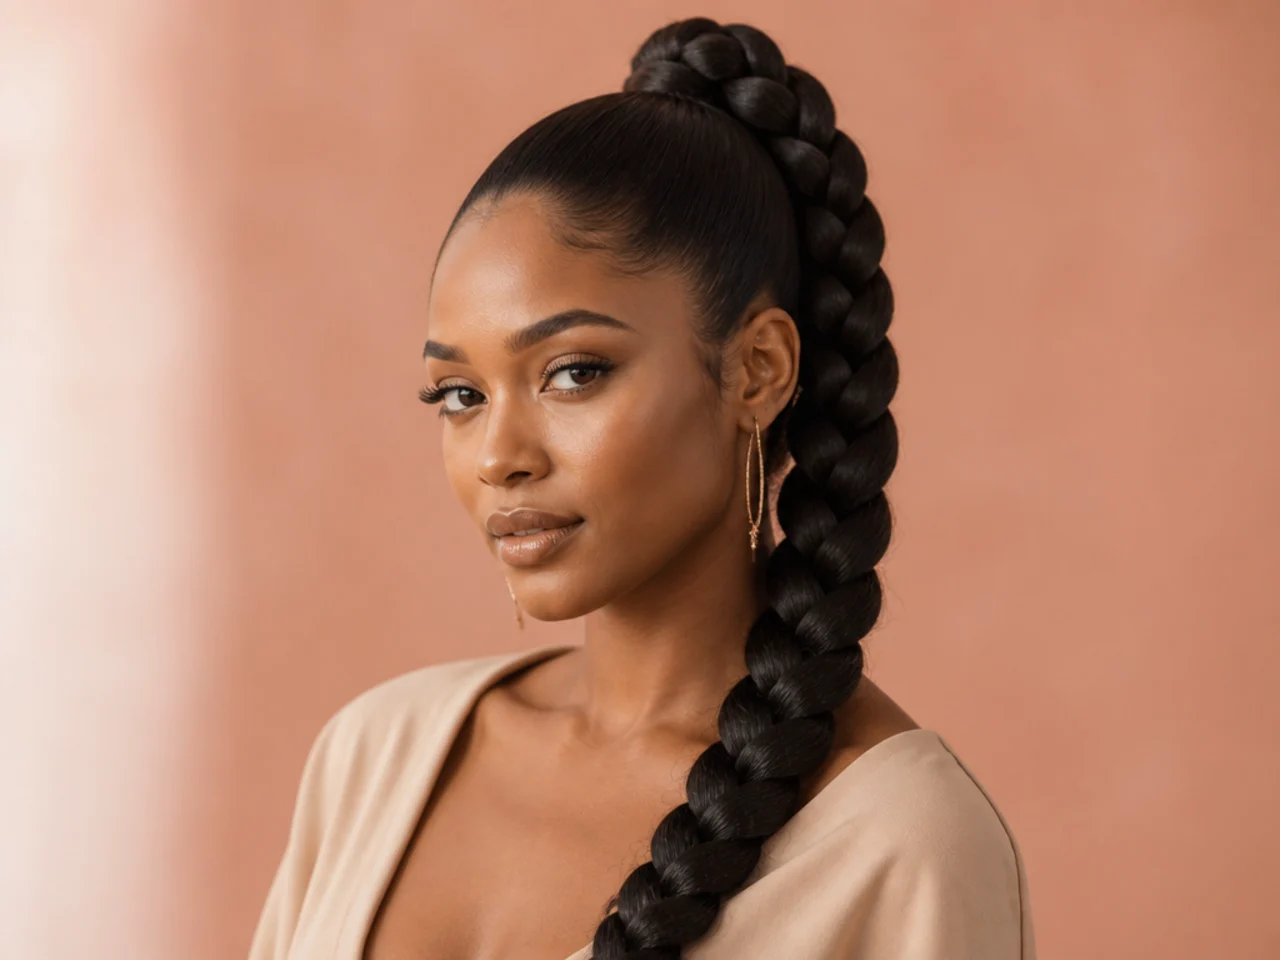
One thick, chunky three-strand braid replaces the loose tail. It suits natural, stretched, and thick straight hair — the density is what makes the jumbo silhouette land. It also reads day-two hair beautifully.
Set a snatched high pony over a satin scrunchie. Split the tail into three visibly equal sections — think baguette-thick strands, not pencil. Braid loose. Pancake by pulling each loop outward as you go so the finished braid sits chunky and cohesive, not tight and pinched.
Stylist tip: apply a curl-defining cream or a leave-in through the tail before braiding so coily and stretched textures don't fluff into halo. Rebraid on day two rather than combing out — the jumbo braid holds two full days on natural hair.
5. Cornrow-Fed High Pony
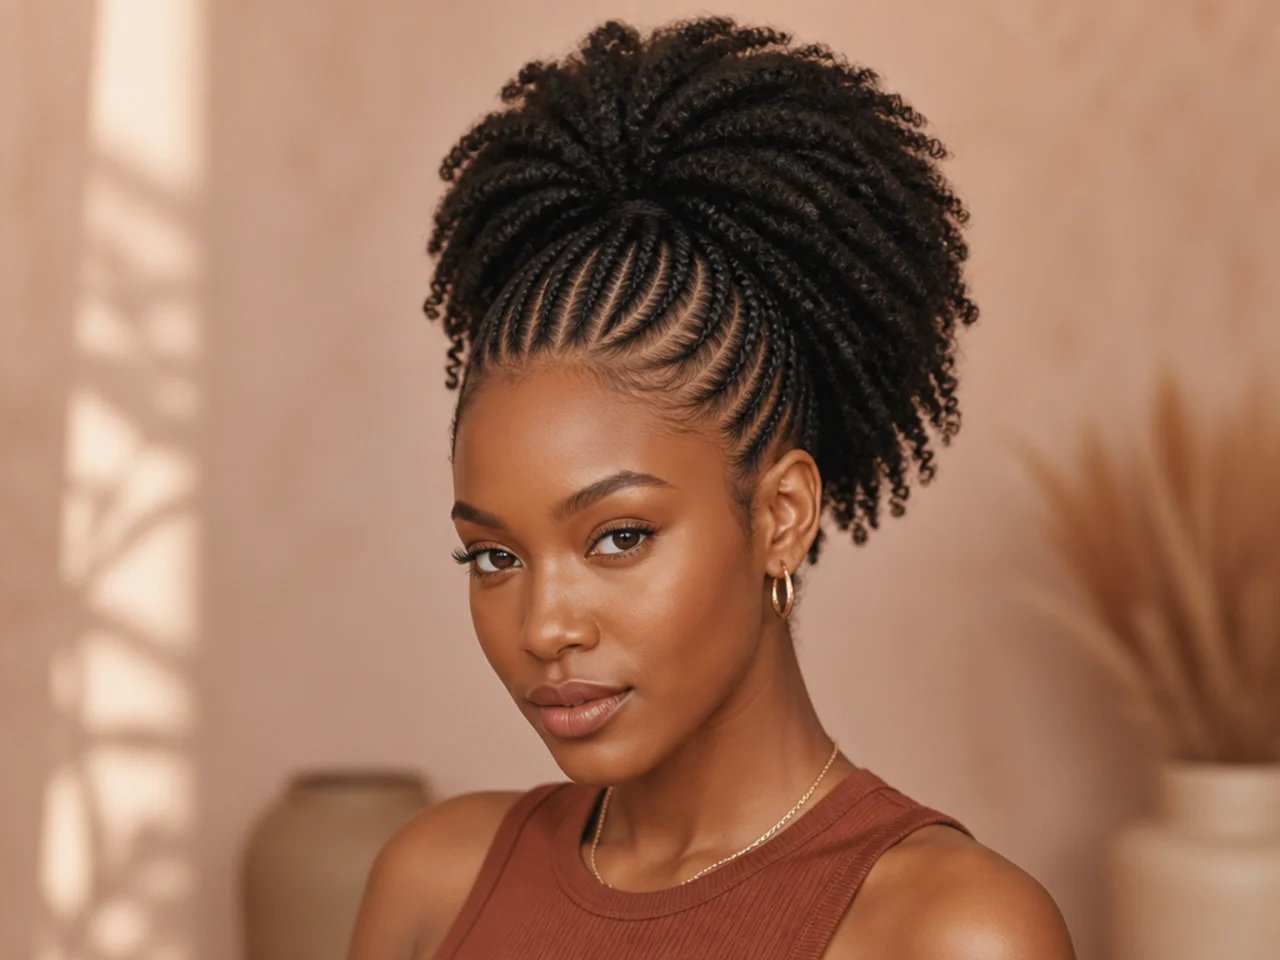
A row of clean cornrows runs from the forehead straight back and gathers into a high pony at the crown. It suits protective-style rotations and workout weeks — the cornrows do the tension holding, so the pony itself sits with less pull.
The install runs one to two hours with a braider. Part the head into six to eight straight-back rows with a rat-tail comb. Braid each row underhand — a Dutch technique — from the front hairline to the crown. Gather all the ends into a wrapped high pony over a bungee tie. Feed a small extension into each cornrow for length if desired.
Stylist tip: oil the scalp between the cornrows twice a week with a lightweight scalp oil — jojoba, argan, or a growth blend. It stops itch and keeps the parted lines from drying out. For companion trims and shape work between installs, our curly hair haircuts guide walks through scissor foundations that grow well under cornrow rotations.
6. Box Braid High Pony
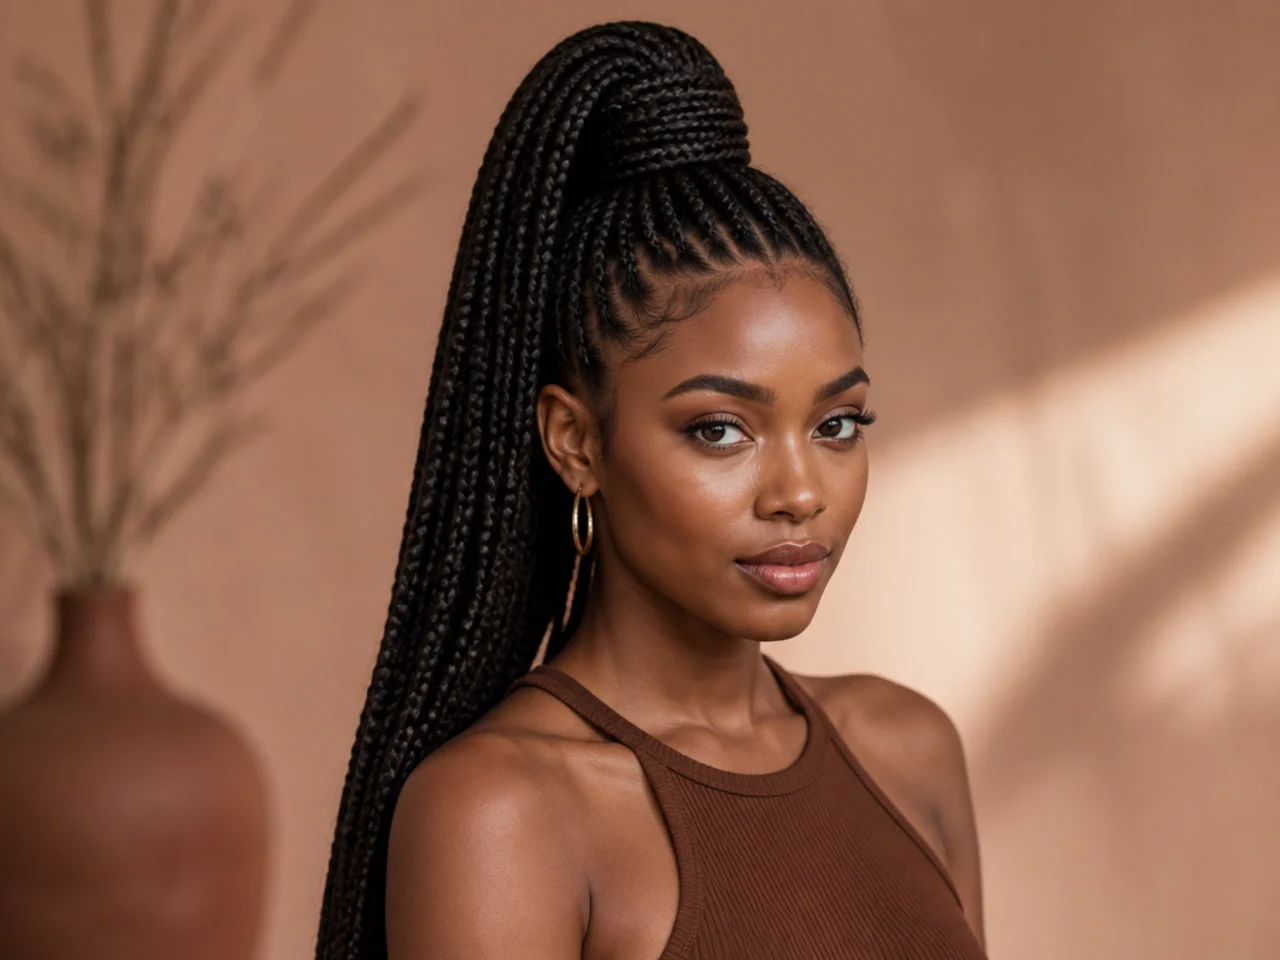
Full-head box braids gathered high into a wrapped pony. It suits three to four weeks of protective styling and reads chic to formal without a restyle. Length is up to you — mid-back to waist all wear the high pony well.
Install the box braids fresh or restyle a two-week-old install. Gather all the braids to the crown and secure over a bungee tie. Take five to seven braids from underneath and wrap them around the elastic, then tuck the ends under and pin. For a snatched perimeter, lay the baby hairs before you gather and mist edge control to seal.
Stylist tip: don't gather ice-cold-old braids into a high pony without misting first. Dry install hair snaps at the perimeter under the tension. A light braid spray keeps the strands supple as you pull them up. See more high pony placements built for our textures in our high ponytail hairstyles for Black women guide.
7. Double Dutch Braid High Pony
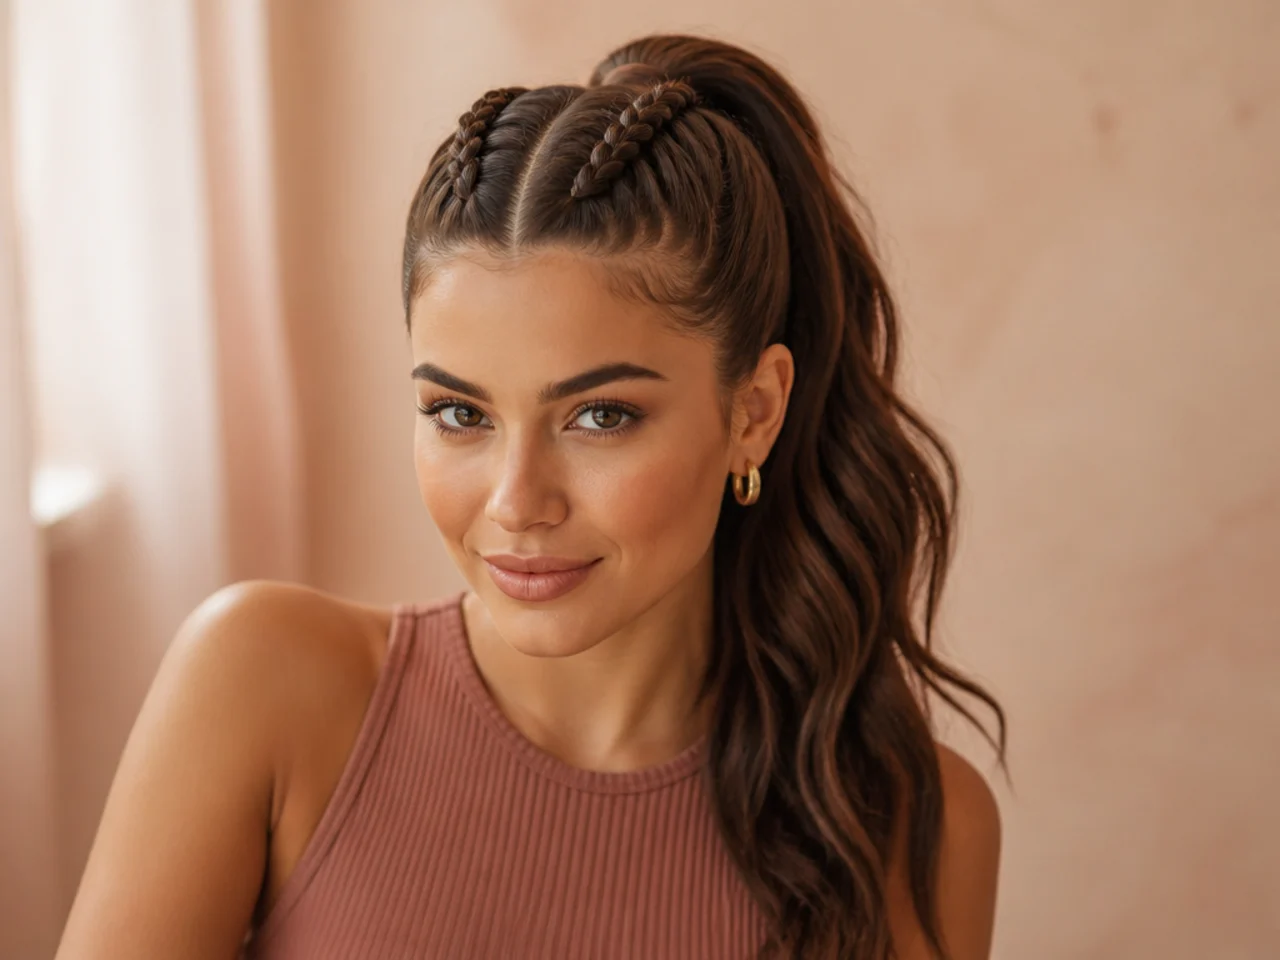
Two symmetrical Dutch braids run from the front hairline along either side of the head, meeting at the crown to feed a center high pony. It suits round and heart faces because the parallel lines elongate visually.
Part the hair down the middle. On each side, section a two-inch strip from the front and Dutch braid — under-crossing strands — following the curve of the head toward the crown. Feed both braids into a single high pony at the peak. Pancake both plaits outward for chunky mirror ropes.
Stylist tip: wet the part with a rat-tail comb dipped in water before you divide. A crisp part sells the mirror effect. A fuzzy or crooked part reads amateur no matter how clean the braids are.
8. Halo Braid Around the Base
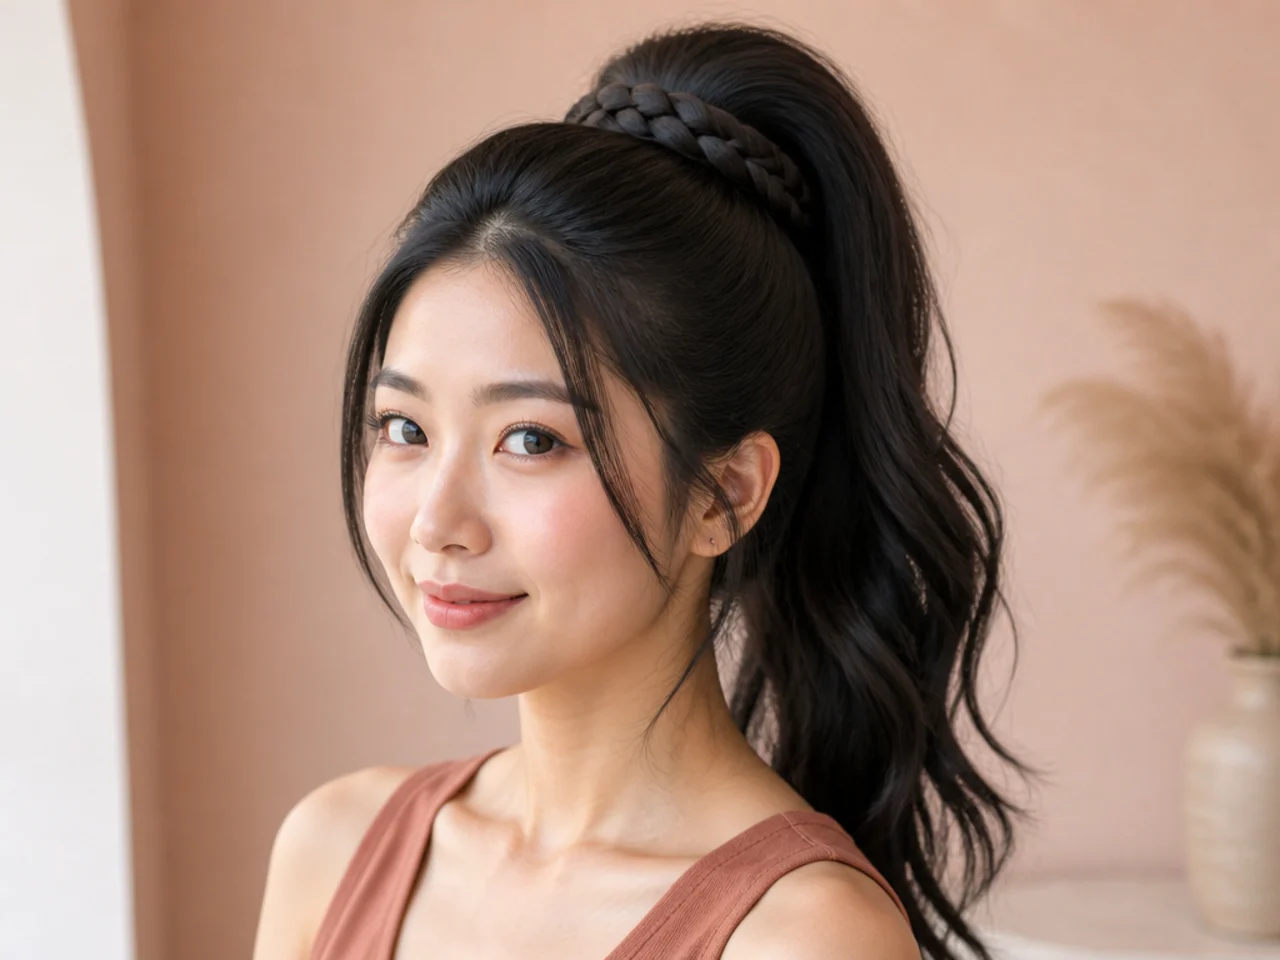
A single braid circles the base of the pony like a crown — hiding the elastic and adding a sculptural rim. It suits weddings, formal dinners, and moments that want a hair accessory built from hair itself.
Set a snatched sleek pony first over a satin scrunchie. Take a two-inch strand from underneath the tail. Braid it into a tight three-strand plait as long as your hair allows. Wrap the finished braid clockwise around the elastic, tuck the end under, and pin with a small bobby pin driven up toward the scalp.
Stylist tip: mist the braid with a light-hold hairspray before you wrap. The plait grips itself and sits flush against the elastic instead of gapping. A drop of dry oil rubbed only along the outside makes the braid read glossy in photos.
9. Fulani-Inspired Braided High Pony with Beads
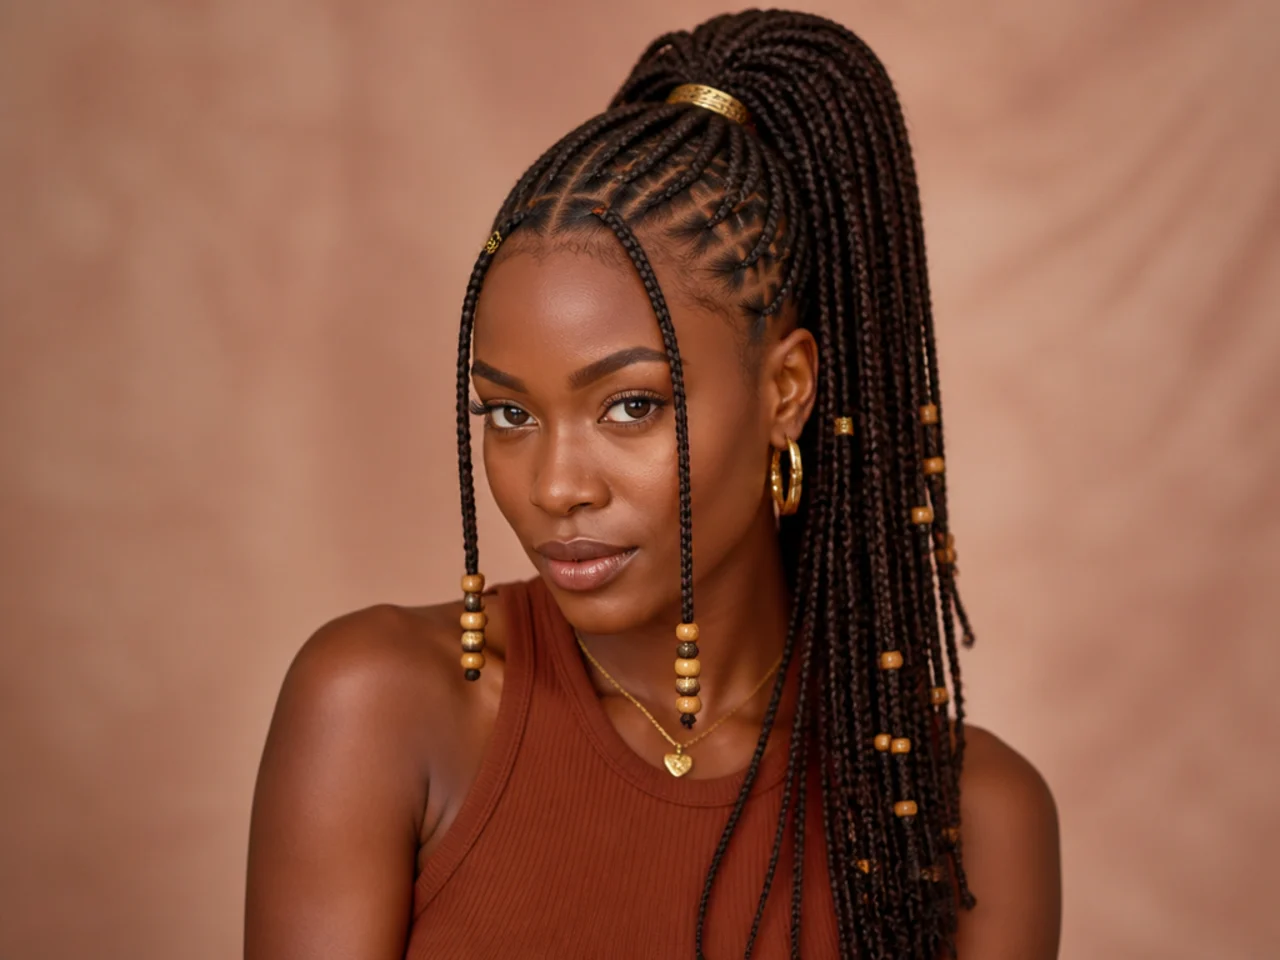
A traditional Fulani-inspired look — a single center-parted cornrow running from the forehead to the crown, side cornrows framing the temples, gold or wooden beads dressing the plaits, everything feeding into a high pony. It suits weddings, cultural events, and multi-week protective installs.
The install runs two to four hours with a braider. A center cornrow curves from the forehead into the base of the pony. Two to four side cornrows are fed with extension hair down each temple. The rest of the head can be braided, twisted, or worn free. All strands gather at the crown into a wrapped high pony. Bead the plaits with graduated wooden or gold beads along the length.
Stylist tip: honor the roots of the style. Fulani braids come from the Fulani people of West Africa — read into the origin and the community that carries the tradition before you rock it. Book with a braider who specializes in the style rather than winging it at home.
10. Bubble Braid High Pony
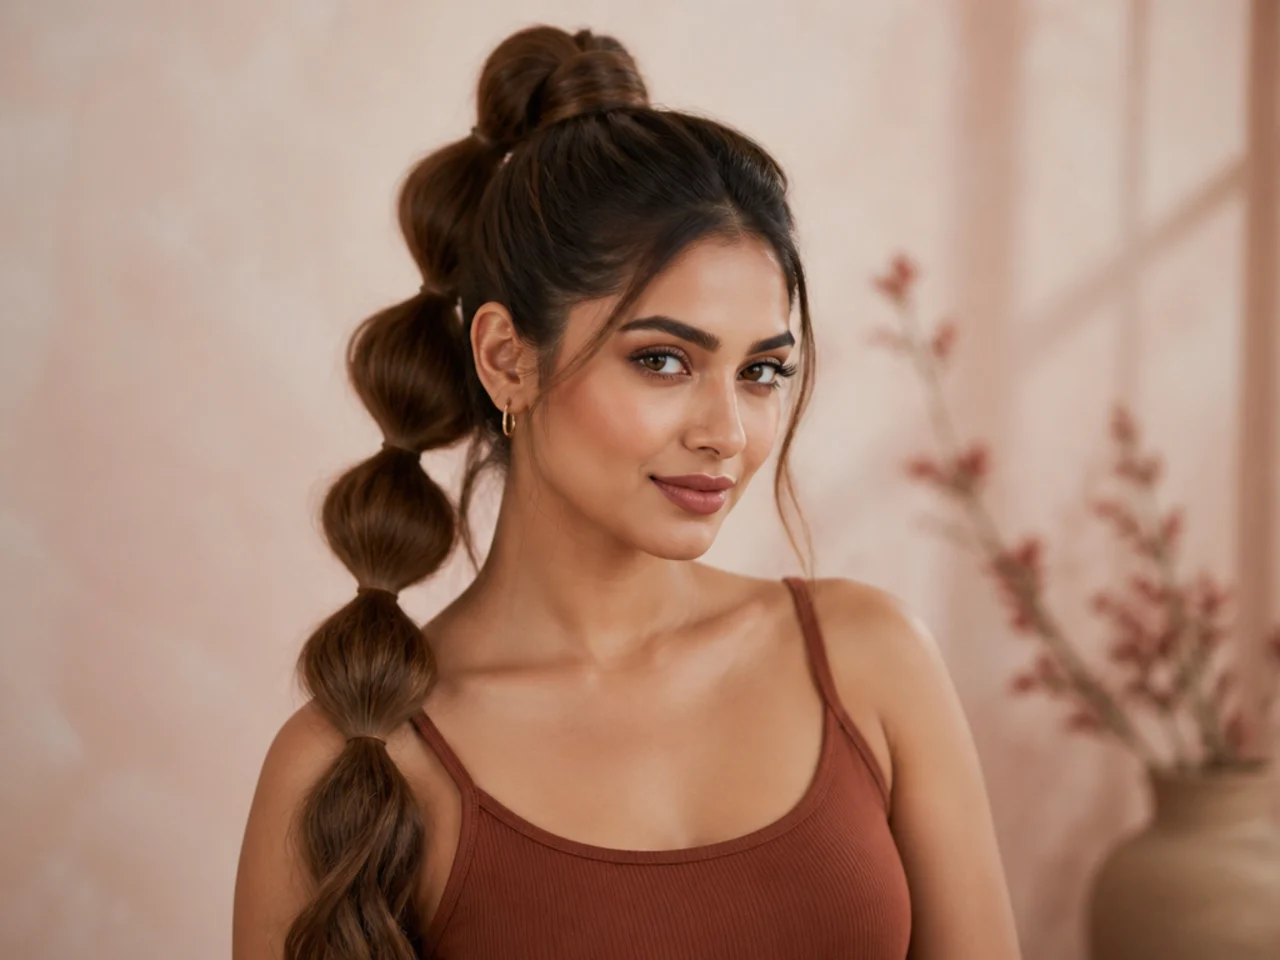
The bubble braid mixes a segmented pony with the visual weight of a plait — braid one section, bubble the next, alternating down the tail. It suits fine and medium hair because the puffed segments fake density in photos.
Tie a snatched high pony. Braid the first three inches of the tail into a three-strand plait and secure with a clear elastic. Below the elastic, gently tug the hair outward with your fingertips to create a bubble. Braid the next three inches. Bubble again. Repeat to the ends.
Stylist tip: pinch each elastic between your thumb and forefinger as you tug the bubbles outward. It stops the whole tail from shifting and keeps the segments perfectly parallel. For a purely puffed-segment version without the plait, browse our cute high ponytail hairstyles guide.
11. Waterfall Braid Into a High Pony
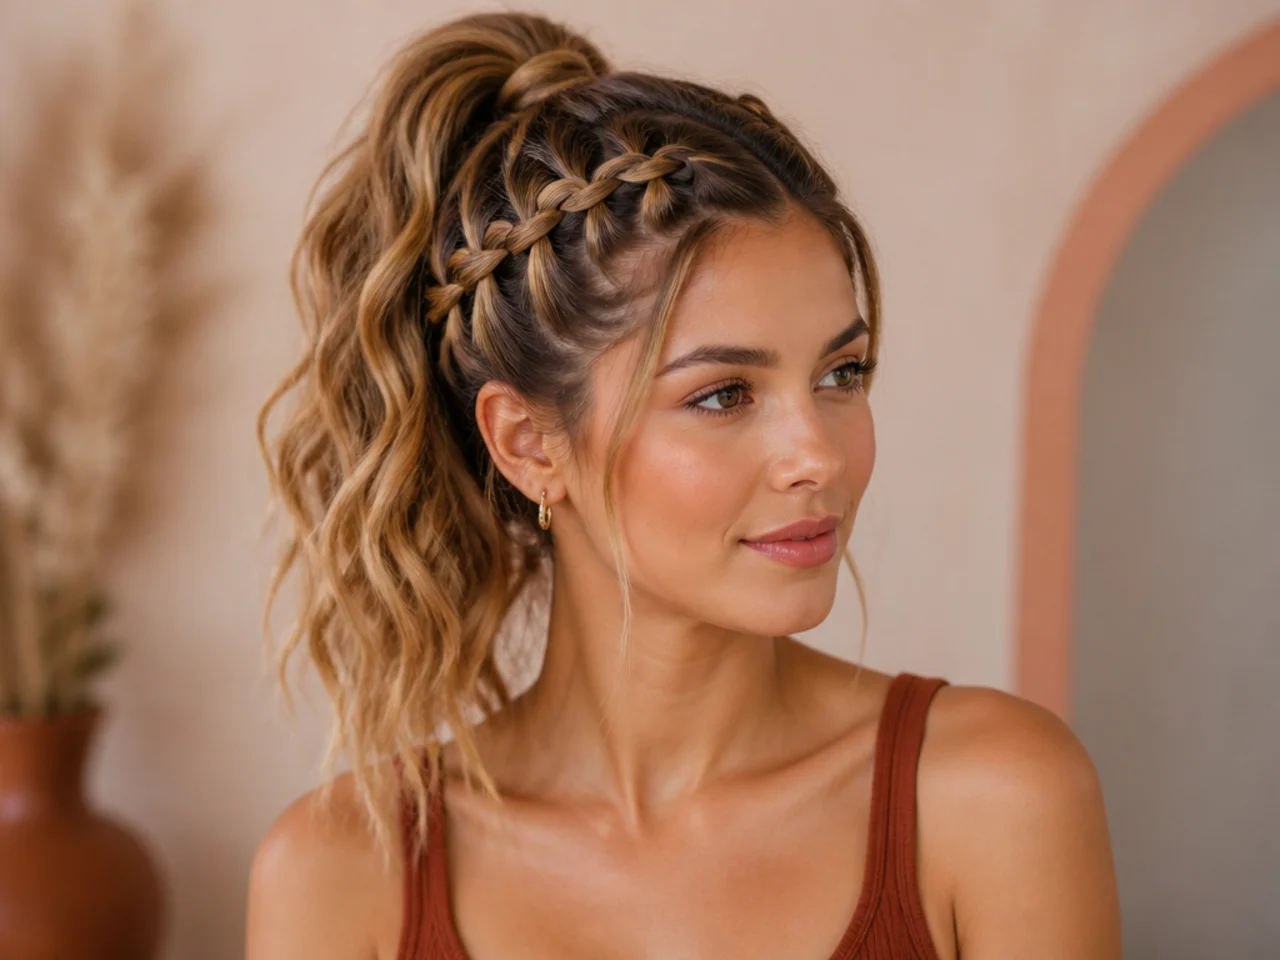
The waterfall drops loose strands out of the braid instead of adding them in, then meets the base of a high pony. It suits garden events, brunches, and any moment that wants romantic without going full down-style.
Start a three-strand braid at one temple. On each pass, take the top strand across, then drop it and pick up a fresh piece of hair to replace it — that's the "waterfall." Braid across the top of the head to the opposite temple. Gather everything above the braid into the high pony; leave the loose dropped strands cascading below.
Stylist tip: curl the dropped strands after the braid is complete, not before. Pre-curled hair tangles into the plait; freshly braided hair takes an iron cleanly. Use a 1-inch wand and mist with light hairspray to lock the shape.
12. Micro Braid High Pony
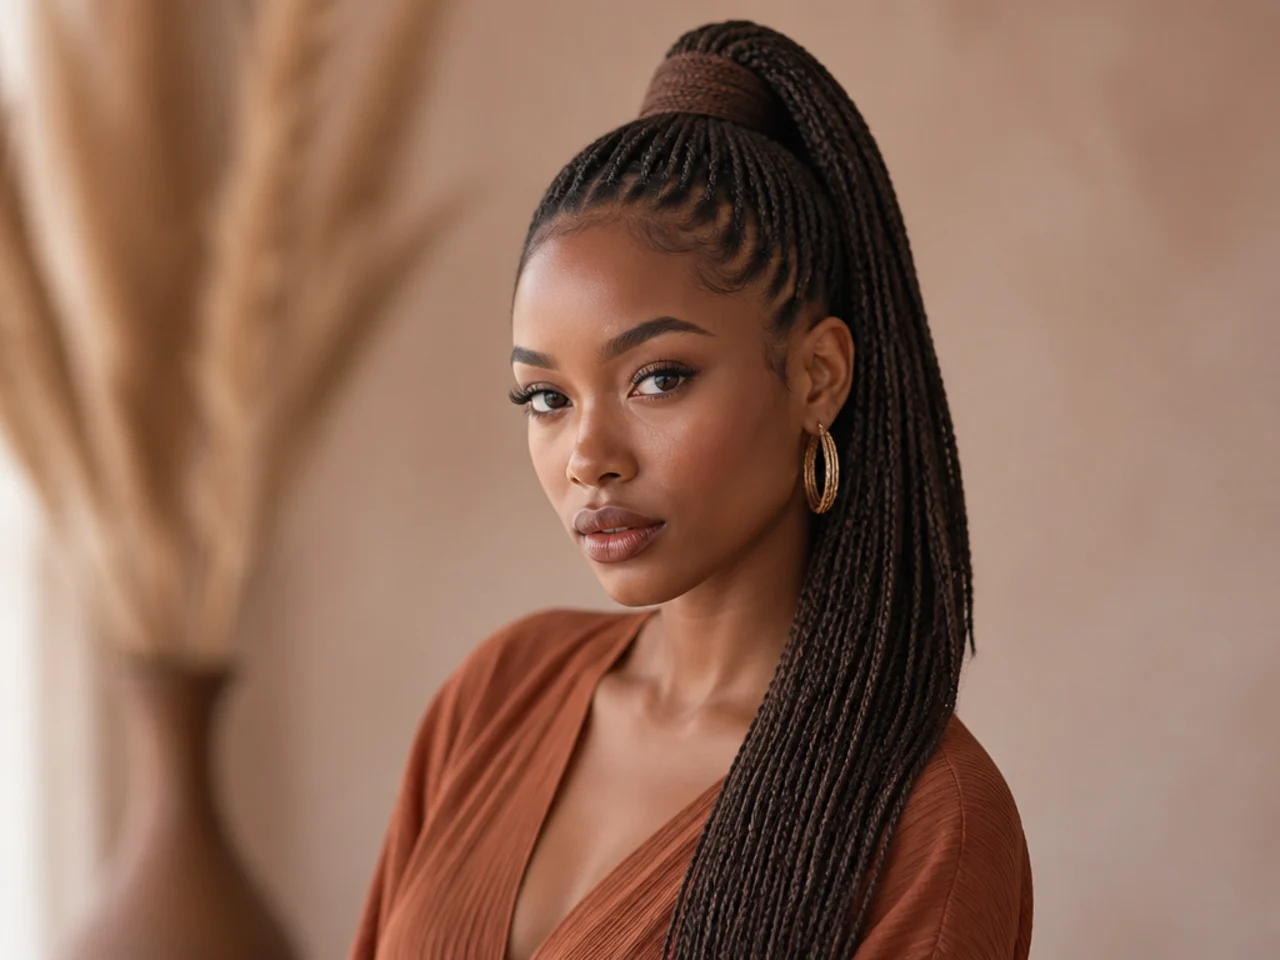
Full-head micro braids gathered into a high pony. It's the finer sister of a box-braid pony — thinner plaits, more of them, and the pony reads flowier from every angle. It suits three to four weeks of protective styling and photographs beautifully with movement.
Install micro braids fresh — the whole-head install takes six to ten hours with a braider. Gather all the braids to the crown and secure over a bungee tie. Wrap the base with five or six braids from underneath, tuck, and pin. Refresh the perimeter every three days with a light braid mist.
Stylist tip: never gather micro braids into a high pony while they're wet. Water weight quadruples the tension at the perimeter and snaps the shortest plaits. Air dry fully after wash day before you re-tie high. For scissor foundations that grow well under micro-braid rotations, our curly hair haircuts guide covers cutting cadences worth knowing.
13. Rope Twist Braid Pony
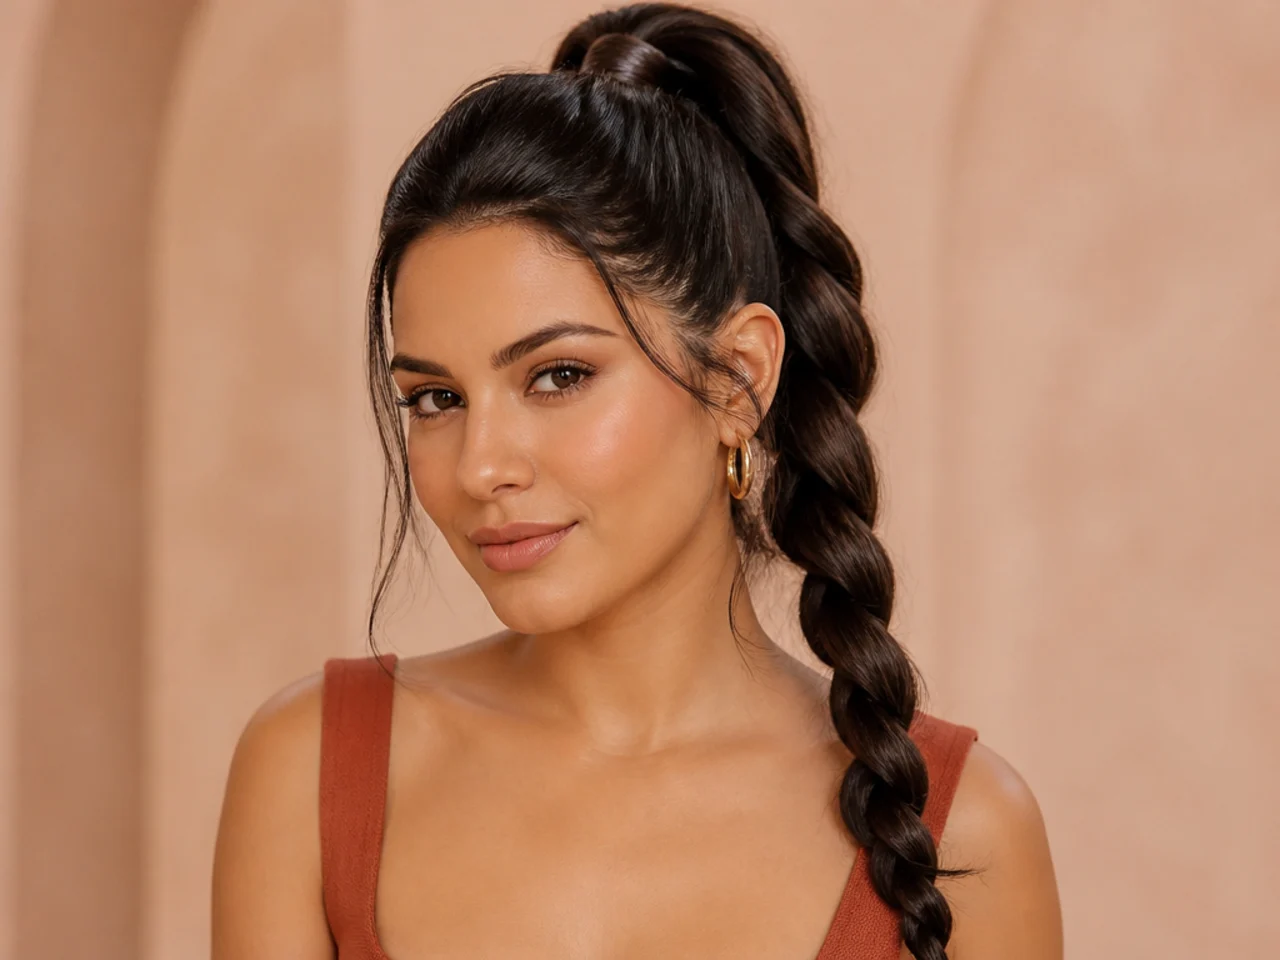
The rope twist replaces a three-strand braid with something more sculptural — two thick sections wound around each other with opposing tension. It suits straight and wavy hair; coily textures need more grip to hold the twist all day.
Tie a snatched high pony. Split the tail in two. Twist each half clockwise as tightly as you can. Then wrap the two twisted sections around each other in the opposite direction — counter-clockwise. The opposing tensions lock the rope shape in place. Secure with a clear elastic.
Stylist tip: work a smoothing cream into the tail before you twist, not gel. Gel makes the strands slippery and the rope unravels within an hour. Cream gives you the grip you need for the twist to hold shape from morning to night.
14. Pull-Through Braid Pony
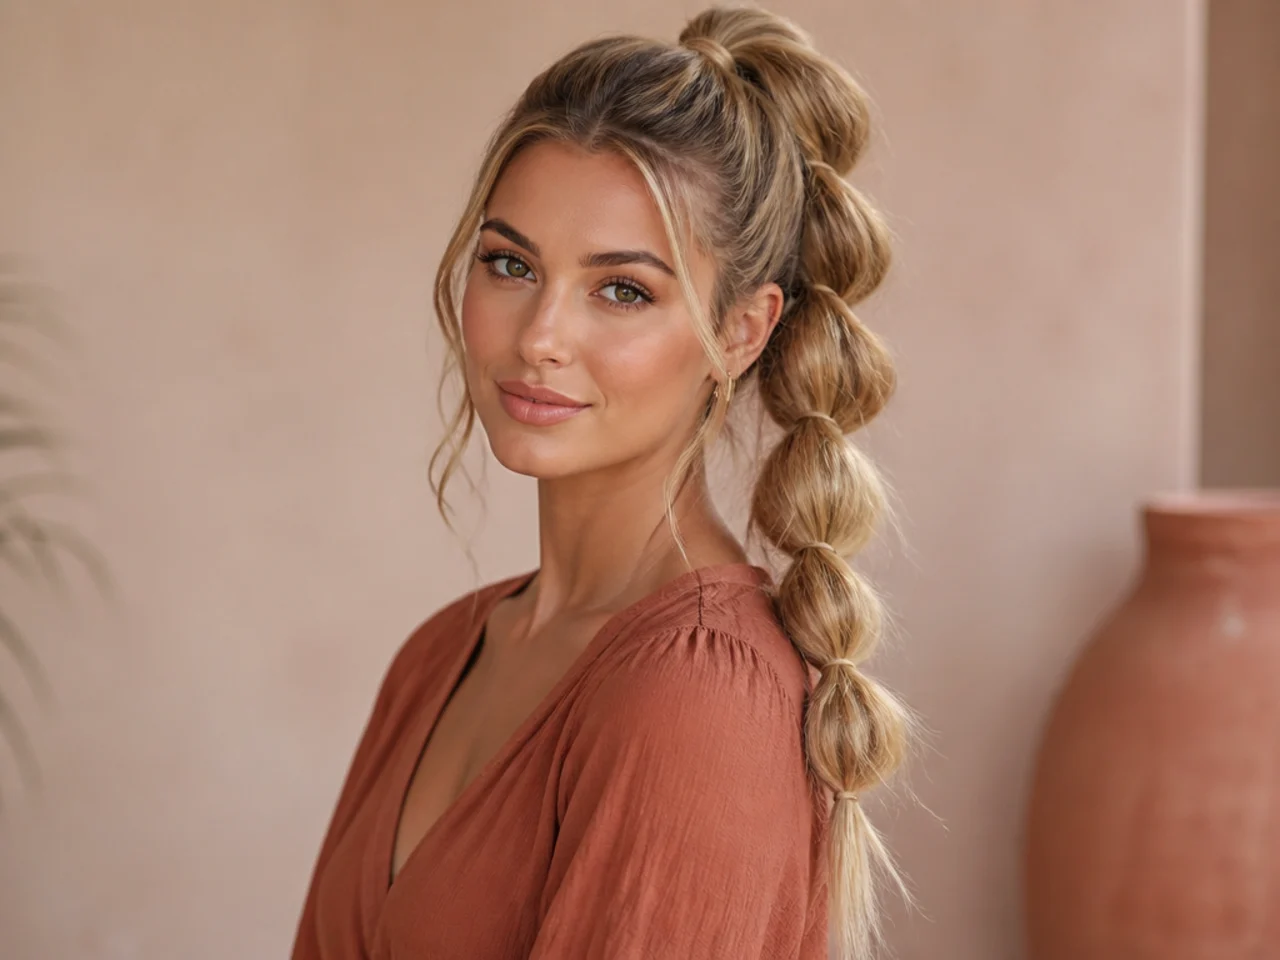
The pull-through fakes a braid with elastics and finger work — no actual plaiting involved. It suits beginners, thick hair that fights a real braid, and anyone who wants intricate texture with minimum skill.
Tie a high pony. Two inches down the tail, tie a second clear elastic. Split the section above it in half and flip the upper half over the lower — that's the "pull-through." Tie a third elastic another two inches down. Repeat the split-and-flip. Continue to the ends. Pancake each loop outward for volume.
Stylist tip: point the elastics down as you tie each one, then flip the section up over the elastic. It hides the band behind the fake braid loop so the plait reads seamless. A drop of dry oil rubbed only over the outside of the ponytail makes the whole braid glow.
15. Reverse French Braid Pony
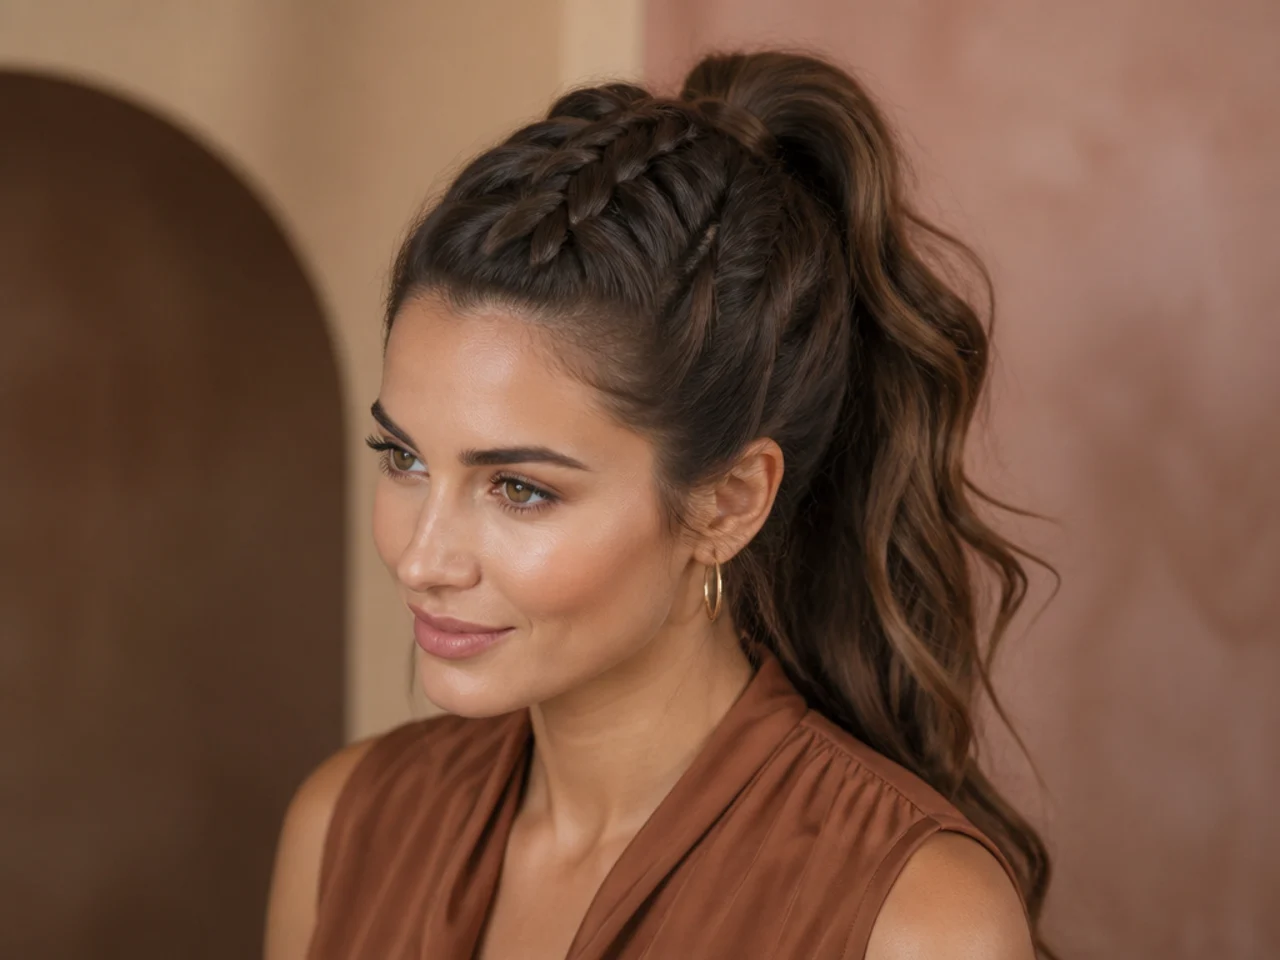
The upside-down French braid keeps the nape flat and moves all the visual weight up to the crown. It suits active days when a loose pony would slide out by noon — the braid at the back holds the whole structure taut.
Flip your head forward. Start a French braid at the nape and work upward, adding hair from each side of the section on every pass until you reach the crown. Flip your head back up and gather everything remaining — plus the ends of the braid — into a high pony over a satin scrunchie.
Stylist tip: dry-shampoo the nape before you braid. Freshly washed hair at the neck is too slippery to hold a French going upward, and the braid loosens within ninety minutes. Dry shampoo gives you the grip to lock the plait against gravity.
16. Faux Loc High Pony
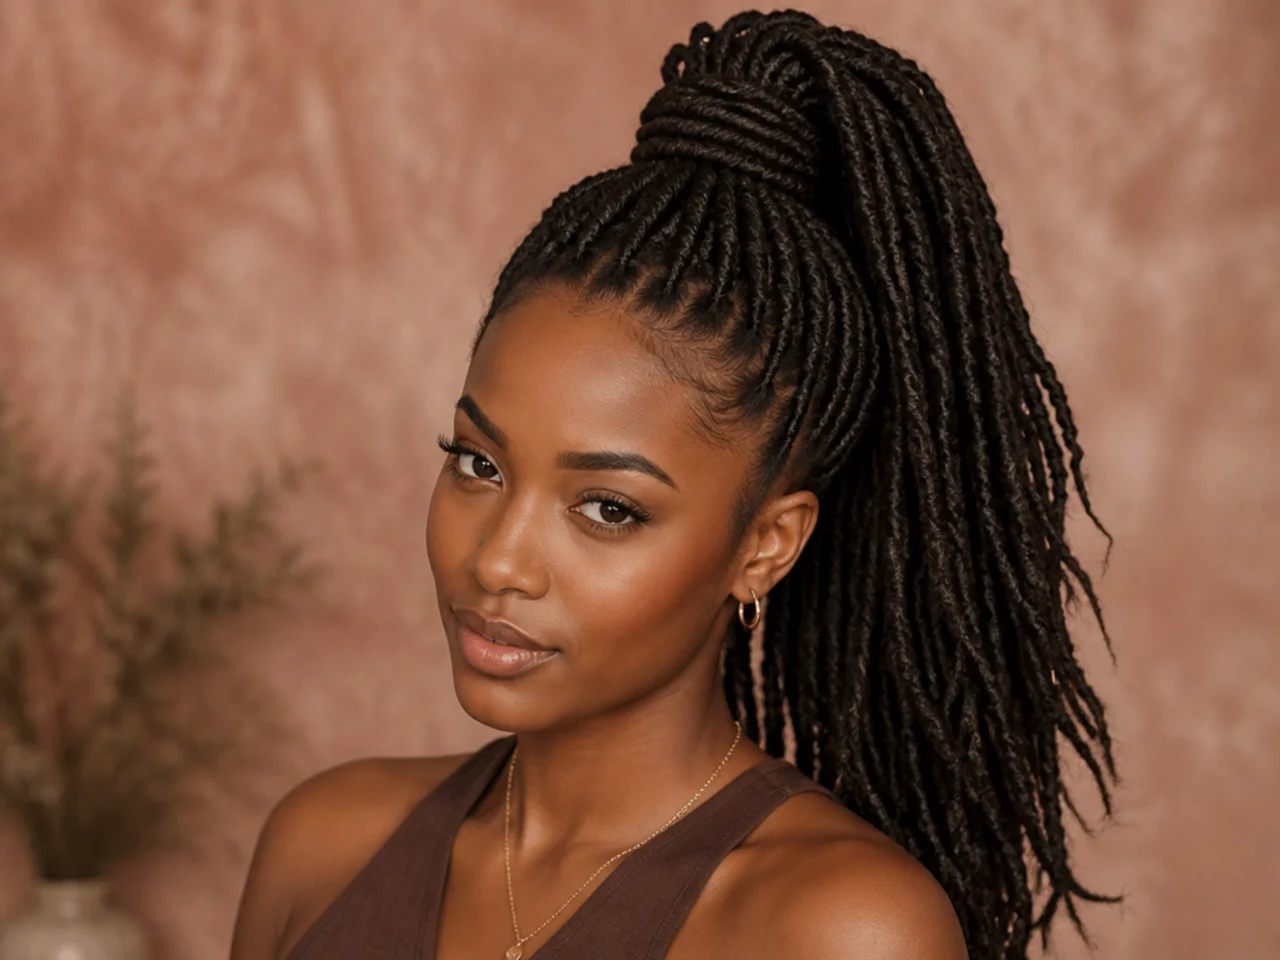
Full-head faux locs gathered into a wrapped high pony. It suits four to six weeks of protective styling and reads bold in every setting — office, wedding, festival, red carpet. Length runs shoulder to hip.
Install faux locs fresh or restyle a two-week-old install. Gather all the locs to the crown and secure over a bungee. Take four or five locs from underneath and wrap them around the base, tucking the ends under and pinning with a hairpin driven up toward the scalp. Lay the perimeter with edge control and a boar-bristle brush.
Stylist tip: faux locs are heavy — the crown carries the weight, so distribute it. Cross two bobby pins under the elastic in an X to give the base a structural splint. Refresh the roots every ten days with a lightweight scalp oil so the install stays comfortable for the full run.
17. Braided Wrap Base Pony
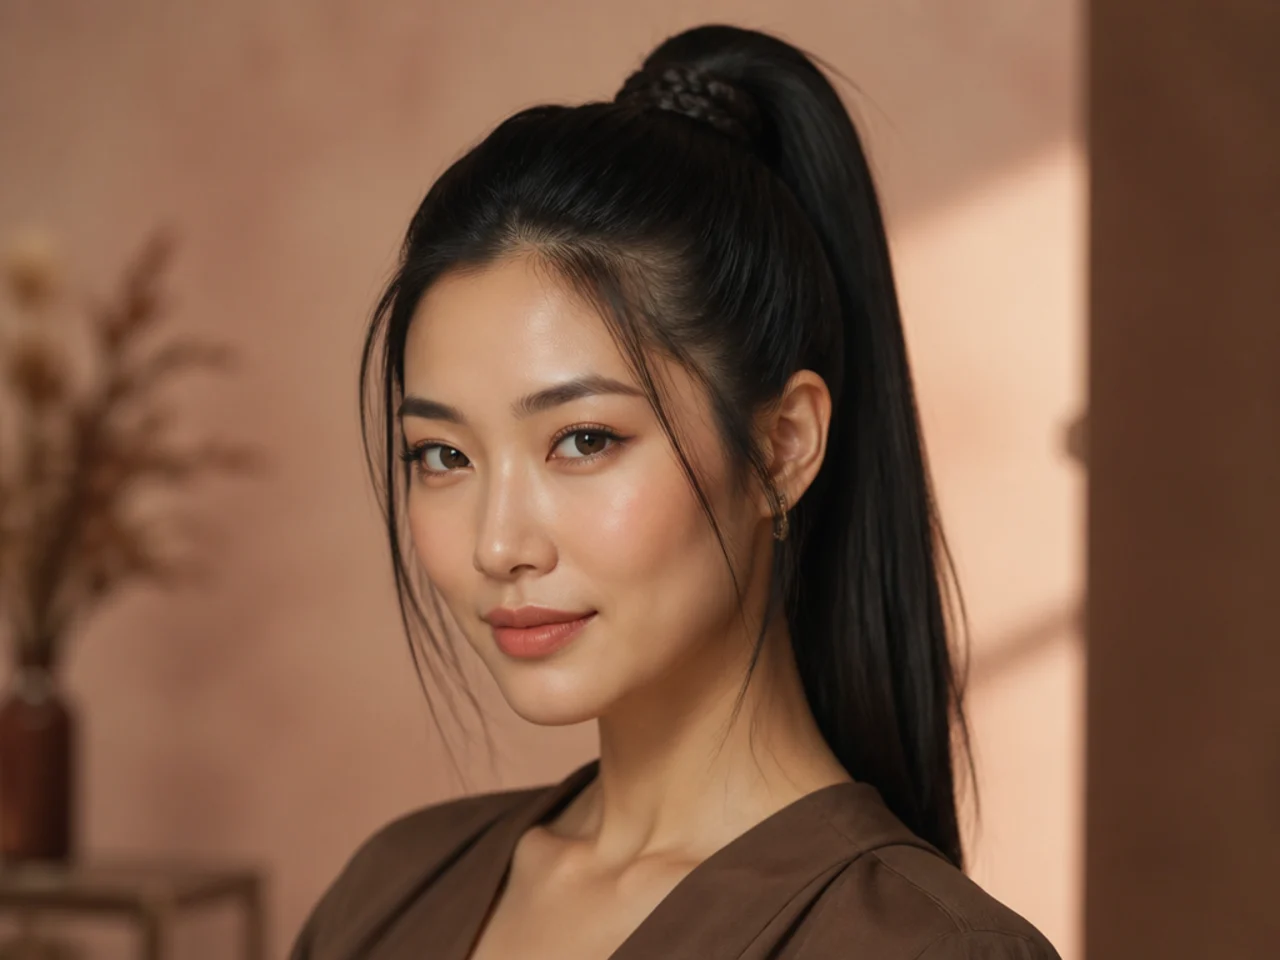
The simplest braid version — a single three-strand plait wraps the elastic to hide it and add a subtle textured rim. It suits beginners, minimalist looks, and anyone who wants "styled" without hardware or drama.
Tie a snatched high pony over a satin scrunchie. Take a half-inch section from underneath the tail. Braid it into a tight three-strand plait for as long as your hair allows. Secure the end of the braid with a clear mini-elastic. Wind the finished braid clockwise around the elastic. Tuck the end under and pin with a bobby pin pushed up toward the scalp.
Stylist tip: mist the braid with a fine light-hold hairspray before you wrap. The plait grips the elastic and stays flat all day. For the same wrap trick without the plait, our sleek high ponytail hairstyles guide covers the plain-wrap version.
18. Feed-In Braid High Pony with Extensions
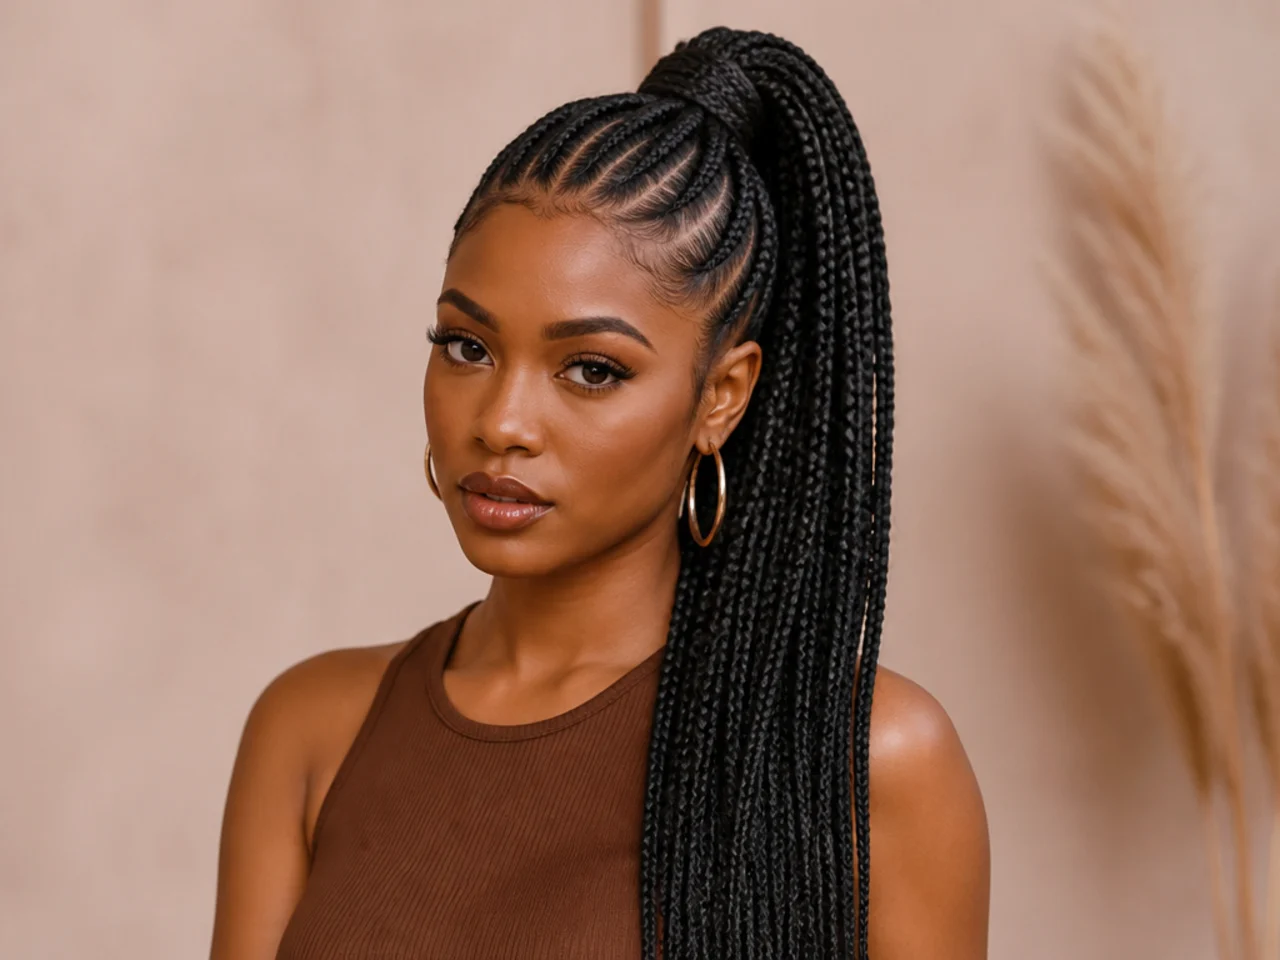
Cornrows fed with extension hair as they braid — the added density is what gives the pony its exaggerated length and thickness. It suits protective-style rotations and gives the "installed" pony look without a wig cap.
Book with a braider. Section the head into six to ten straight-back or shape-following rows. Feed a small amount of extension hair into the plait every one to two inches so the braid thickens gradually — that's the "feed-in." Braid each row from the front to the crown. Gather all rows and extension ends into a high pony over a bungee.
Stylist tip: match the extension color to your ends, not your roots. Roots hide under the pony wrap; ends show in every photo. For companion product guidance on lightweight sealing oils and refresh sprays that keep the install fresh for its full run, see our best wavy hair products roundup for compatible lightweight options.
19. Half-Up Braided Crown Pony
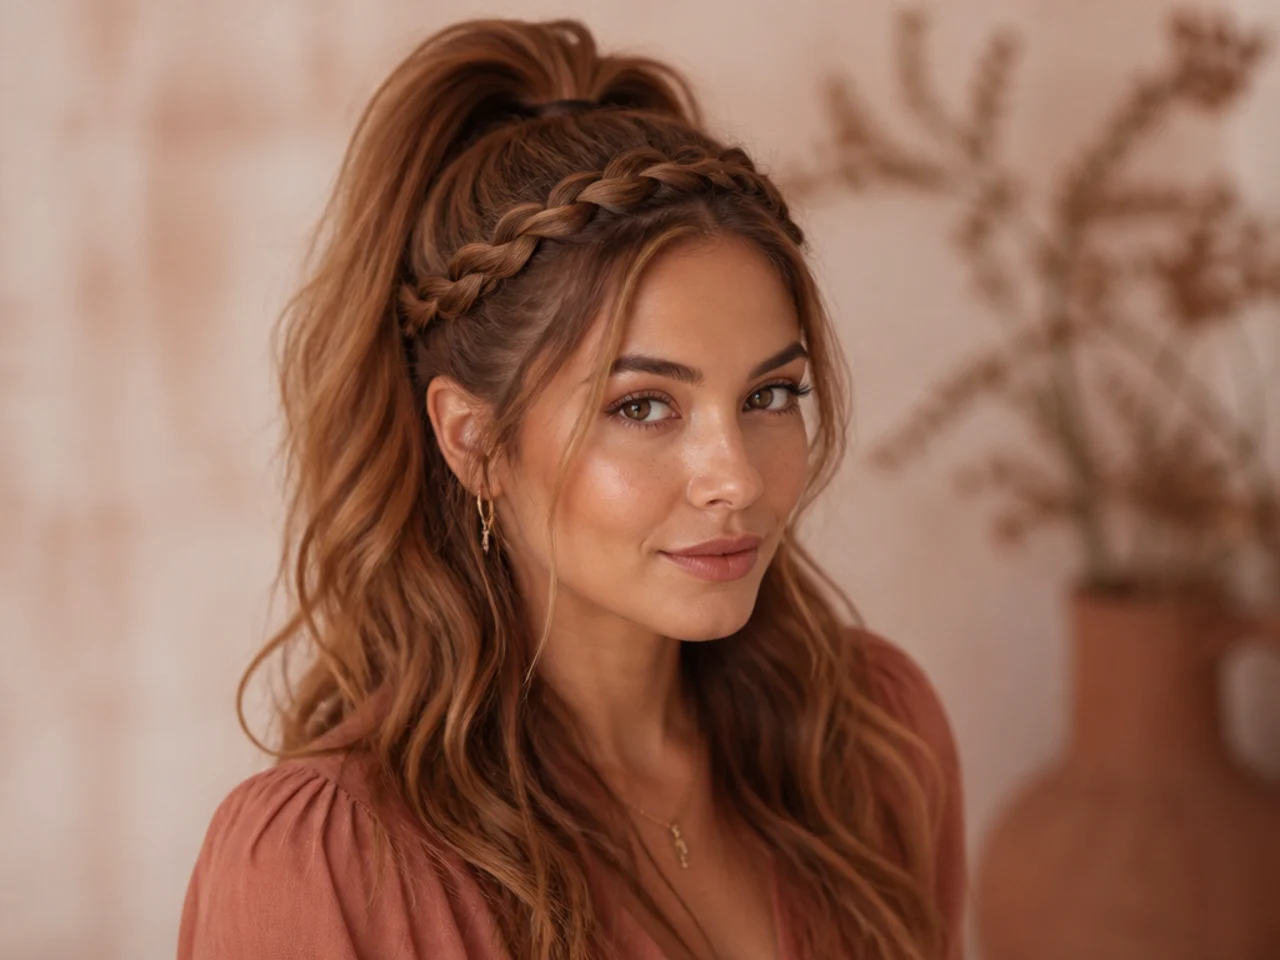
A thin braid runs across the top of the head like a crown, gathering the upper half into a high pony while the lower half falls loose. It suits medium and long hair worn out with a controlled front, and reads garden party to boho wedding.
Section the hair horizontally at the ear line. Take a small section from one temple, French or Dutch braid it across the top of the head to the opposite temple. Gather the braid plus everything above the ear line into a high pony over a satin scrunchie. Leave the lower half loose — waved, straight, or in its natural pattern.
Stylist tip: flat-iron or wave the lower half after you tie the top. Pre-styled hair tangles under the braided crown. Post-tie styling keeps the lower half looking intentional against the polished upper structure.
20. Cornrow Front + Curly Puff Pony
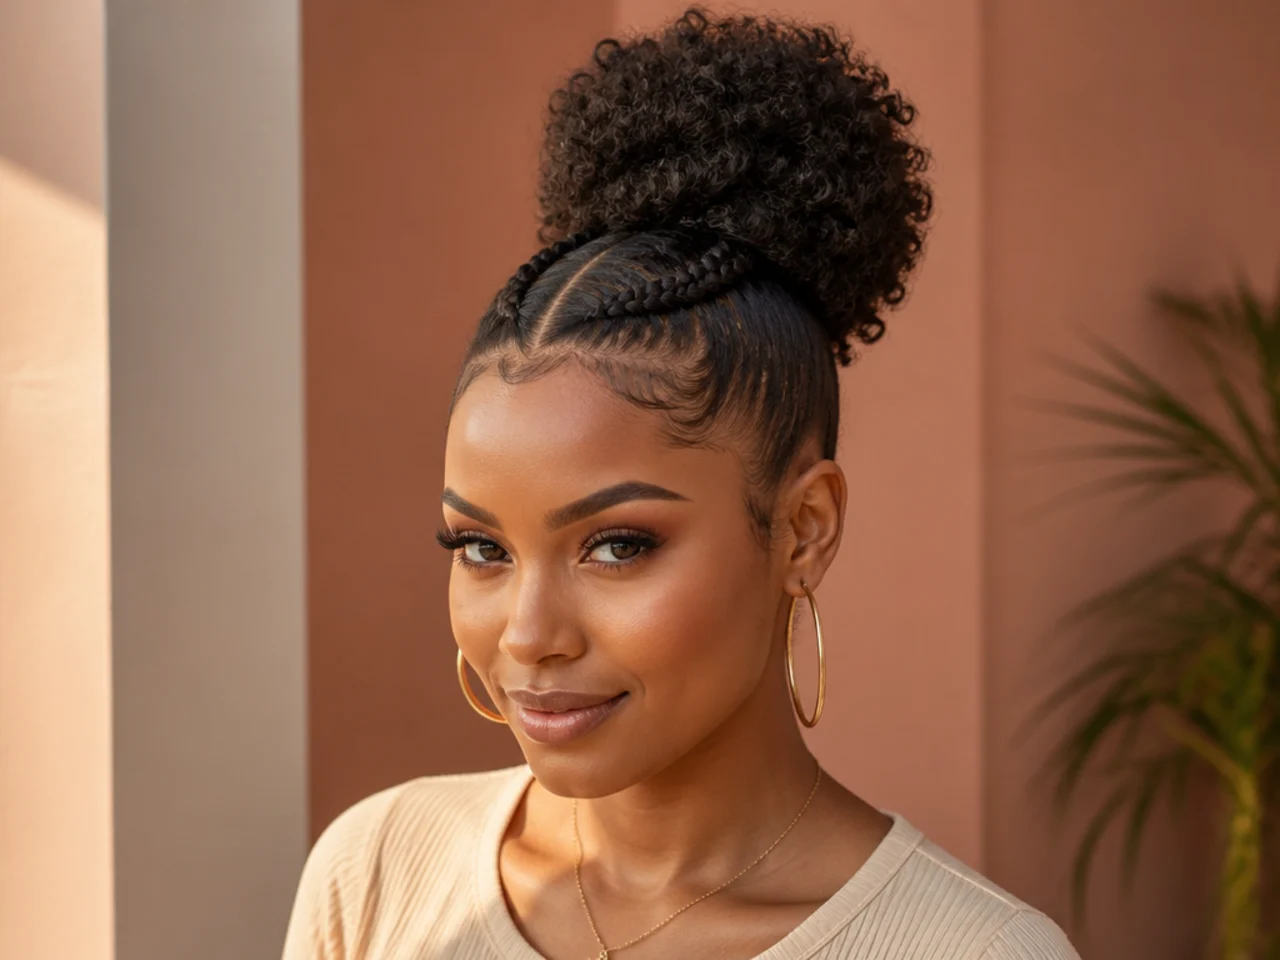
Two or three straight-back cornrows across the front of the head meet a natural coily puff at the crown. It's the two-textures version — sculpted at the front, free and curly at the back. It suits wash days, second-day hair, and celebrating your texture with a structural front.
Braid two or three cornrows from the front hairline to the crown along the top of the head. Leave the back and sides in their natural pattern — freshly twist-outed or in a fresh wash-and-go. Gather everything at the crown into a puff pony over a satin scrunchie. Refresh the puff with a curl mist so the coils bounce against the smooth cornrows.
Stylist tip: cornrow on damp hair set with a stretching cream so the plaits lie tight against the scalp. Dry coils fluff into fuzzy cornrows within hours. For deeper curl-pattern-specific product weight guidance, our curl types guide covers exactly which formulas hold coily textures without weighing them down.
How to Ask Your Stylist for a Braided High Pony
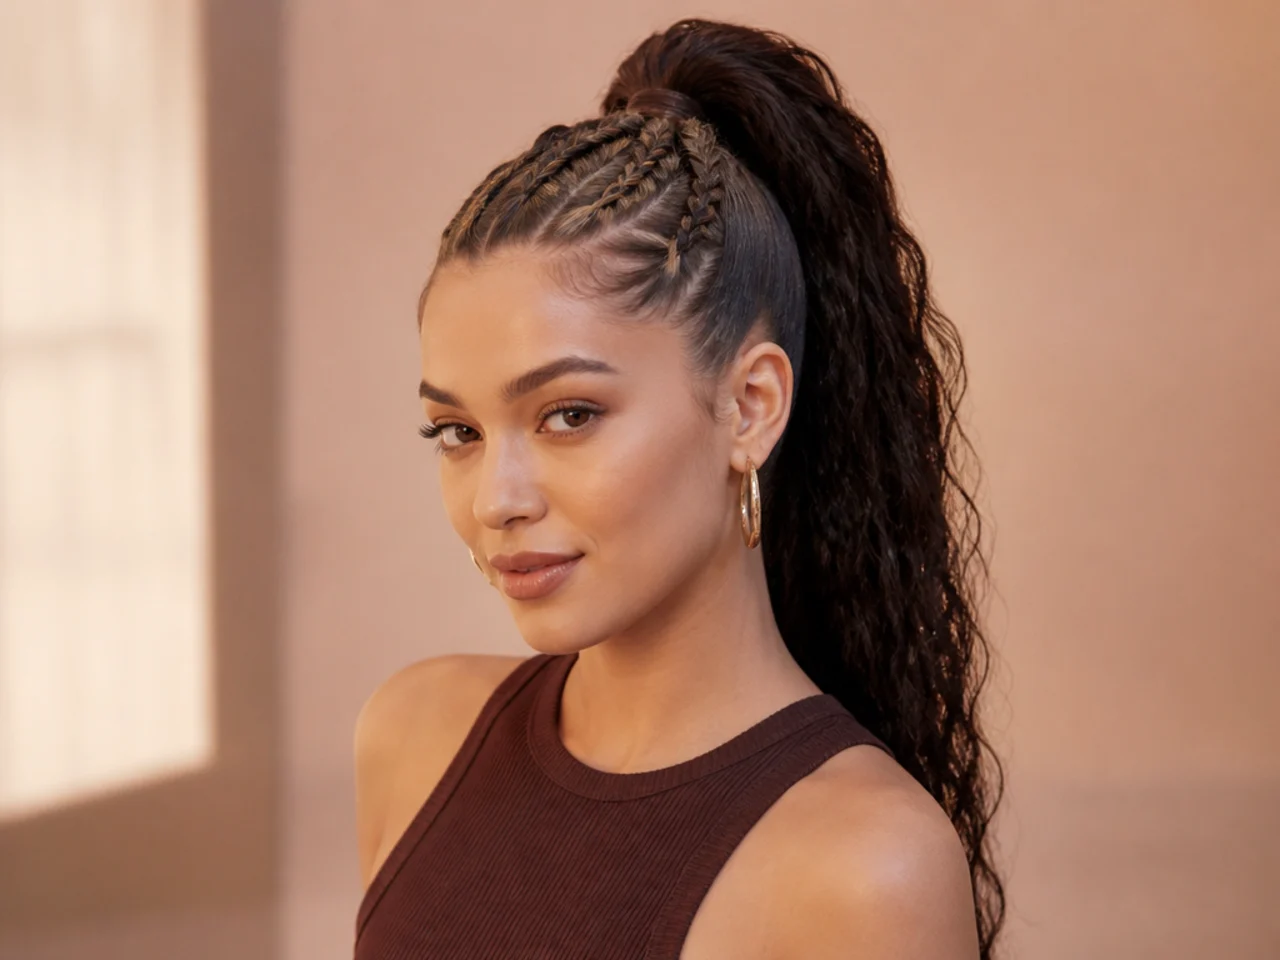
Bring pictures. The name of the braid changes salon to salon — the photo doesn't lie. Then walk through these steps at the chair.
- Show two or three reference images — front, back, and side if possible. Confirm the placement (crown vs. above the ear) and the braid type (French, Dutch, fishtail, box).
- Name the base finish — sleek and glassy, wet-look, low-tension soft-brushed, or natural puff. Each demands different products and prep.
- Confirm the tension — snatched-and-tight, mid-hold, or low-tension. Tell your stylist if you have thinning at the temples or a history of headaches.
- Discuss extensions — clip-in, sew-in, feed-in cornrow, or none. Bring the extensions in advance so tone and length get matched under salon light.
- Match the accessory — beads, cuffs, ribbon, wire, or unadorned. Bring what you plan to wear and lay it out at the station.
- Ask about the wear window — a single-day style washes out with tonight's shampoo; a box-braid or faux-loc pony holds three to six weeks. Confirm the maintenance appointment before you leave.
- Confirm the trim cadence — every eight to ten weeks under braided rotations, sooner if you see fraying at the tail from friction on pillowcases.
Styling and Maintenance
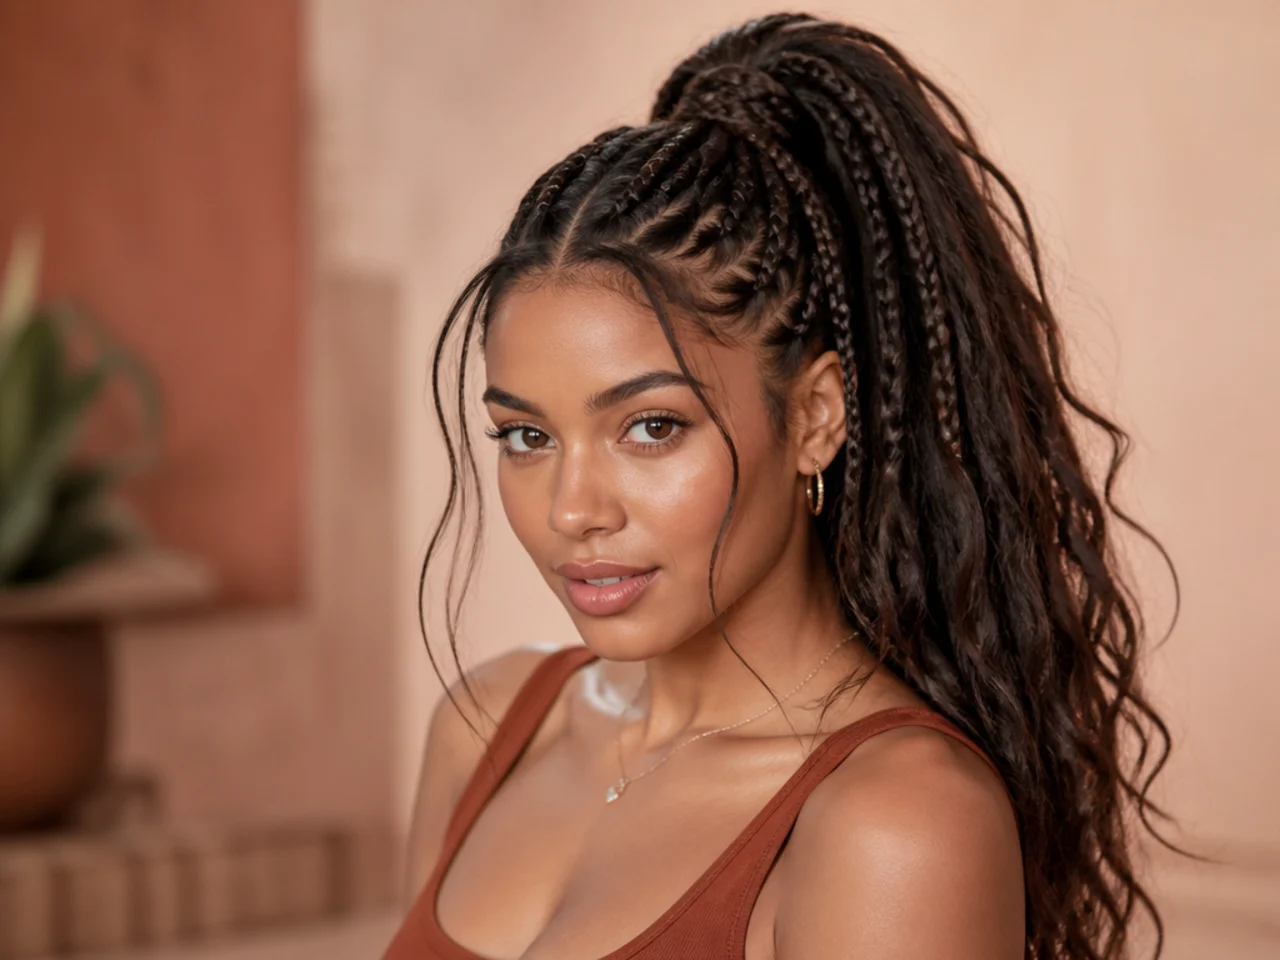
The braided high pony lives or dies at the base. Get the prep right and any of the 20 variations above lands snatched.
Prep the perimeter with a strong-hold edge gel and a boar-bristle brush. Work in short strokes toward the crown. Tie over a satin scrunchie under any coated elastic — it spreads tension across a wider surface and stops the ridge of broken hair that develops at the tie line. For sleek variations, mist a light-hold hairspray twelve inches away to seal. For textured or coily variations, refresh with a curl mist or water-and-leave-in blend rather than dry-brushing.
At night, swap the elastic for a silk scrunchie and pineapple the tail on top of your head under a satin bonnet. Sleeping in the same tight elastic breaks hair at the tie point within weeks. Sleeping in a bonnet extends the life of a box-braid or feed-in pony from two weeks to four.
Wash on your normal cadence for single-day styles. For multi-week braided installs, shampoo the scalp only with a diluted cleansing formula through a squeeze bottle every seven to ten days — never rub the length. Follow with a lightweight leave-in and a scalp oil massaged into the parts.
If you wear a braided high pony more than three days a week, rebook a trim every eight to ten weeks. Ends fray fast in a pony from friction on pillowcases and clothing, and a fresh trim keeps the tail sitting cohesive at the base of the plait. For choppy, textured end shapes that photograph better in a pony, our how to get choppy ponytail hair guide covers the point-cutting cheat worth asking for.
FAQ
Which braided high pony holds the longest?
Feed-in cornrow ponies and box-braid ponies hold the longest — three to six weeks with proper maintenance. Single-day styles — French, Dutch, fishtail, wrap-around — wash out with tonight's shampoo but can be re-styled in twenty minutes the next morning.
Do I need long hair for these styles?
Shoulder-length holds every version above except the jumbo braid tail and the long feed-in styles. For fishtail, French, Dutch, and wraparound looks, shoulder-length is the floor. Chin-length hair can carry a mini high pony with a small wrap-around braid but won't take a full braided tail.
Which braid works best on fine hair?
Pull-through and pancaked French. Both fake density without fighting the strand count — the loops and pull-throughs create visible width from very little hair. Skip the tight three-strand rope; it emphasizes how thin the tail is.
Can I sleep in a braided high pony?
Only on a satin pillowcase or under a bonnet, and only if the base is loose enough to slide a fingertip beneath. Tight bases sleep-crushed at the crown break hair overnight. For multi-week installs, always sleep with a satin bonnet.
What's the fastest braided high pony?
The wrap-around braid base. Total time is under two minutes — a snatched high pony, one small braid pulled from underneath, wound around the elastic, pinned. It hides the elastic and reads finished from every angle without asking for French braid skills.
How do I keep a braided high pony from giving me a headache?
Switch to a bungee tie instead of a coated elastic — you control the tightness as you wrap. Loosen the perimeter by a quarter inch after tying. And rotate: alternate a high pony one day with a low bun the next so the same follicles aren't loaded two days running. For lower-placement alternatives that skip crown tension entirely, our low updo hairstyles guide covers softer options worth wearing on rest days.