
20 Layered Jellyfish Haircut Ideas
Twenty layered versions of the stepped cut, and the trade nobody explains. Layers add movement to the lengths and quietly close the gap from below, so where the layering starts decides whether you still have a jellyfish at the end of it.
In this article · 28
- What Is a Layered Jellyfish Haircut
- Where the Layers Go
- Jellyfish Versus Wolf Versus Mullet Versus Shag
- Who Suits a Layered Jellyfish
- Styling the Bell and Layered Tentacles
- Growing It Out and Asking for It
- The 20 Layered Jellyfish Ideas
- 1. Long Layers Under a Blunt Bell
- 2. Short Stacked Layers
- 3. Invisible Internal Layers
- 4. Razored Ends on the Lengths
- 5. Face Framing Layers Only
- 6. Curtain Bangs
- 7. Point Cut Bell
- 8. Heavy Layers for Thick Hair
- 9. Minimal Layering for Fine Hair
- 10. Medium Collarbone Length
- 11. Wavy Hair
- 12. Curly 3A Hair
- 13. Cheekbone Bell
- 14. Waist Length
- 15. Double Tier Butterfly Blend
- 16. V Shaped Perimeter
- 17. U Shaped Perimeter
- 18. Two Tone Colour
- 19. Undercut Nape
- 20. Partial Disconnection
- Final Thoughts
Layering a jellyfish cut is the fastest way to lose one, and the fastest way to make one wearable. It depends entirely on where the layers start.
Layers close the gap from below. Cutting into the top of the long tier raises its shortest point, which narrows the distance between the two hems without a single inch coming off the bell.
Everything below the mid lengths is free. Layers cut from there down add movement to hair that has none, and the step above them never notices.
What Is a Layered Jellyfish Haircut
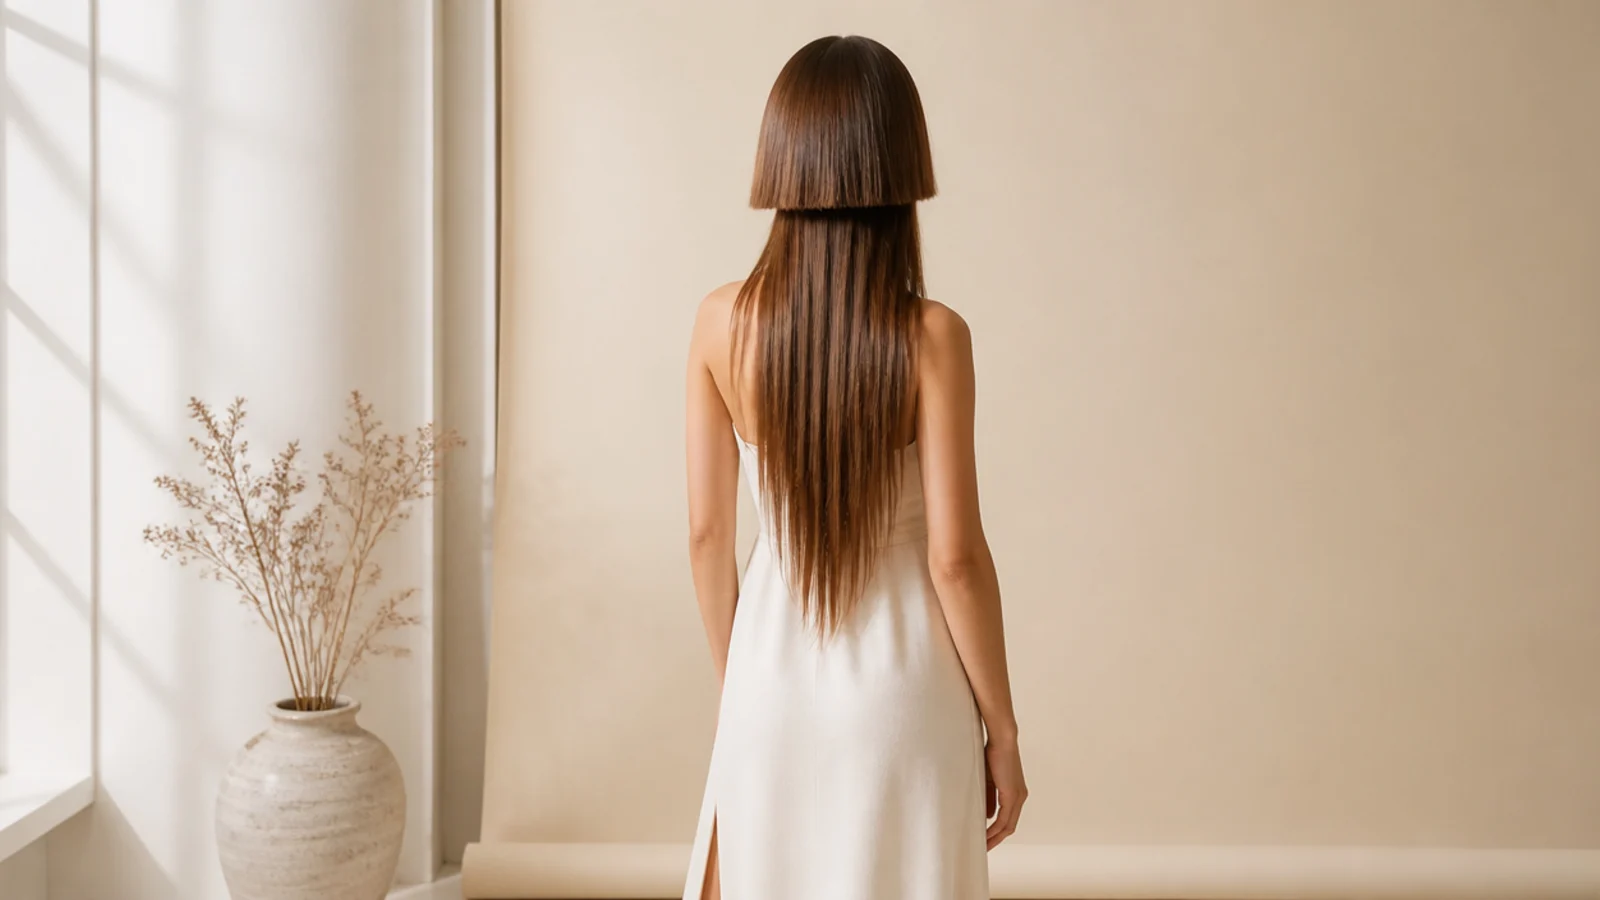
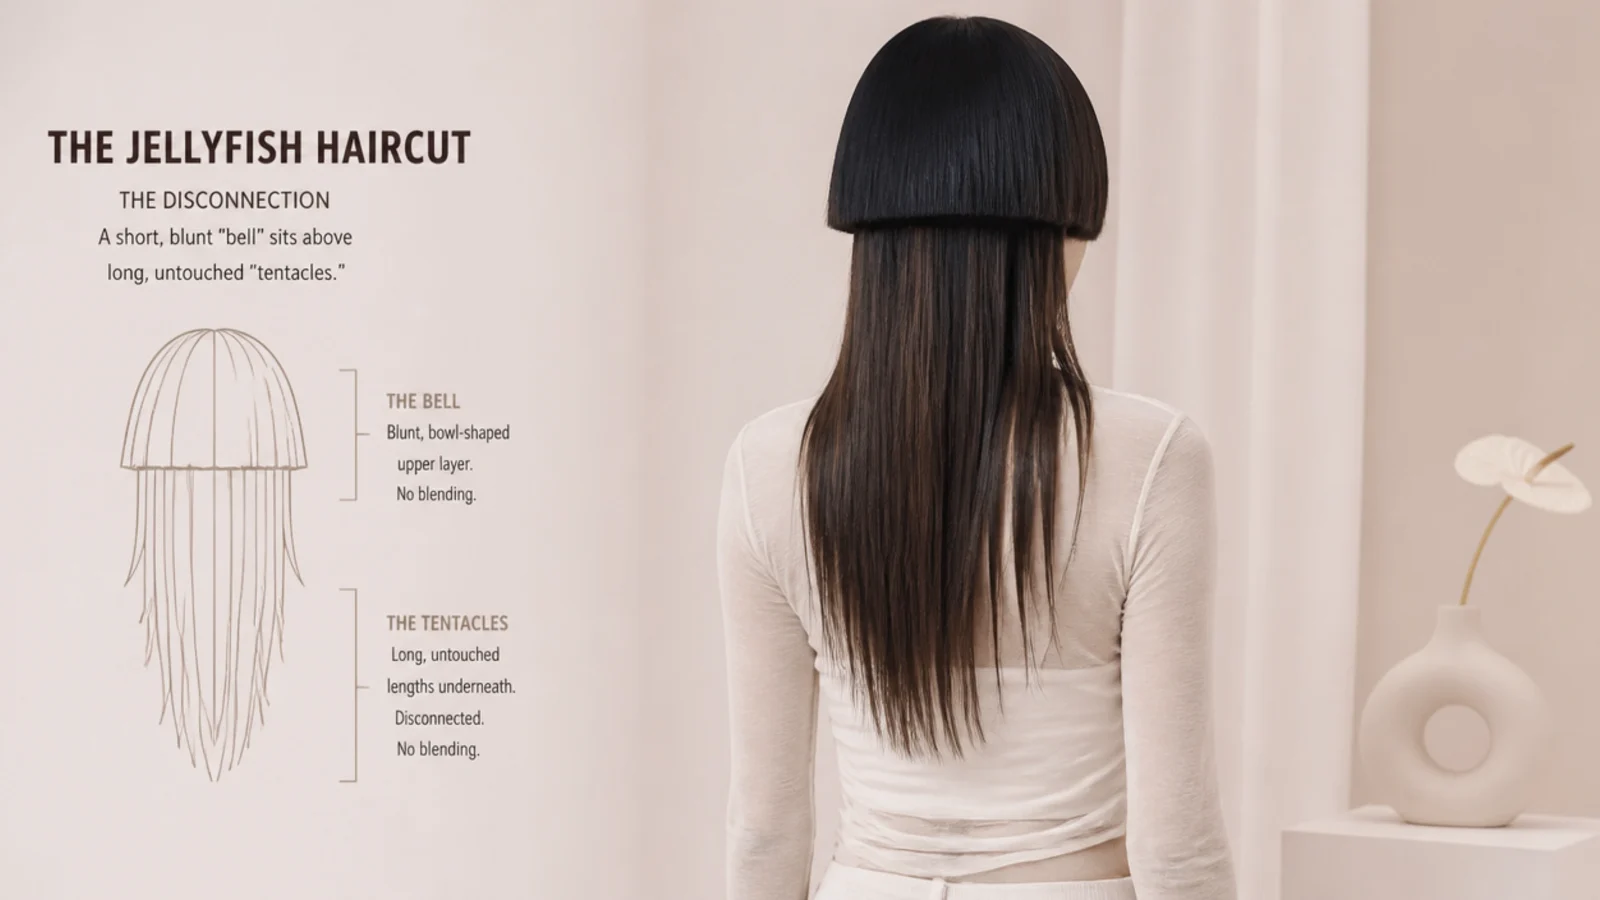
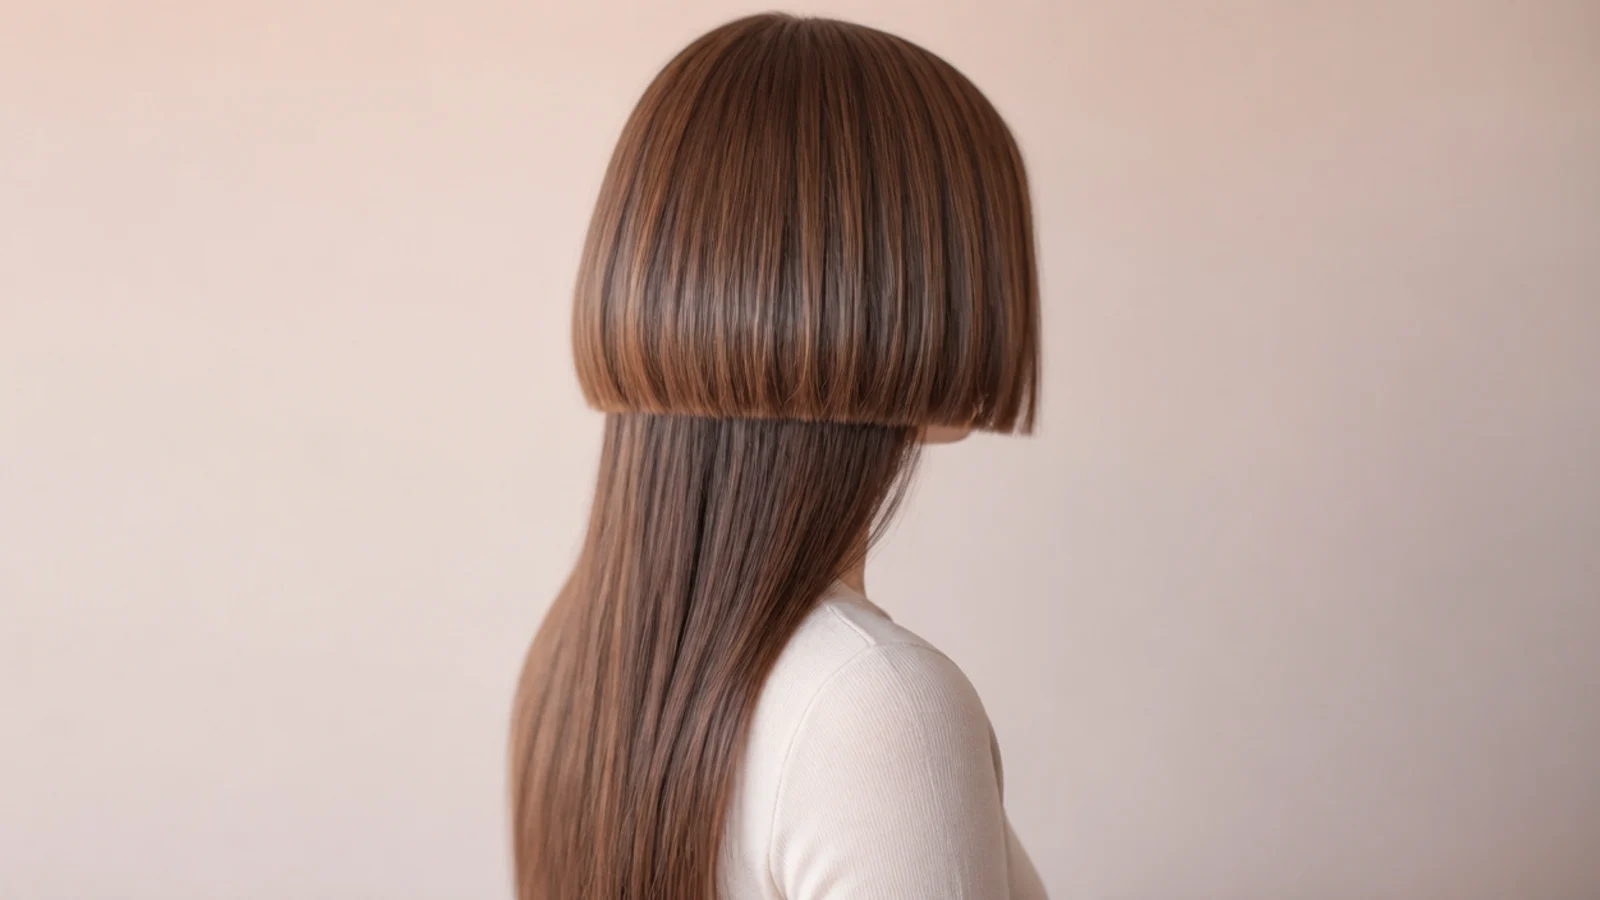
It is the stepped cut with movement added underneath. A short blunt upper tier over long lengths, with layers cut into those lengths rather than left as one solid mass.
The step still has to survive. If the layering softens the boundary between the tiers, what you have is a wolf cut, whatever it was called when you booked it.
Two kinds of layer do two different jobs. Surface layers show movement. Interior layers remove weight and change how the hair hangs without touching the outline.
The bell can be layered too, but rarely should be. Its whole function is to hold one readable line, and a layered bell has no line left to hold.
Where the Layers Go
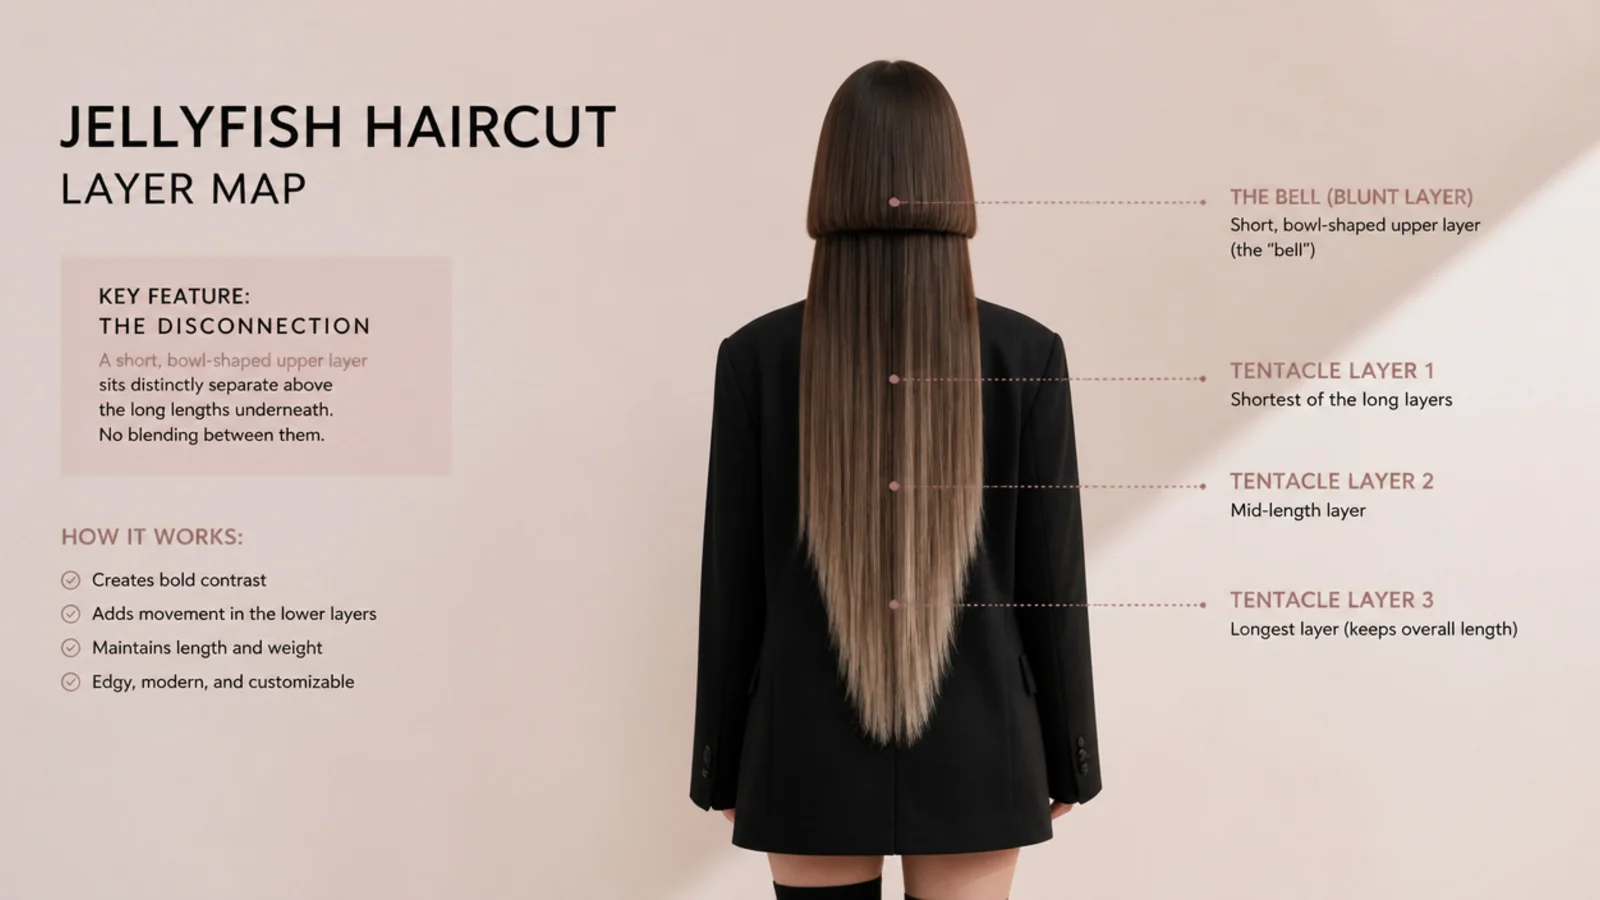
Never in the top third of the lengths. That is the zone that faces the bell, and any shortening there eats the gap directly.
Mid lengths downward is the safe zone. Layers starting below the chest add visible movement while the boundary above them stays exactly as cut.
Interior layers can start higher. Weight removed from underneath is invisible from outside, so it lightens the lengths without shortening the surface at all.
Face framing is a separate decision. Layers around the face sit in front of the bell rather than under it, so they change the frame without changing the step.
Jellyfish Versus Wolf Versus Mullet Versus Shag
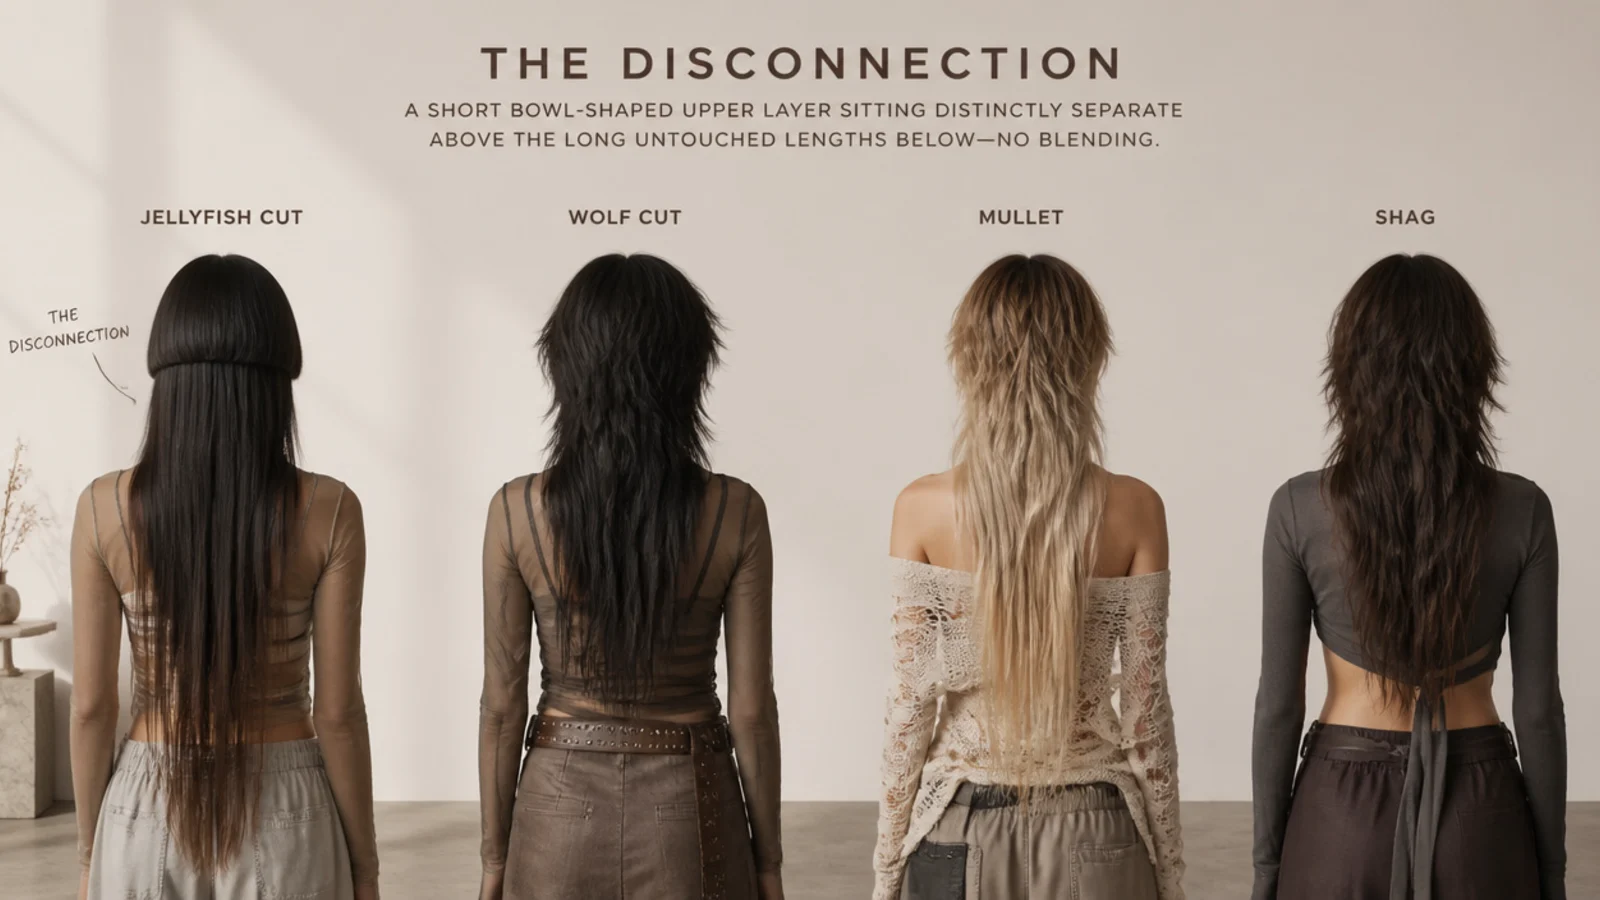
Jellyfish steps top to bottom. One short tier, one long tier, nothing joining them. It is the only cut of the four with a deliberate break in it.
Wolf graduates top to bottom. Same axis, no step. Short crown layers running smoothly down into long ends.
Mullet changes length front to back. Short at the front and sides, long behind. It reads from the side rather than from the front, which is the giveaway.
Shag layers everywhere and connects everything. Layers throughout plus a fringe, with no dominant direction and no hard edge anywhere in it.
Who Suits a Layered Jellyfish
Thick hair benefits most. The unlayered version leaves two solid masses on one head, and interior layers remove the weight that makes the lower tier sit like a curtain.
Fine hair needs restraint. Layering thin lengths spreads the same amount of hair across more ends, so the perimeter loses the density the blunt bell above it is trying to echo.
Wavy hair gets the most out of it. The bend already wants to move, and layers give it somewhere to go rather than fighting the weight of an unbroken length.
Hem placement still decides the face. A blunt bell puts a horizontal across your face regardless of what happens below it, so cheekbone, jaw or chin remains the first question.
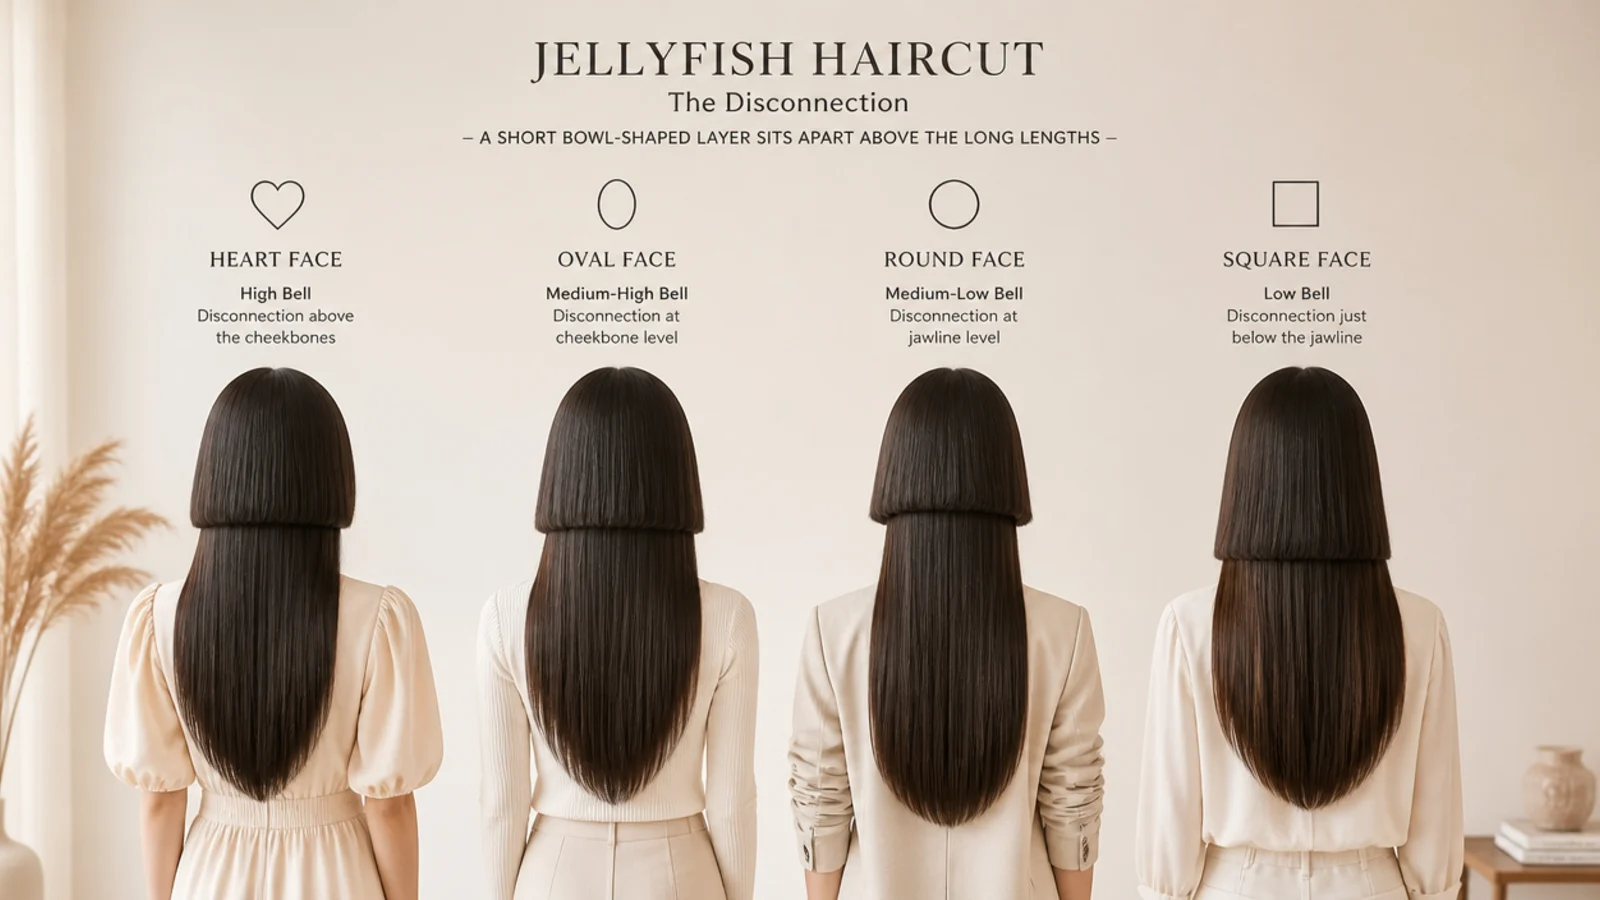
Styling the Bell and Layered Tentacles
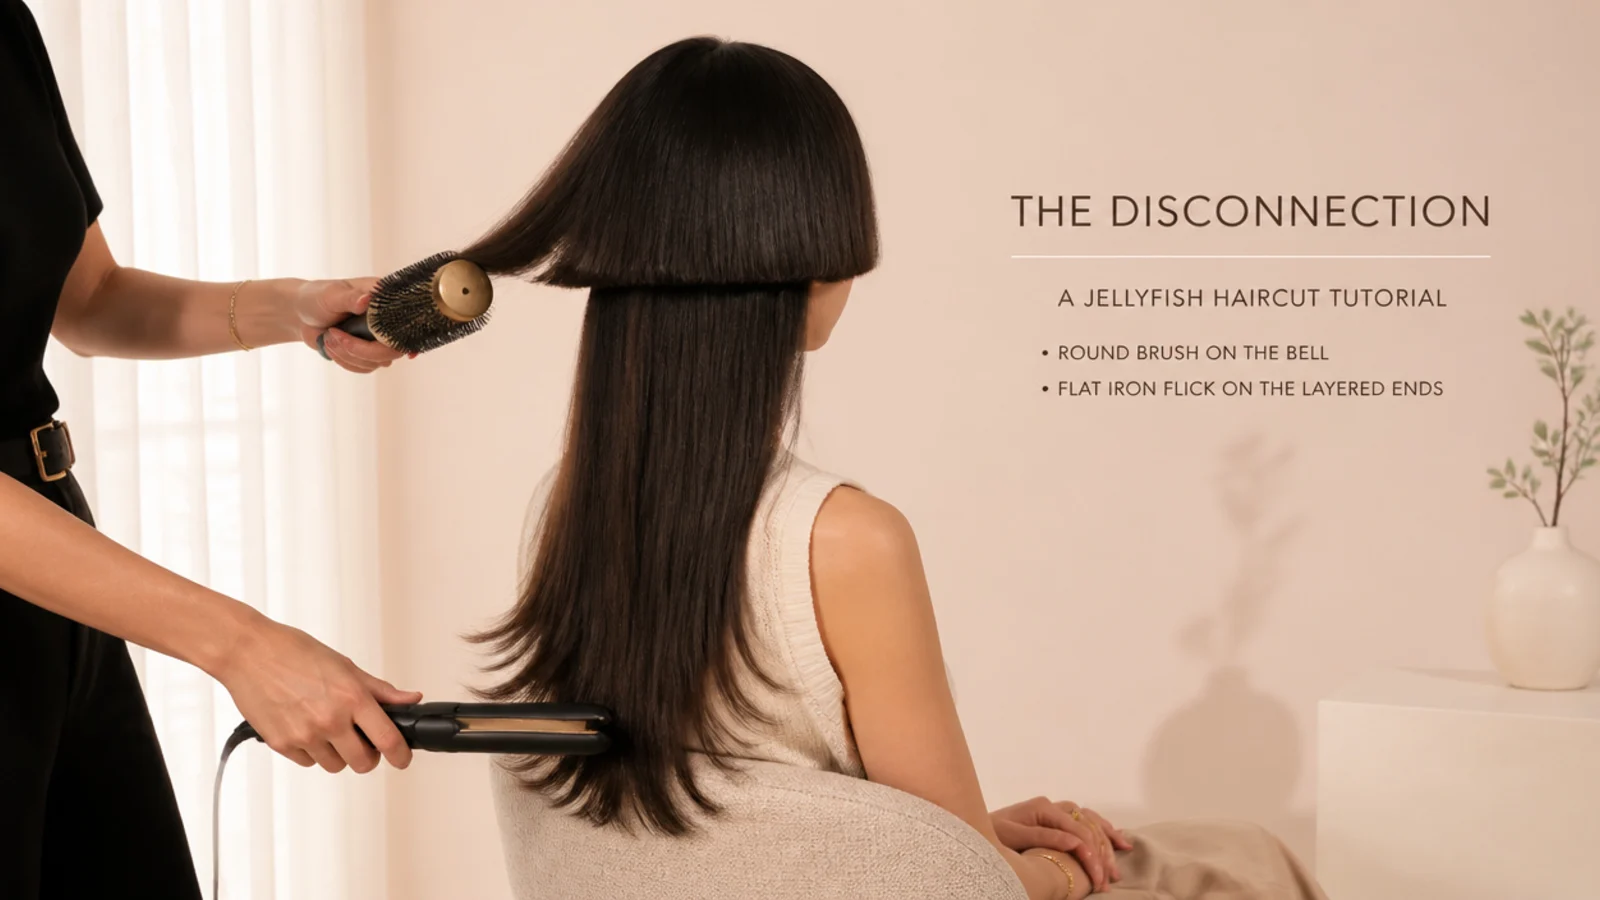
The bell wants heat and a brush. It is short enough to keep a set all day, and its hem is the only hard edge in the entire cut.
Layered lengths want a diffuser or fingers. Layers separate on their own once the weight is gone, and brushing them smooth pushes them back into a single sheet.
Product order matters more once layers are in. Texture spray through the lengths and a drop of serum on the bell. Reversed, each one undoes the other.
Do not texturise the bell. A roughened surface scatters light along the hem and removes the line that the layers below are meant to contrast against.
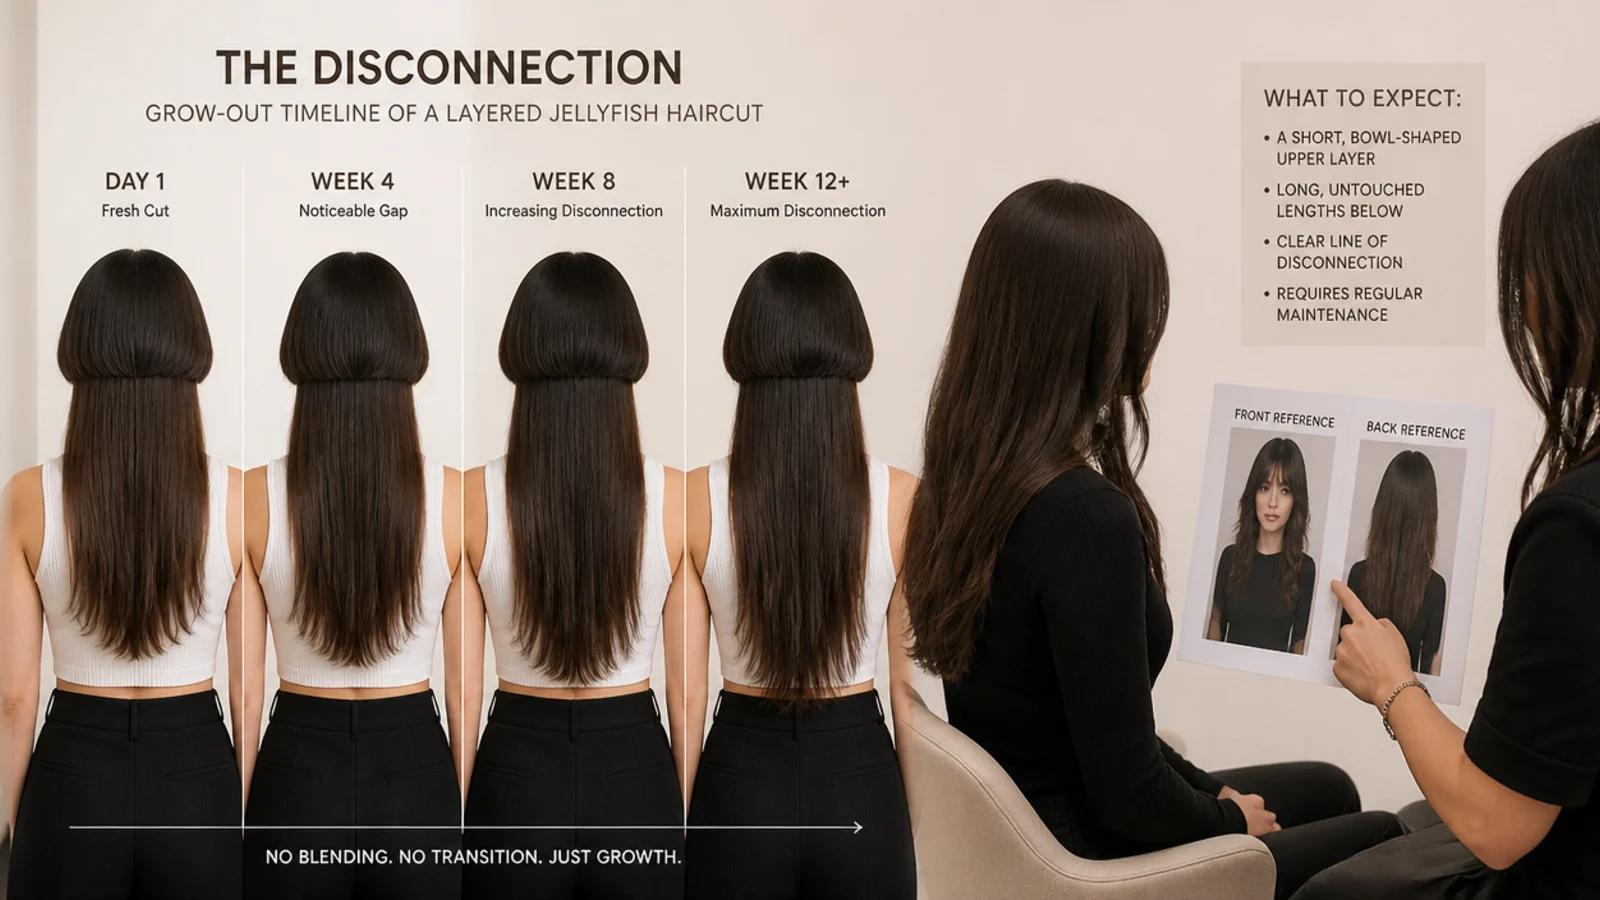
Growing It Out and Asking for It
Hair grows roughly half an inch a month. The bell drops about an inch and a half in three months, which is usually where a layered version stops reading as stepped.
Layers buy you time here. Because the lengths already move, the softening step blends into them rather than sitting awkwardly halfway.
Say disconnected at the top and layered from the mid lengths. Two instructions, in that order, both spoken before any sectioning starts.
Ask for interior layers by name. Weight removed from underneath is the request that gets you movement without losing an inch off the visible perimeter.
The 20 Layered Jellyfish Ideas
1. Long Layers Under a Blunt Bell
The safest combination there is, because long layers start low enough that the gap above them never changes. The bell keeps its hard line while the ends gain enough movement to stop the lower tier reading as a flat curtain.
2. Short Stacked Layers
Layers cut close together through the mid lengths build a stepped bulk that pushes the hair outward instead of down. It suits hair that hangs limp, and it is the wrong choice on anything already thick because the stacking adds width on top of density.
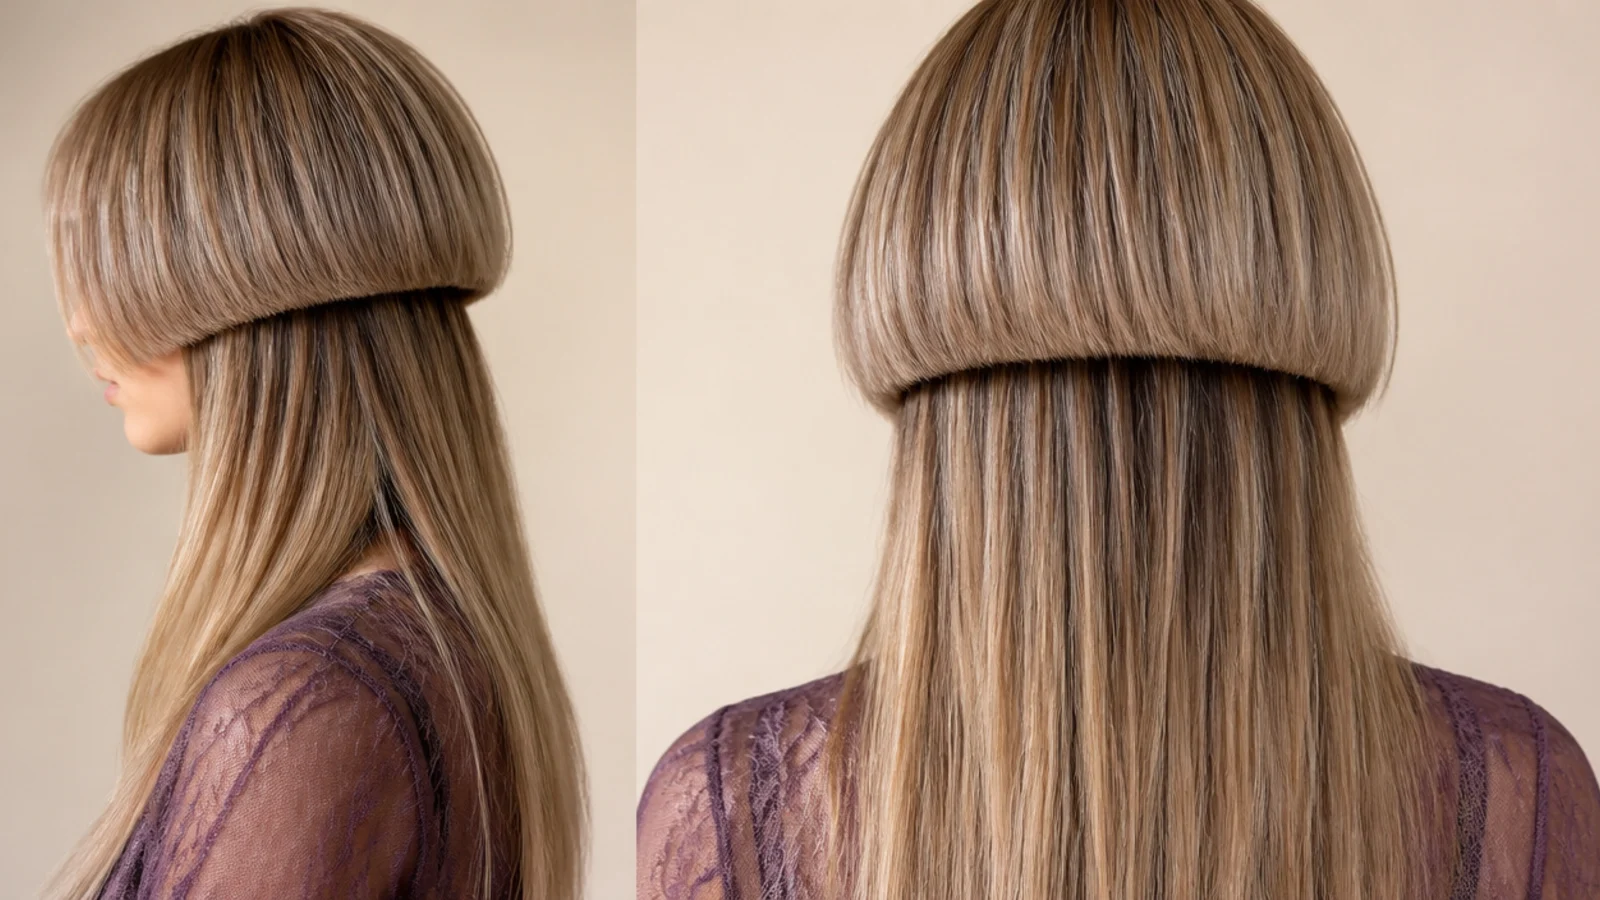
3. Invisible Internal Layers
Weight is taken from the interior sections while the outer canopy stays long and unbroken. Nobody sees the inside of your hair, so the perimeter still reads as one line while the whole lower tier hangs closer to the head and moves more.
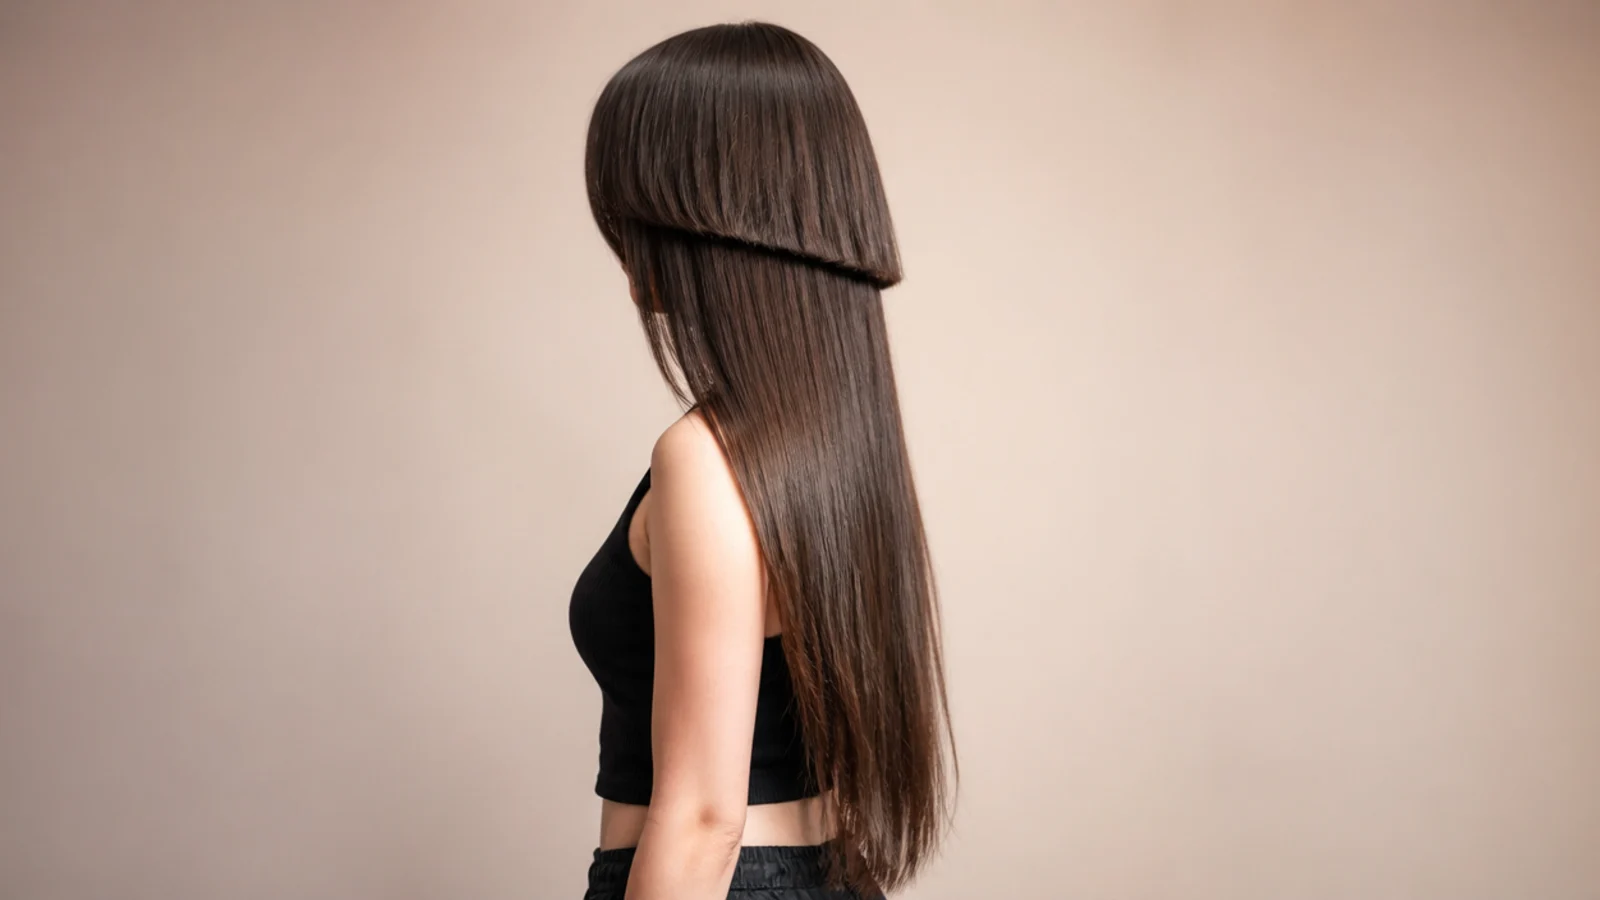
4. Razored Ends on the Lengths
A razor tapers each strand to a point rather than cutting it square, so the ends finish finer and lighter. That taper is what makes a razored perimeter move, and it is also why it looks thin on hair that had no weight to spare.
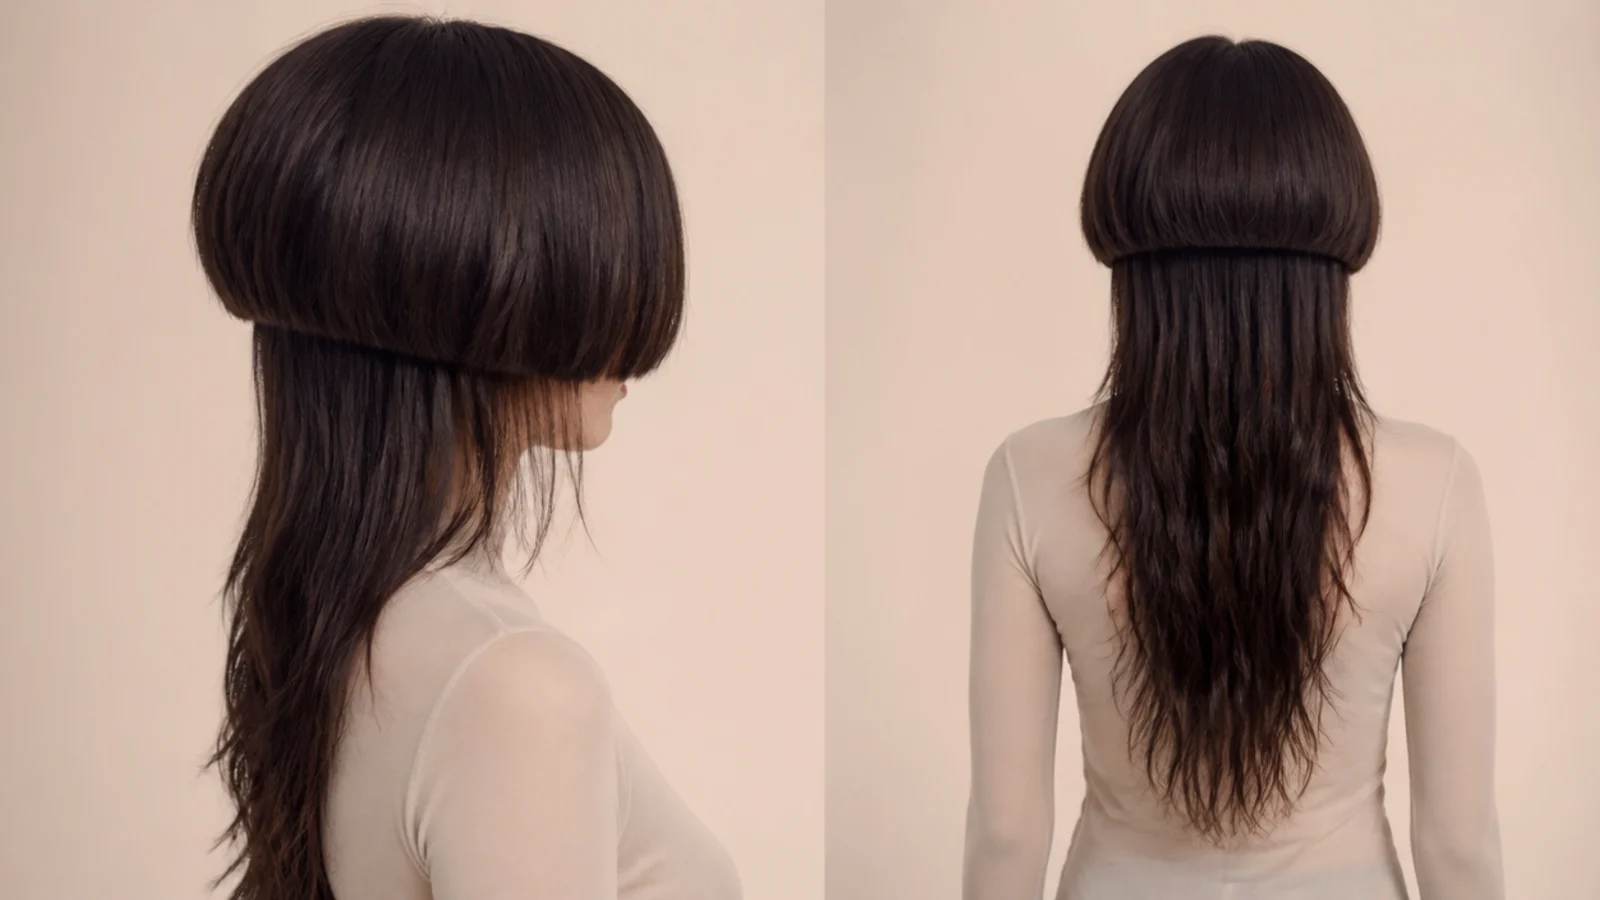
5. Face Framing Layers Only
The lengths stay untouched everywhere except beside the face, where a few pieces are shortened into a frame. Those pieces sit in front of the bell rather than beneath it, so the step behind them stays exactly as wide as it was cut.
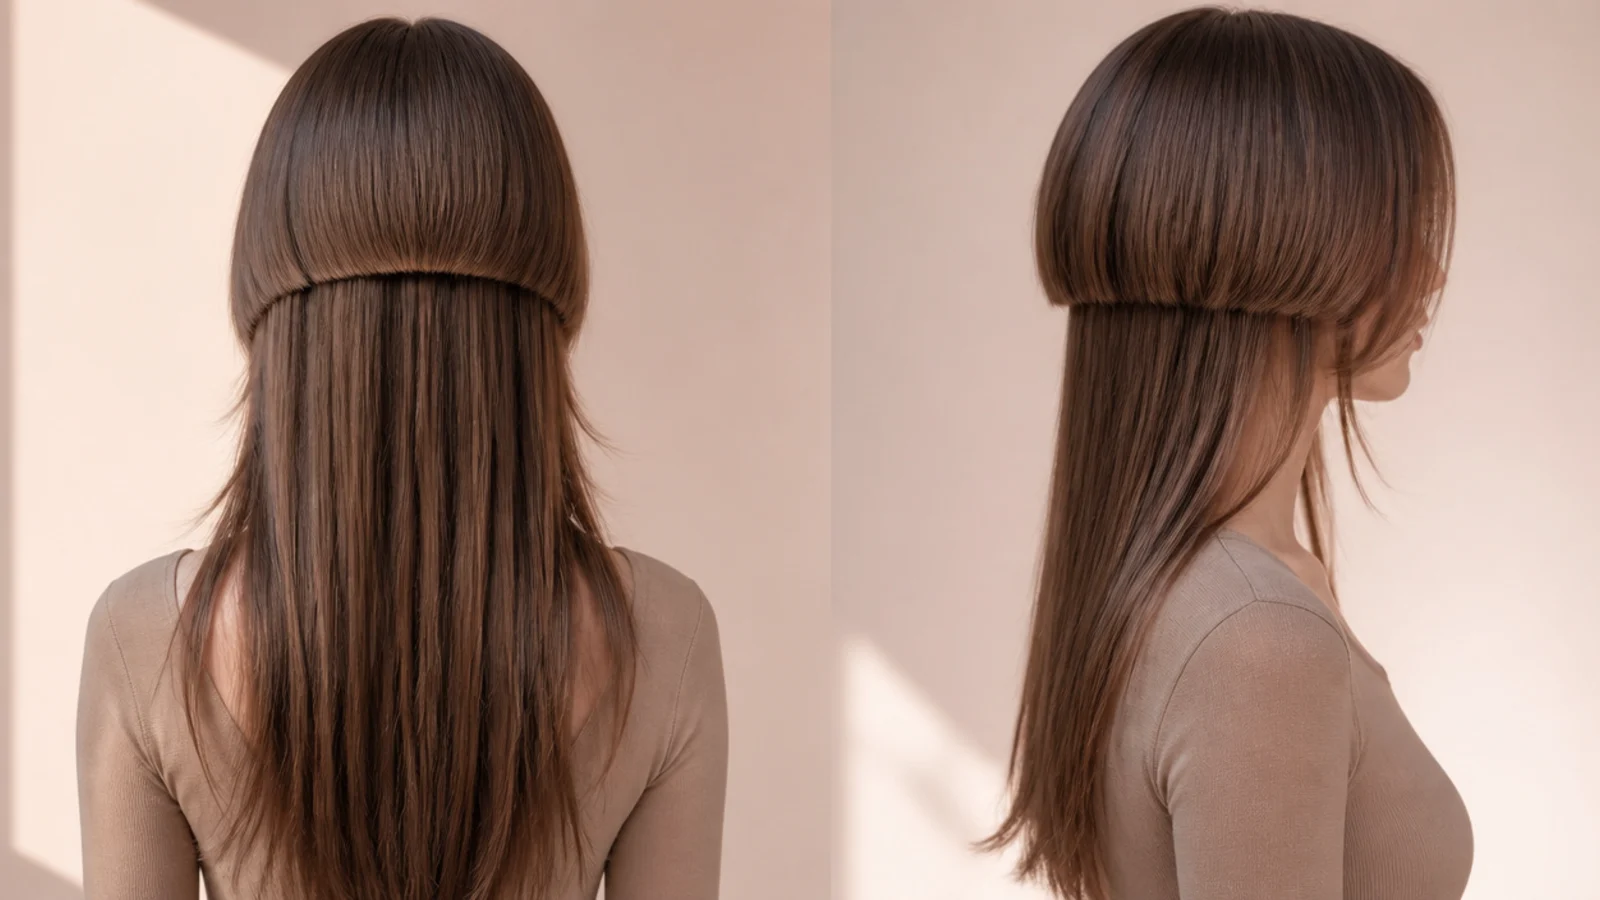
6. Curtain Bangs
Splitting the front of the bell into a curtain opens the outline at the temples and gives the shape somewhere to breathe. It also softens the hem where it is closest to the eye, which is exactly where a full bowl feels most severe.
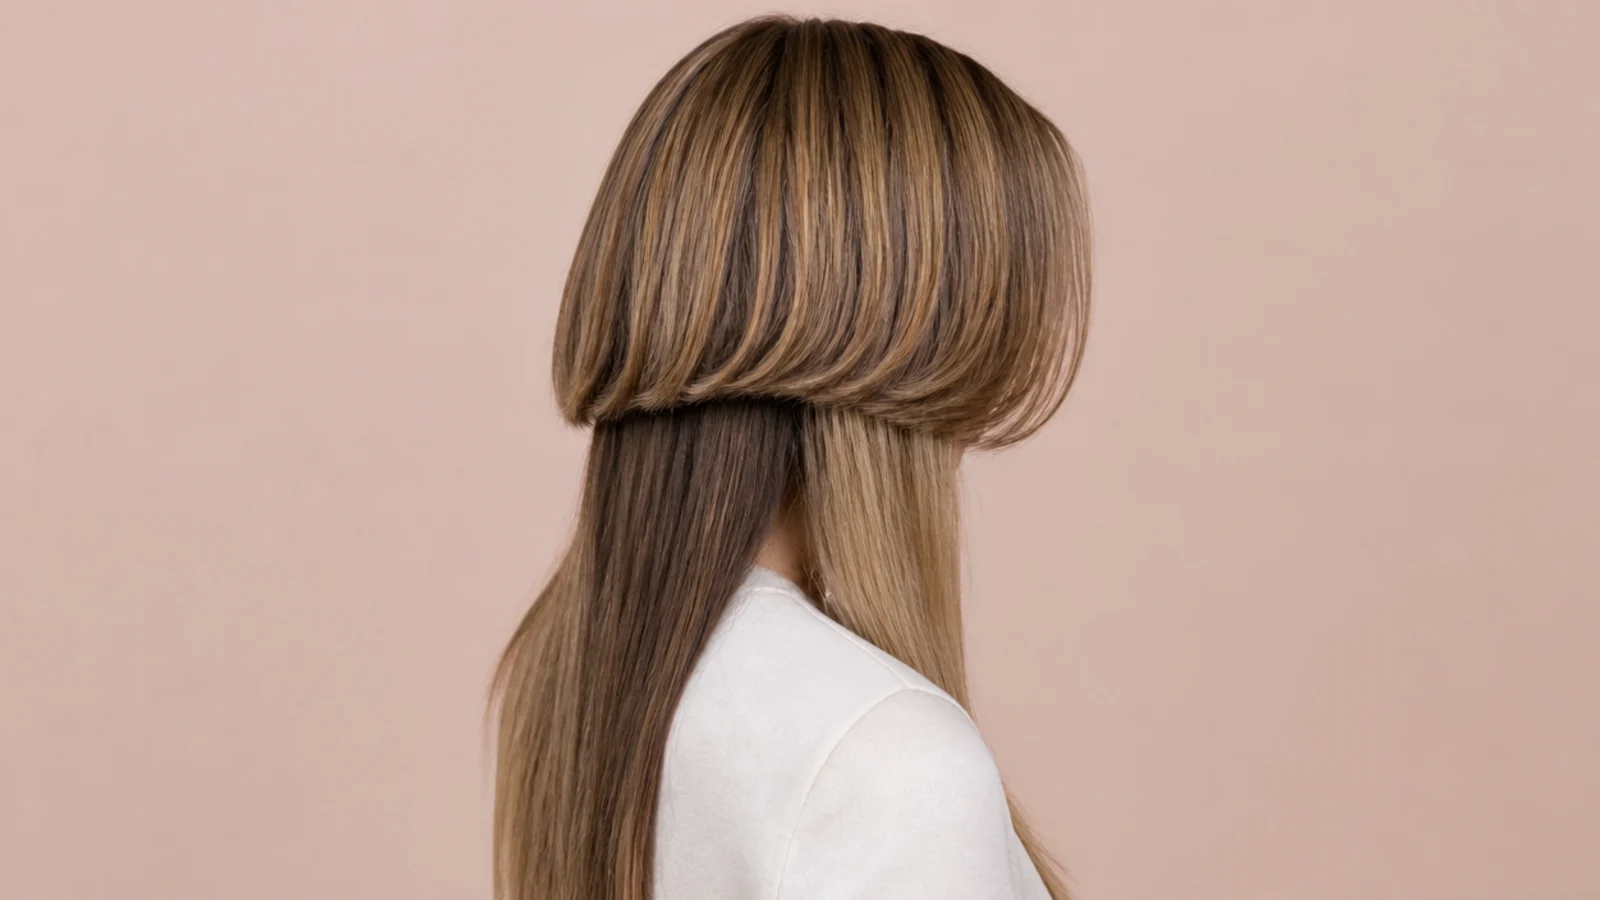
7. Point Cut Bell
Cutting into the hem with vertical scissor points breaks the line into small notches without changing its height. The step survives because the length is unchanged, but the edge stops reading as severe, which is the compromise most round faces need.
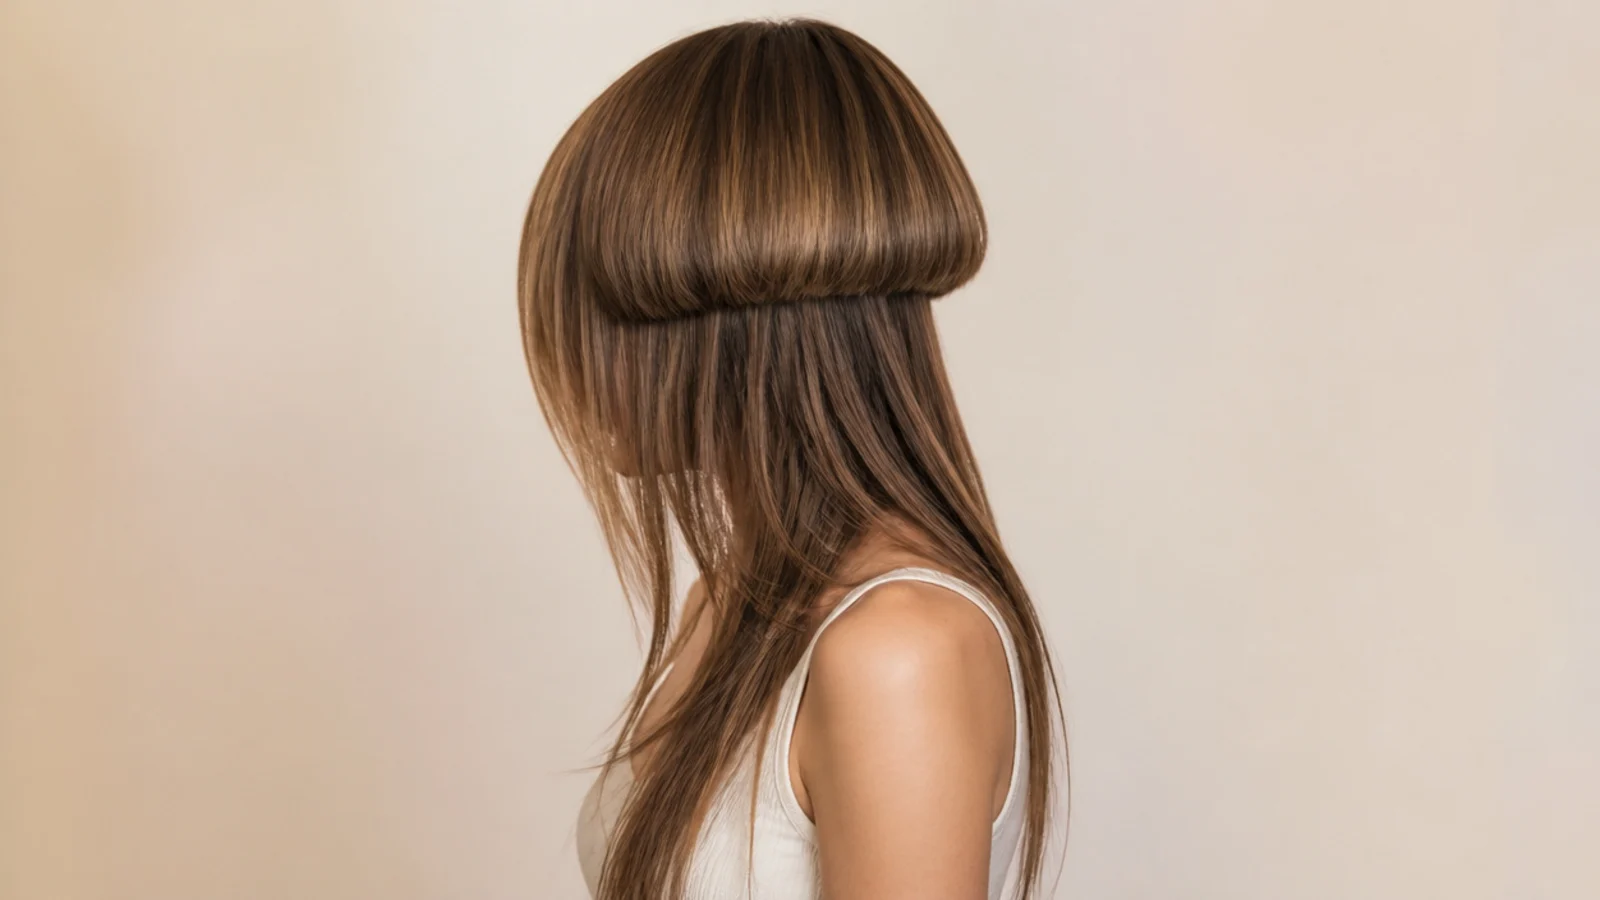
8. Heavy Layers for Thick Hair
Dense hair holds its own shape, so heavy layering is the only thing that stops the lower tier sitting like a solid board. Removing bulk in quantity lets the lengths fall closer to the body and makes the bell above look proportionate rather than small.
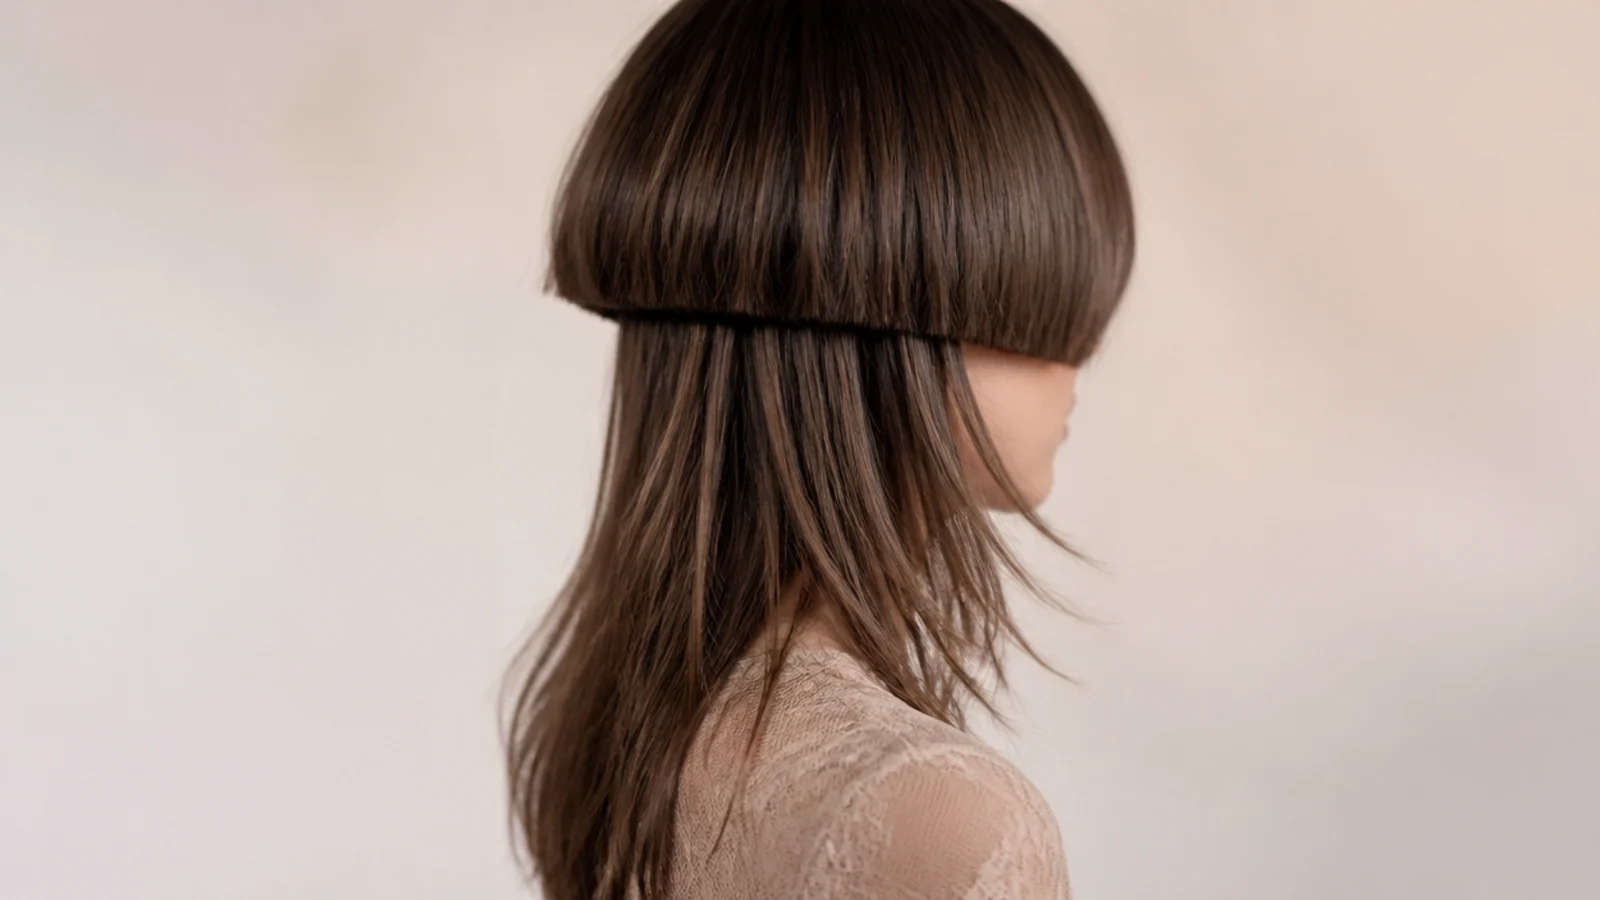
9. Minimal Layering for Fine Hair
Two or three long layers, no more. Every layer divides the same quantity of hair across an extra ending point, so on fine hair the perimeter thins out fast and stops matching the density of the blunt bell above it.
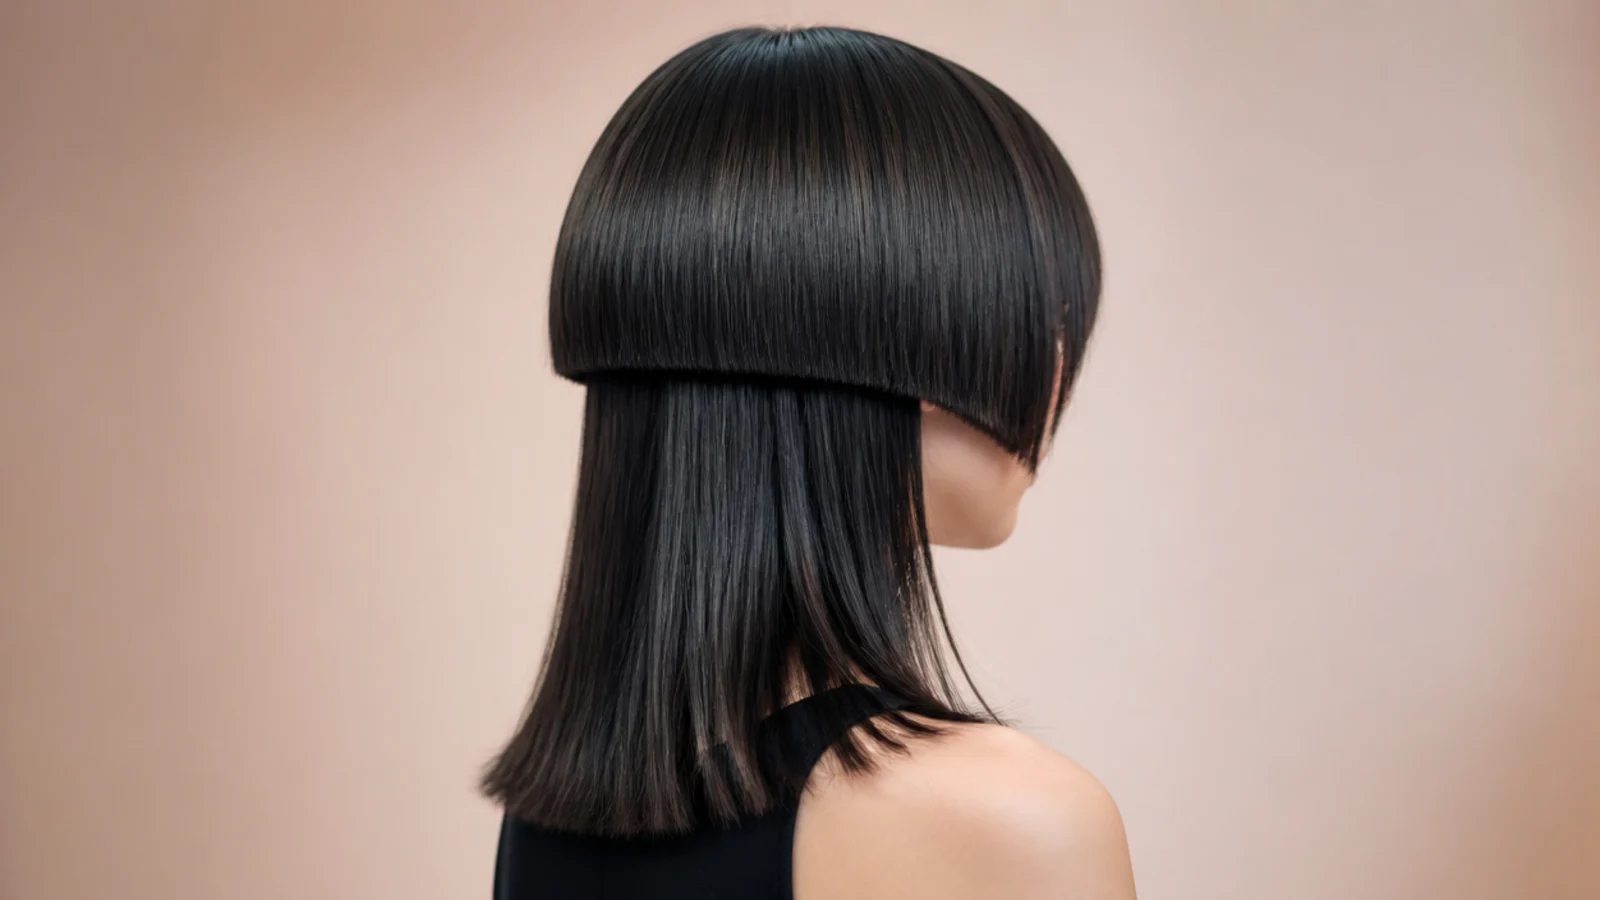
10. Medium Collarbone Length
The shortest length this cut survives at, because the gap has very little room. Layering has to be almost entirely internal here, since any visible layer raises the lower tier and the step loses the separation it depends on.
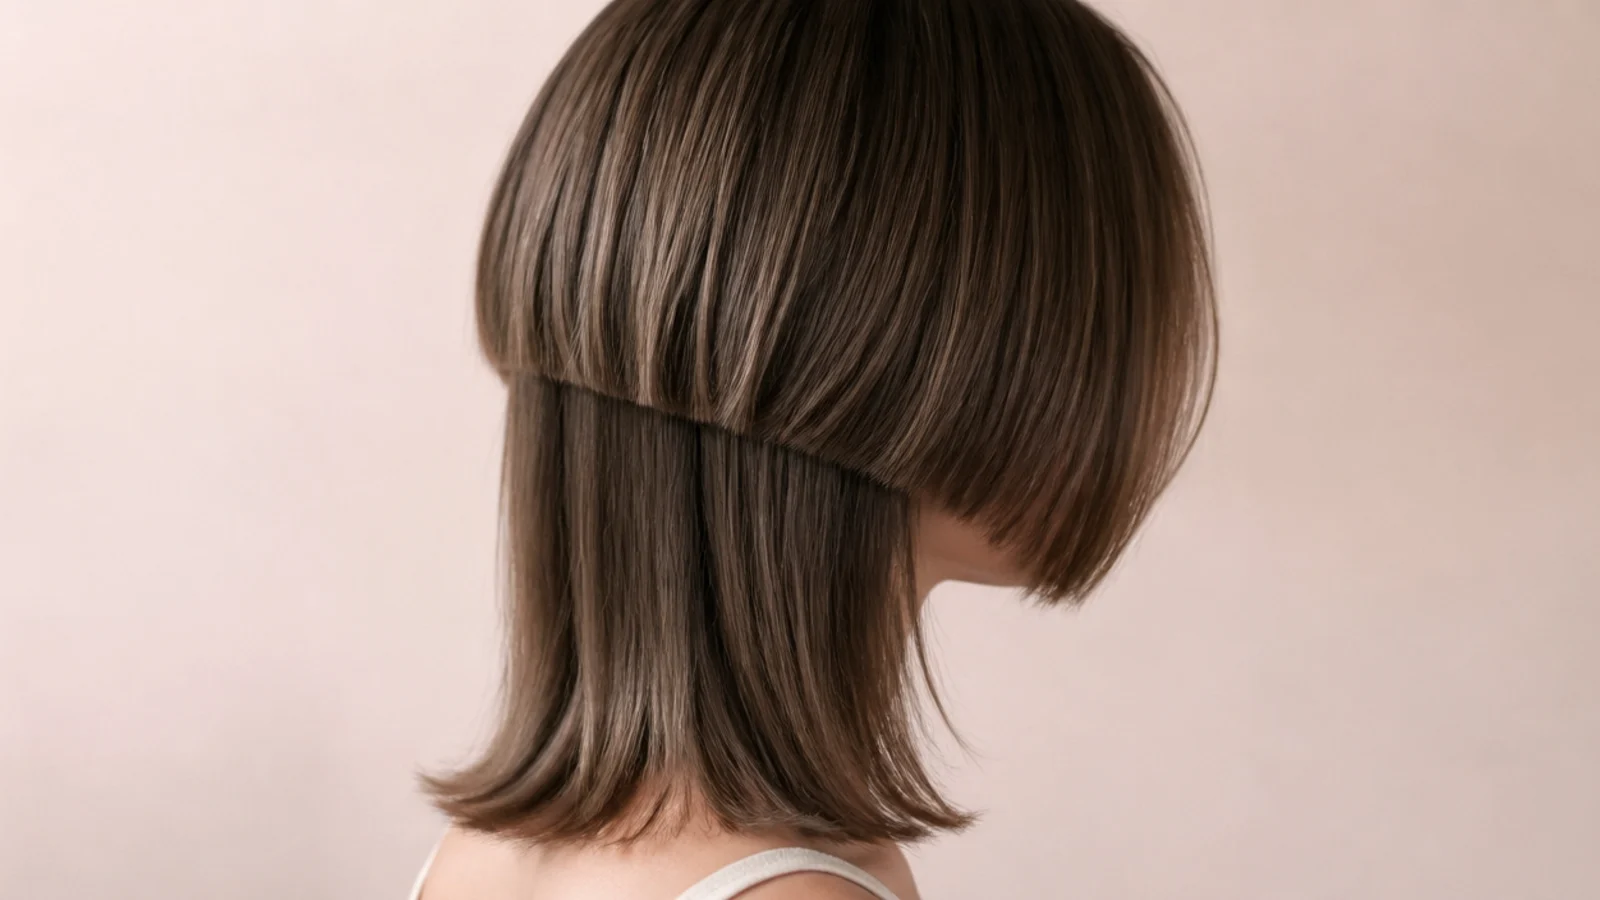
11. Wavy Hair
Waves and layers work together because the bend needs weight removed before it can lift. The same bend softens the bell hem though, so the gap has to be cut larger than it would be on straight hair to stay readable.
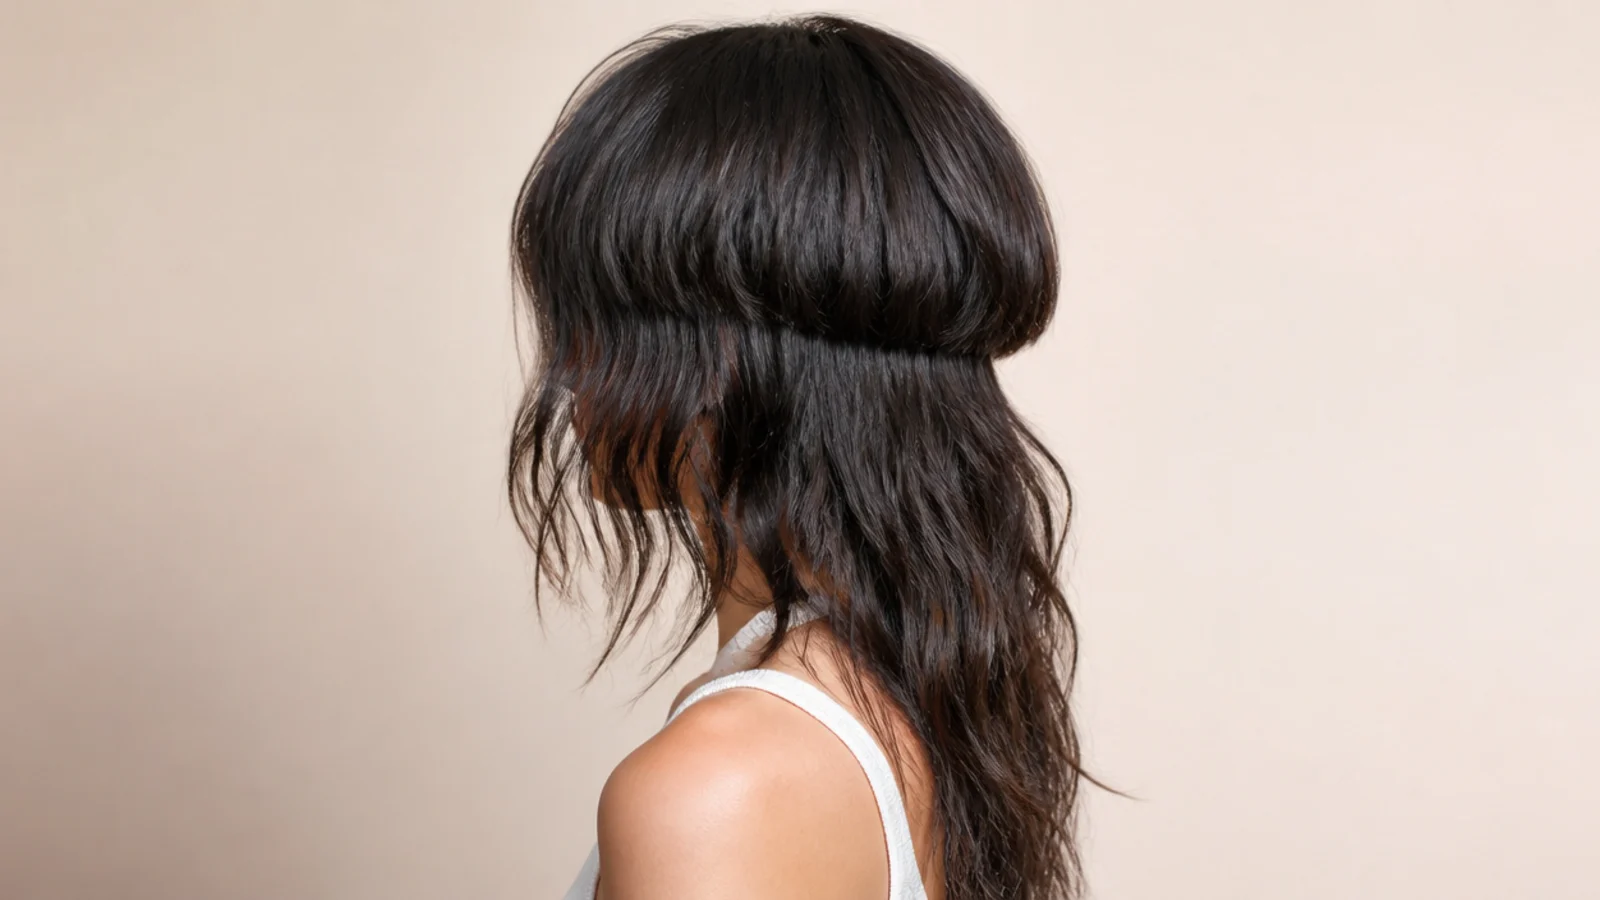
12. Curly 3A Hair
Curl draws hair upward as it dries, so both the bell and every layer must be cut longer than the target position. Curl also fills space on its own, which means fewer layers are needed to stop the lengths reading as a solid mass.
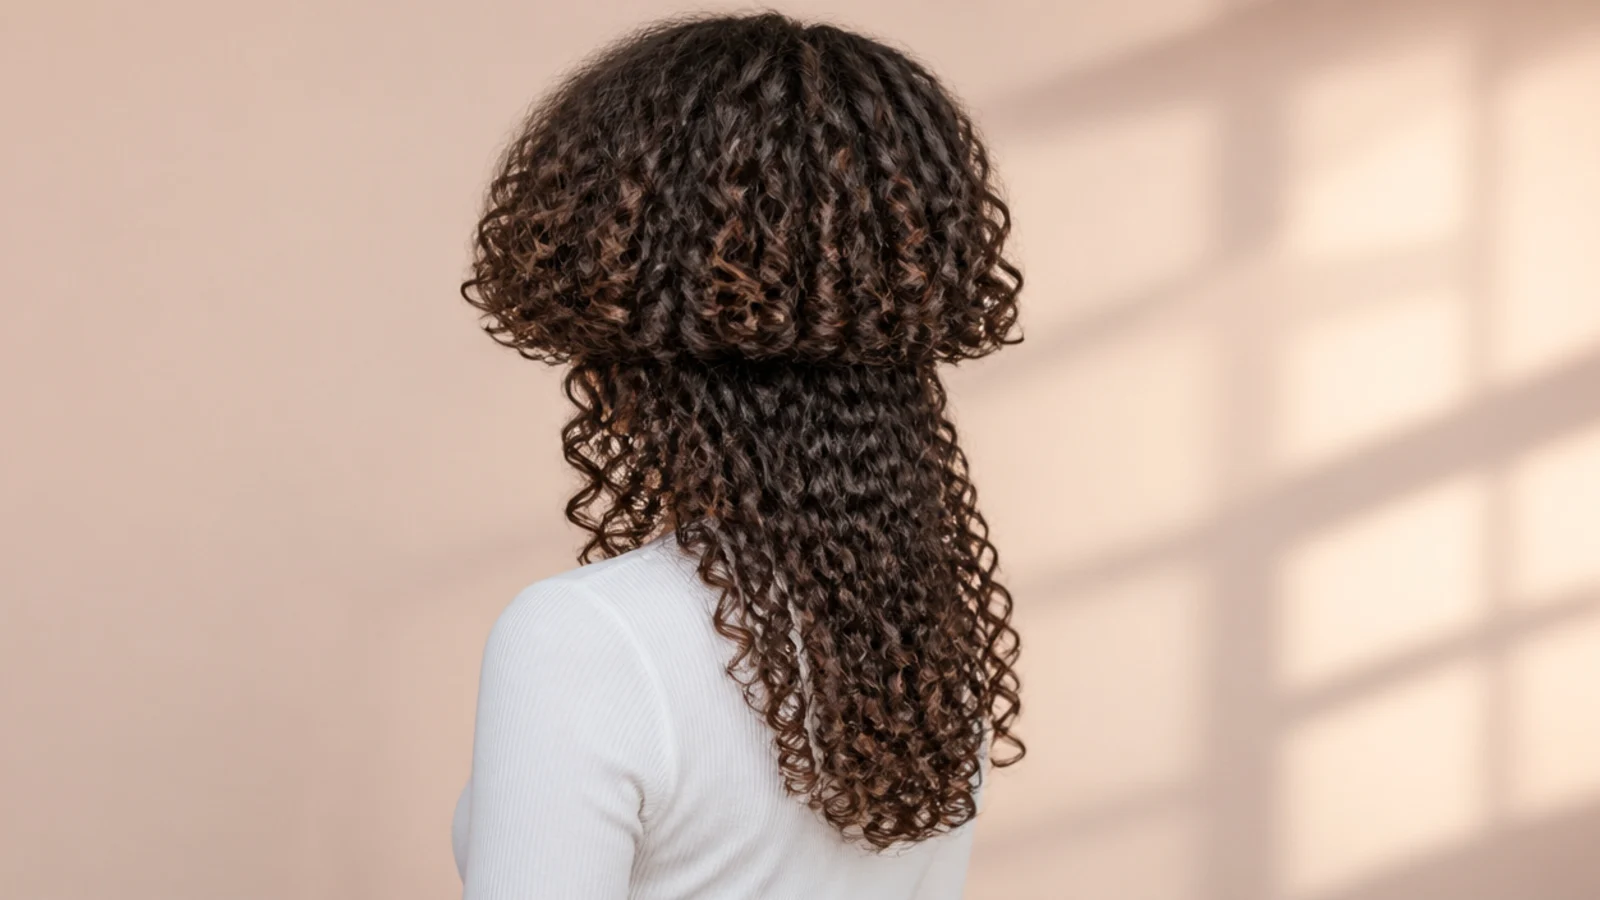
13. Cheekbone Bell
The highest hem placement, and the one that changes a face most. A horizontal crossing at the cheekbone adds width at the widest point, so it flatters a long outline and overwhelms a round one regardless of the layering below.
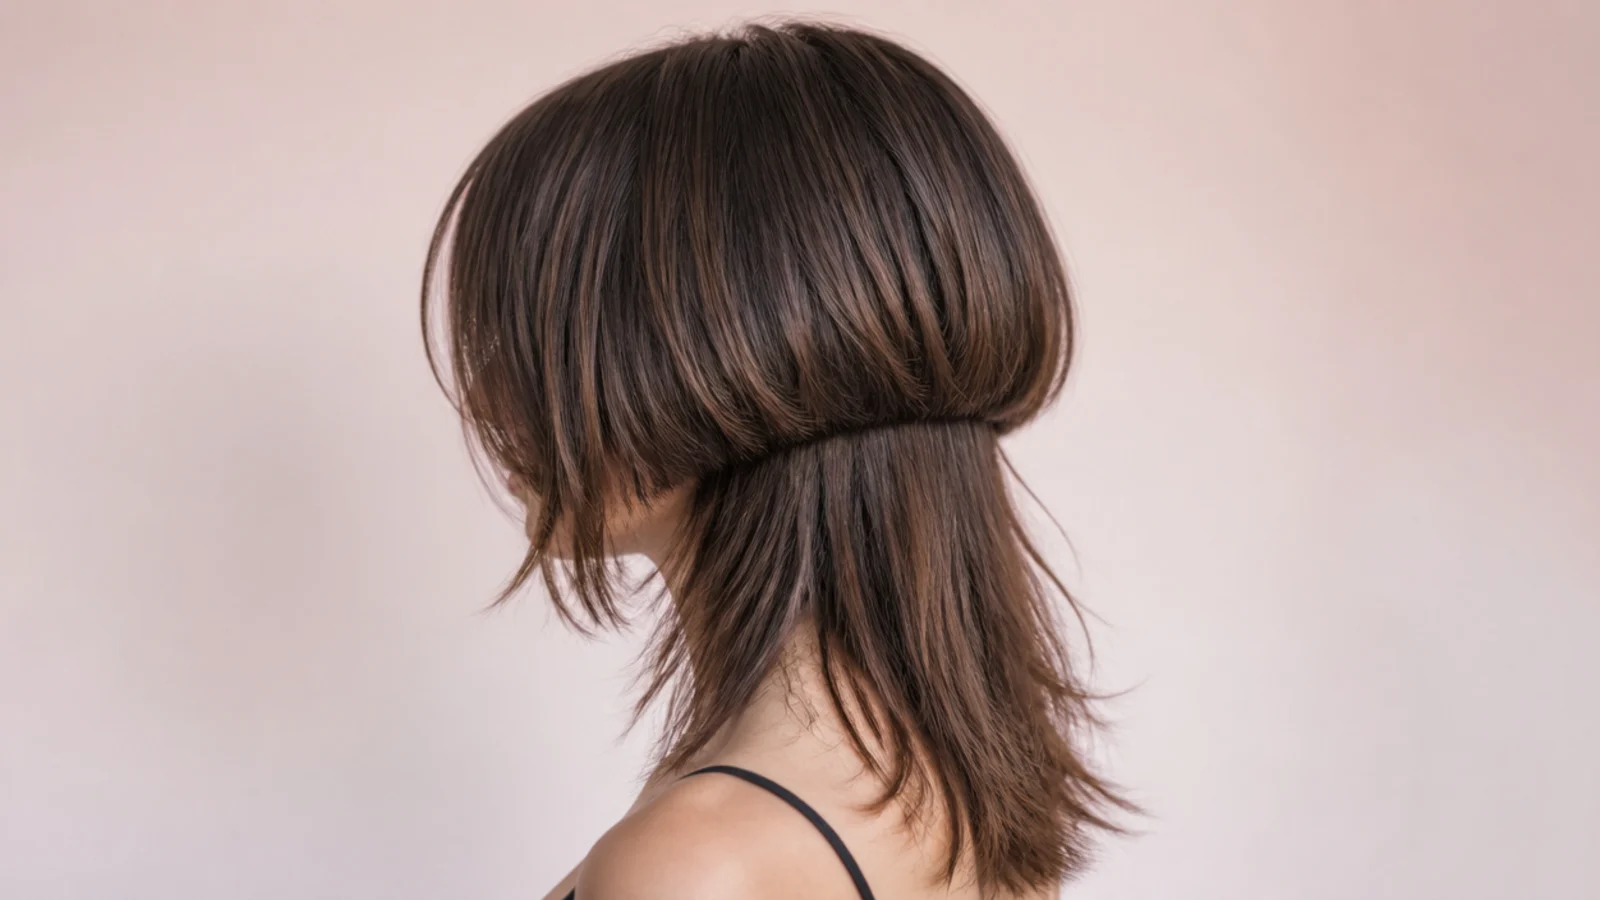
14. Waist Length
The most room the cut ever gets, and the version where layering is least risky. With that much distance between the hems, even generous layers through the lengths leave the step untouched and clearly visible from across a room.
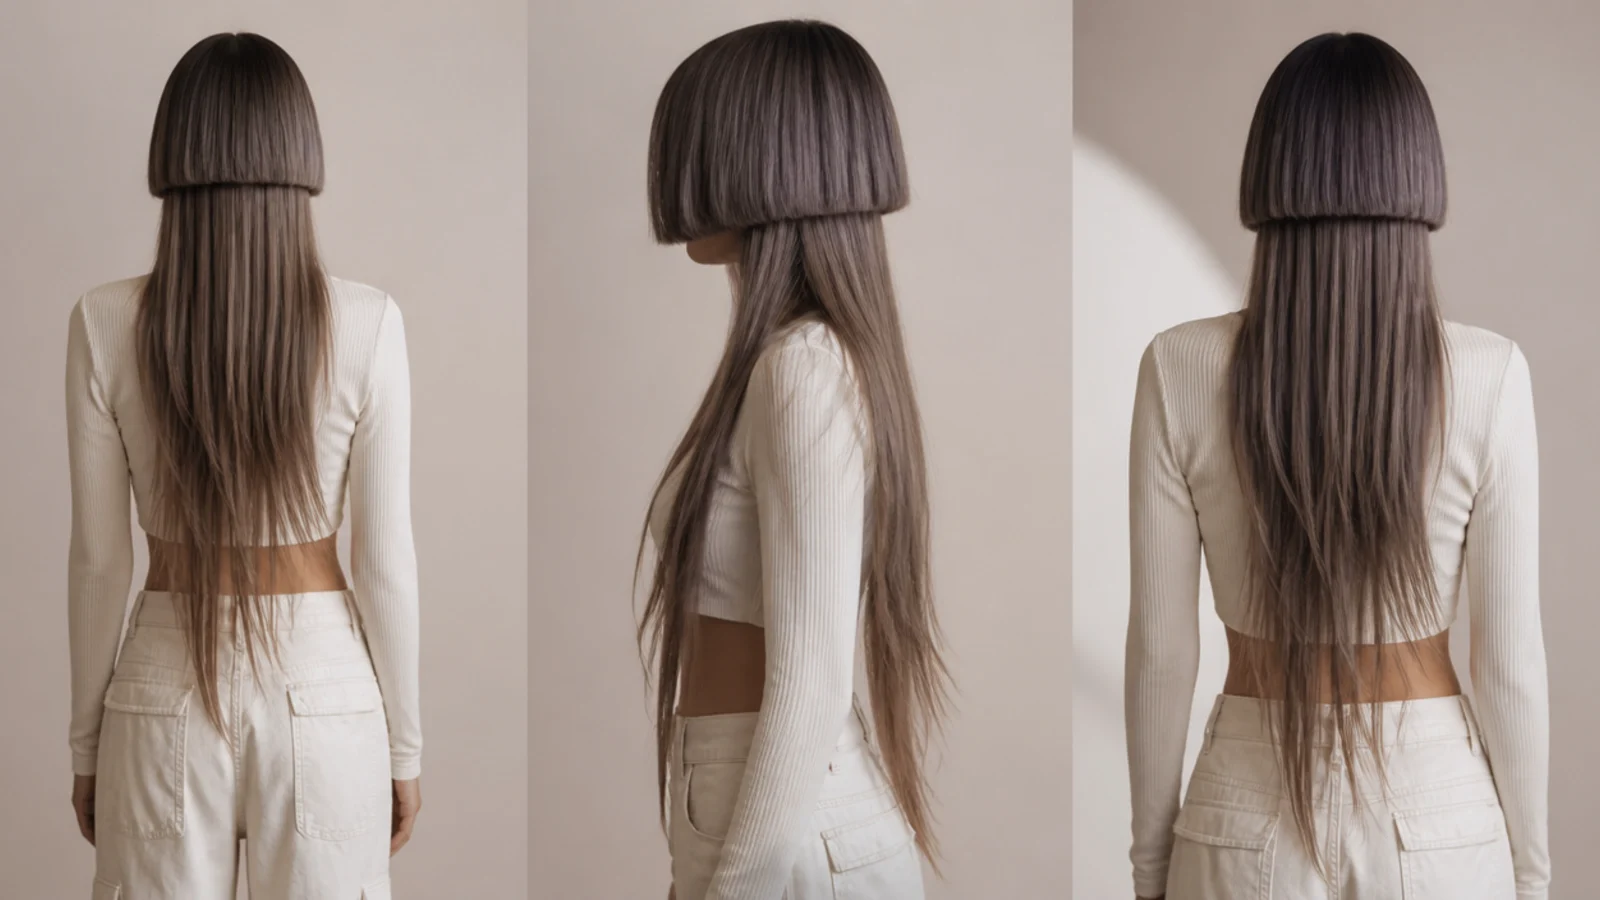
15. Double Tier Butterfly Blend
Layering the bell itself into a second tier turns the cut into something closer to a butterfly, with two graduated bands instead of one step. It is easier to wear day to day and it gives up the hard edge that made the original shape distinctive.
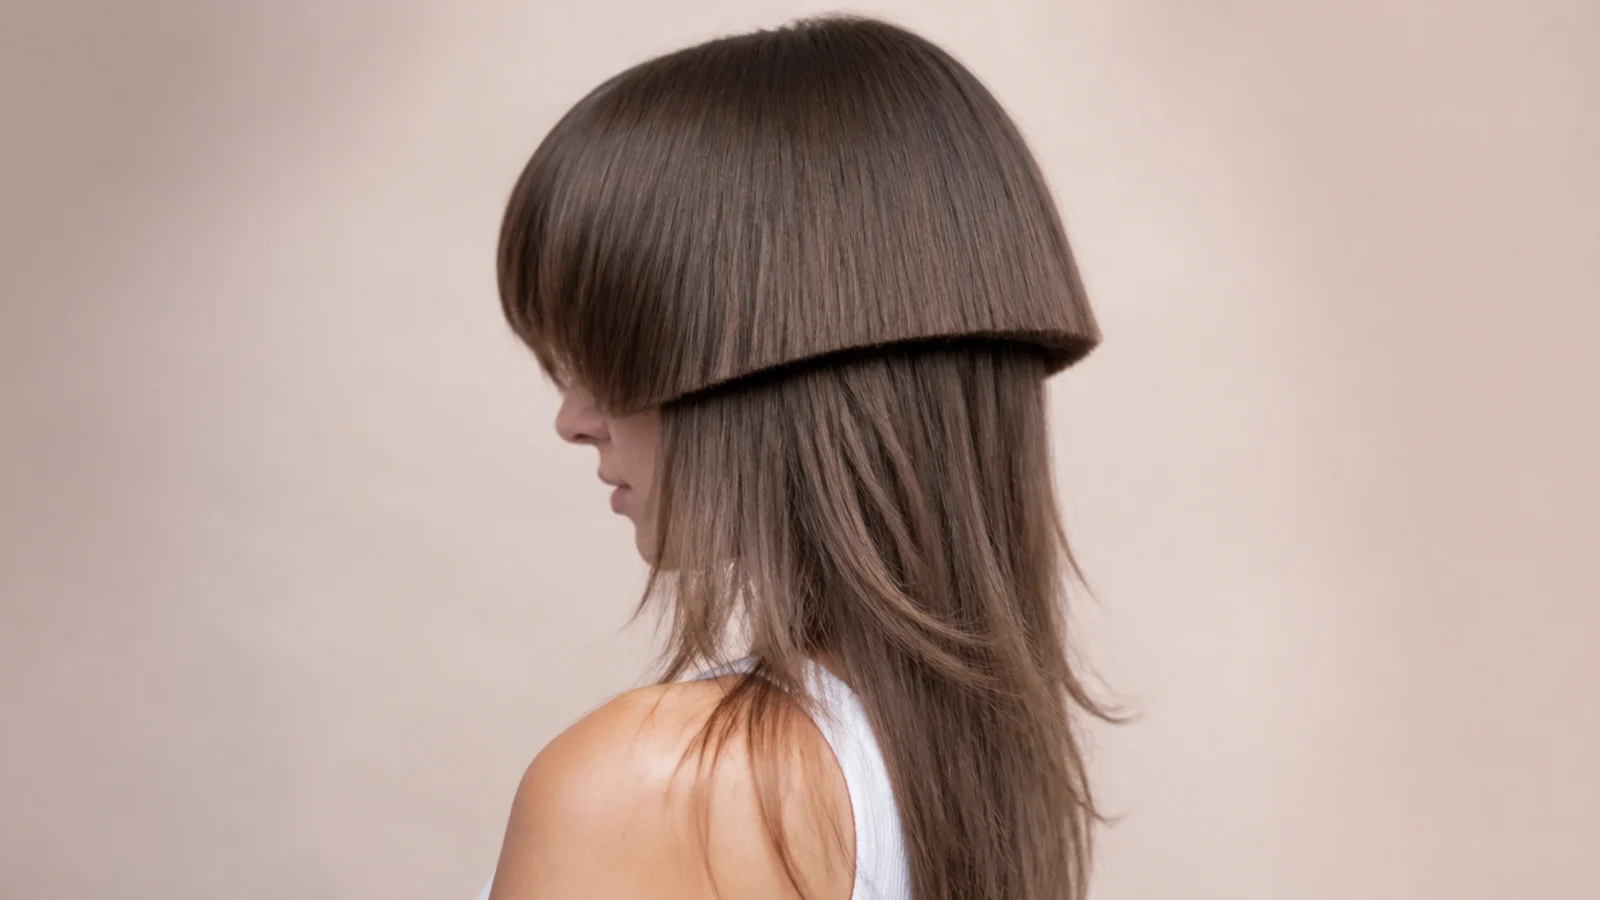
16. V Shaped Perimeter
Cutting the hem longest at the centre back and shorter toward the sides draws the outline into a point. It emphasises length and narrows the visual width of the ends, which balances a heavy bell but makes fine hair look thinner still.
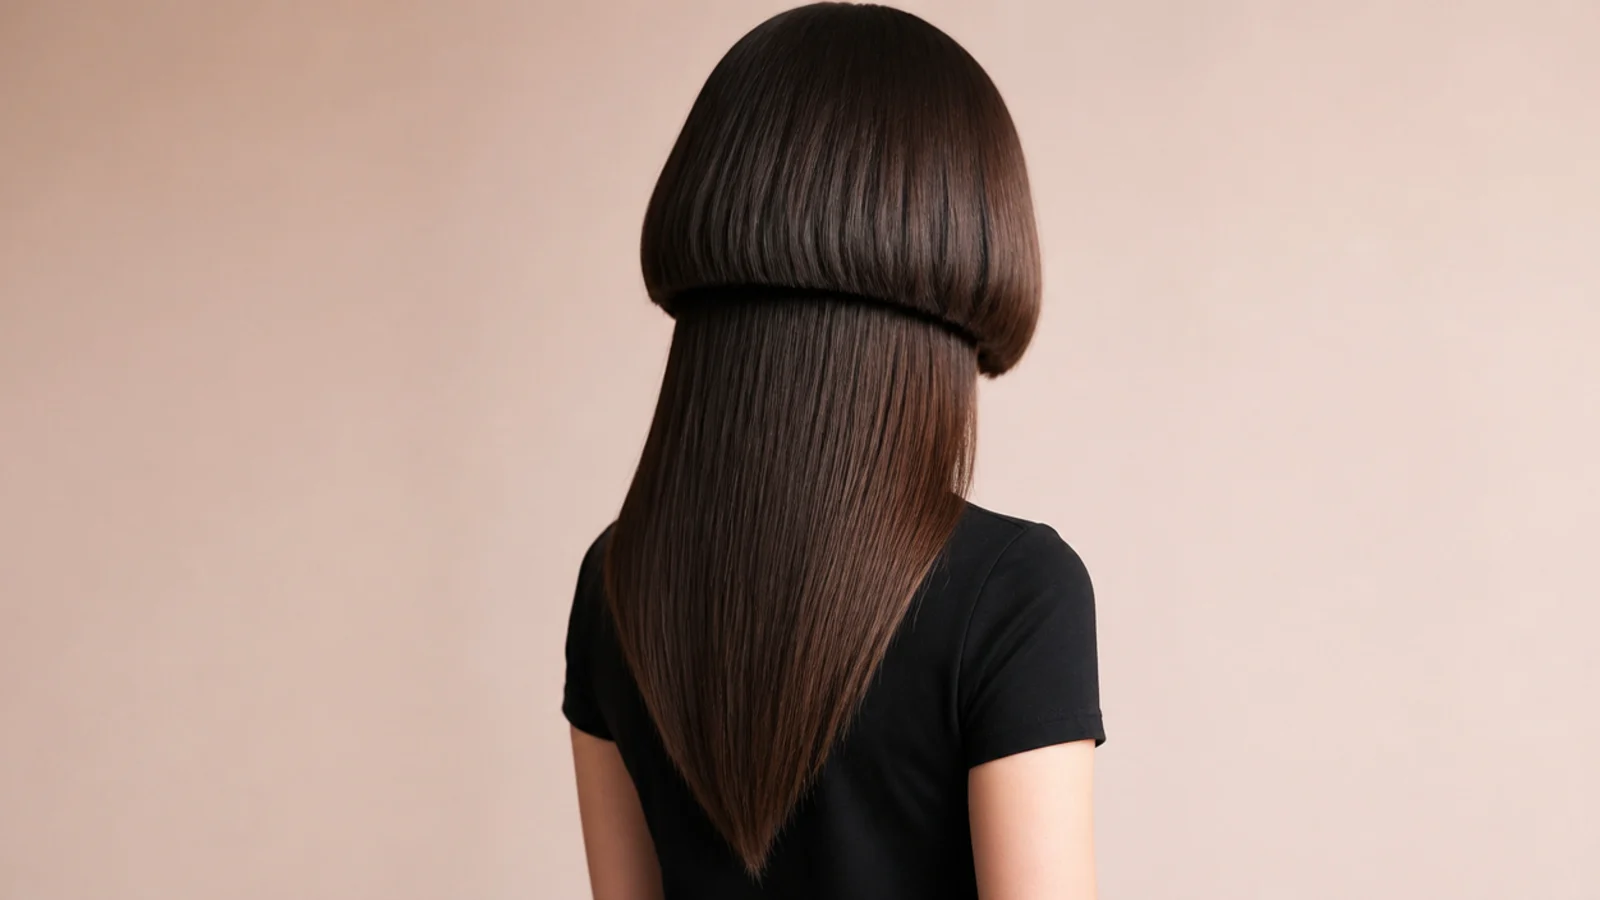
17. U Shaped Perimeter
A shallow curve keeps far more weight across the bottom of the lengths, so the ends read as full and square. It is the better perimeter on fine hair, because density at the hem is the only thing that matches the solidity of the bell.
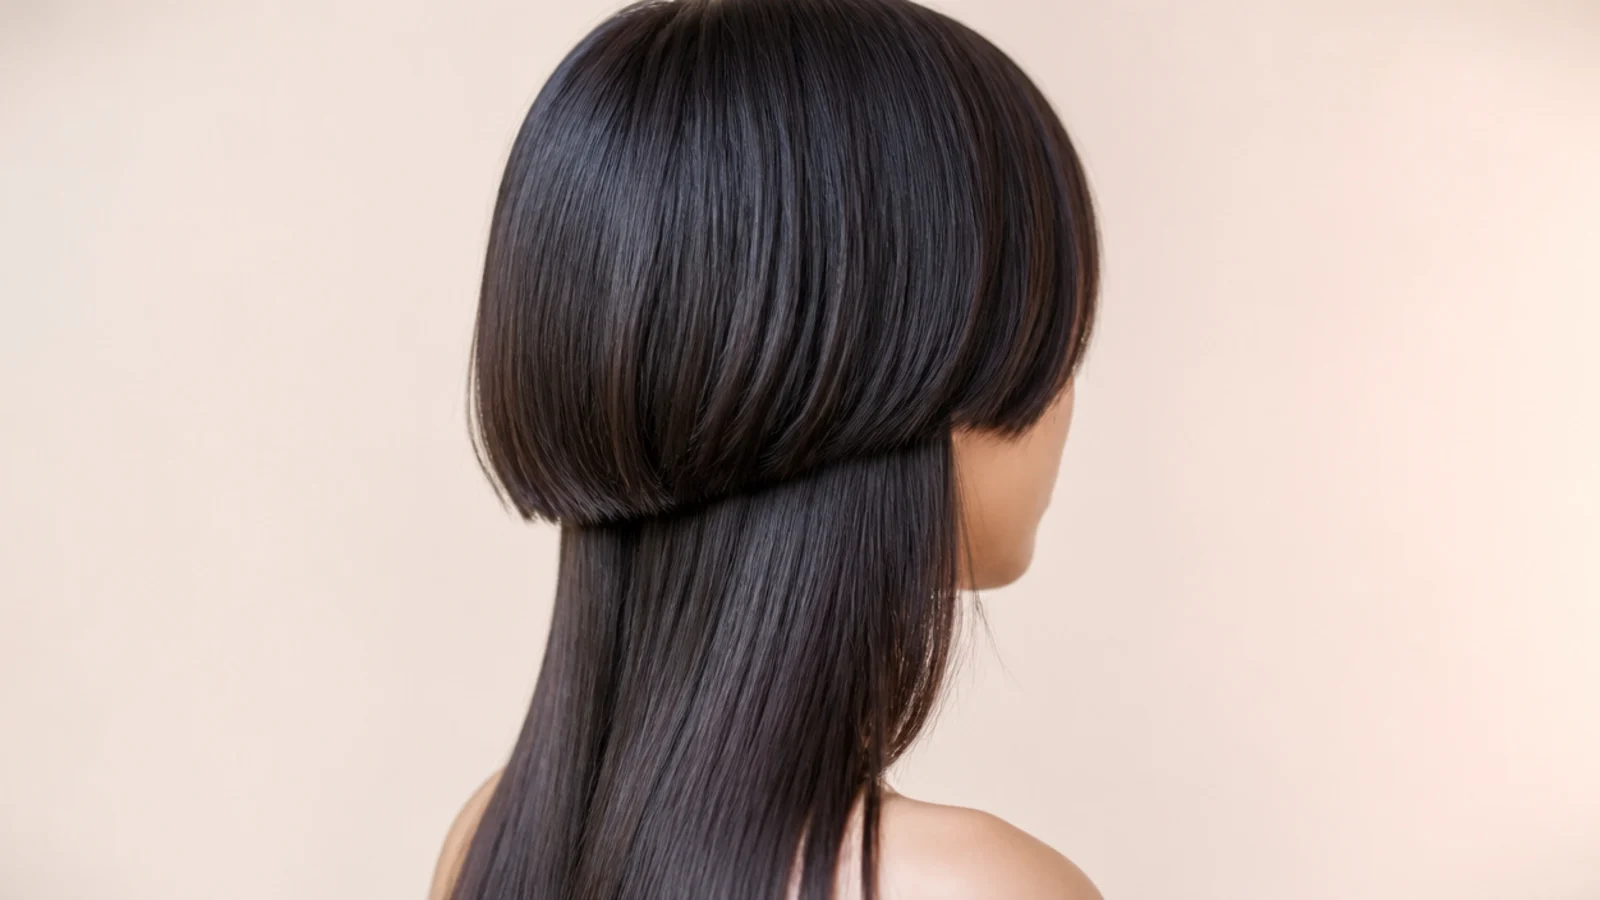
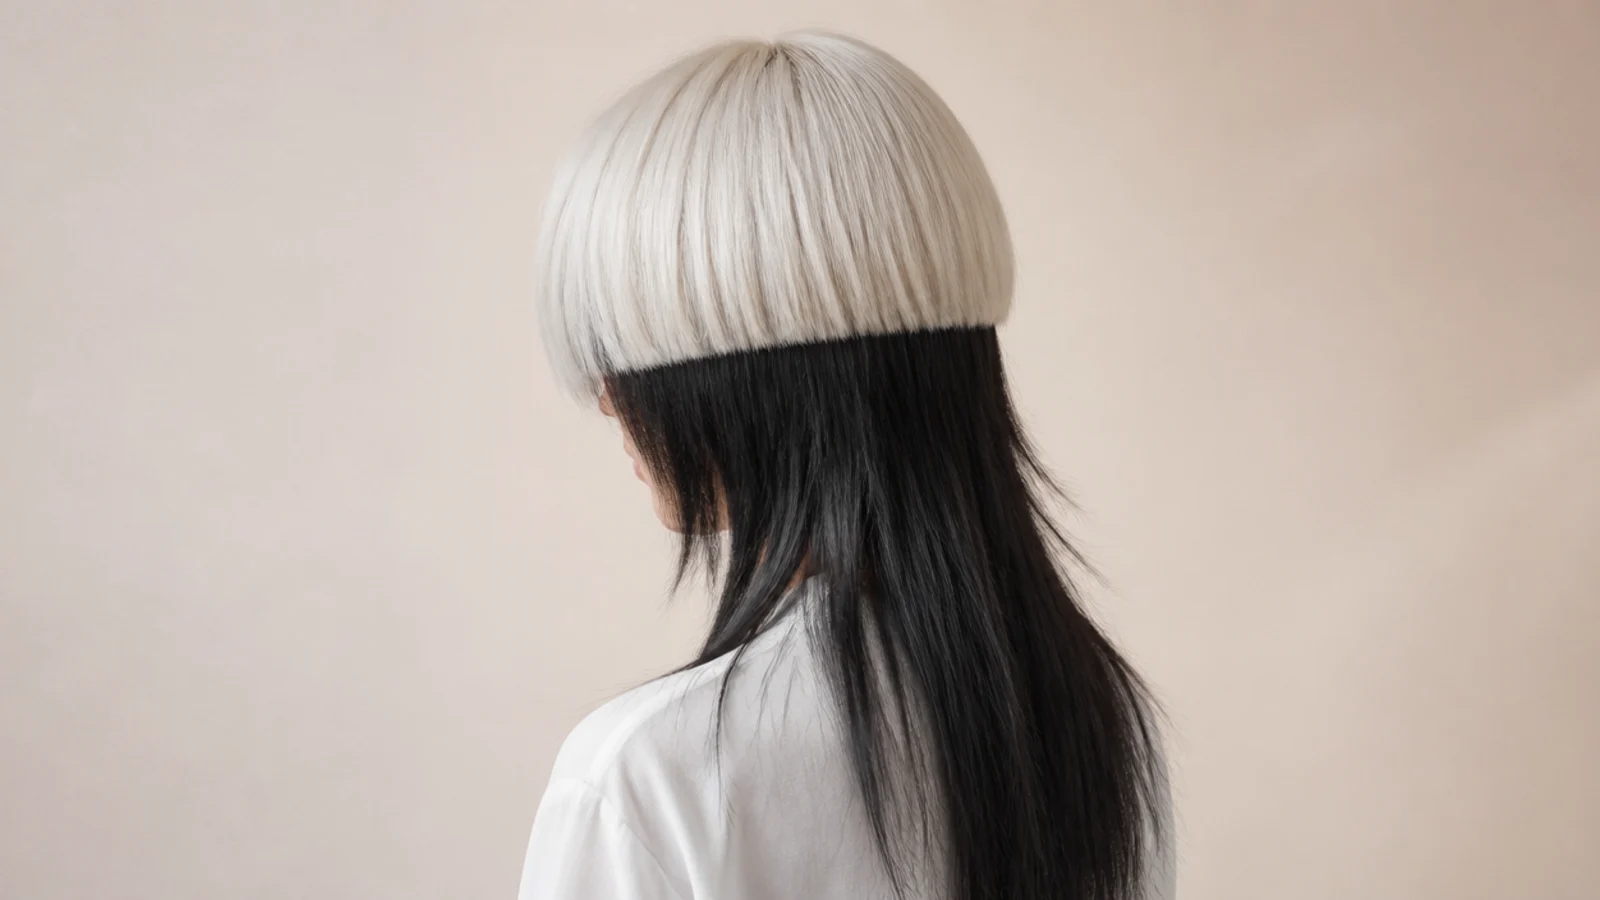
18. Two Tone Colour
The cut already draws a boundary, so putting a colour change on the same line doubles the contrast at no extra structural cost. It also exposes every uneven millimetre of the hem, which means the cut has to be genuinely level first.
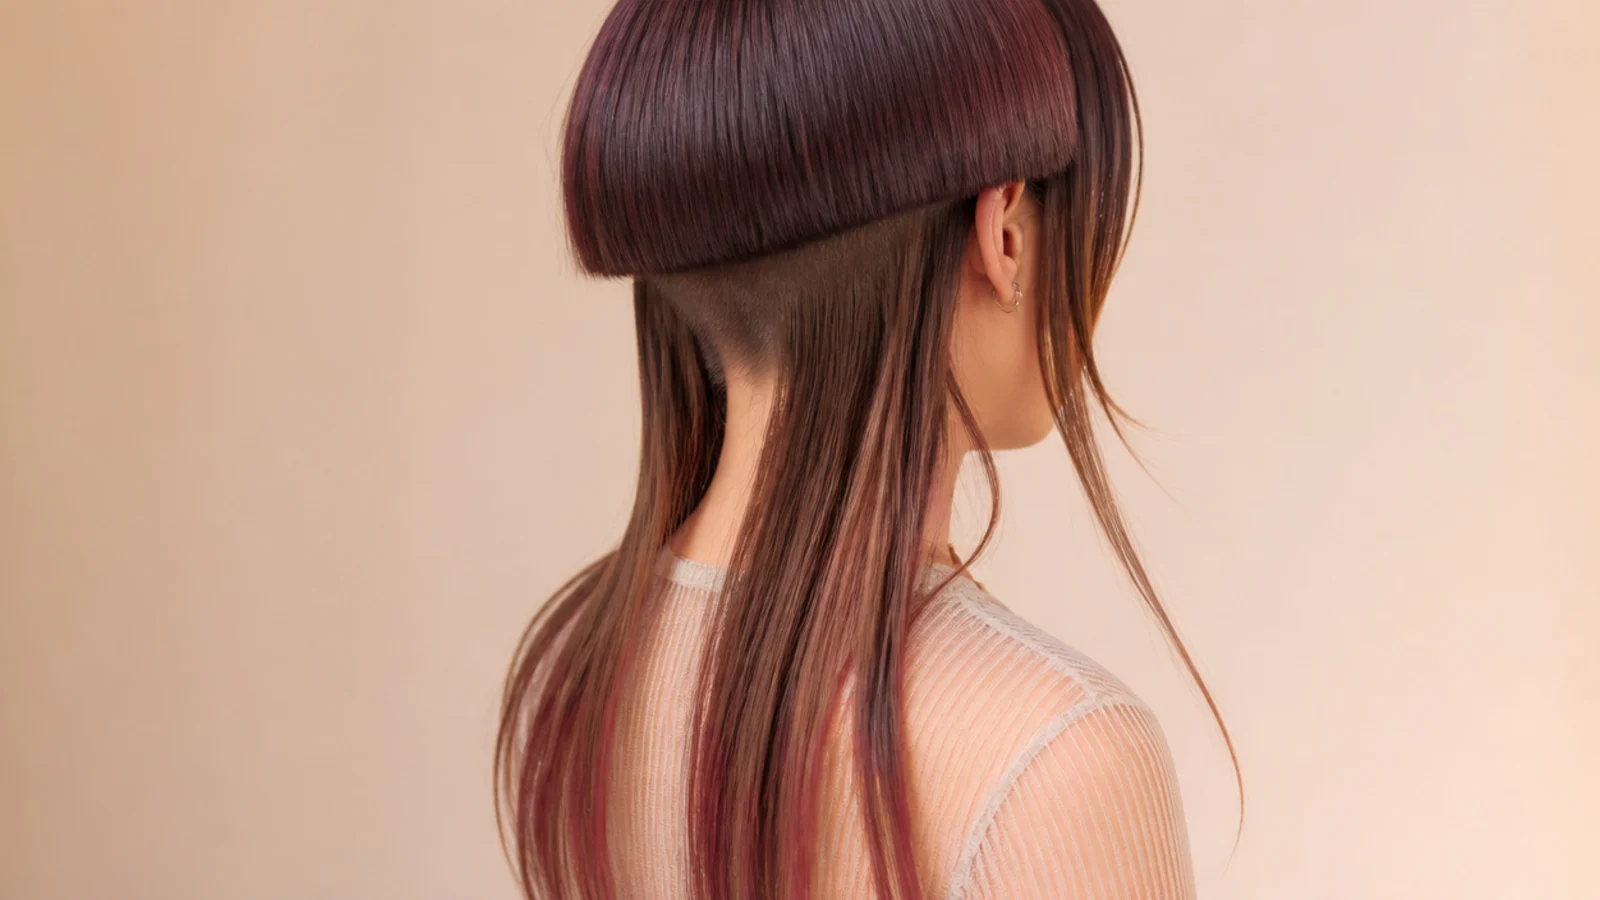
19. Undercut Nape
Shaving or clipping the nape removes bulk from underneath so the lengths hang flat against the neck. The bell then stands proud of them by a wider margin, which reads as a larger gap without anything being taken off the top.
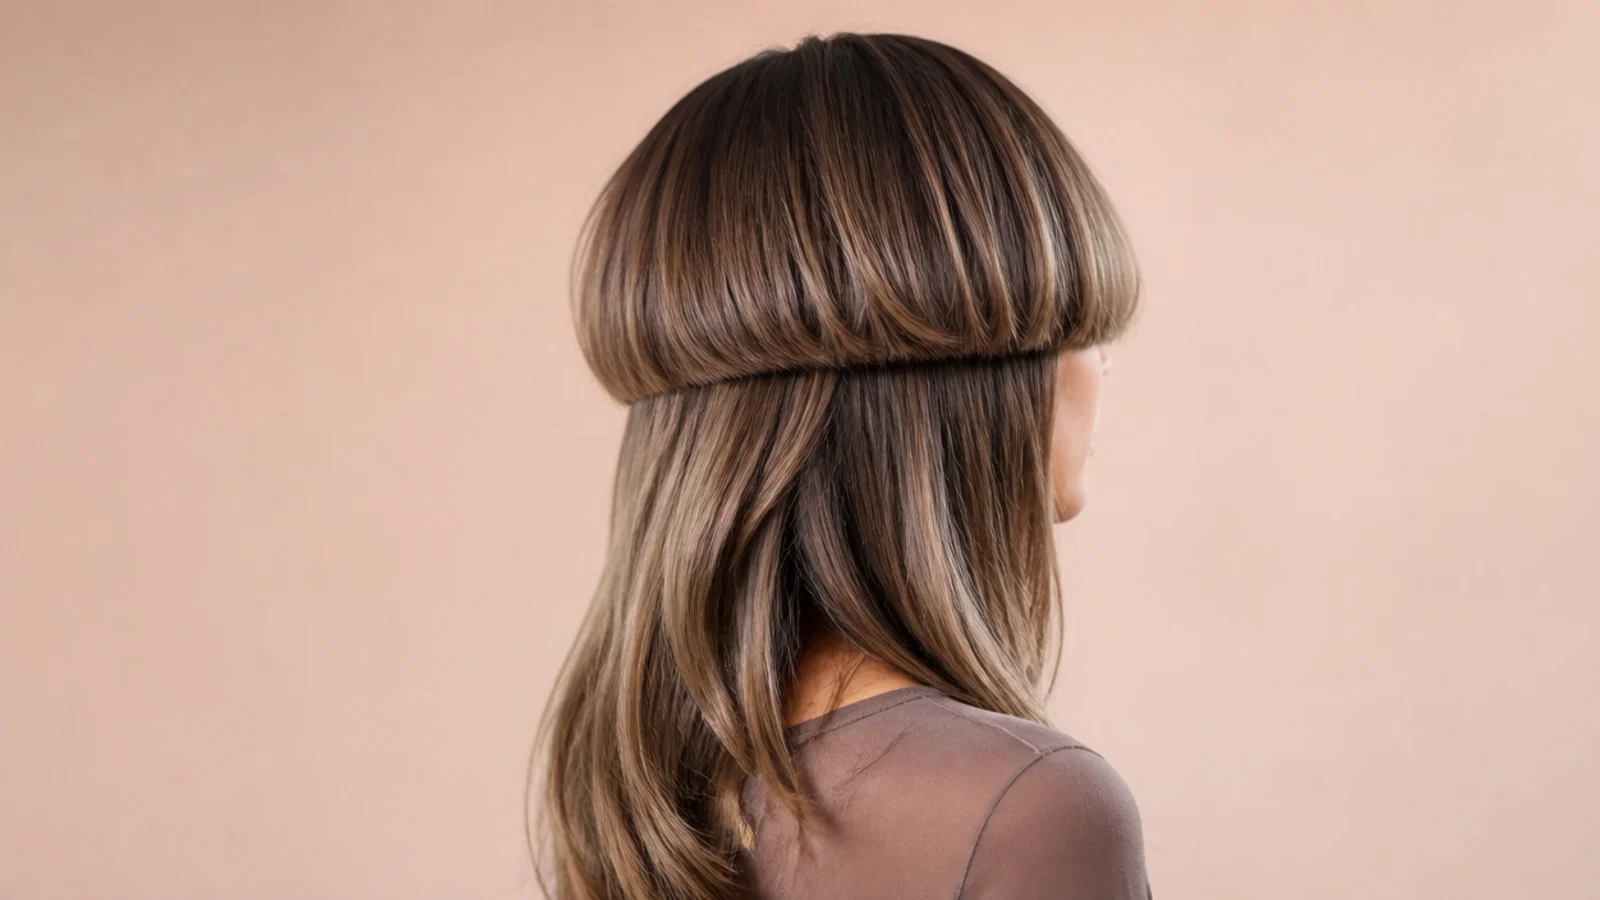
20. Partial Disconnection
The step is softened at the back and left hard at the sides, so the cut reads sharp from the front and blended in a ponytail. It is the version to ask for when the full disconnection is more commitment than the week can take.
Final Thoughts
Decide the gap first and the layers second. The step is the cut, and every layer is negotiable around it, but a layer cut too high takes the gap away and no amount of styling puts it back. Ask for the disconnection to be set and checked before any layering happens, and the rest becomes a matter of taste.
If your hair is thick, spend the layering budget on the interior rather than the surface. Weight removed from underneath changes how the whole lower tier hangs while the perimeter stays whole, which is the only version of layering this cut genuinely wants. For the full range see the jellyfish haircut guide, and for a different approach to layering long hair see layered Korean haircut ideas. More in Mullet and Wolf Cut.



