
15 Graduation Cap Hairstyles and How to Pin Them
Fifteen cap friendly styles and the pinning method behind them, built on the fact almost nobody is told — a mortarboard is held on by friction and pins, and a pin only holds if it passes through hair anchored to the head.
In this article · 31
- The Cap Line Explained
- Updo Versus Hair Down in Photographs
- Cap Styles by Hair Length
- All Day Hold and Pins
- The Morning Timeline
- The Cap Off Dent Fix
- The 15 Cap Hairstyles
- 1. Low Nape Bun
- 2. Half Up at Ear Level
- 3. Side Swept Waves
- 4. Flat Crown Braid
- 5. Sleek Low Ponytail
- 6. Messy Side Bun
- 7. Double Dutch Braids
- 8. Pinned Back Bob Curls
- 9. Defined Natural Curls
- 10. Rolled Low Chignon
- 11. Half Up Bubble
- 12. Side Part Blowout
- 13. Braided Headband
- 14. Low Double Knots
- 15. Slicked Bun With Edges
- How to Pin a Graduation Cap Step by Step
- Step 1. Find Your Cap Line
- Step 2. Prep the Hair for Grip
- Step 3. Build Everything Below the Line
- Step 4. Set It With a Flexible Hold
- Step 5. Anchor the Cap With an X of Pins
- Step 6. Rehearse It Once
- Step 7. Pack a Dent Fix Kit
- Final Thoughts
A graduation cap is not held on by its shape. It is held on by friction against your hair plus whatever pins you put in, which means the style underneath is doing structural work whether you planned for that or not.
A pin only holds if it passes through anchored hair. Driven into loose length it travels with the length, and the cap comes with it.
Friction is the other half. A mortarboard grips the crown through its skullcap, and freshly washed or heavily gelled hair gives it almost nothing to grip.
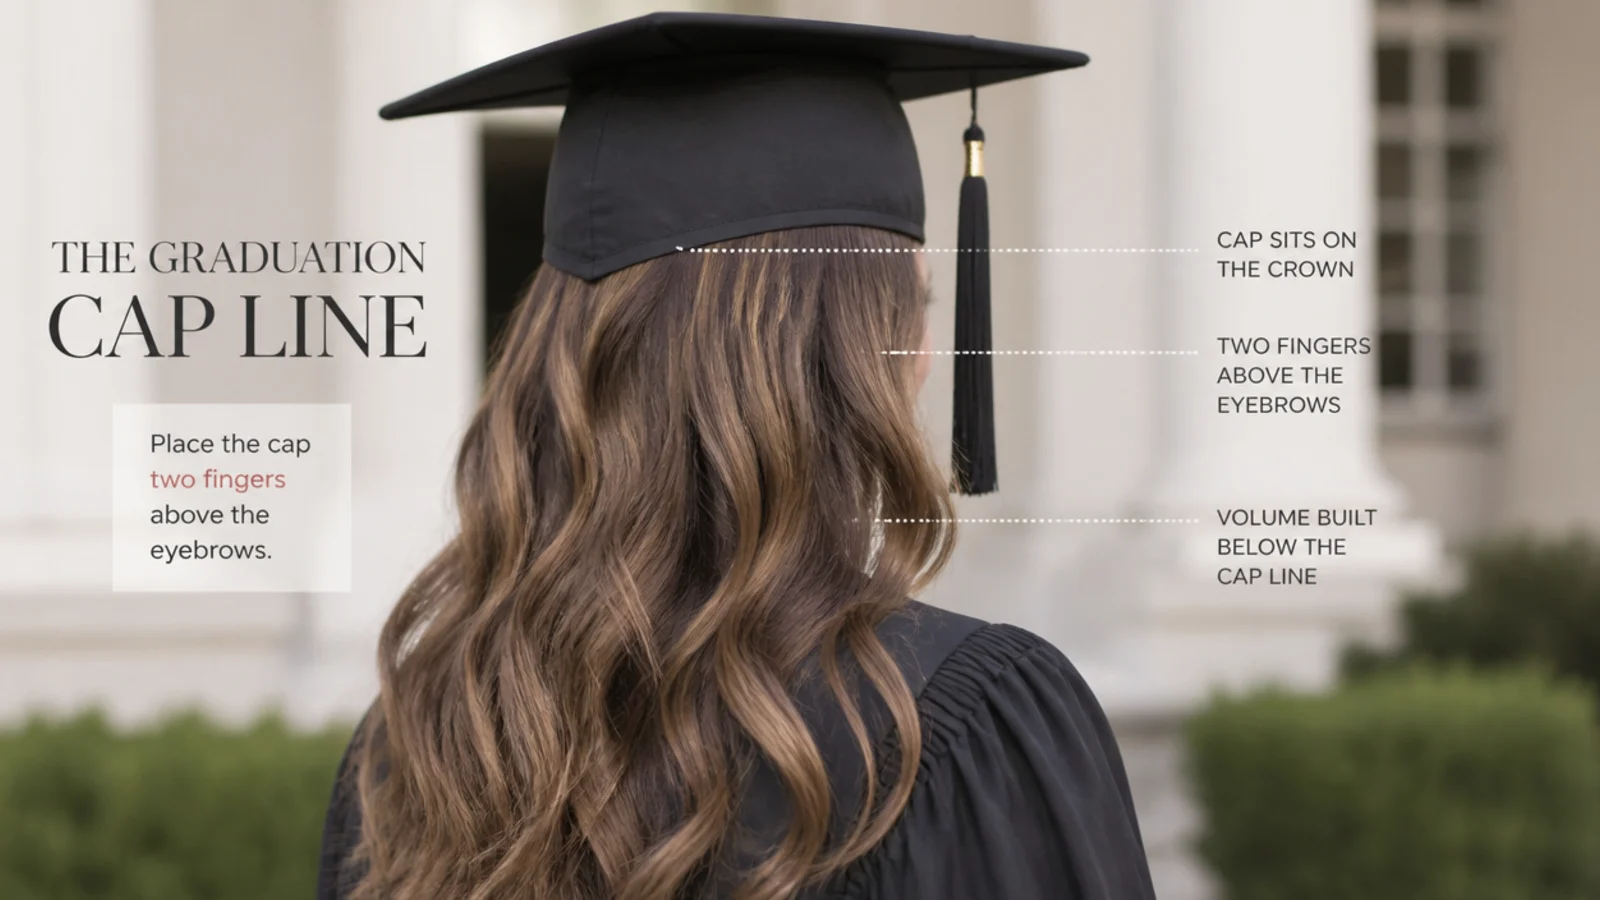
The Cap Line Explained
The line is where the front edge of the cap crosses your head. Roughly an inch above the eyebrows, curving back around the widest part of the skull.
In front of the line is display, behind it is compression. Everything behind that boundary spends the ceremony under a flat board and comes out flat.
Height under the band tips the board. A bump on one side lifts that edge, and a board sitting at an angle slides every time you turn your head.
Find your own line rather than guessing. Heads differ. Put the cap on before you style anything and clip a section where the edge actually falls.
Behind the line, bulk is fine as long as it is low. The nape is entirely outside the cap and takes as much volume as you want to give it.
Updo Versus Hair Down in Photographs
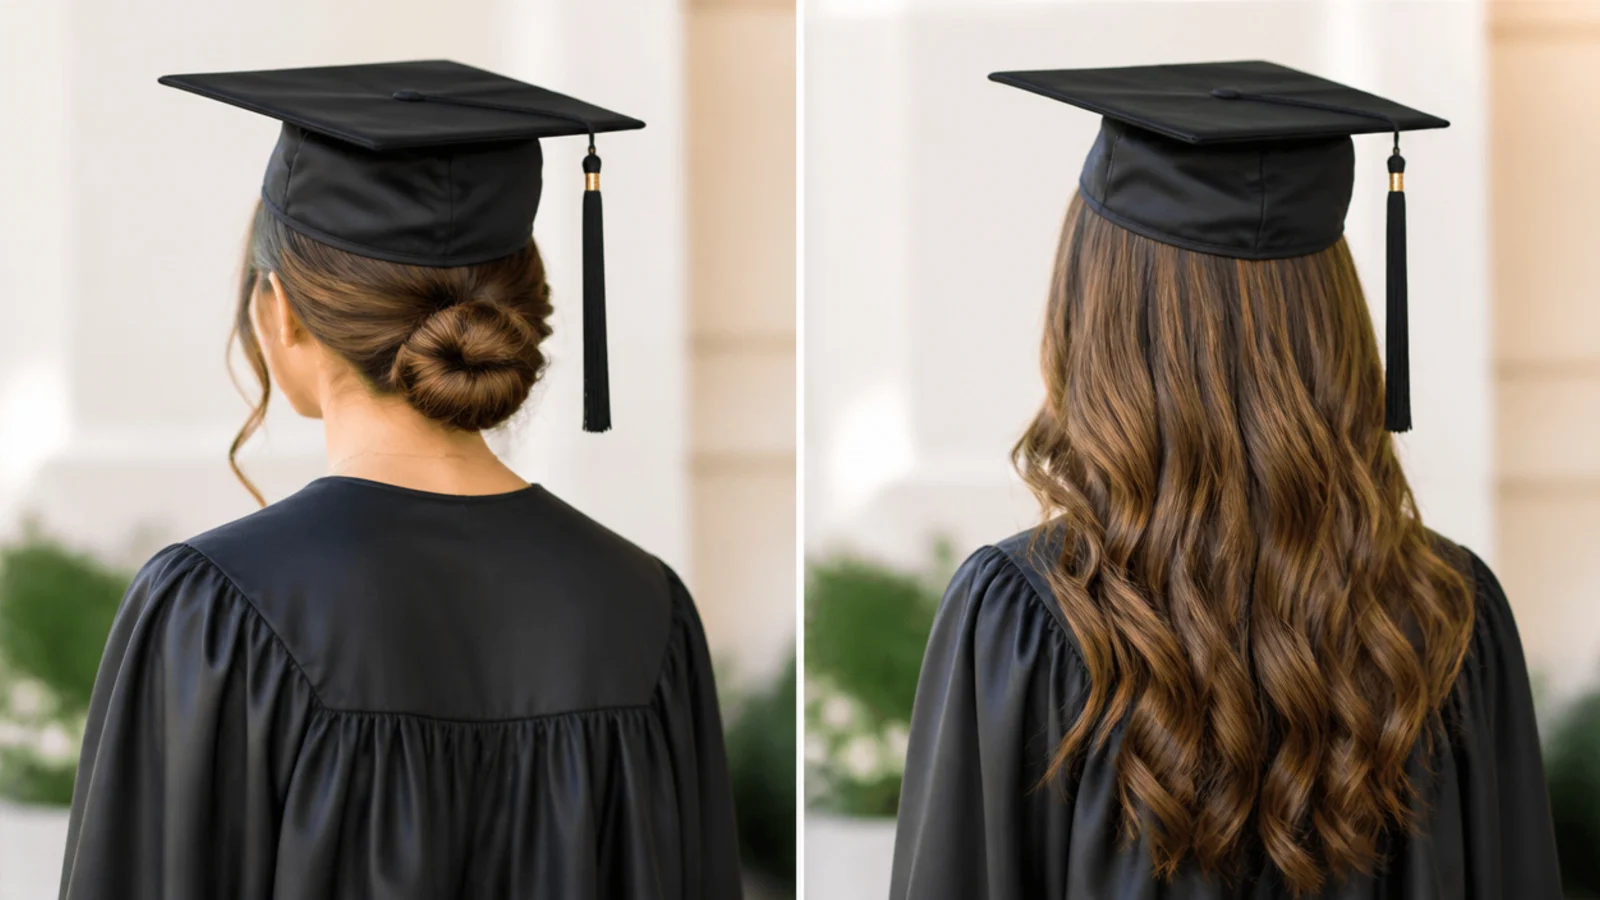
An updo gives the cap something to hold. A bun or a braid is anchored to the head, so pins passing through it cannot travel.
Hair down photographs better with the cap off. It is the difference between a style that looks correct in the ceremony shots and one that looks correct in every shot afterwards.
Hair down needs four pins rather than two. Without a structural anchor the pins are carrying the whole load, so spread them front, back and both sides.
An updo needs almost nothing added. Two crossed pins into the bun and the cap is done.
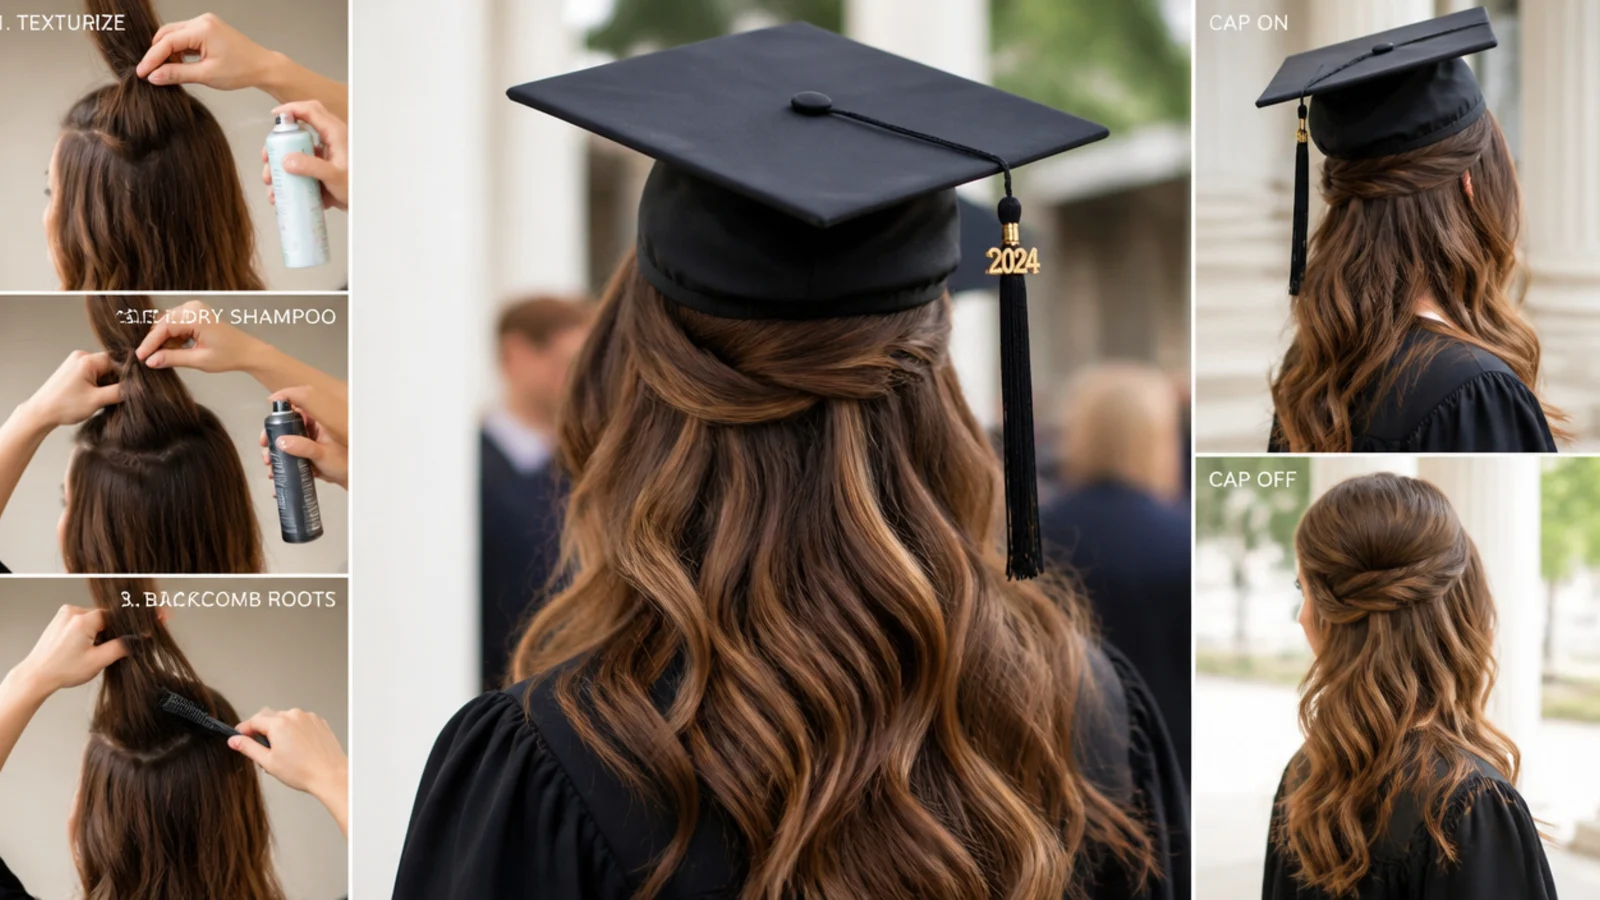
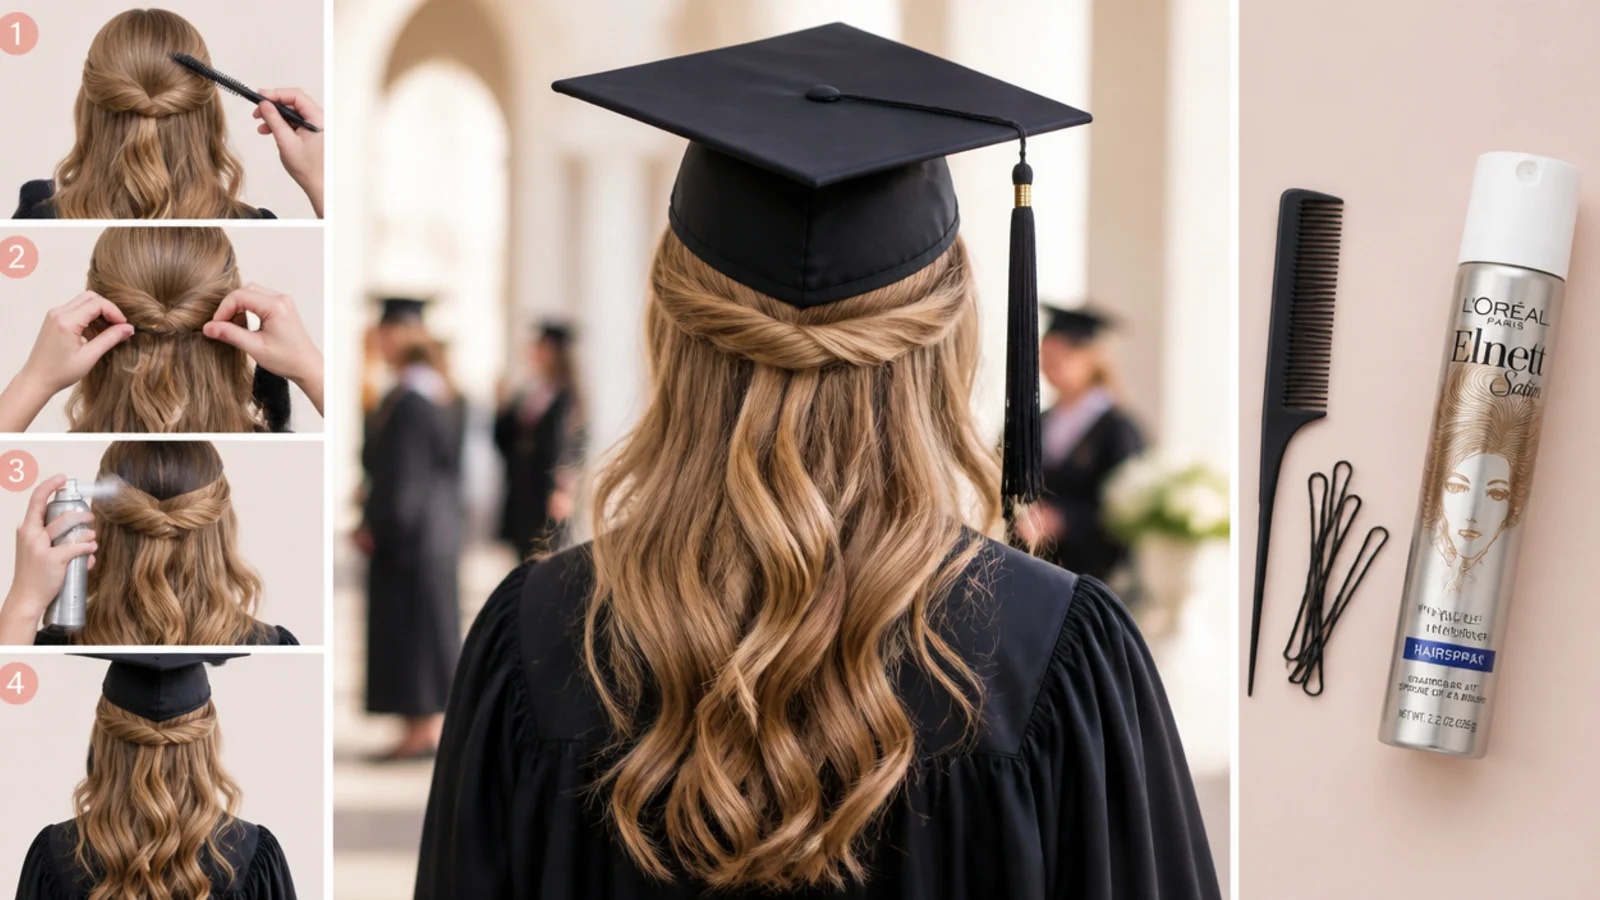
Half up is the compromise that actually works. The gathered join gives you a real anchor, and the length still reads as hair down in photographs.
Cap Styles by Hair Length
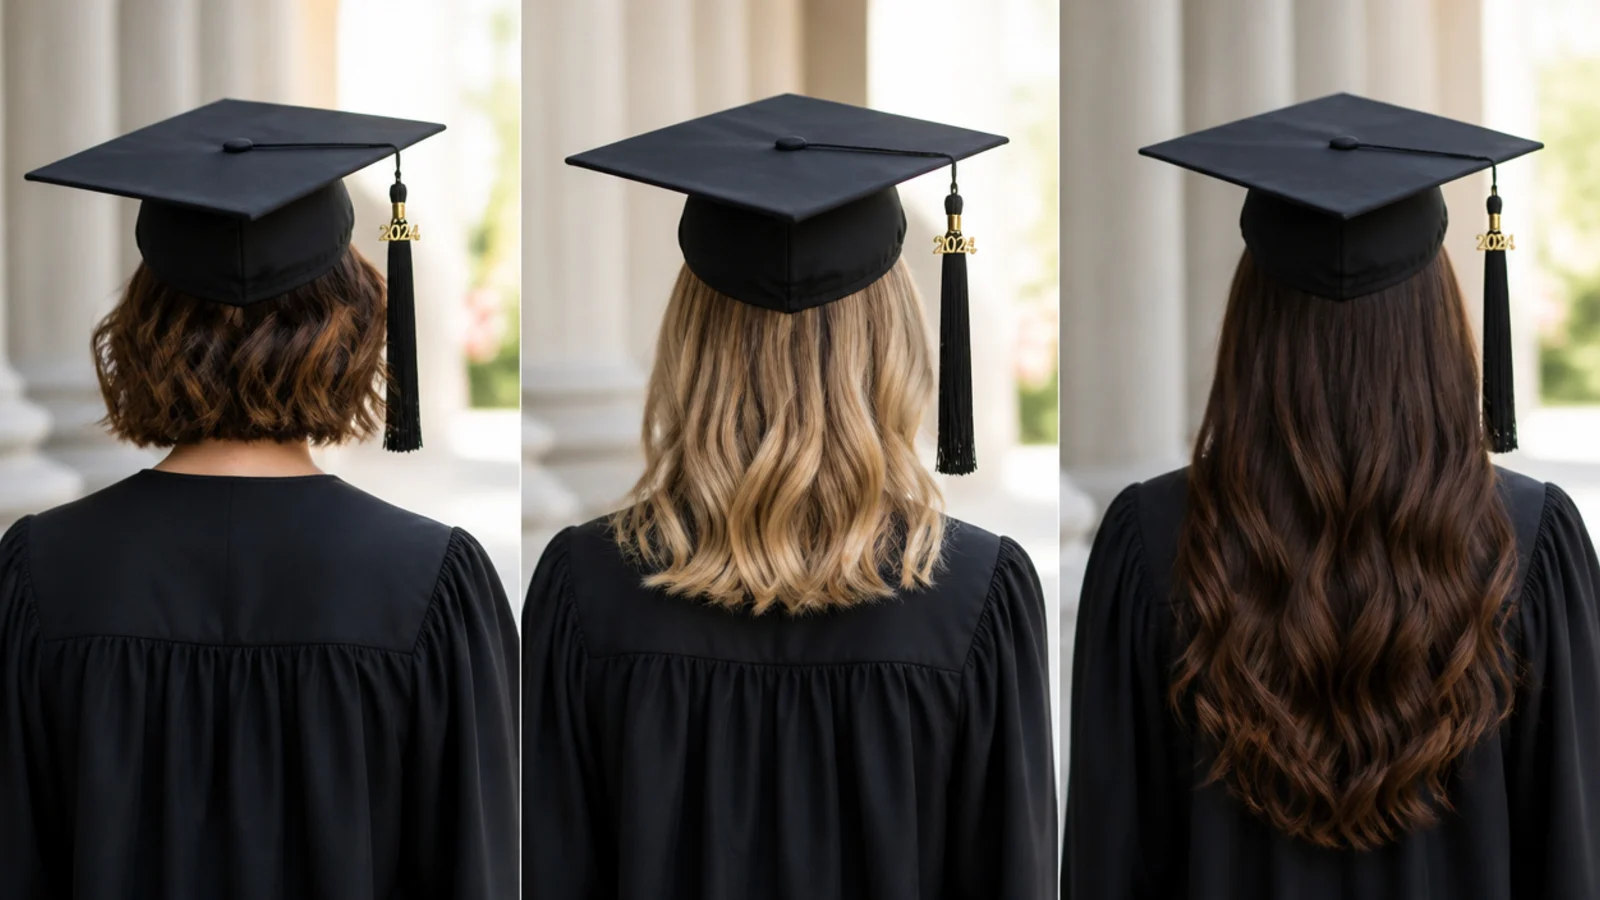
Short and bob length. There is no mass to anchor into, so pins go through the pinned back sections at the sides where the hair is densest and already secured.
Shoulder length. Every option is open. A half up join at ear level gives the easiest anchor point on the head.
Long hair. Weight is the issue. A long ponytail swinging against a gown collar drags on the cap band, so contain the ends even if the top stays loose.
Curly and coily hair. Curl compresses rather than grips, so the cap sits higher and needs more pins. Four is normal rather than excessive here.
Fine hair. Grip is the whole problem. Second day hair or a mist of dry shampoo at the roots gives both the pins and the skullcap something to bite.
All Day Hold and Pins
Wavy side against the head. The ridged edge is the part that grips, and a pin inserted flat side down gives away half its hold for no reason.
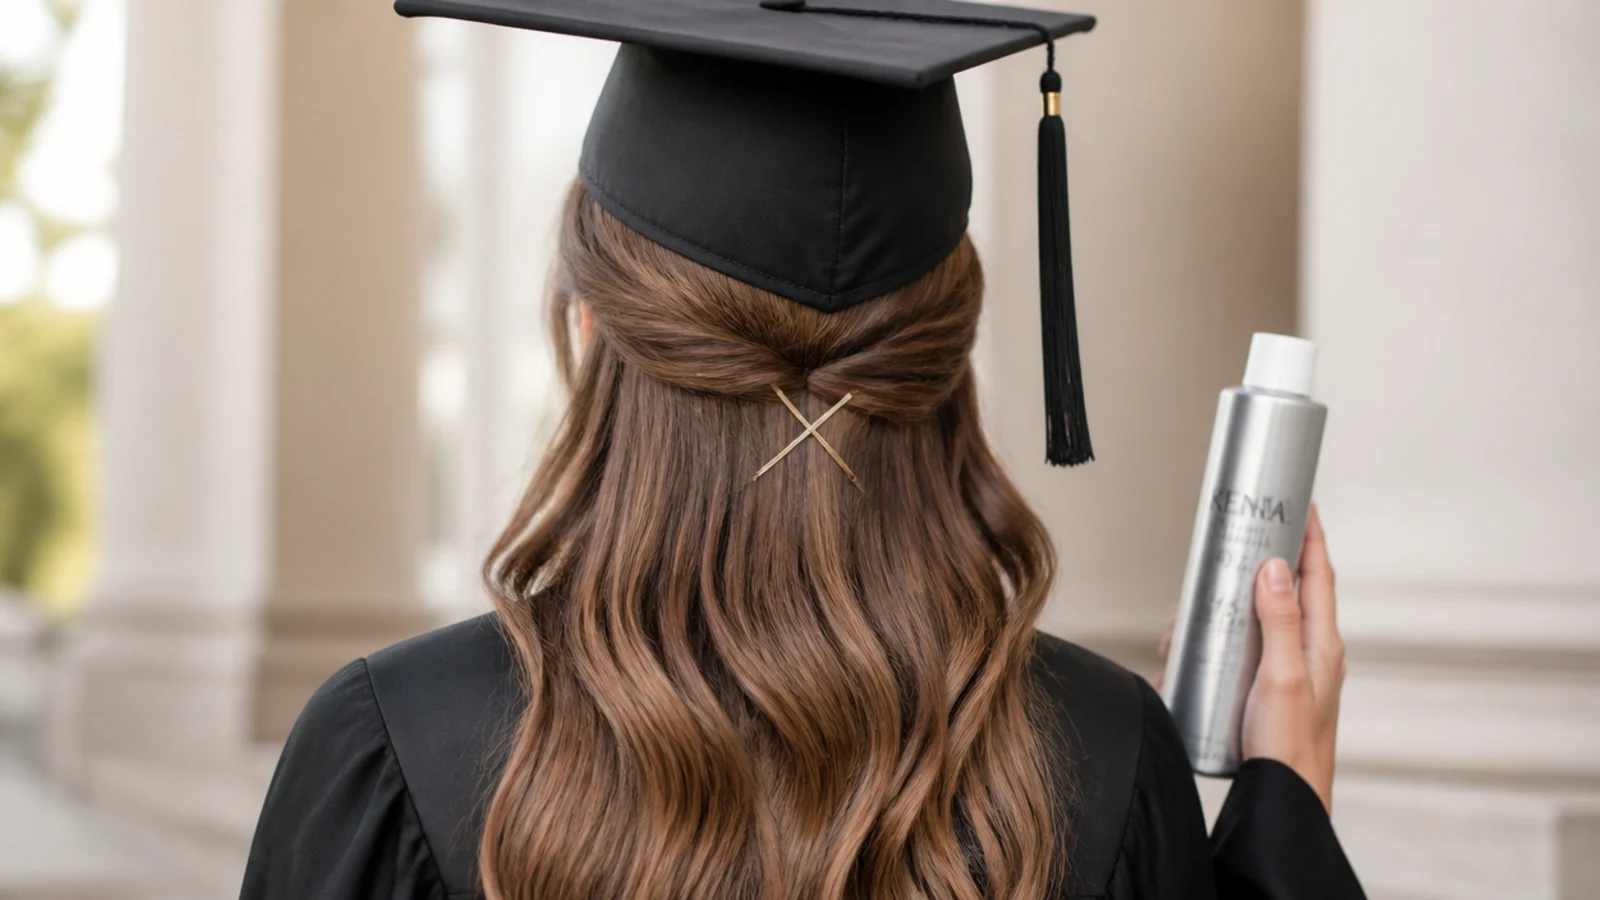
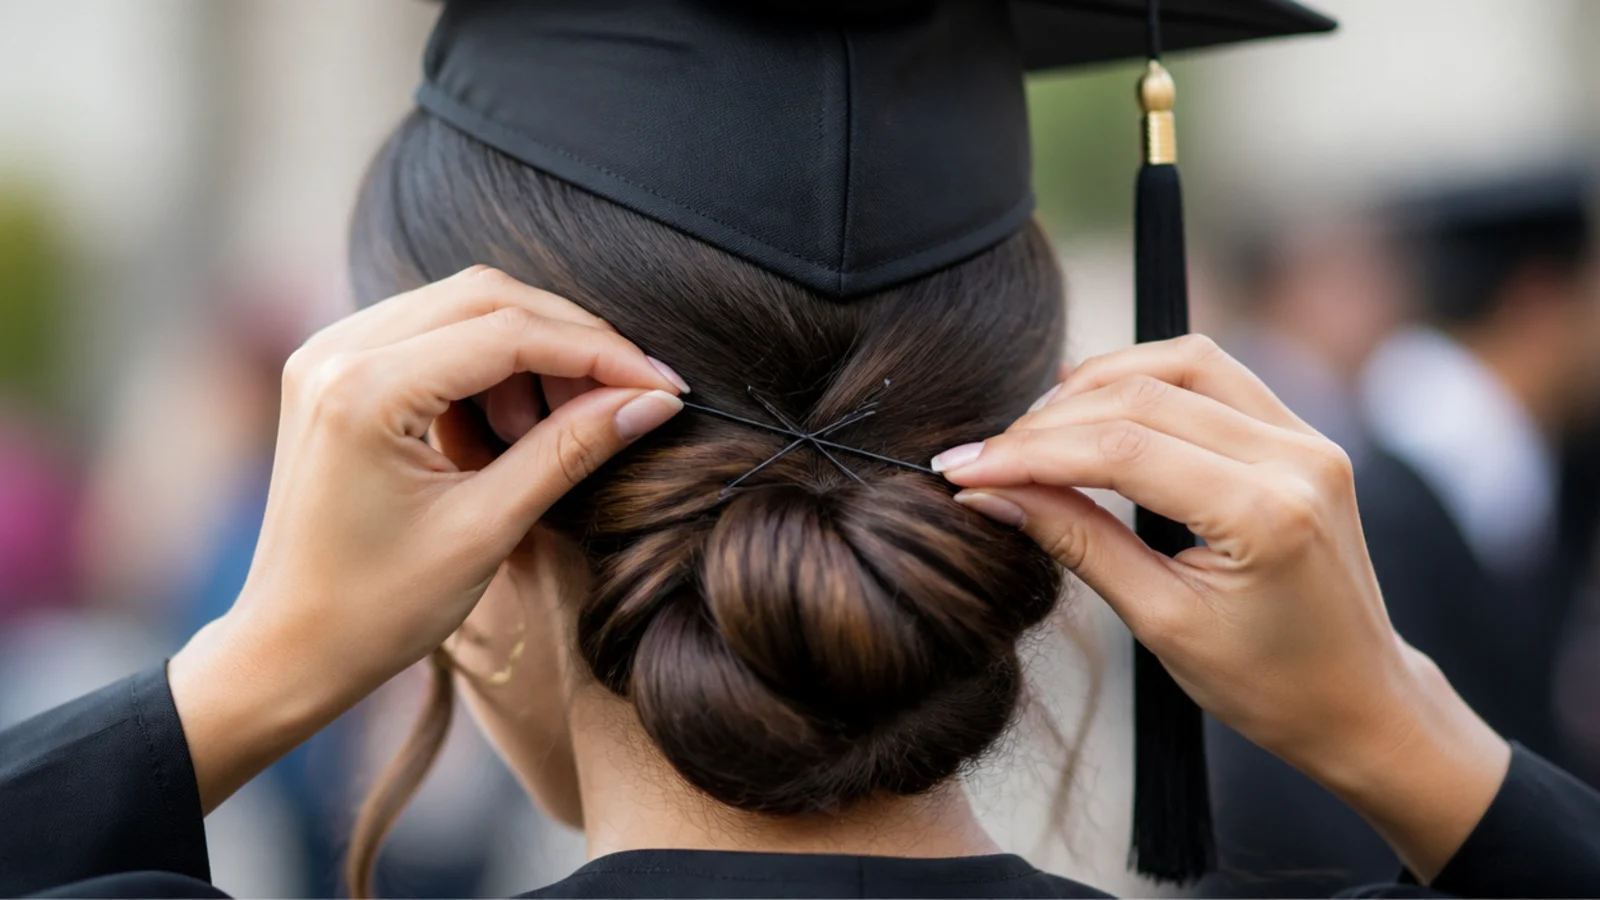
Cross them in an X. One pin resists movement across itself only. Two crossed give you four points of contact in two directions.
Anchor into anchored hair. Every pin should pass through the cap band and then through hair already fixed to the head, never through loose length.
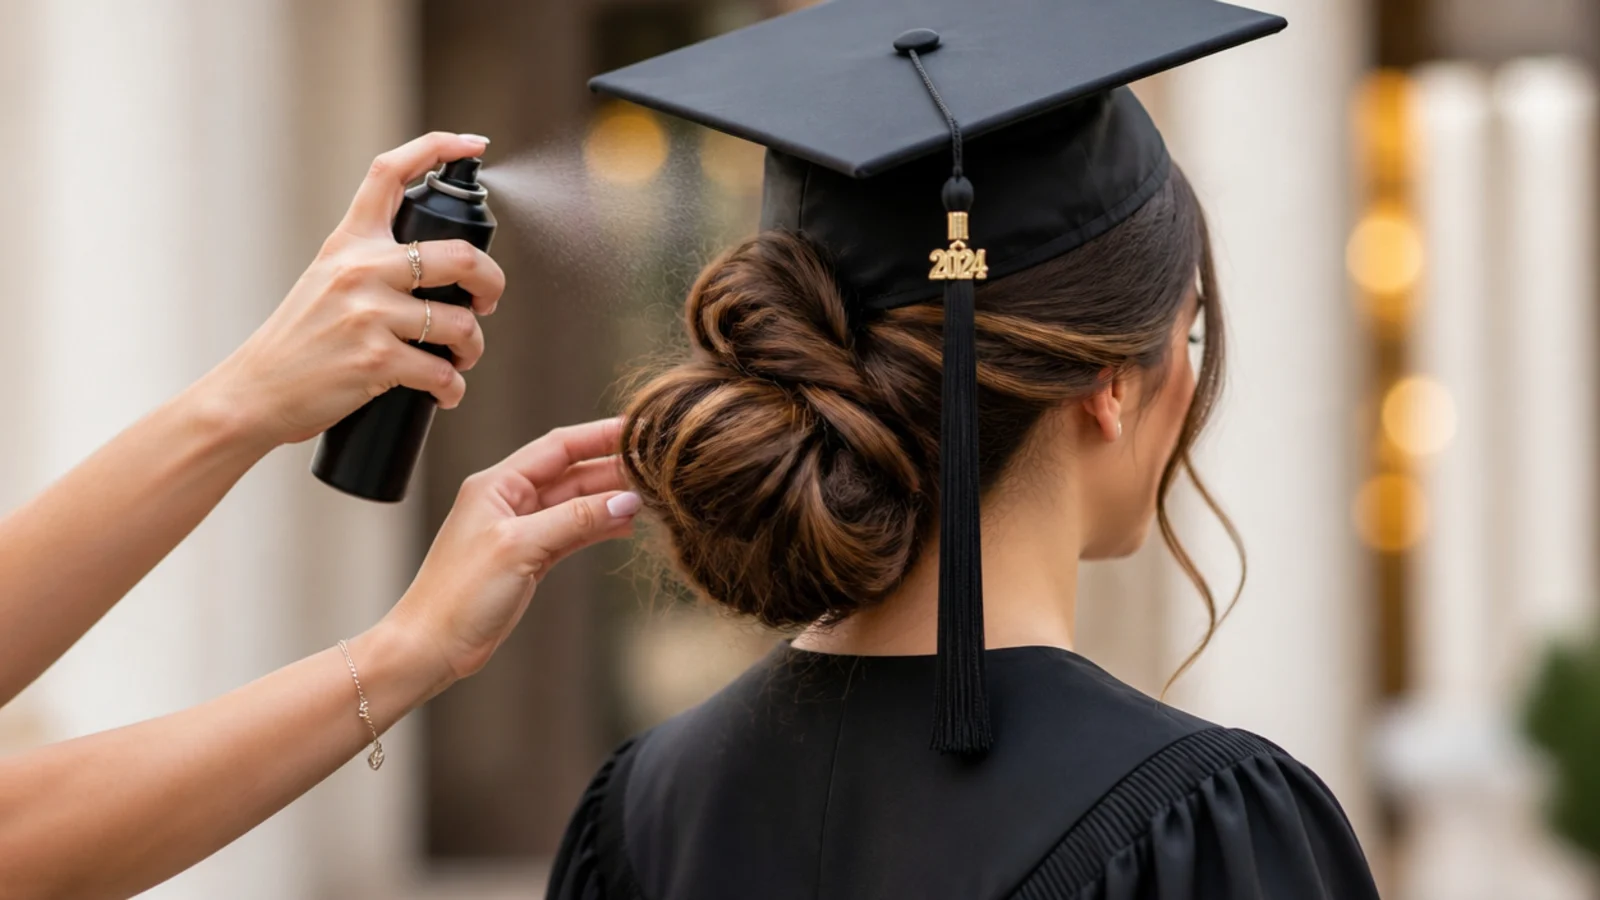
Flexible hold spray, not firm. A rigid cast cracks under two hours of even pressure and the flakes land on a dark gown.
Test by shaking your head, not by looking. A cap that survives a firm nod will survive the walk. One that only survives standing still will not.
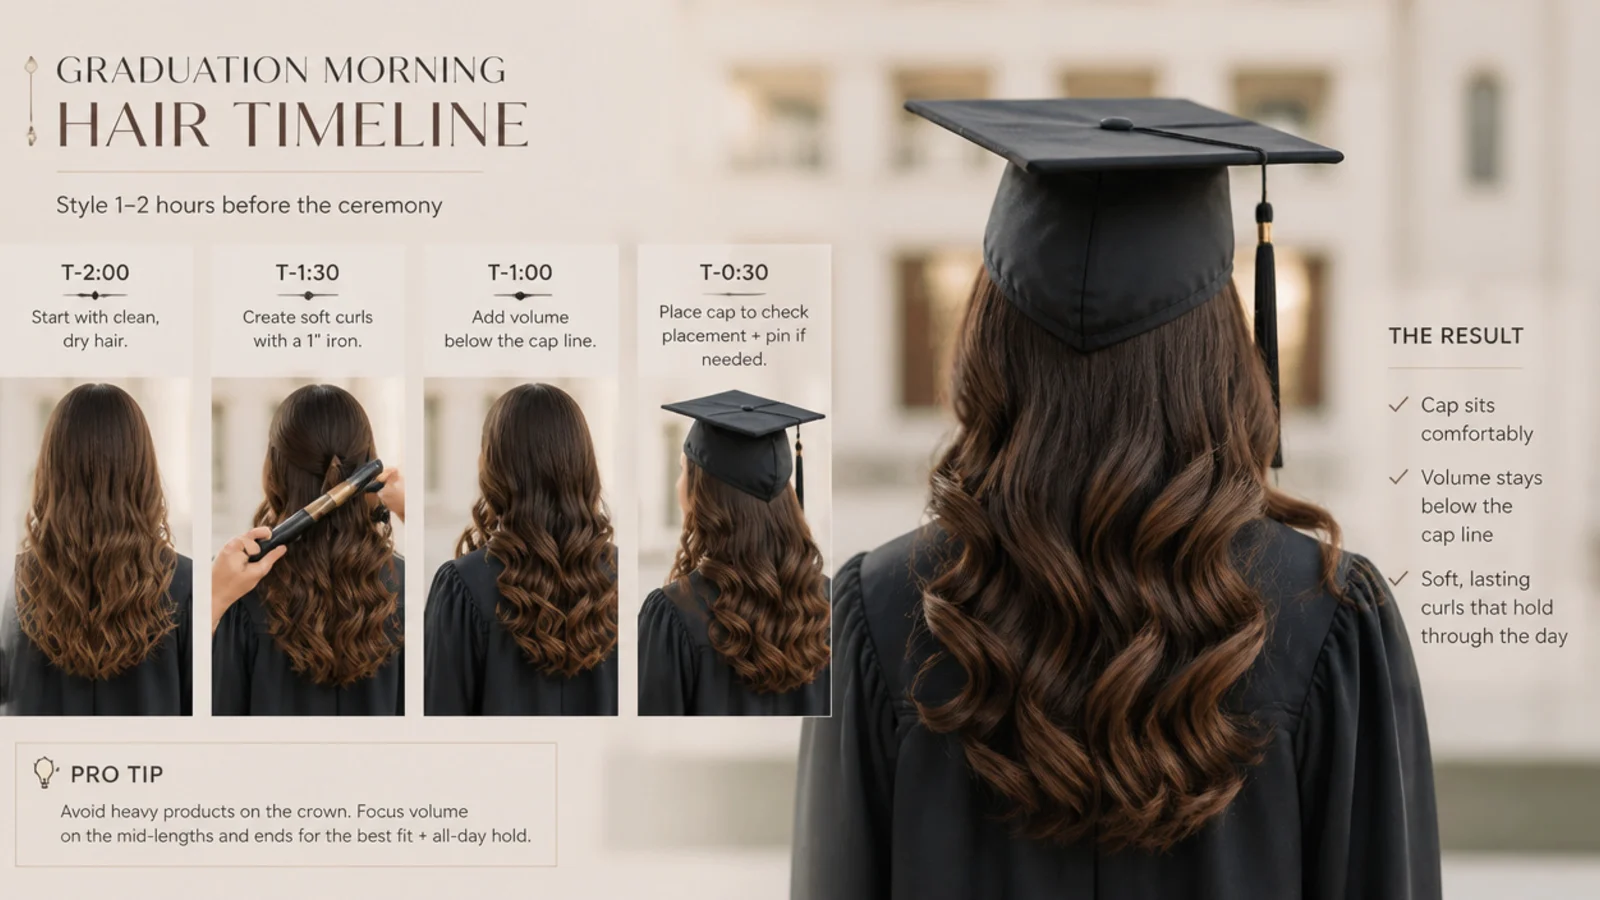
The Morning Timeline
Wash the night before. Clean hair is slick, and slick hair gives a cap nothing to hold on to.
Style ninety minutes before you leave. Everything settles and drops slightly, and you want that finished before the photographs start.
Pin the cap at home. Not in the queue, not in a car park. This is the step everyone postpones and then rushes.
Dress after the hair is done. A gown pulled over a finished updo undoes more work than anything else in the morning.
Photograph the back. You cannot see it, and it is the only reference you will have if something moves later.
The Cap Off Dent Fix
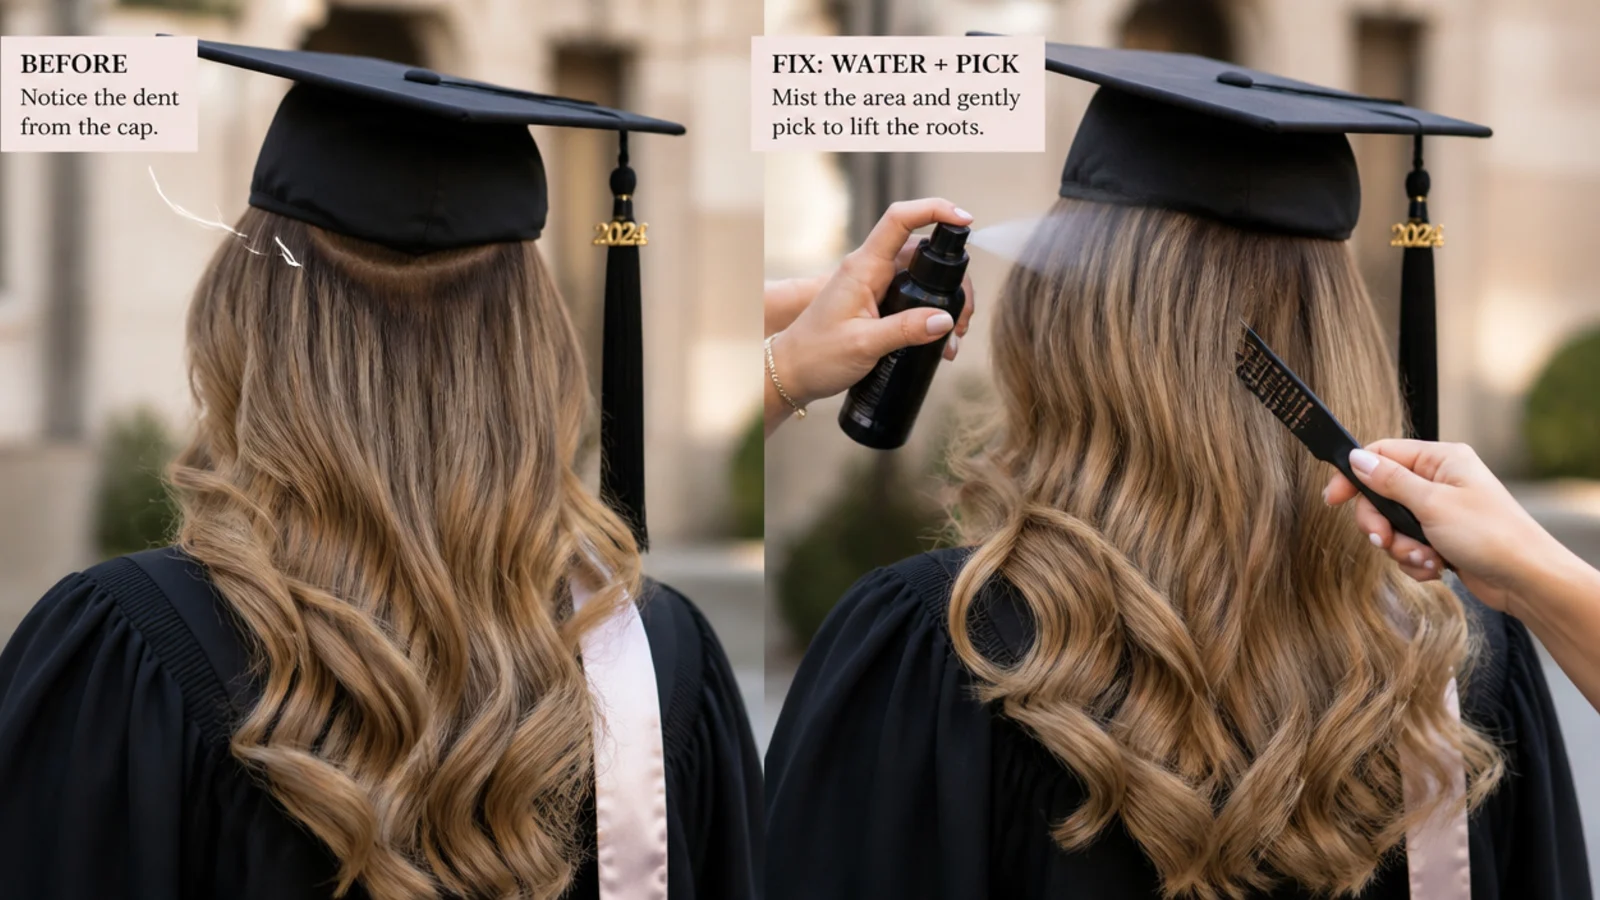
A line across the crown is normal. Two hours of even pressure produces one on almost every style, so plan the repair rather than hoping.
Lift at the roots. Fingers underneath and a shake. Brushing the length only spreads the flatness further down.
Warm, lift, then let it cool held up. Hair sets its shape as it cools rather than while it is hot, so releasing a section warm undoes the fix immediately.
Dry shampoo works by friction. It gives flattened strands something to catch on so they stop lying back down.
Or turn the crease into a parting. A deliberate line reads as a decision, and a flattened crown brushed into a part stops looking like damage.
The 15 Cap Hairstyles
1. Low Nape Bun
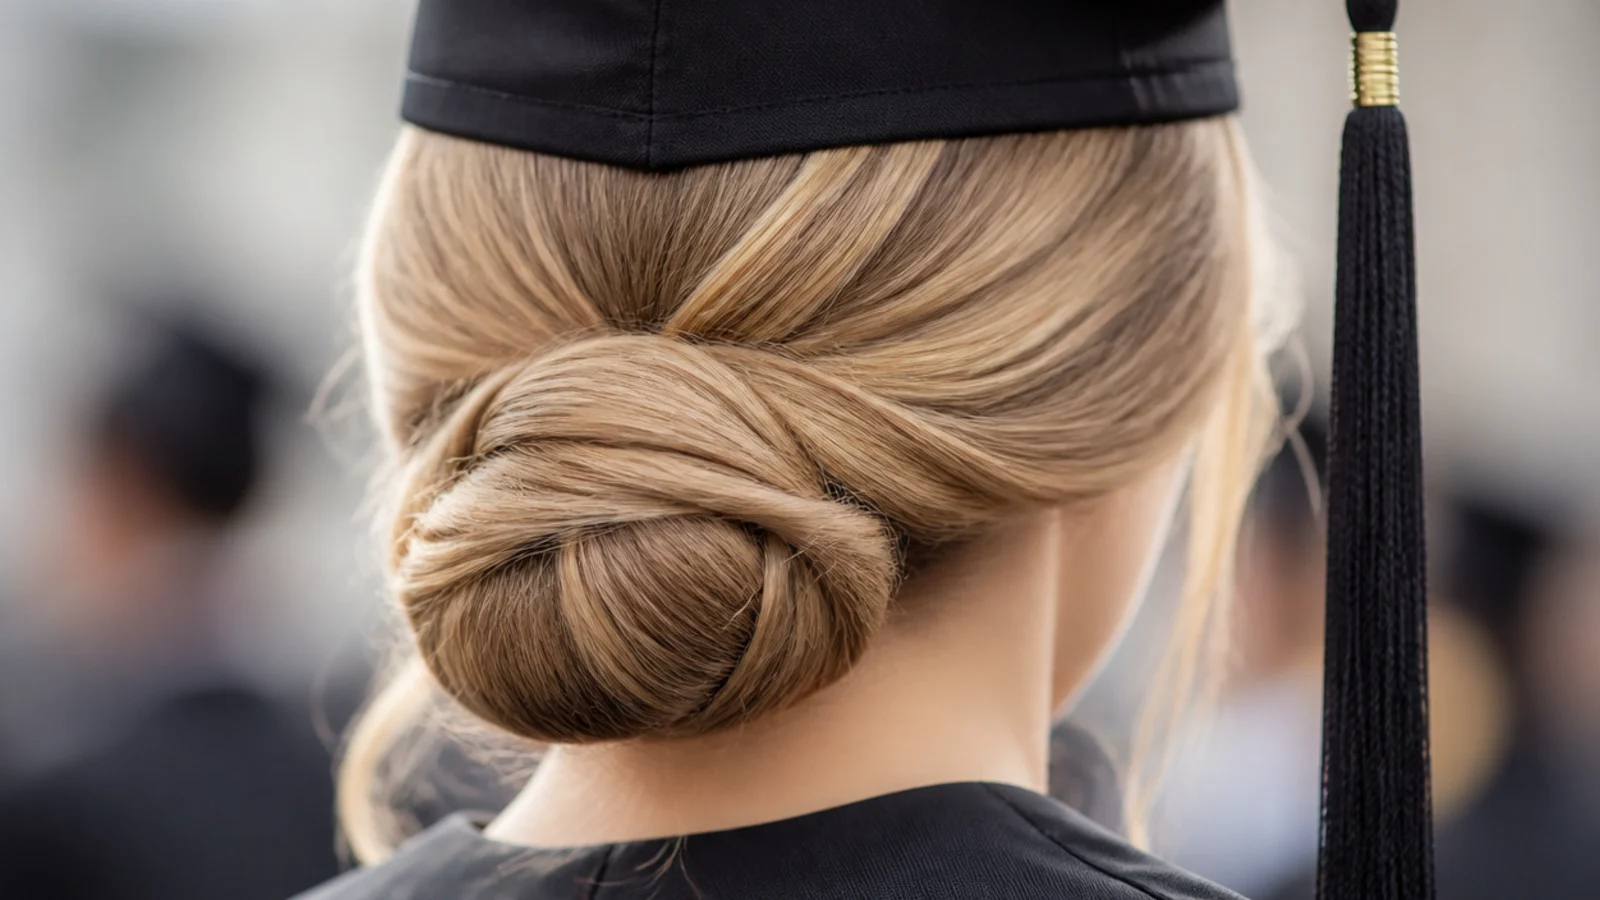
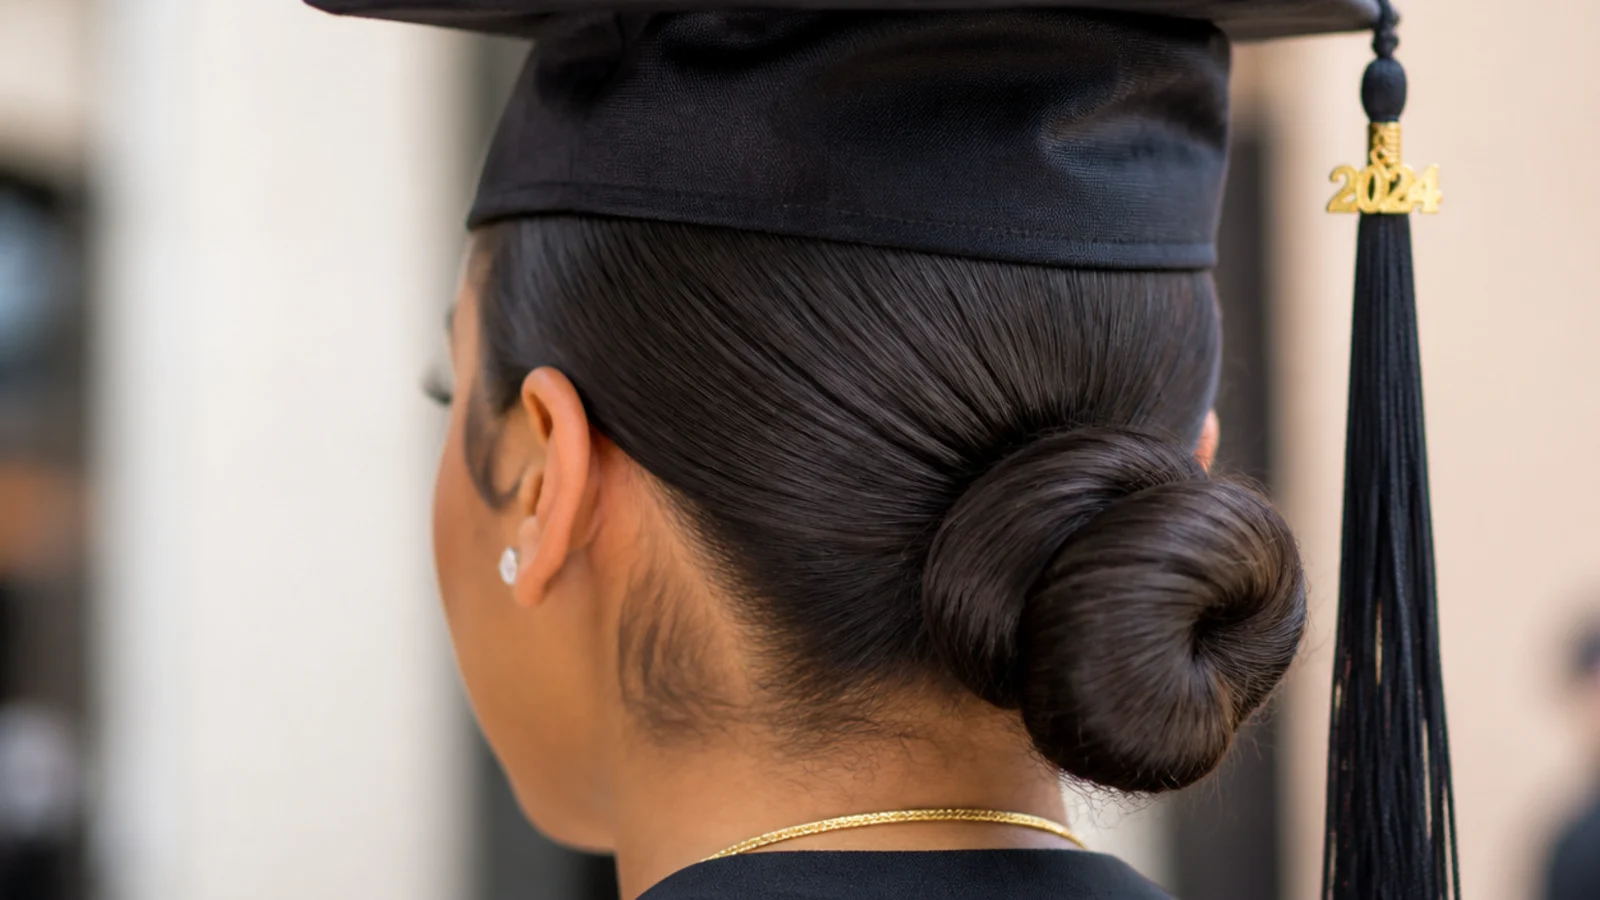
A gathered mass at the nape is the firmest anchor on the head, so pins passing through it catch dense secured hair rather than loose strands. It also leaves the entire crown free, which is exactly the surface the skullcap needs to grip.
2. Half Up at Ear Level
The gathered join gives you a solid pin target while the length still reads as hair down in photographs. Keep the join at ear level or below, because a join any higher becomes a bump directly under the skullcap and lifts the front edge of the board.

3. Side Swept Waves
Sweeping everything to one shoulder creates a denser side to pin into and takes the length off the gown collar. There is no structural anchor here, so the cap needs four pins rather than two and the crown will want restyling afterwards.

4. Flat Crown Braid
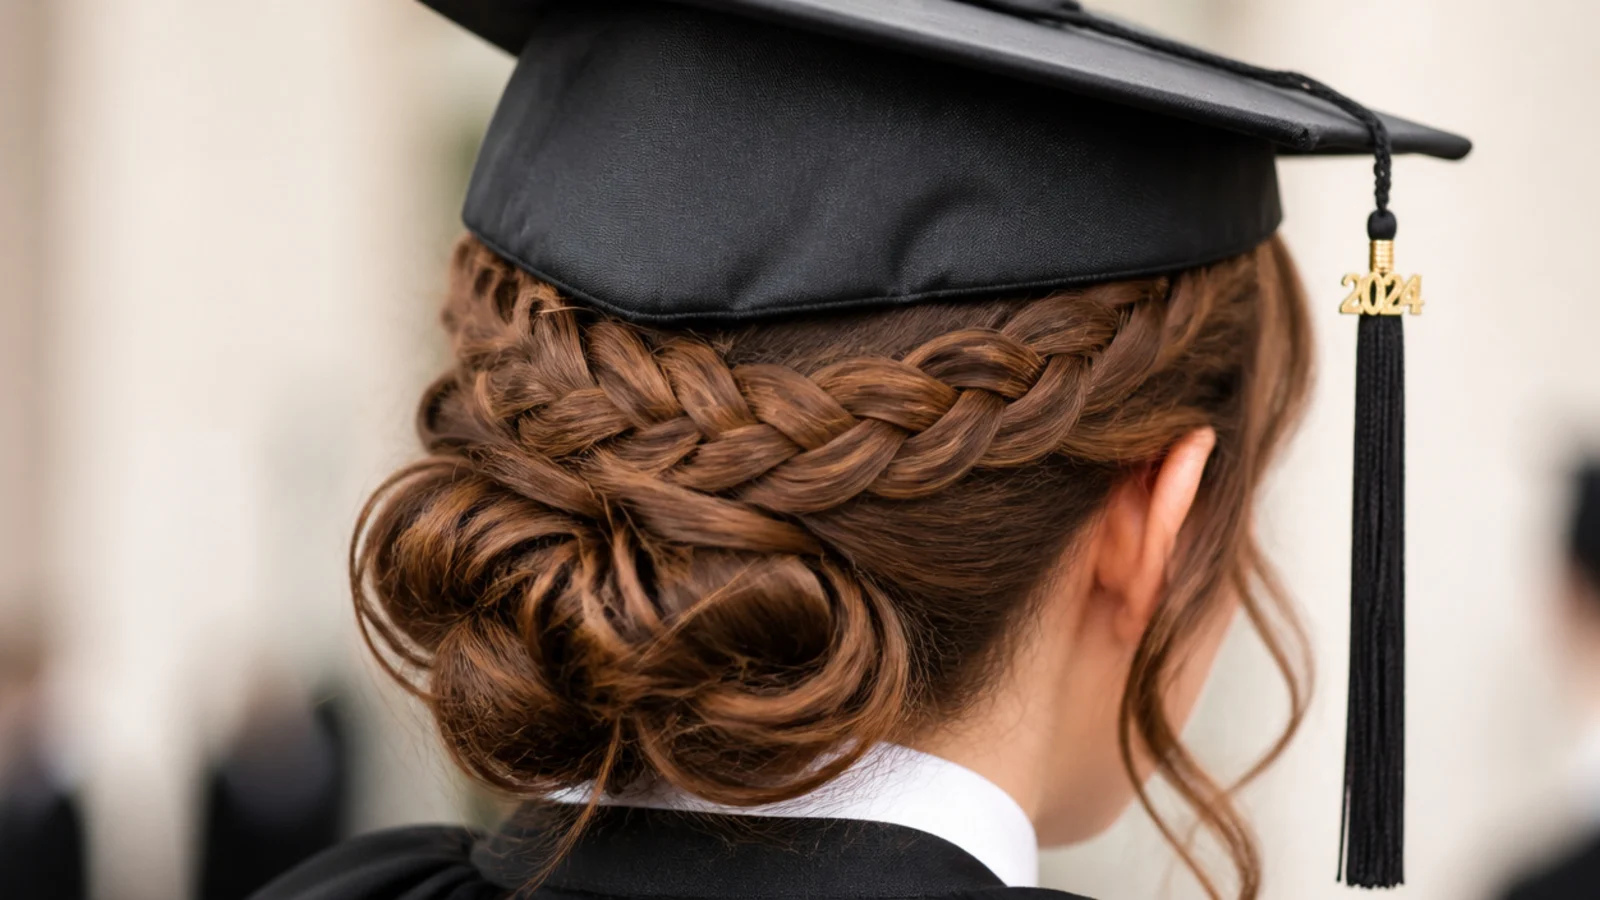
A braid worked against the scalp is anchored to the head along its entire length, which makes it the single best thing on this list to pin into. A pin through a scalp braid has nowhere to travel to, so the cap stays exactly where you put it.
5. Sleek Low Ponytail
There is nothing above the cap line to crush, which makes this one of the safest choices for a long ceremony. The catch is that gel makes the crown genuinely slippery, so the friction the cap normally relies on is gone and the pins have to go into the ponytail base.

6. Messy Side Bun
Roughed up hair has friction against itself and against the cap, so this grips better with two pins than a polished style does with four. The asymmetry also means one side carries more hair, giving you an obvious place to put the anchor.

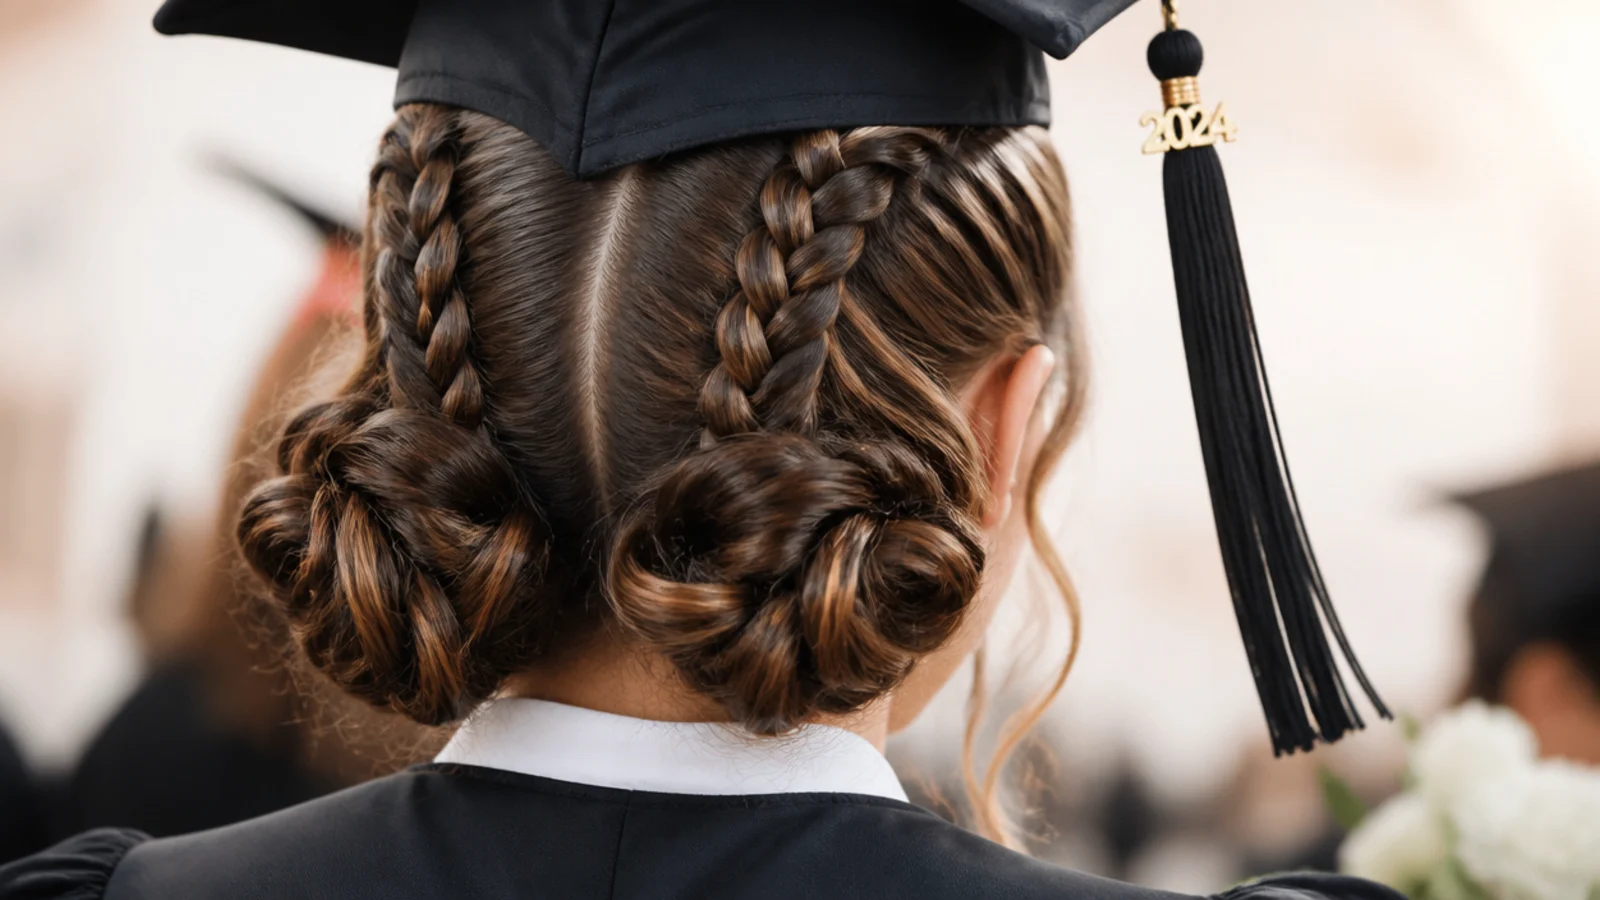
7. Double Dutch Braids
Because Dutch braiding crosses the strands underneath, each braid stands proud of the scalp and forms a ridge the cap band can seat behind rather than slide over. Two anchored rows also give you four obvious pin points spread across the head.
8. Pinned Back Bob Curls
Short hair offers no mass to anchor into, so the pinned back sections at the sides become the anchor and the cap pins go through those. Keep the curl itself below the cap edge, since a heat set at the crown is the first thing two hours of pressure will undo.

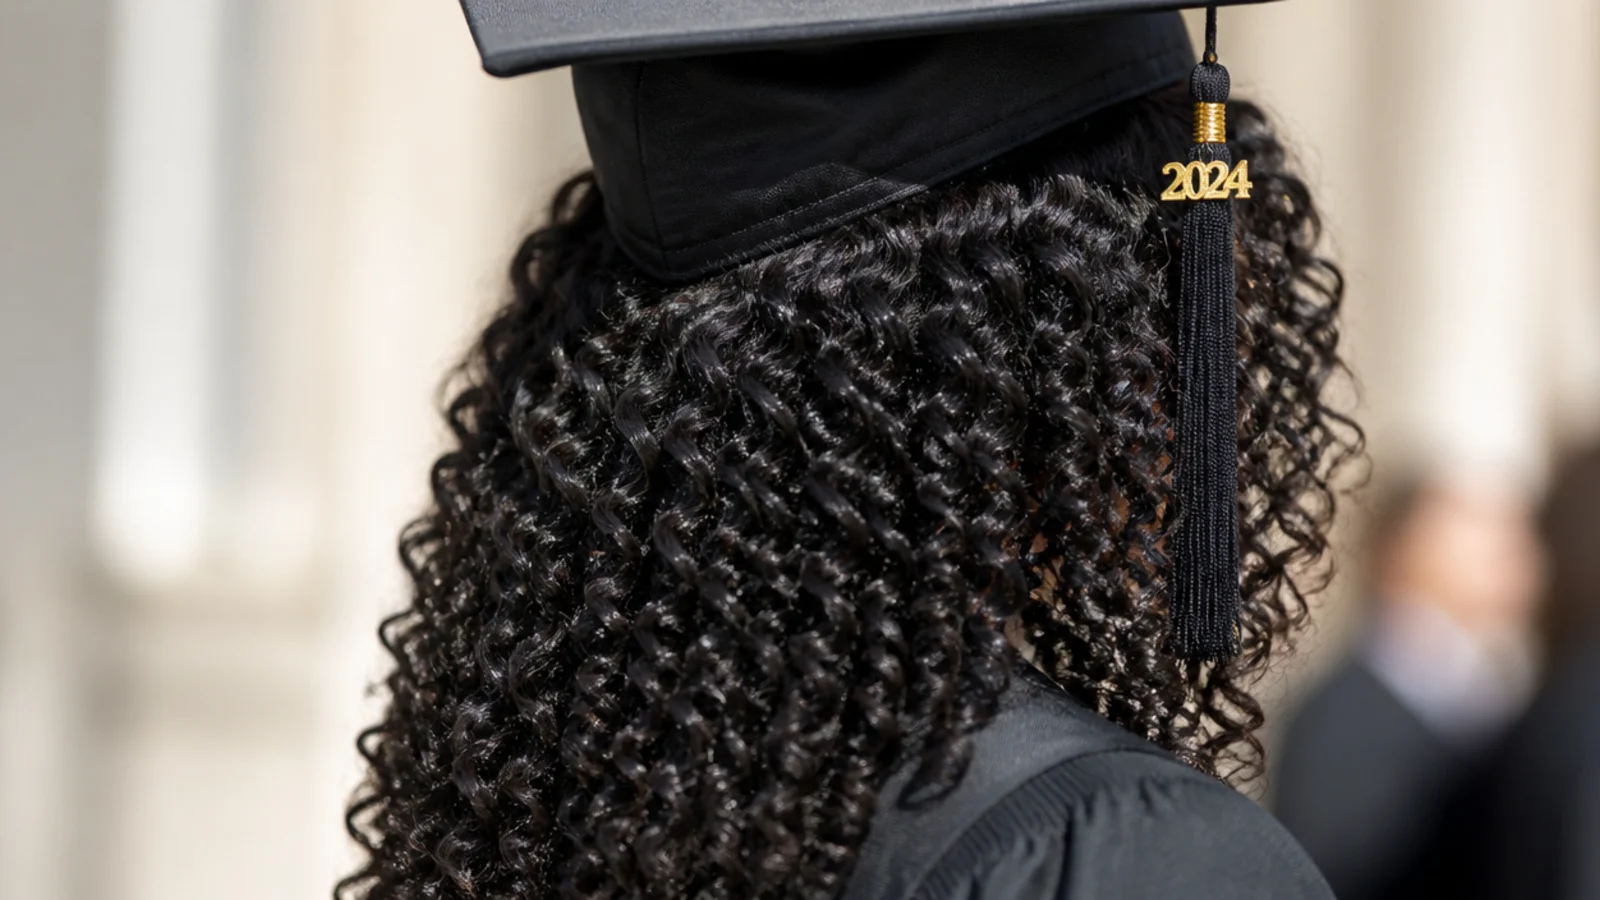
9. Defined Natural Curls
Curl volume compresses under a cap rather than gripping it, so the board sits higher and moves more, which is why four pins is the normal number here rather than a precaution. Smoothing only the crown before the cap goes on buys back most of the stability without flattening the style.
10. Rolled Low Chignon
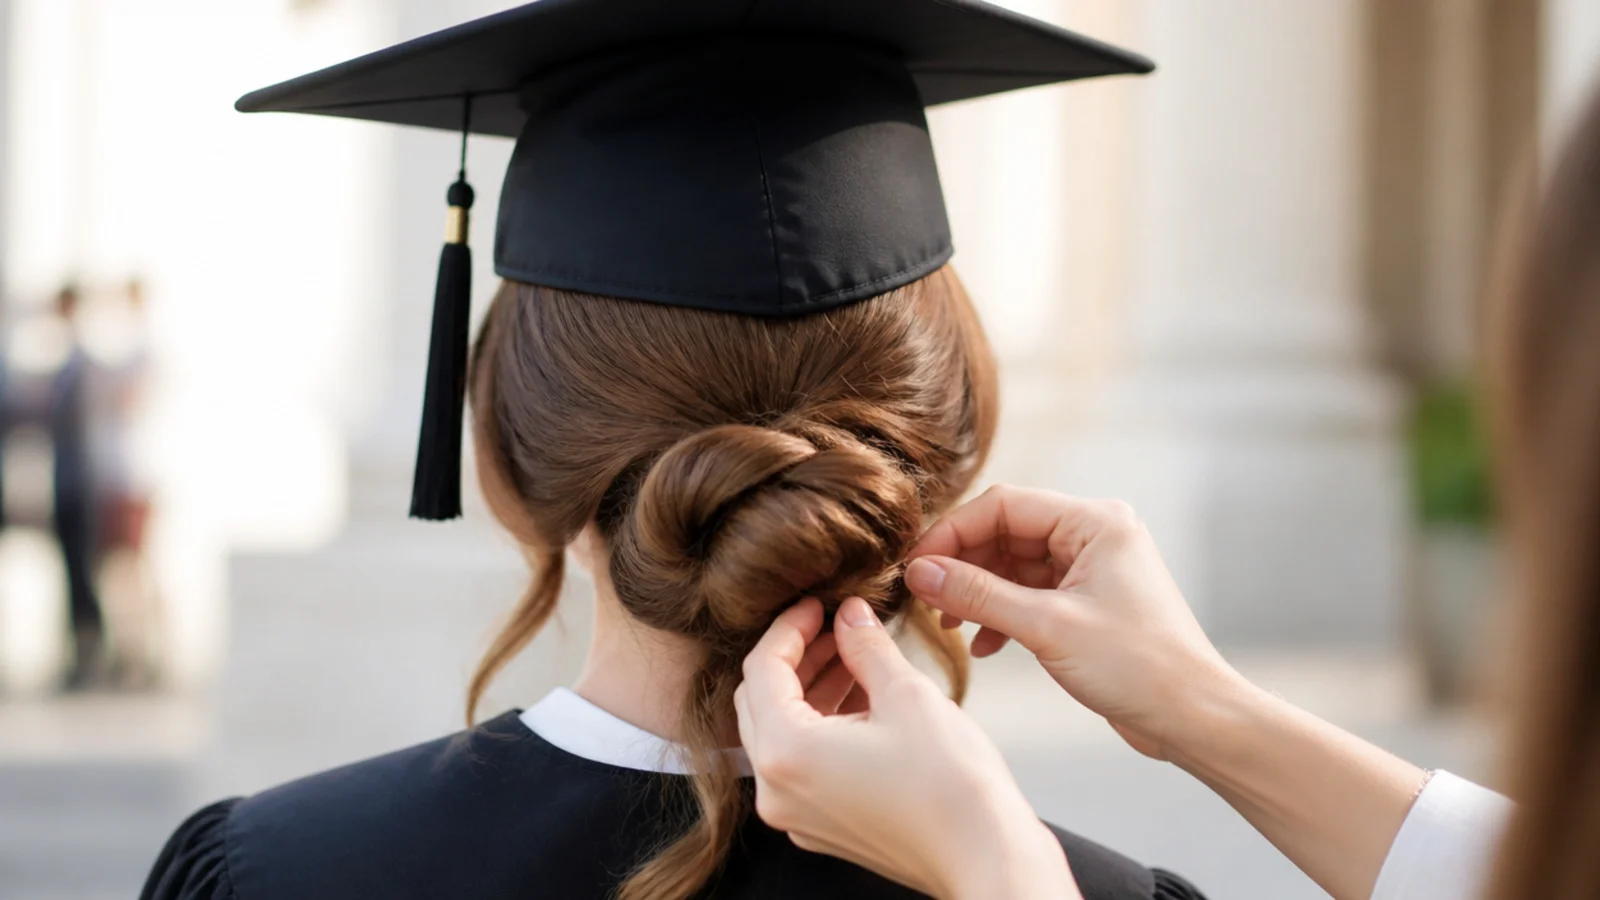
A roll is firmer than a gathered bun because the hair is wrapped around itself under tension, giving pins a dense structure to pass through. Pin through the roll and into the hair beneath it rather than into the roll alone, or the whole thing rotates.

11. Half Up Bubble
The elastics down the gathered section split the weight so no single band takes the whole load, which is what stops a half up sagging over a long afternoon. The first elastic doubles as your pin anchor, and it sits comfortably below the cap line.

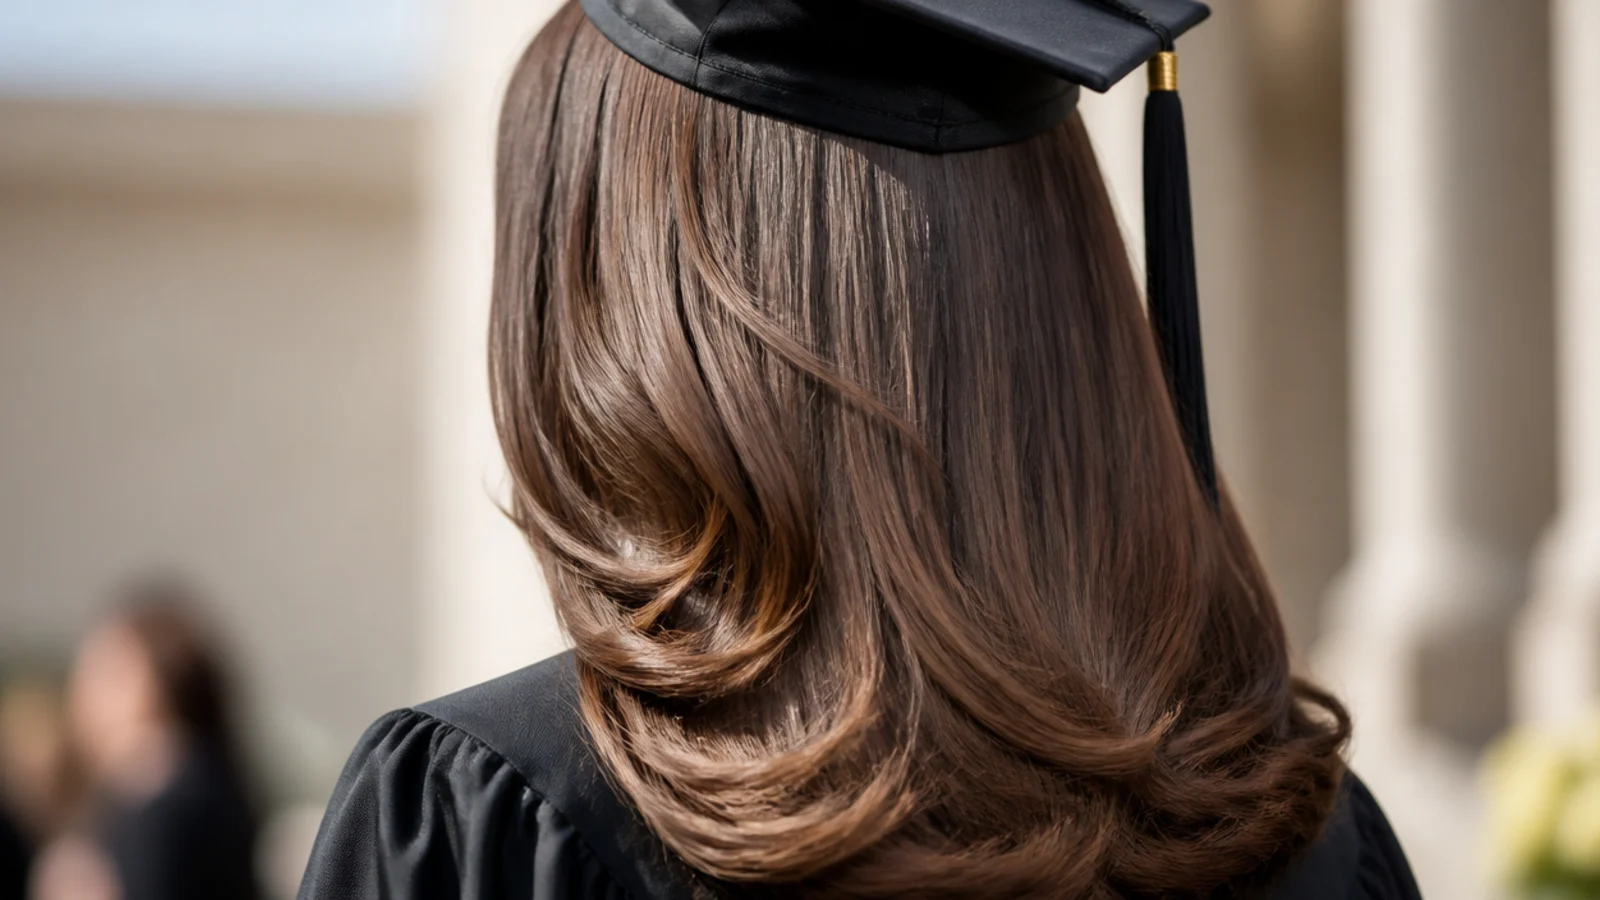
12. Side Part Blowout
This is the most vulnerable style on the list, because a blowout is a heat set held by hydrogen bonds on a smooth surface with no grip. Pin at four points, secure the parting with a small pin underneath, and plan to lift the crown as soon as the cap comes off.
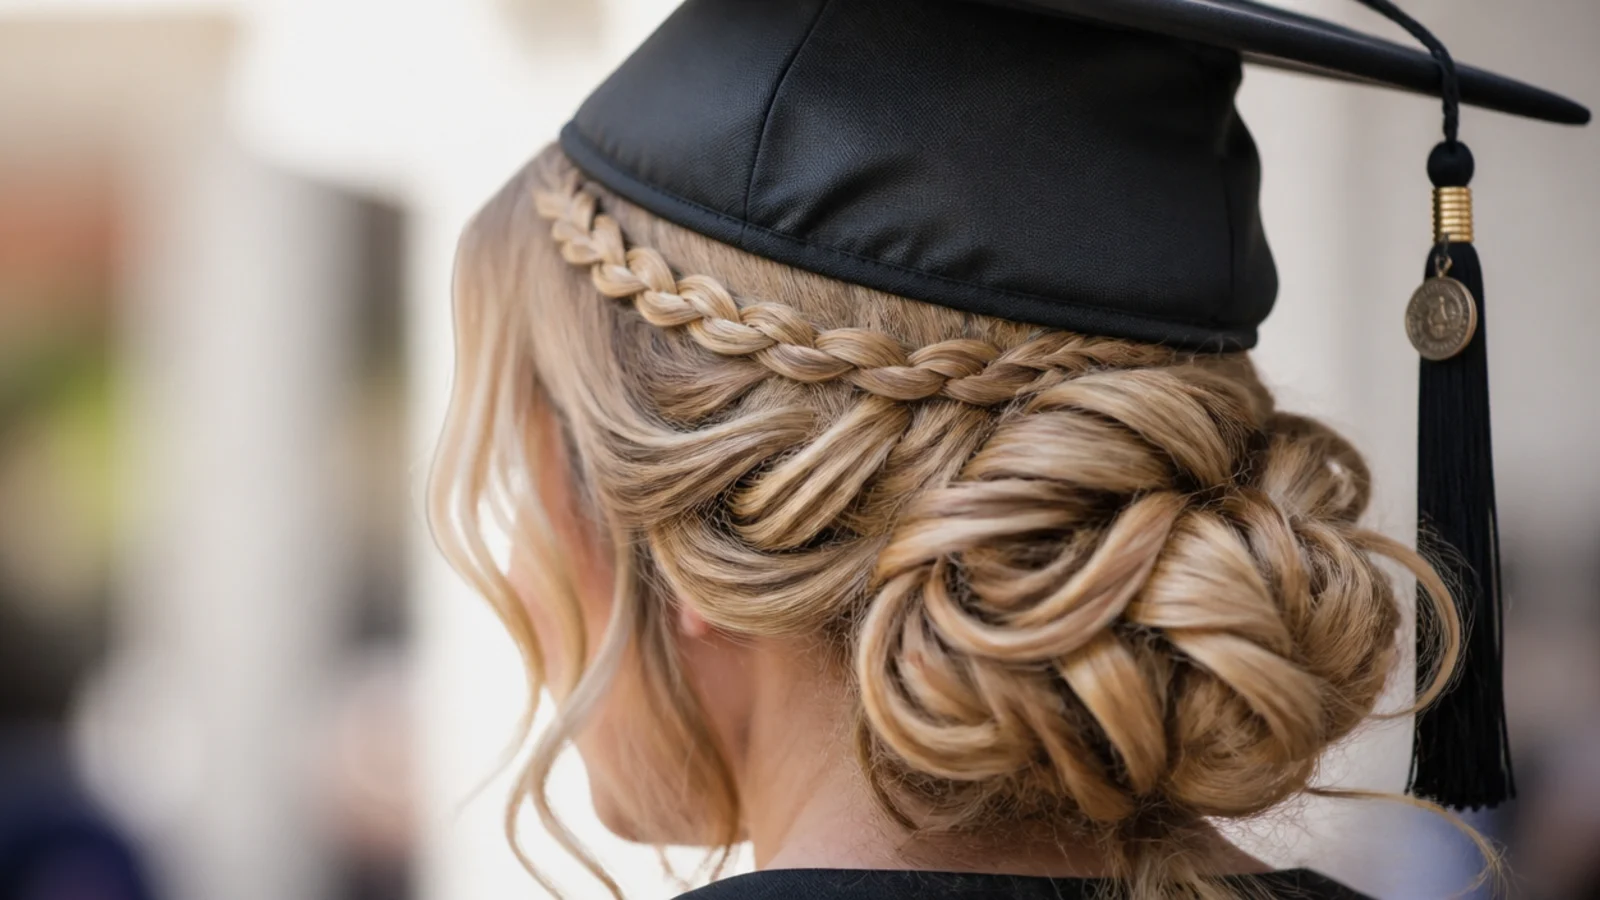
13. Braided Headband
A braid running across the head just behind the front hairline creates a physical ridge, and the cap band seats against it instead of creeping forward. It is the only style here that solves the sliding problem with shape rather than with pins.
14. Low Double Knots
Two small knots side by side at the nape give you two separate anchors instead of one, so the load on each is halved and neither works loose. The symmetry also keeps the weight balanced, which stops the cap being pulled toward one side over a long ceremony.

15. Slicked Bun With Edges
The crown is already pressed to the head so there is nothing left for the cap to flatten, and the bun gives the pins a dense anchor. Laid edges sit under the band where the cap would otherwise disturb them, which is why they hold rather than lifting during the ceremony.
How to Pin a Graduation Cap Step by Step
Step 1. Find Your Cap Line
Put the cap on before you touch your hair, run a finger along the front edge, and clip a section where it crosses. Heads are not the same shape, so the line you measure is worth more than the inch above the eyebrows everyone quotes, and everything you build goes behind that clip.

Step 2. Prep the Hair for Grip
Second day hair, or a light mist of dry shampoo through the roots, gives both the skullcap and the pins something to bite on. Freshly washed hair is slick in exactly the place the cap has to grip, which is why a cap that felt fine at home starts creeping an hour later.
Step 3. Build Everything Below the Line
Volume goes at the nape and the crown stays flat, because anything above the line is being compressed for two hours regardless of what you do to it. This is also what keeps the board level, since an even surface under the band means no edge is being lifted.
Step 4. Set It With a Flexible Hold
Use a flexible spray rather than a firm one. A rigid cast has to crack somewhere when a board presses on it for two hours, and when it does it flakes onto a dark gown where every fleck shows in photographs.
Step 5. Anchor the Cap With an X of Pins
Slide each pin wavy side down through the cap band and then through hair that is already secured to the head. Crossing two pins gives you resistance in two directions at once, where a single pin only stops the cap moving across itself and lets it slide freely along the other axis.
Step 6. Rehearse It Once
Wear the pinned cap for five minutes at home. Walk, turn your head, look down at the floor and look up, because those four movements are the whole ceremony and any of them will expose a cap that is only held on while you stand still.

Step 7. Pack a Dent Fix Kit
Four spare pins, a small comb, a claw clip and a travel dry shampoo cover every failure this day produces. It fits in a pocket, and the reason to carry it is that the moment you need it is also the moment there is a queue for the nearest mirror.
Final Thoughts
Give the pins something to hold. That one idea decides everything else here, because a mortarboard held only by friction on clean smooth hair will move, and a mortarboard pinned into a nape bun or a scalp braid will not. If you want to wear your hair down, that is a fine choice, but budget four pins instead of two and accept that the crown gets restyled once the cap comes off.
Then rehearse it. Five minutes wearing the pinned cap at home, walking and turning and looking down, tells you everything a mirror cannot. Adjust the hair rather than the cap, since the cap is a fixed shape and your hair is the only variable you control. More in Occasion Hair. See also the with version and the braided version.
Frequently asked questions
Related posts
See all posts
15 Graduation Hair Ideas for the Updo Versus Down Decision
Read more
15 Straight Hair Wedding Looks to Save
Read more
20 Gorgeous Prom Looks for Straight Hair
Read more