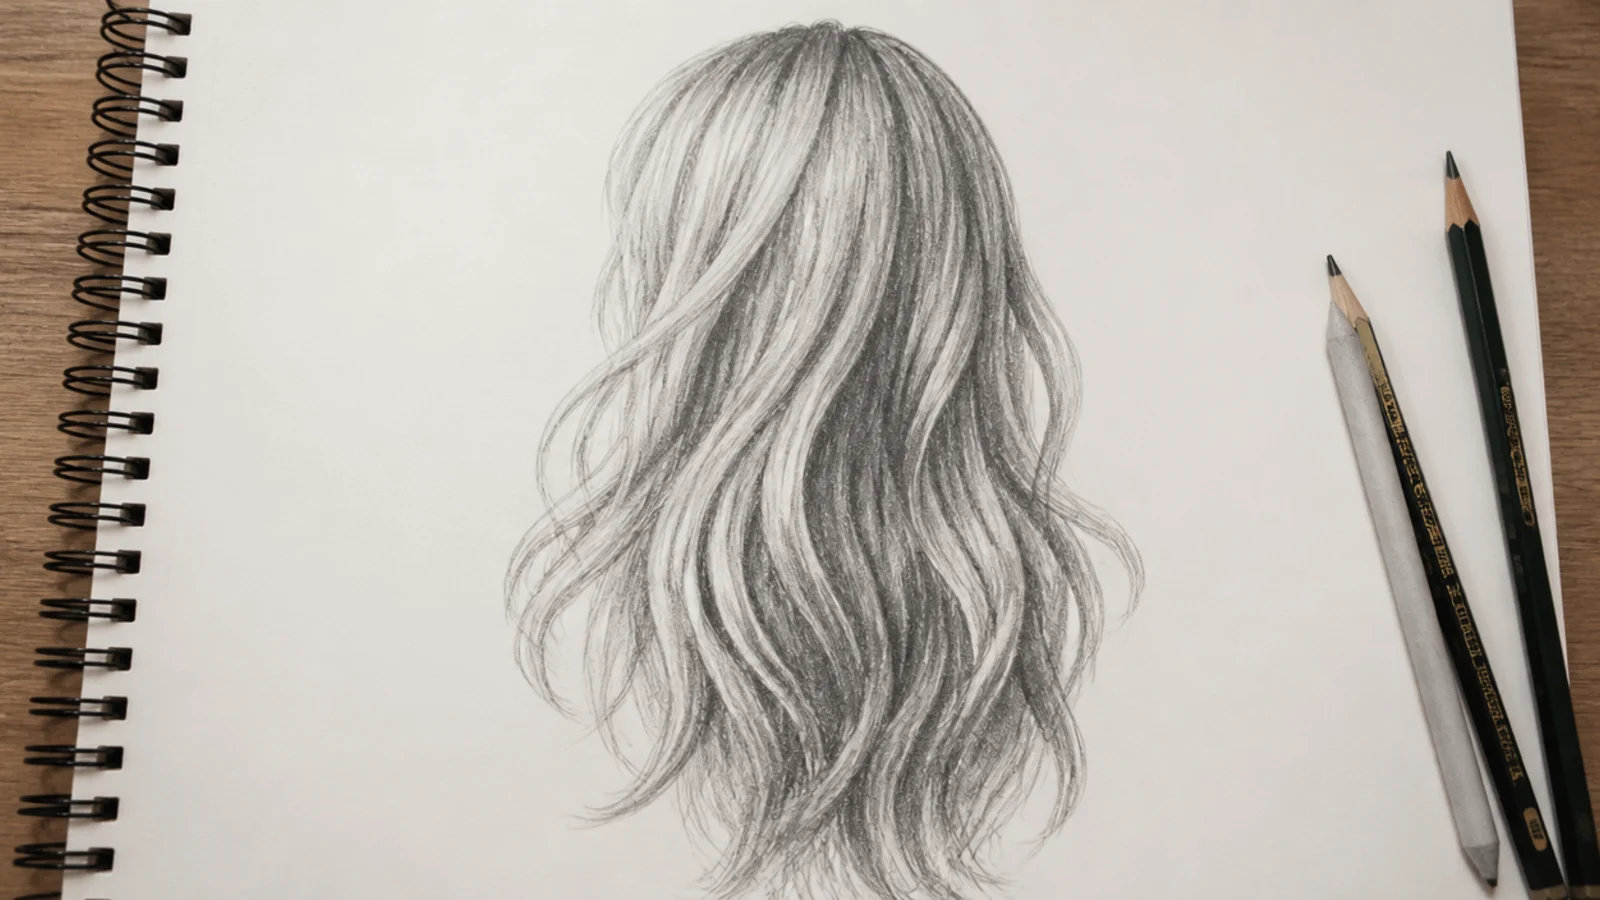
How to Sketch Hair in 20 Rules That Fix Flat Drawings
Twenty rules and an eight step order for sketching hair in graphite. The one that fixes most drawings is that depth comes from the dark channels between strand groups, not from the number of strands you managed to draw.
In this article · 37
- Pencils Paper and Tools
- Starting With Shape Before Strands
- Shading for Volume and Depth
- Texture Comparison Across Four Types
- Using References
- Common Mistakes and Fixes
- The 20 Rules That Fix Flat Hair
- 1. Block the Silhouette First
- 2. Map the Crown
- 3. Nonparallel Flow Lines
- 4. Strand Groups
- 5. The Hair Thickness Gap
- 6. An Irregular Hairline
- 7. Mark the Light Source
- 8. Light Bands
- 9. Pencil Grades
- 10. The Kneaded Eraser Lift
- 11. The Three Value Block
- 12. Dark Spaces
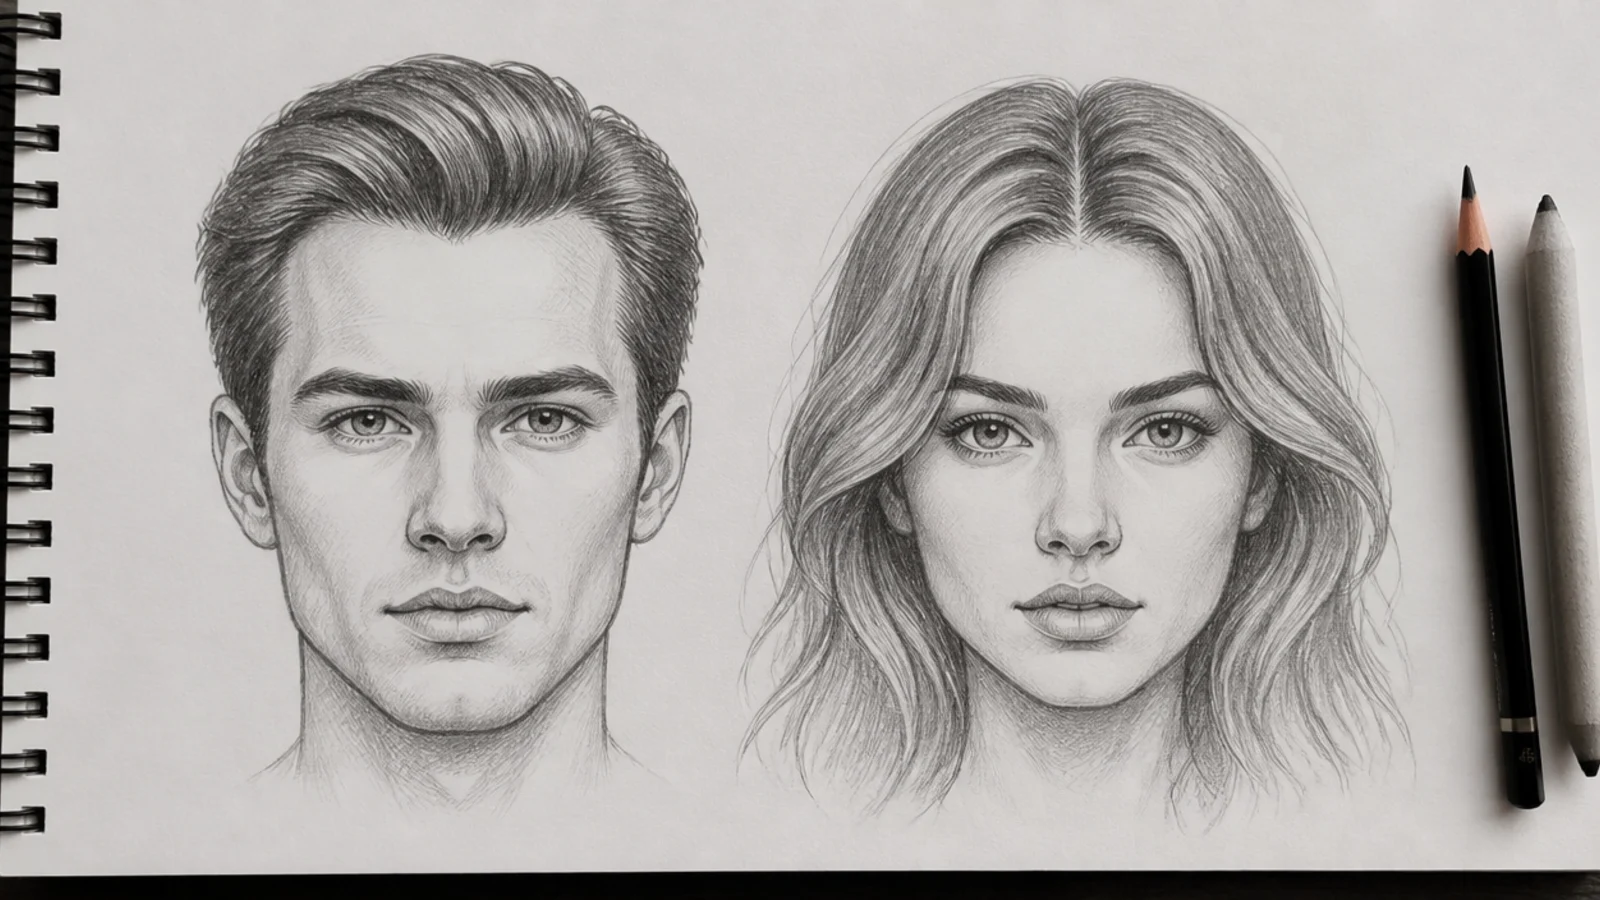
- 13. Straight Hair
- 14. Wavy Hair
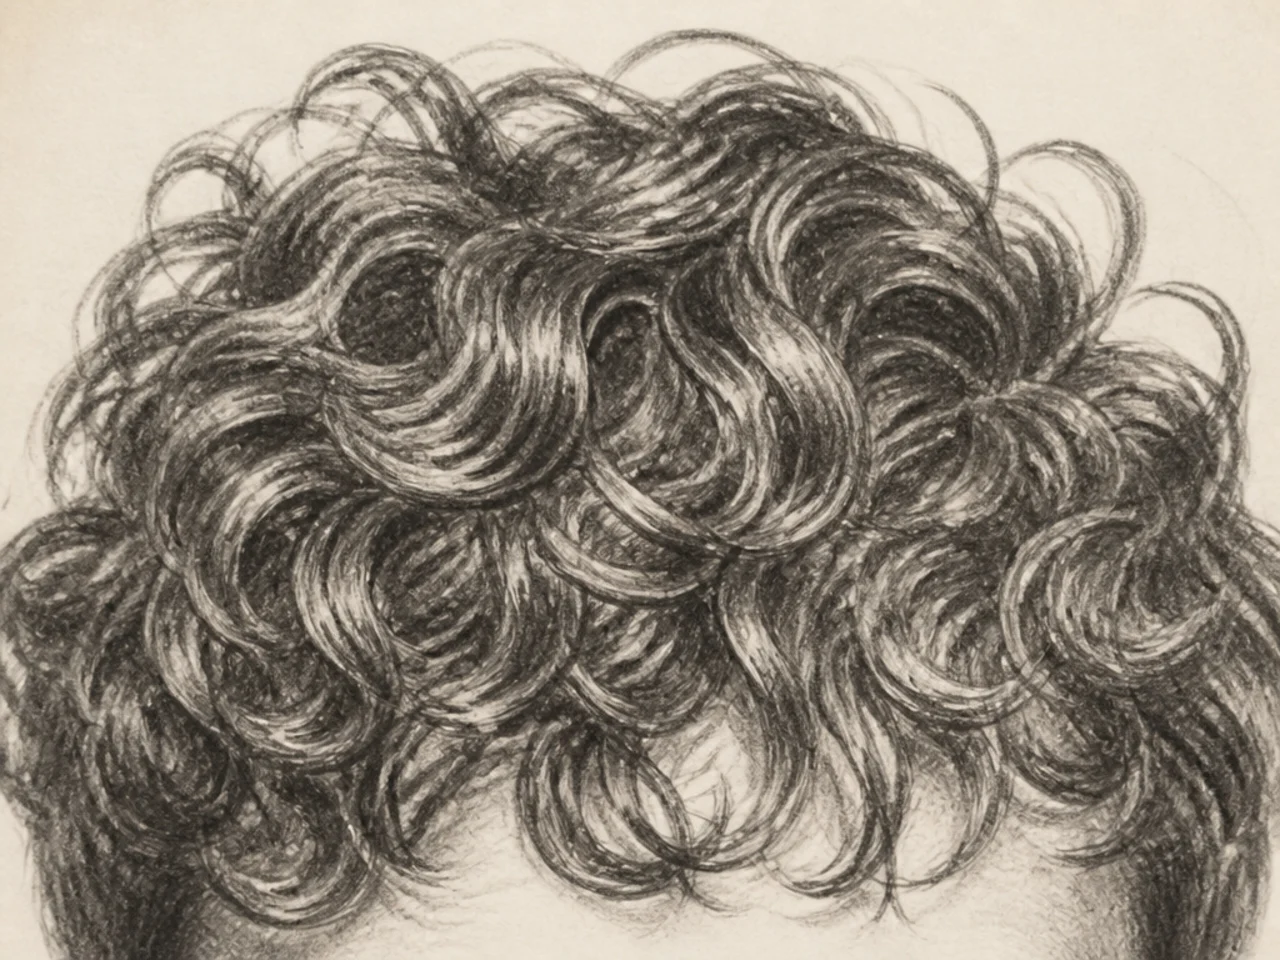
- 15. The Curl Ribbon
- 16. Coily 4C Hair
- 17. Braid Wedges
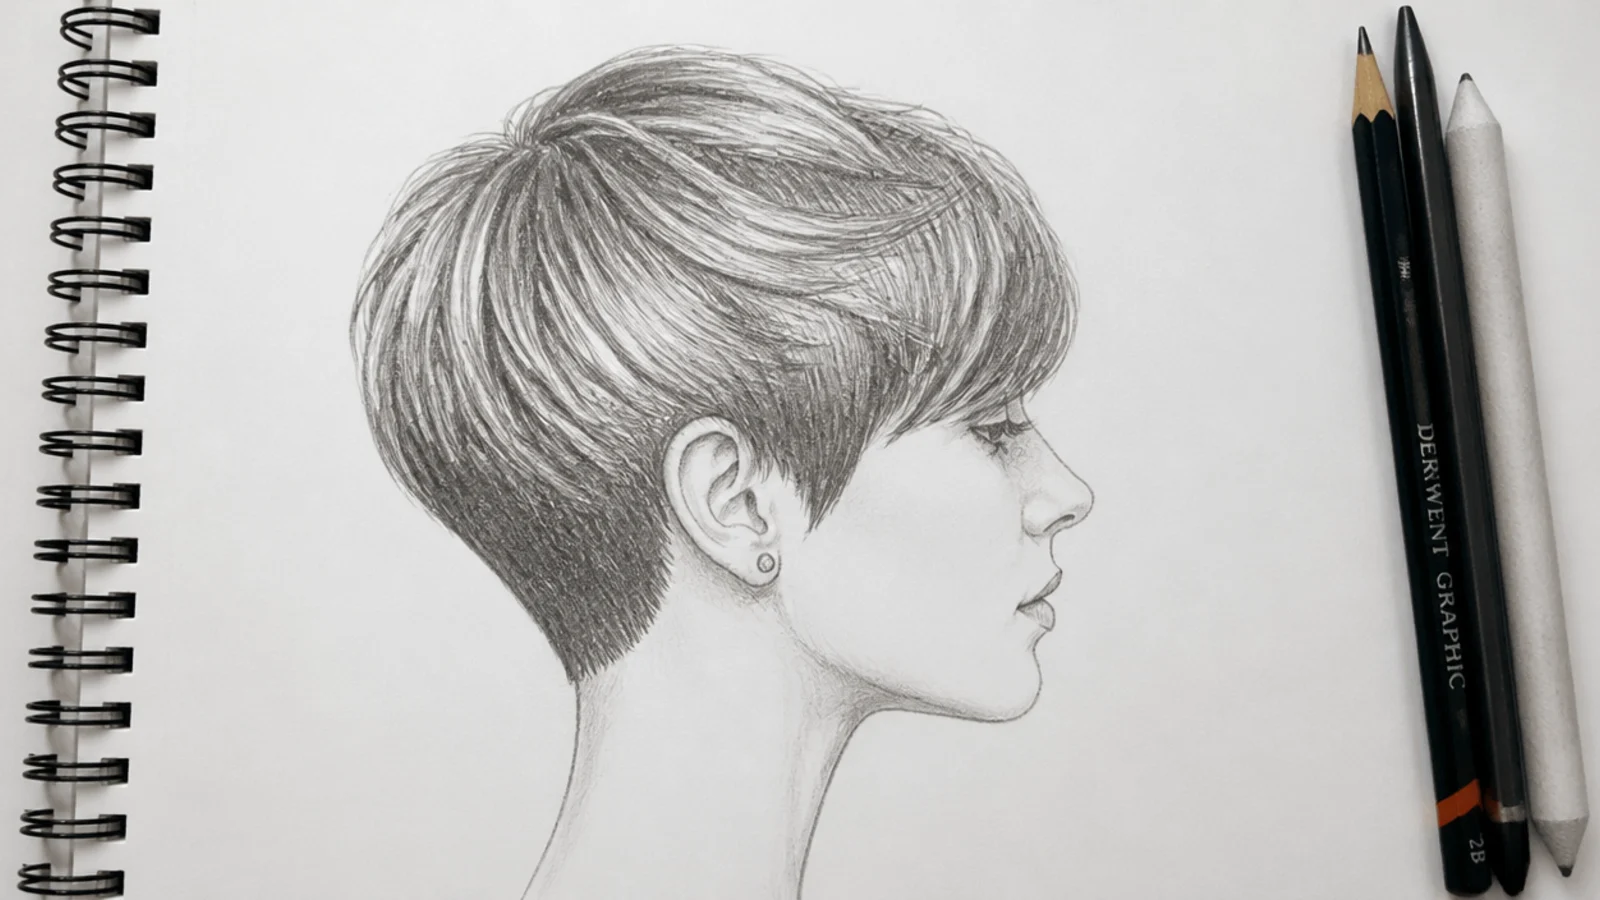
- 18. Short Hair Flicks
- 19. Hair in Motion
- 20. Small Scale Hair
- How to Sketch Hair Step by Step
- Step 1. Skull and Hairline
- Step 2. Block the Silhouette
- Step 3. Crown and Flow Lines
- Step 4. Strand Groups
- Step 5. Light Bands
- Step 6. Flat Mid Tone
- Step 7. Dark Cores
- Step 8. Lift Flick and Finish
- Final Thoughts
A hair drawing usually fails for a reason the artist cannot see, because the fault is in something missing rather than in something badly drawn.
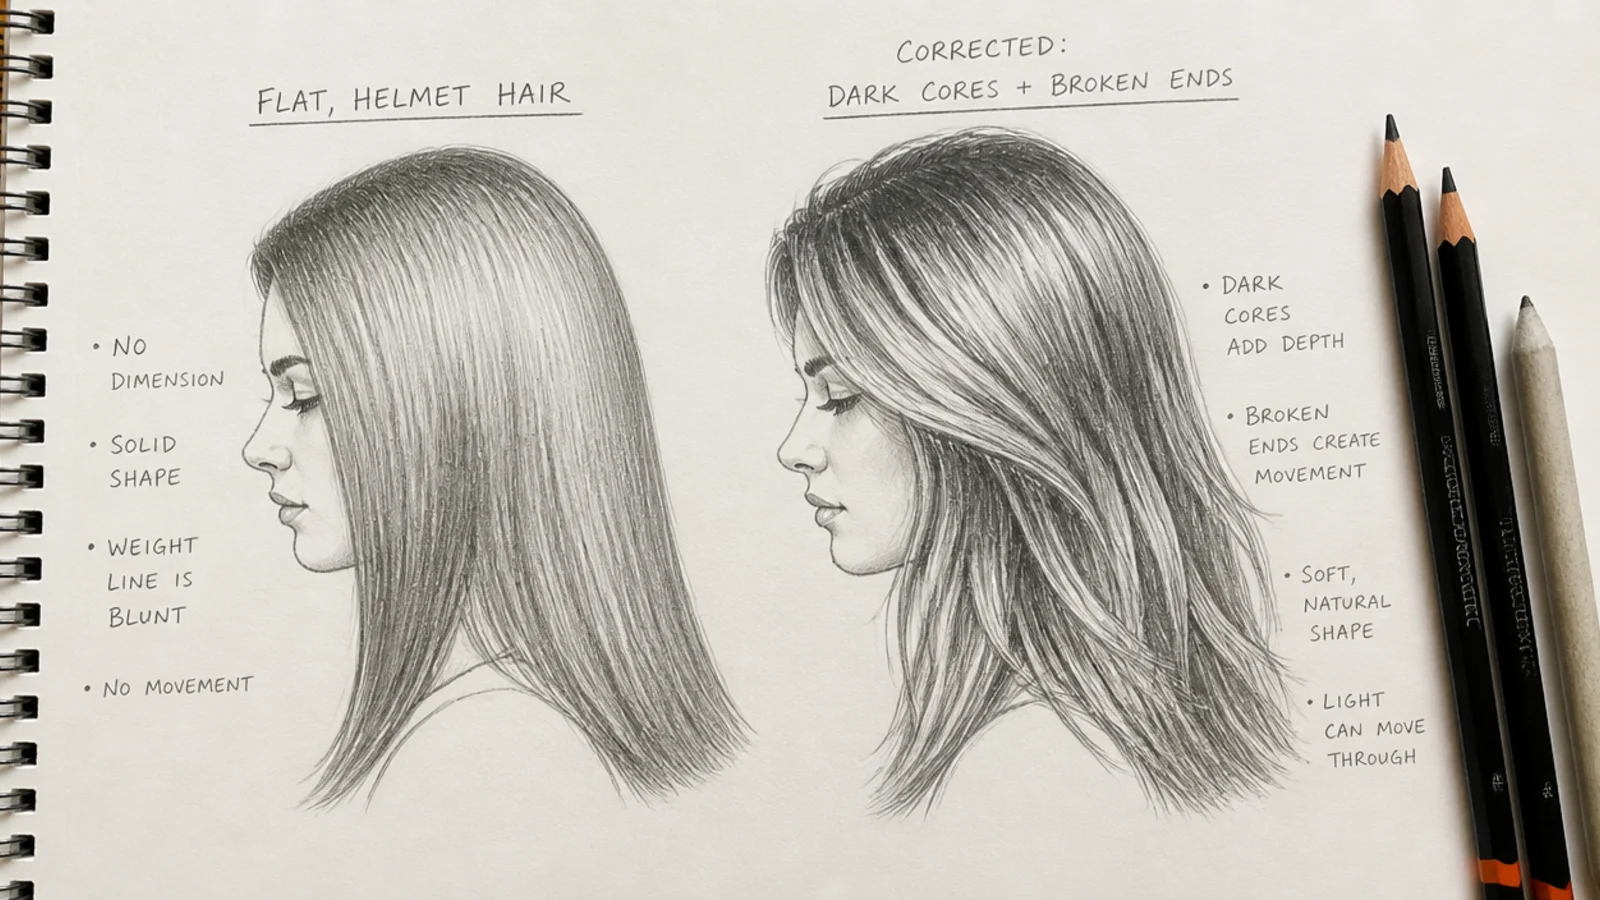
Depth comes from the gaps, not the strands. The dark channels between groups of hair are where light physically fails to reach, and they are what the eye reads as one section sitting behind another.
The order is fixed and it is not optional. Shape, flow, groups, value, strands. Every stage exists to make the next one possible, so skipping forward costs more than it saves.
Pencils Paper and Tools
Paper tooth sets the finest strand you can draw. Hot pressed and bristol surfaces accept a hair thin line, where a toothed cartridge sheet shatters that same line into dots and forces the whole drawing larger.
Sharpen with a blade, not a barrel sharpener. A long exposed lead lets you shade with the side and detail with the tip without changing pencils, which is most of the speed in a hair sketch.
A blending stump belongs on the mid tone only. Smudge the cores and you destroy the contrast between groups, and that contrast is the one thing separating hair from a grey shape.
Keep a hard vinyl eraser for edges. The kneaded one lifts and softens, the vinyl one cuts a clean line back to white paper, which is how you rescue a silhouette that has crept outward.
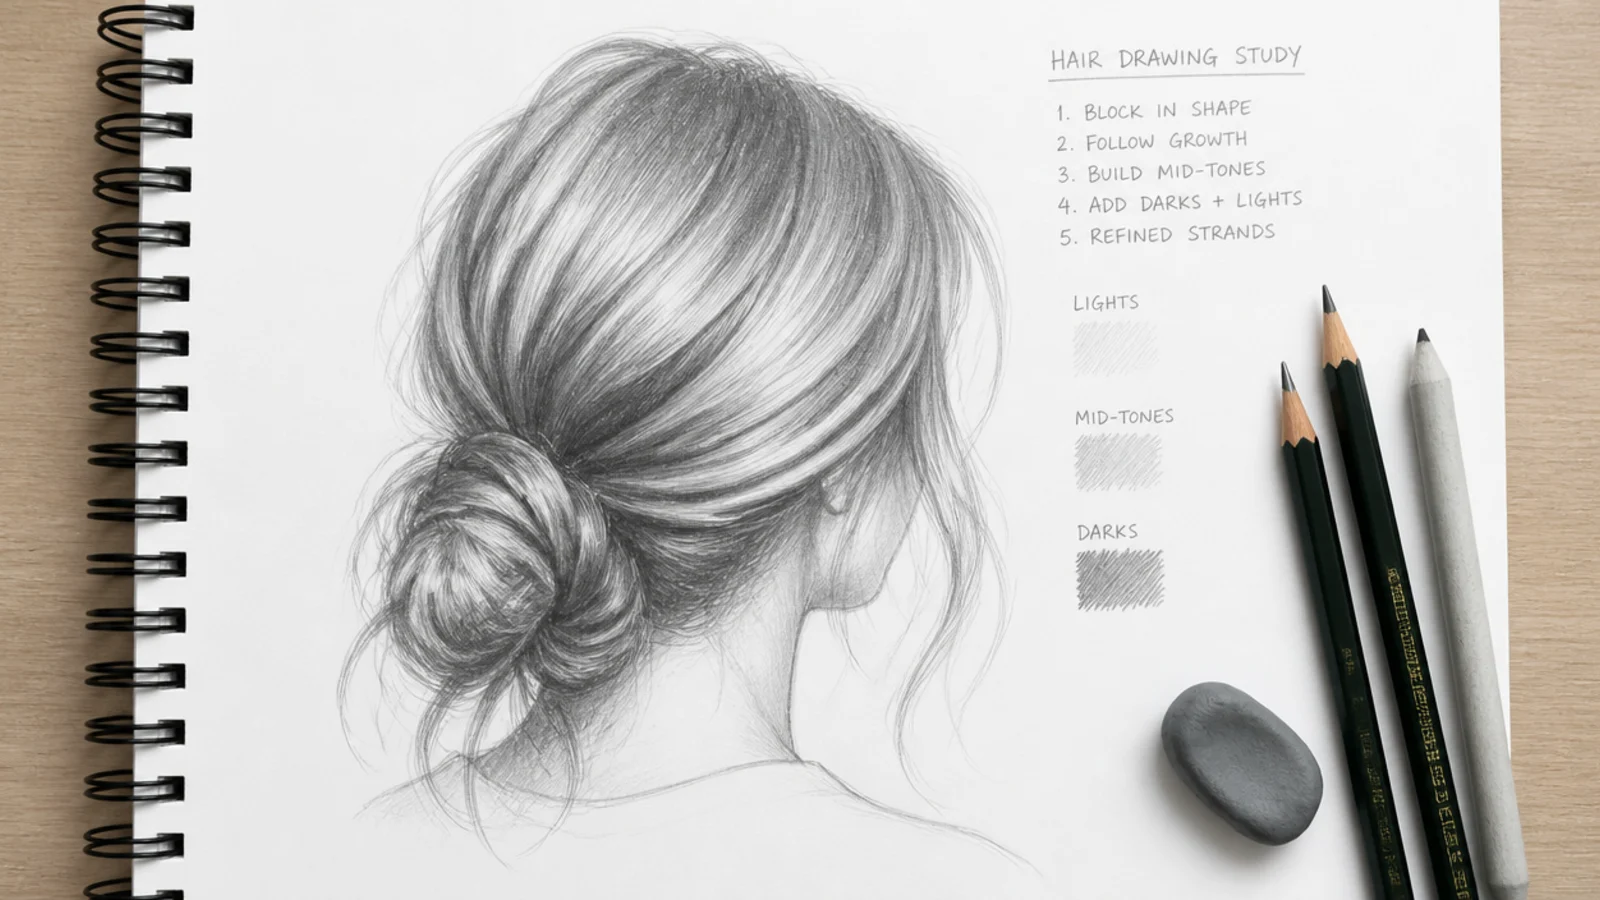
Starting With Shape Before Strands
The face fits the hair, not the reverse. Hair sets the width of the entire head, so blocking it first keeps the features in proportion to the shape they will end up inside.
Judge the outline as a flat shape. Squint at it, or fill it mentally with black. If the style is not identifiable at that level then no interior work is going to make it so.
Construction lines have to be liftable. A 2H at low pressure comes away completely under a kneaded eraser, while a 2B guide line is still readable through four layers of tone.
Redraw rather than patch. A silhouette corrected by adding strands beyond it always shows, because the original edge survives as a change in density along the join.
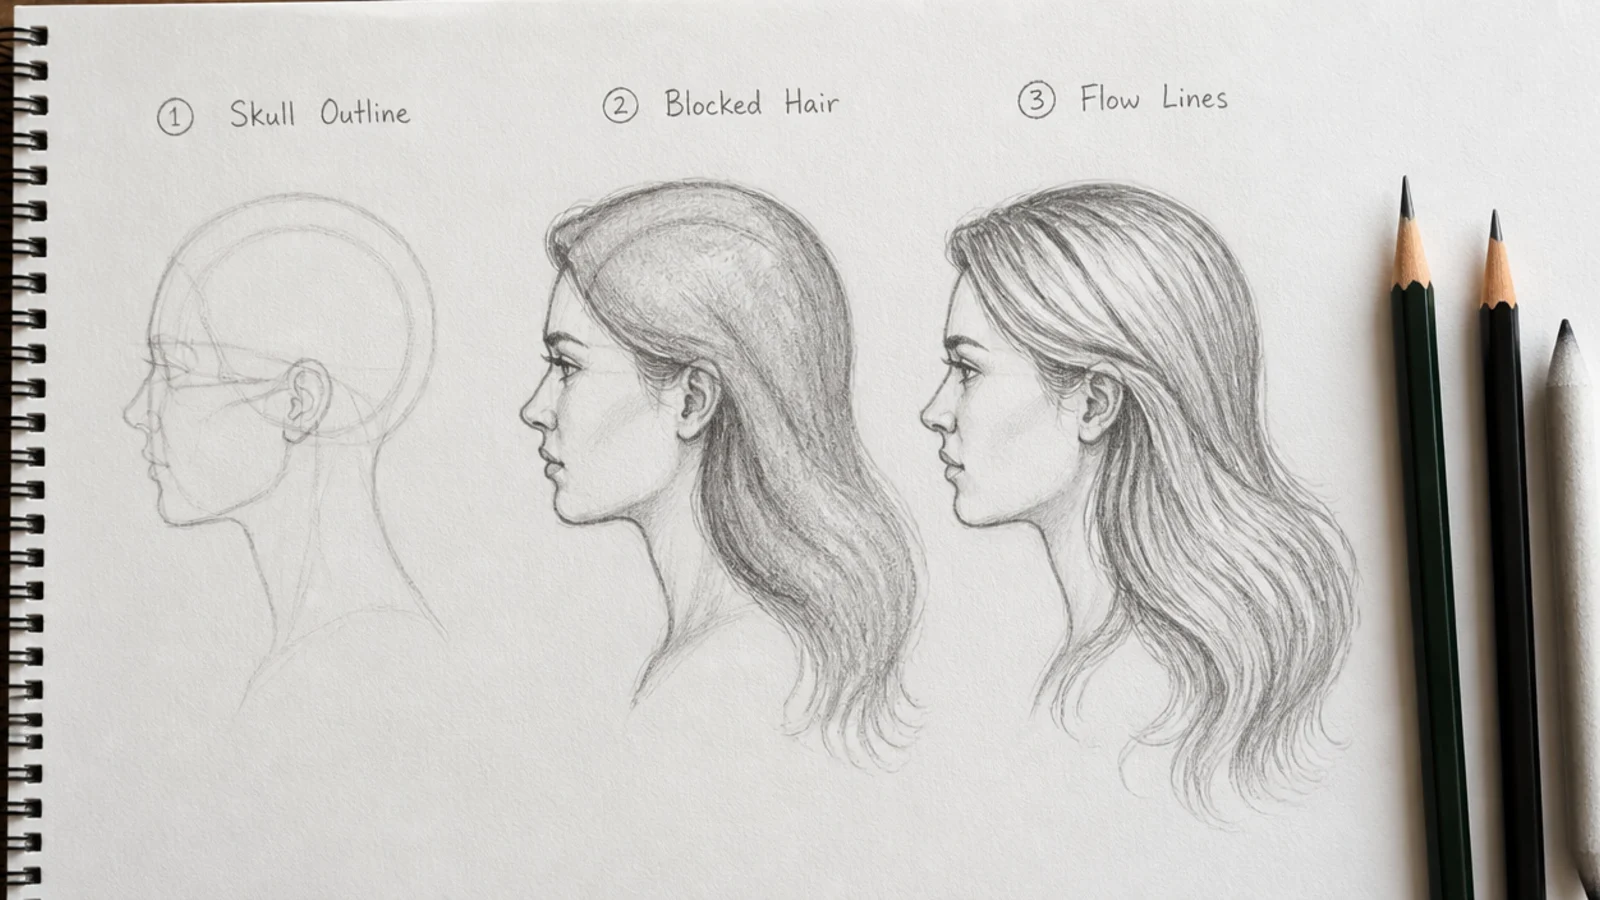
Shading for Volume and Depth
Volume comes from the band, depth comes from the gaps. The highlight band says the mass is round and the dark channels say some of it sits behind the rest. A convincing drawing needs both.
Shade in the direction of the flow. The grain of your strokes is already a texture, so laying tone across the flow means fighting your own drawing at every pass.
Reserve the paper. Untouched white is the brightest value you have and it cannot be fully recovered once shaded, so decide where the highlight lives before the first stroke.
Build in layers, not in pressure. Two light passes give a tone you can still adjust, while one heavy pass burnishes the tooth flat and then refuses to accept anything on top.
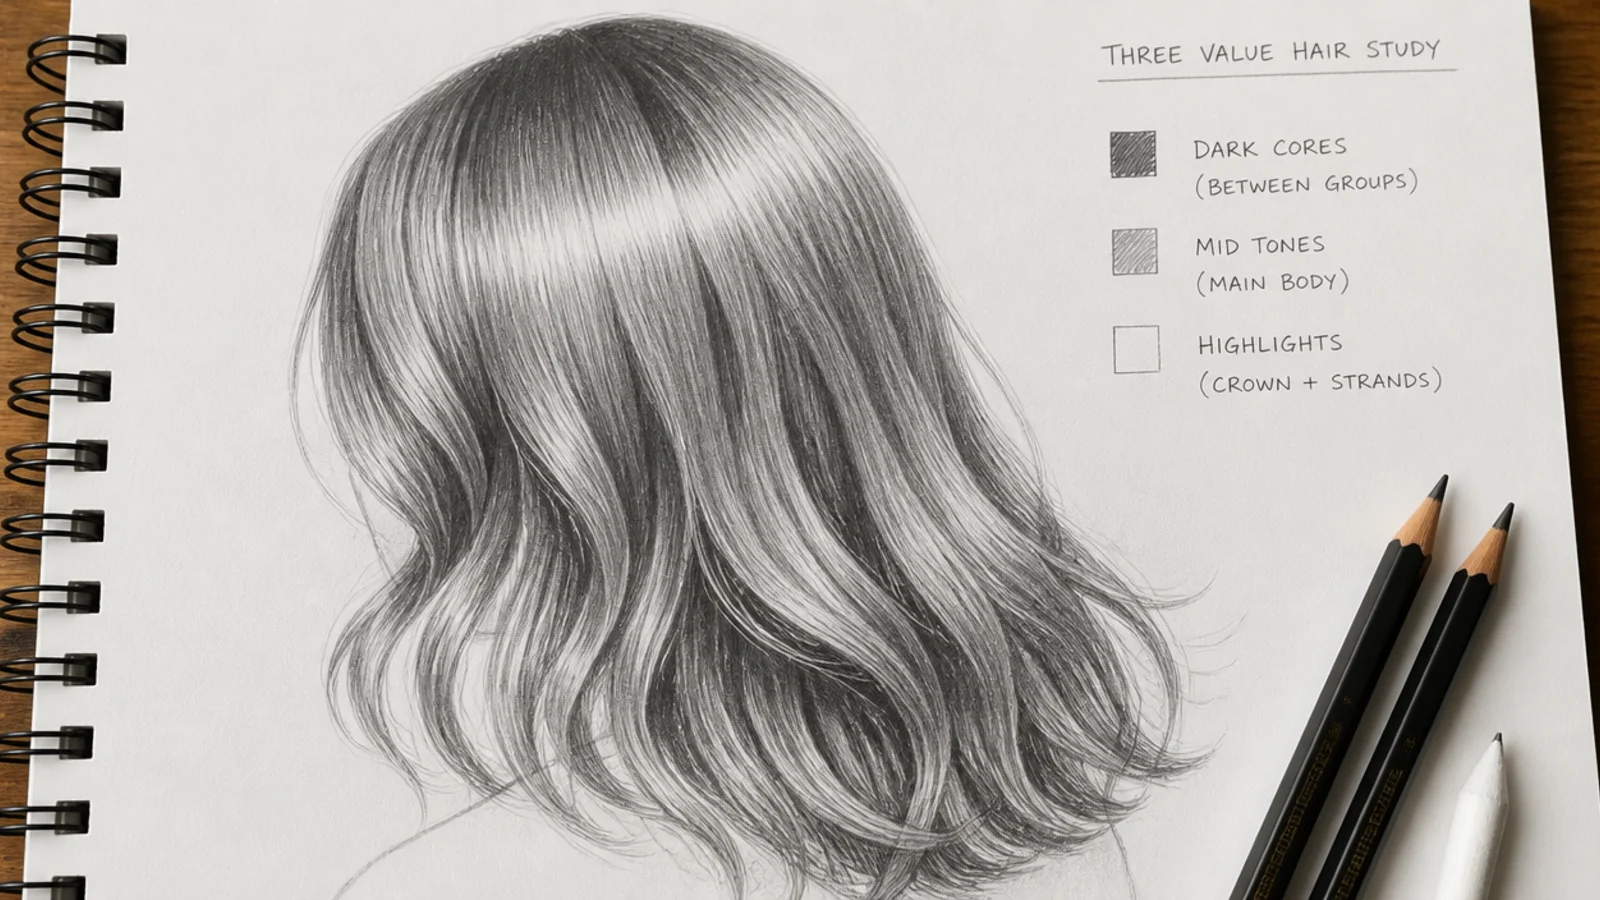
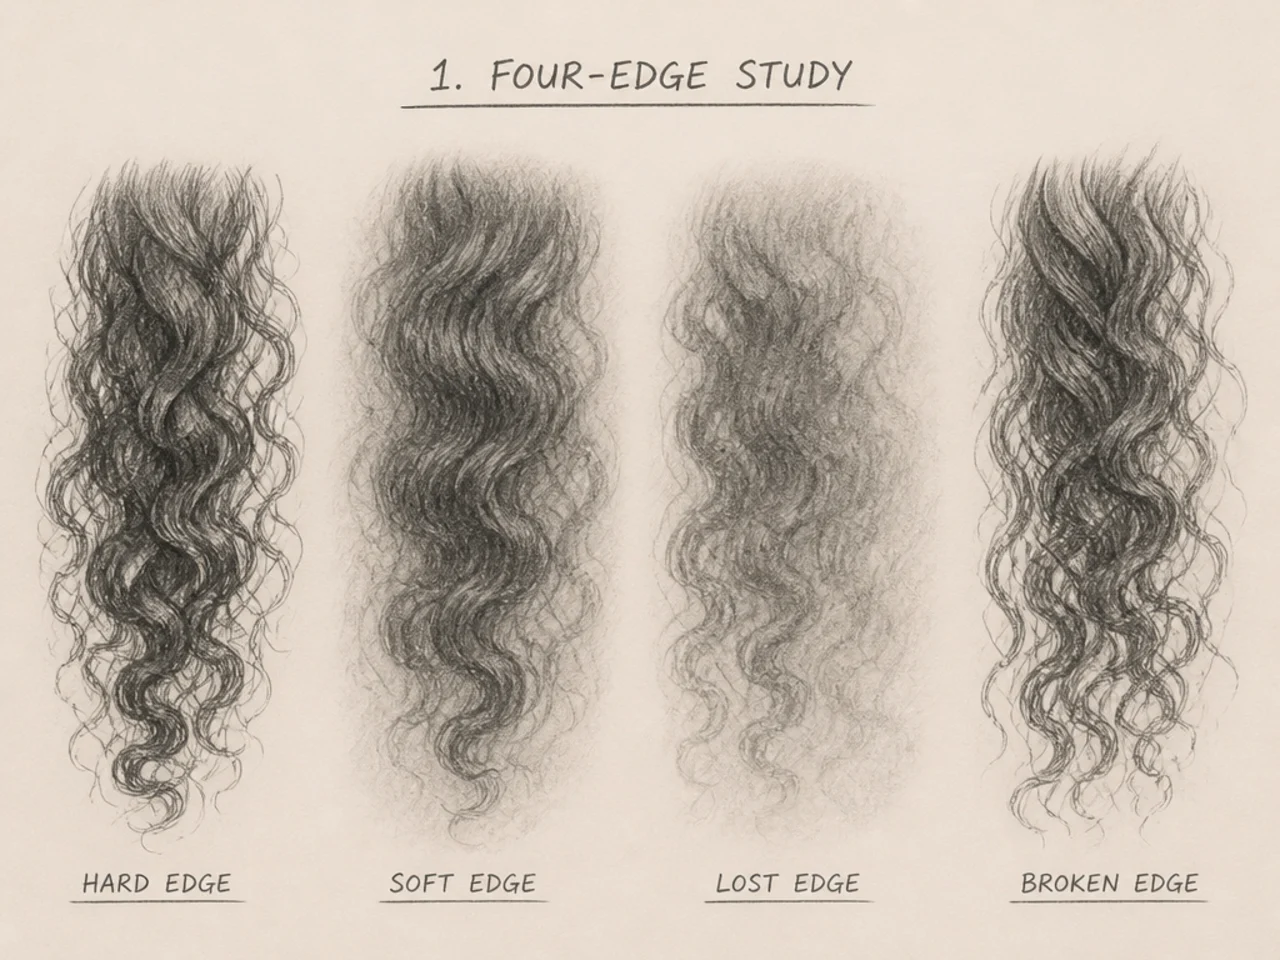
Texture Comparison Across Four Types
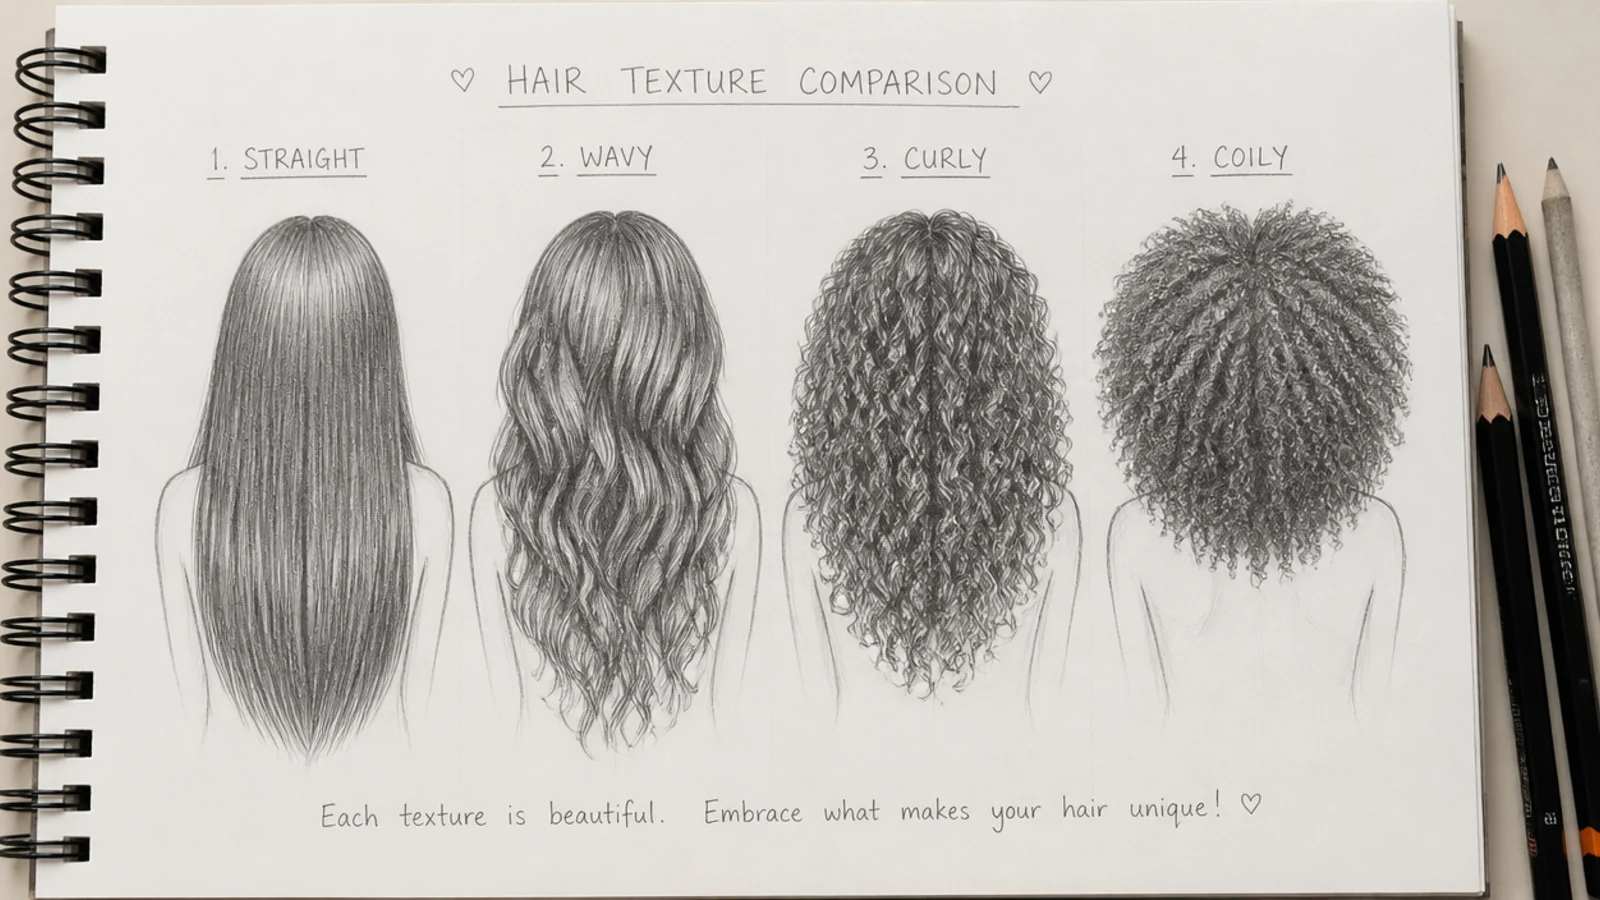
Straight changes the stroke length. Long, continuous and tapering, all travelling in one direction from root to end.
Wavy changes the value rhythm. Light and dark alternate at every bend instead of running evenly down the length of a section.
Curly changes the unit. You are drawing ribbons of a fixed diameter rather than lines of a fixed direction.
Coily changes where the detail goes. The interior becomes sphere shading and every scrap of texture moves out to the silhouette edge.
Using References
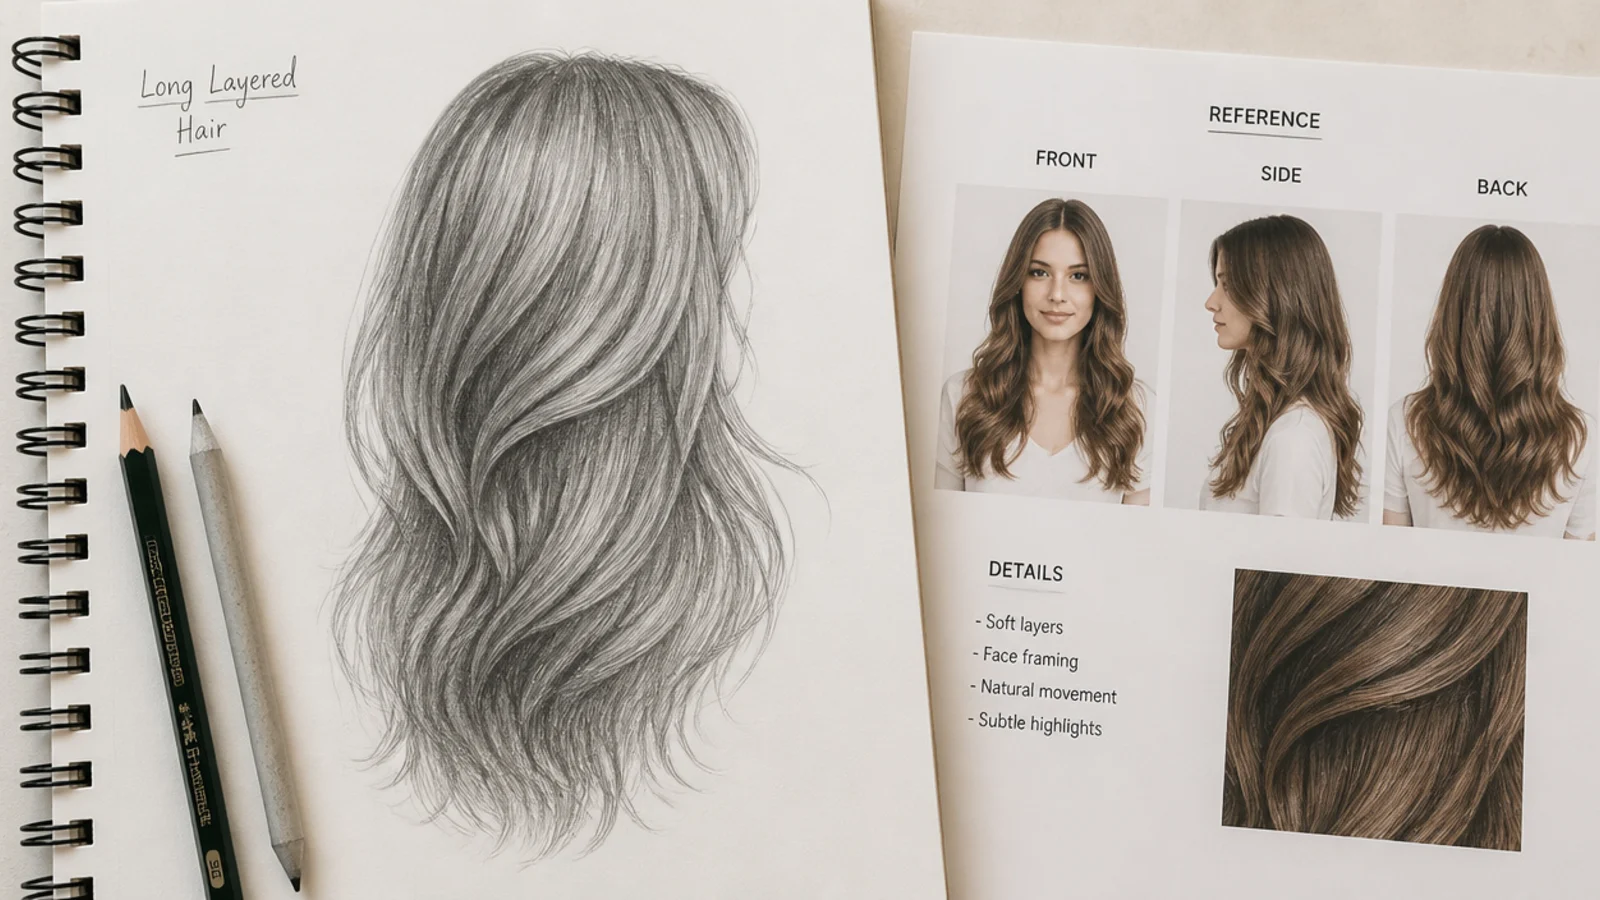
One light source in the photograph, one in the drawing. A reference lit from both sides gives contradictory highlights, and copying both is exactly what makes a drawing look confused.
Squint to find the three values. Squinting discards the middle detail and leaves the light, mid and dark structure you are about to block in.
Take the silhouette from one photograph and the texture from another. They almost never arrive well lit in the same image.
Draw the same reference three times. The first pass is copying, the second is understanding, and the third is the one worth keeping.
Common Mistakes and Fixes
Strands before shape. Block the outline first. Everything else in the process is negotiable and this is not.
Hair sitting flat on the skull. Add the thickness gap and the head immediately stops looking shrink wrapped.
Parallel evenly spaced lines. Let some converge, open others out, and vary every channel width across the mass.
A single flat value. Without dark channels there is no depth available, only a shape with texture drawn on it.
Detail carried right to the edges. Finish one region and leave the rest blocked, because the eye wants a focal point and forgives everything around it.
The 20 Rules That Fix Flat Hair
1. Block the Silhouette First
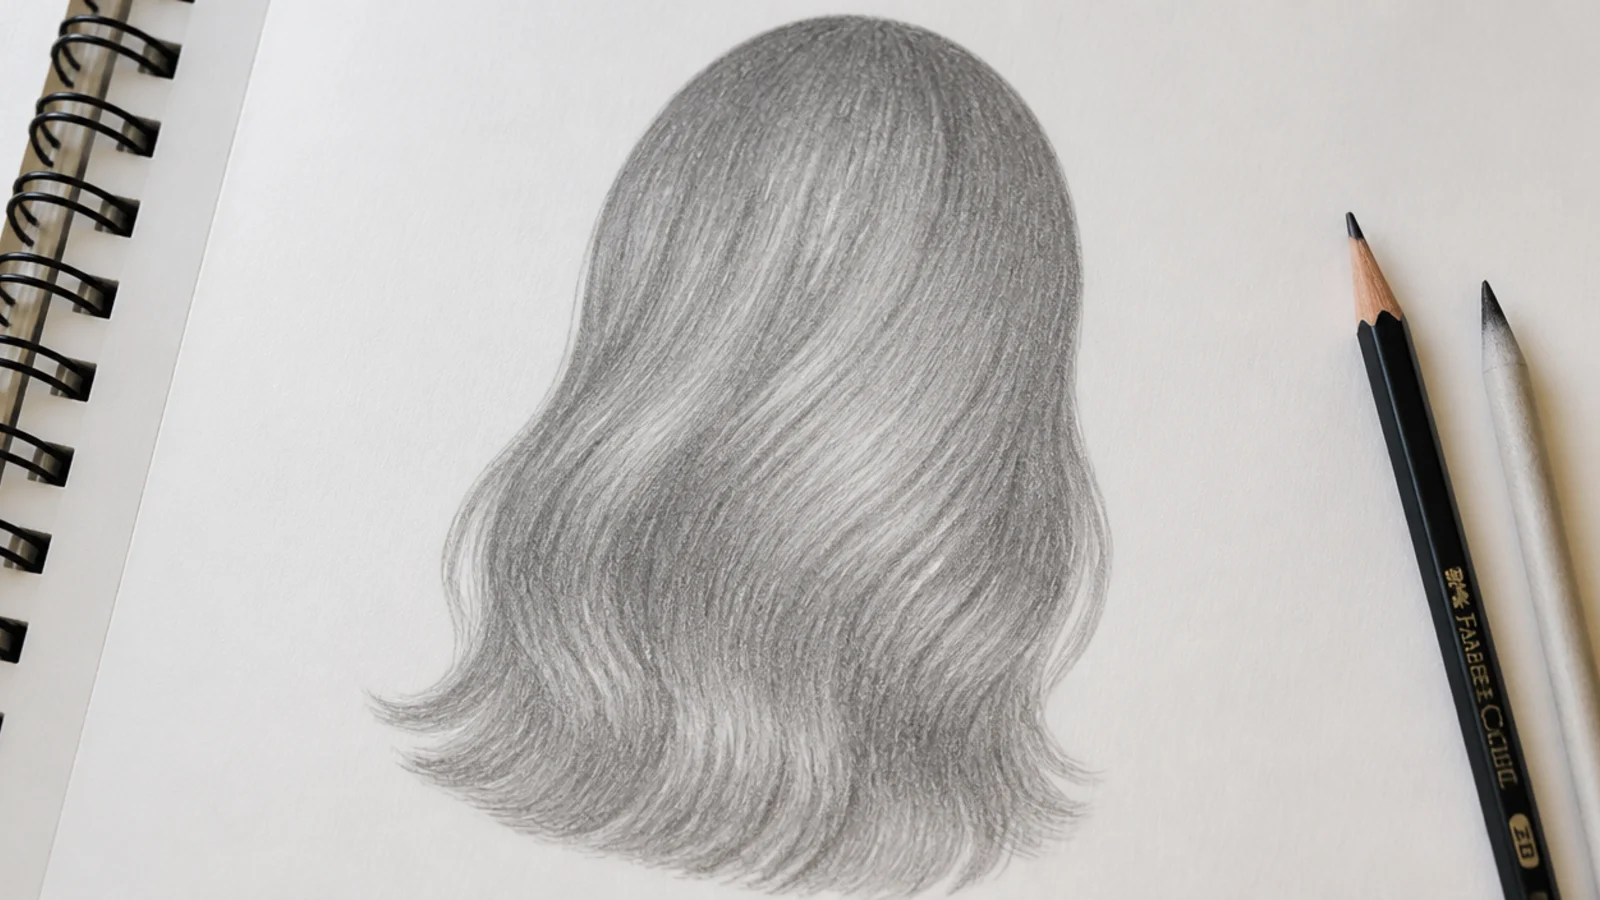
The silhouette is what the eye identifies before anything else, so time spent on strands inside a wrong shape is time thrown away. Draw the outer contour as one closed line and judge it as a flat black blob, because a shape that fails that test will fail as a finished drawing too.
2. Map the Crown
Every hair on a head originates from one whorl, usually sitting back and slightly off centre on the top of the skull. Find it and mark it before drawing anything else, because lines radiating from a single point read as growth while lines starting anywhere read as fibre.
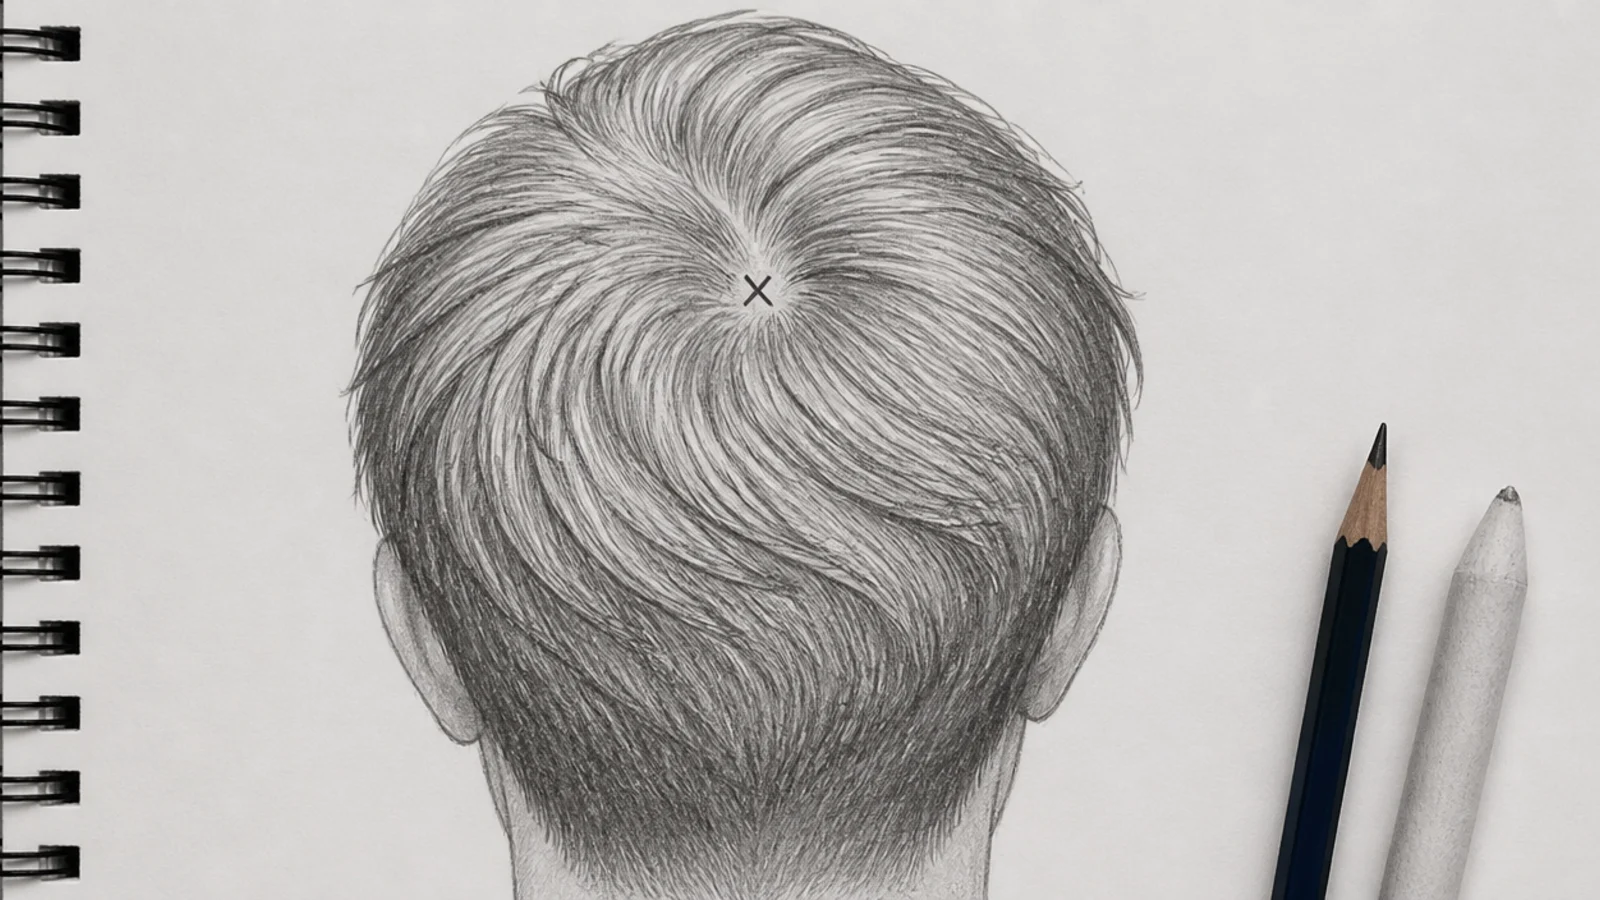
3. Nonparallel Flow Lines
Real hair splits and merges constantly, so evenly spaced parallel lines are the fastest route to a drawing that looks like a wig. Let your flow lines converge in places and open out in others, and vary the gaps so no two channels come out the same width.
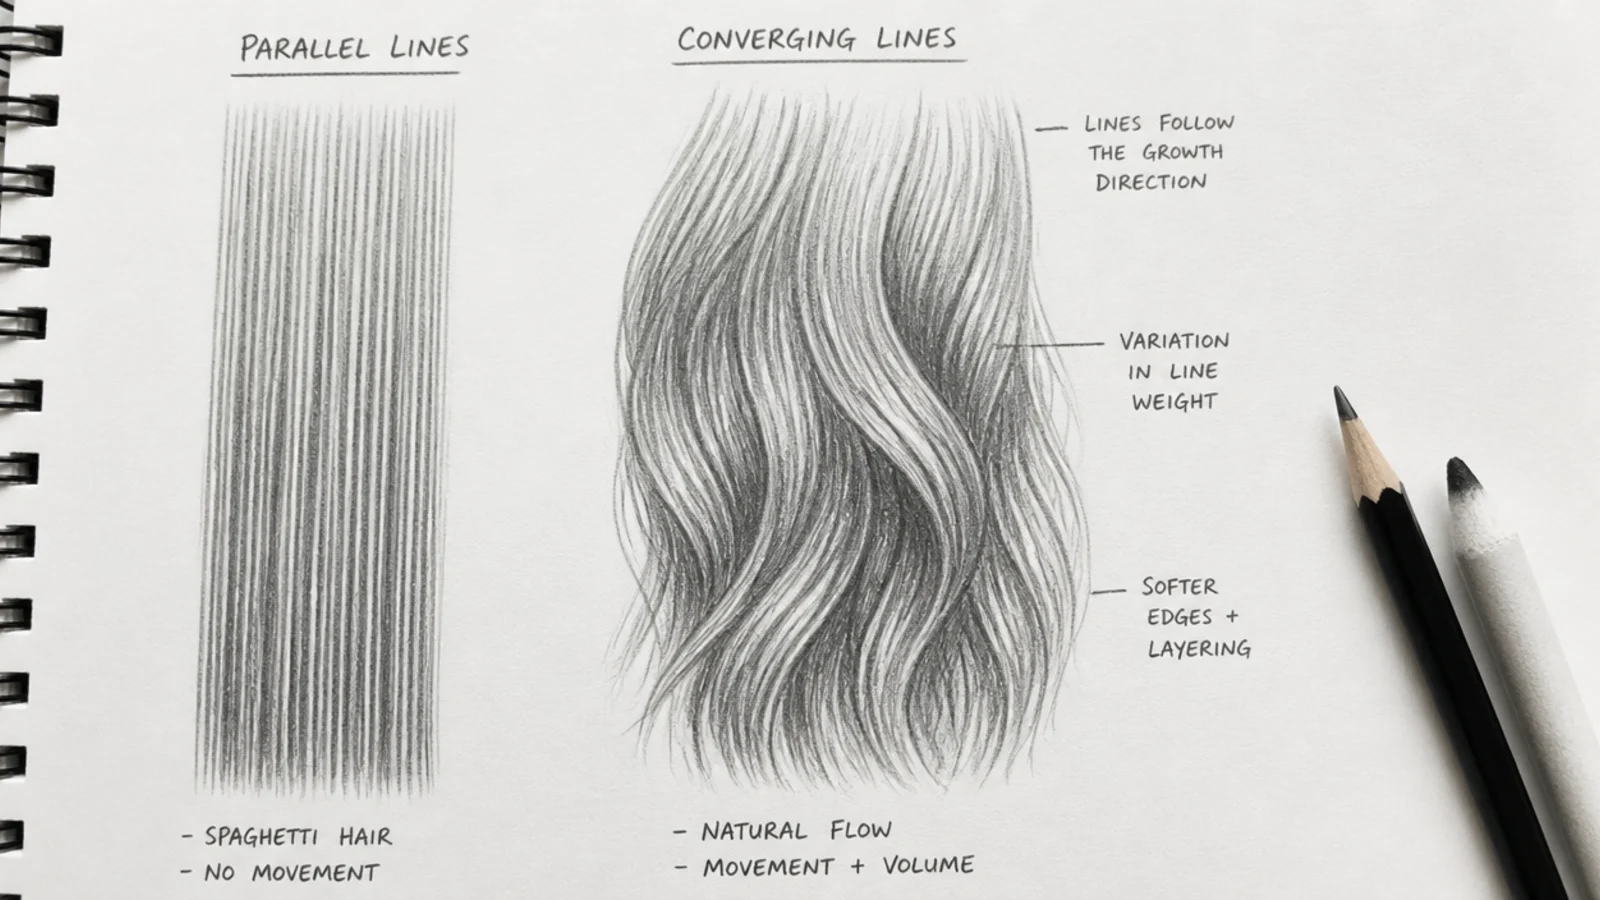
4. Strand Groups
The eye cannot resolve individual hairs past a short distance, so it bundles them into ribbons of a few dozen at a time. Draw those groups and let them overlap, because a mass built from six or eight overlapping ribbons reads as more hair than one built from six hundred separate lines.
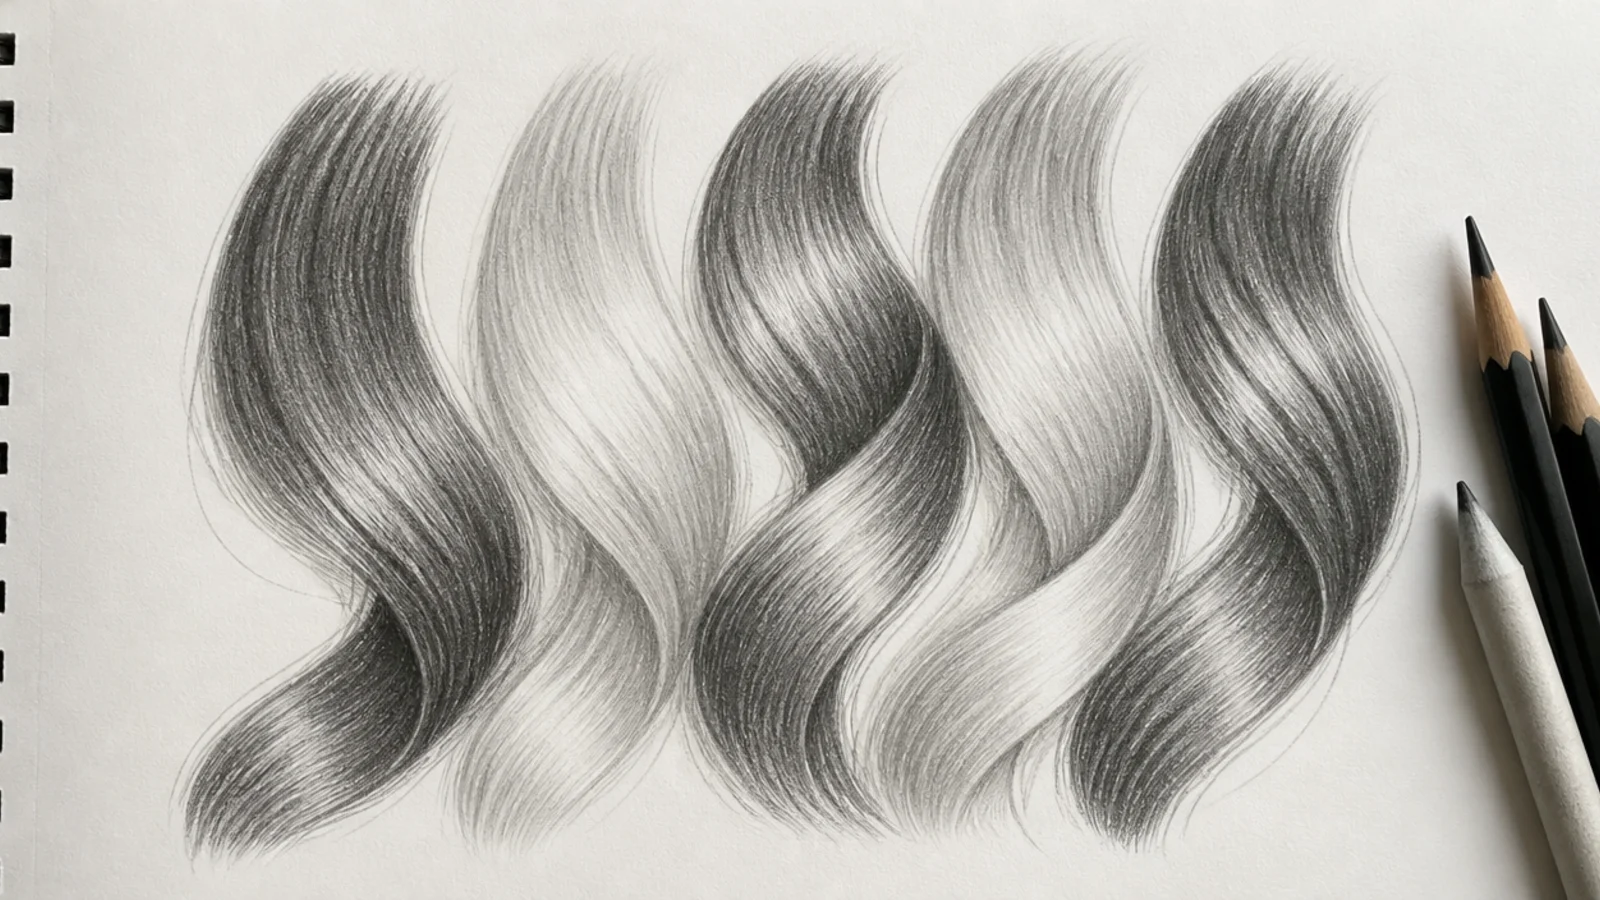
5. The Hair Thickness Gap
Hair is not painted onto the skull, it stands off it, and that gap is the single most common omission in a beginner drawing. Leave a visible margin between the skull line and the hair outline that widens with the volume of the style, and the head stops looking shrink wrapped.
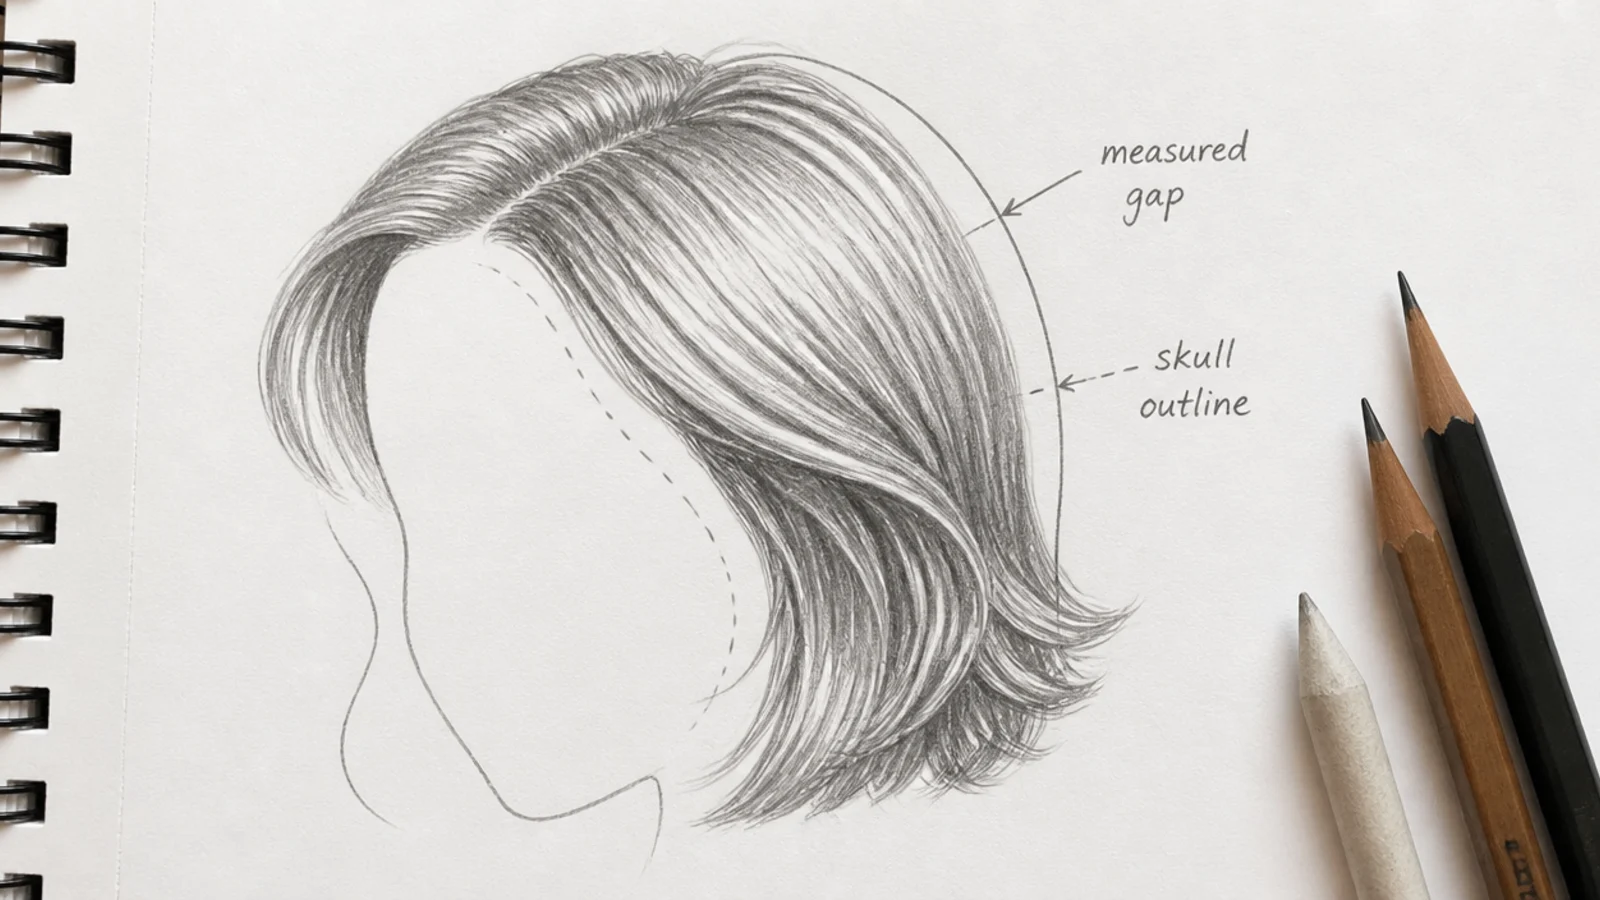
6. An Irregular Hairline
A hairline drawn as a smooth arc reads as a swim cap, because no real hairline is smooth. Break it with a slight central peak, uneven temple corners, and a few fine hairs standing free of the main edge, and the head reads as a person rather than a mannequin.
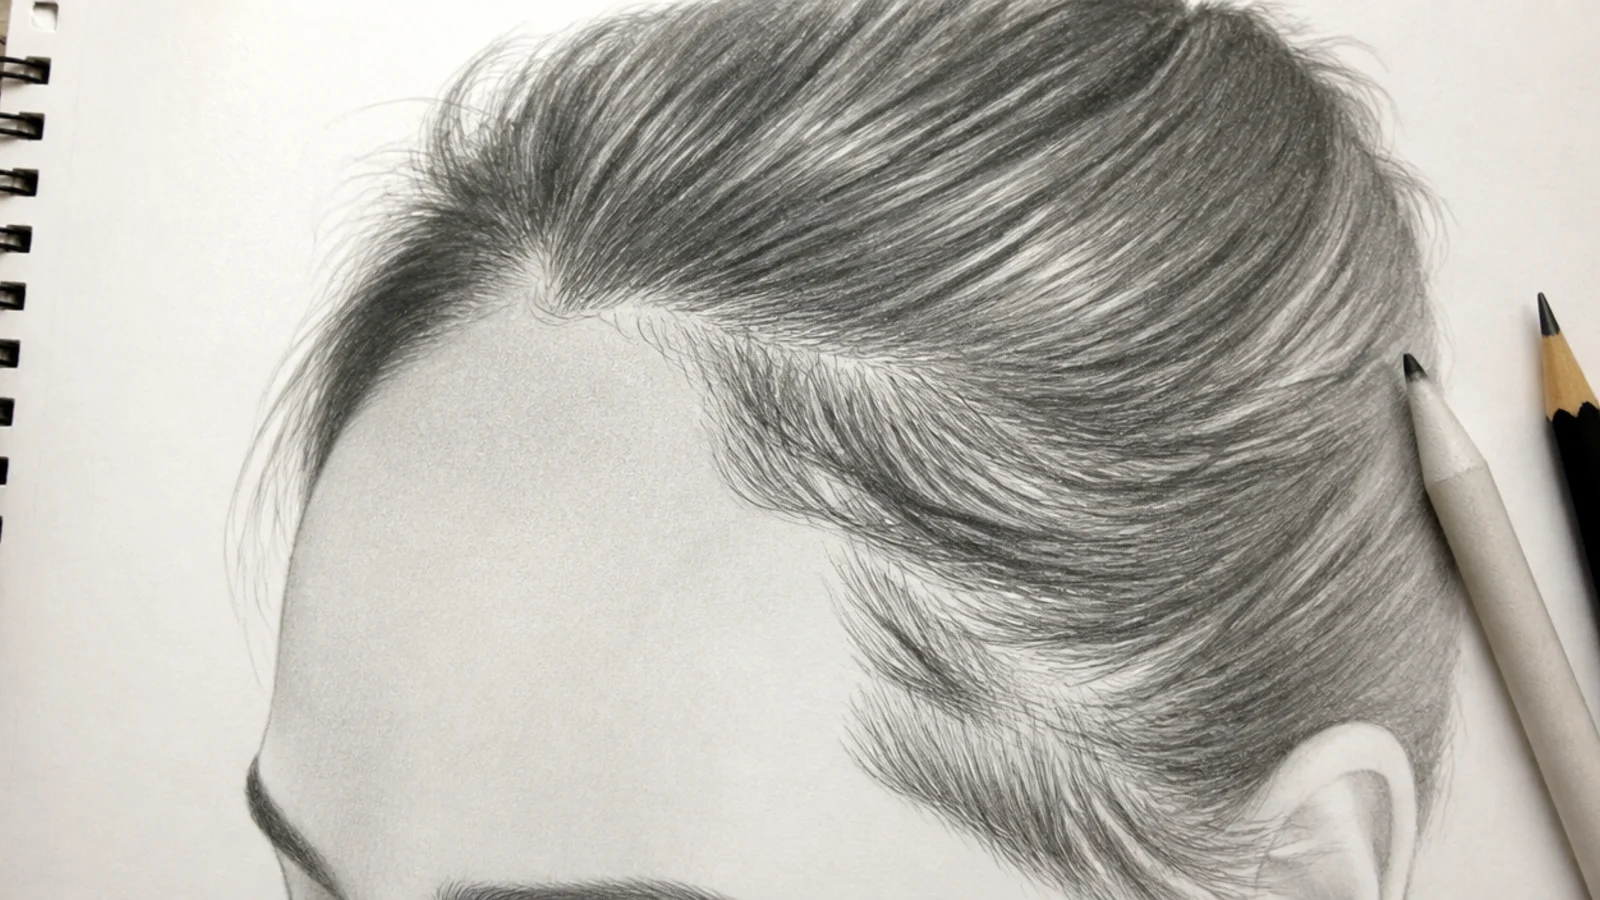
7. Mark the Light Source
Draw a small arrow in the margin before shading anything and keep every highlight and shadow obedient to it. Most muddy drawings are lit from two directions at once, which puts light on surfaces that should be dark and quietly cancels the form out.
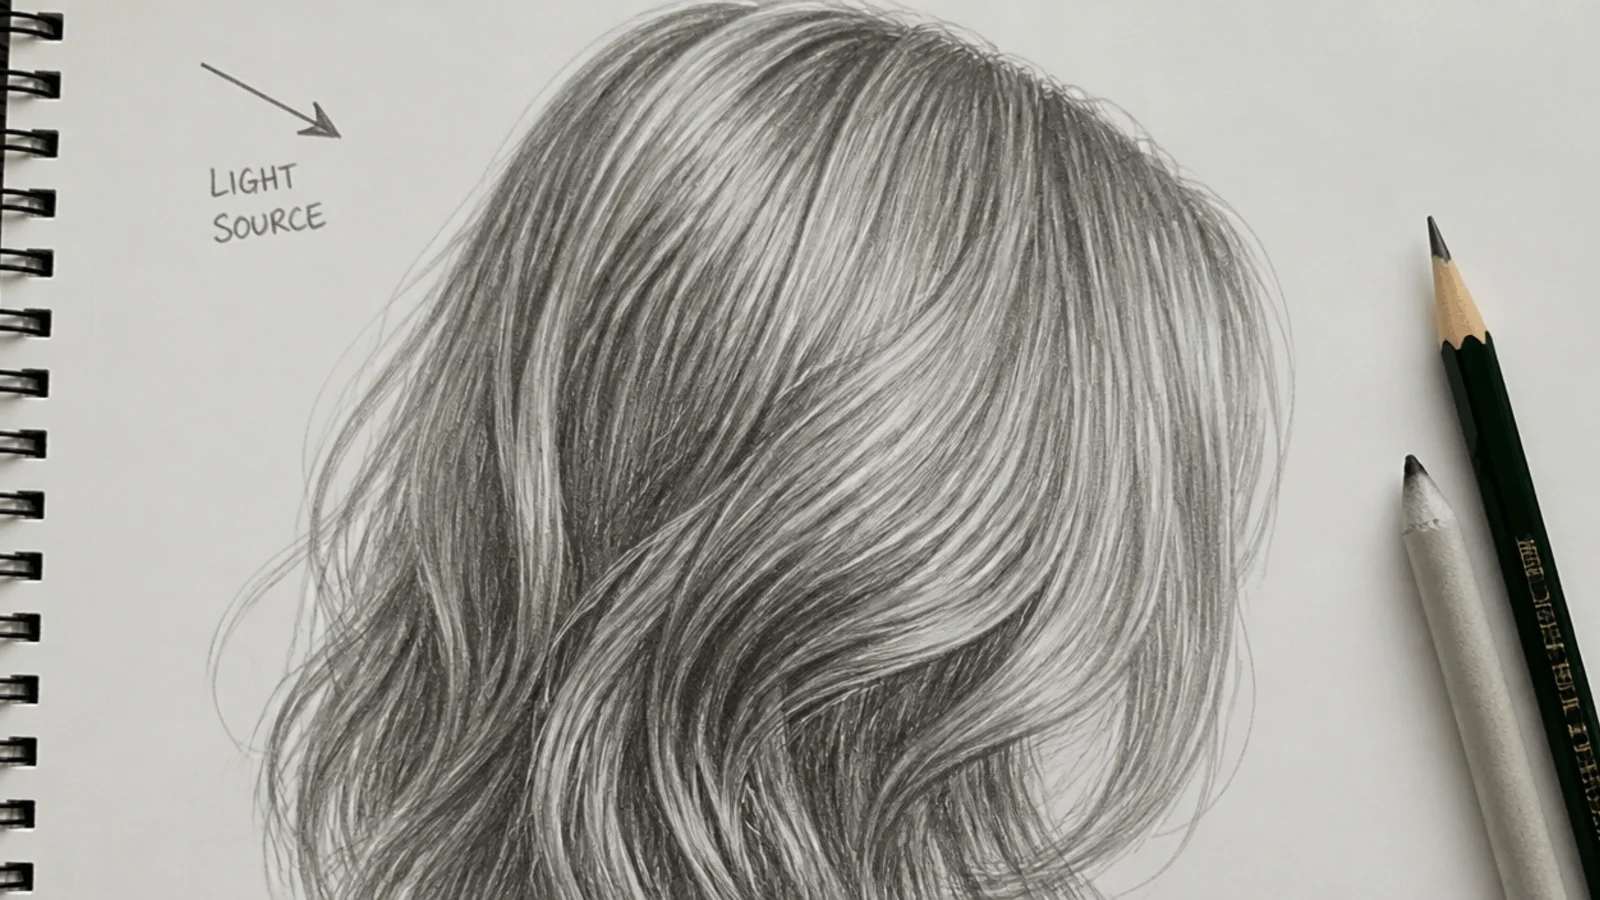
8. Light Bands
The highlight on hair is a band running across the strands and curving around the skull, because the head is a rounded form. A highlight running lengthwise down a section describes a flat sheet, which is why so many careful drawings still look like a curtain hanging behind a face.
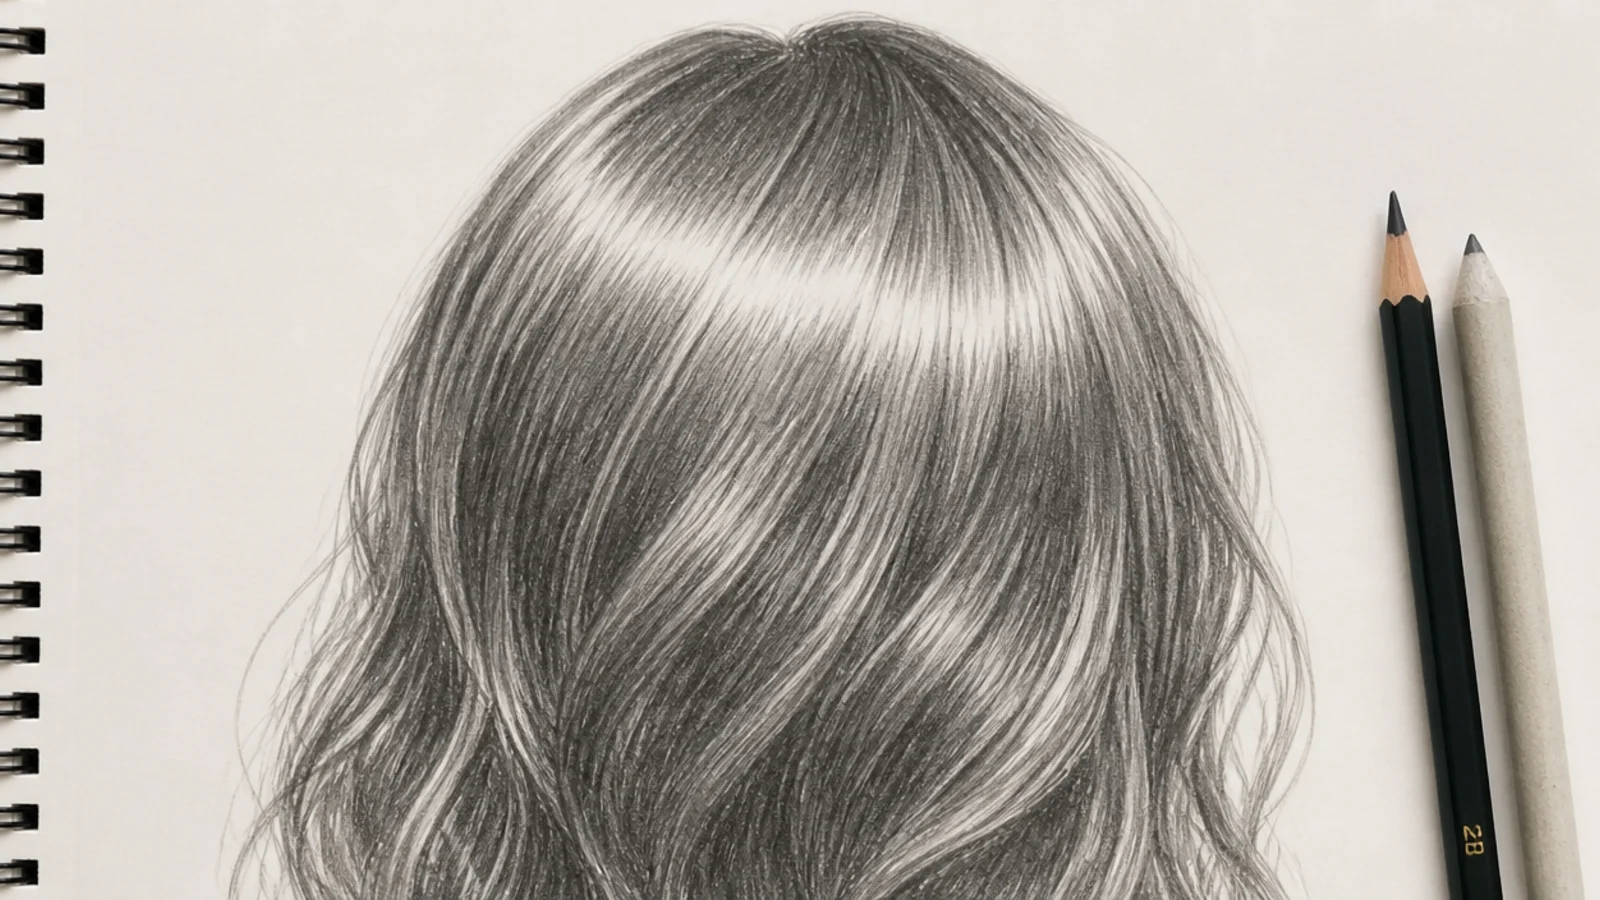
9. Pencil Grades
H grades are hard and pale and hold a point, B grades are soft and dark and blunt quickly. Use a 2H for construction, a 2B for the working mid tone and a 6B for the cores, because pushing an HB toward black only burnishes the paper into a grey shine.
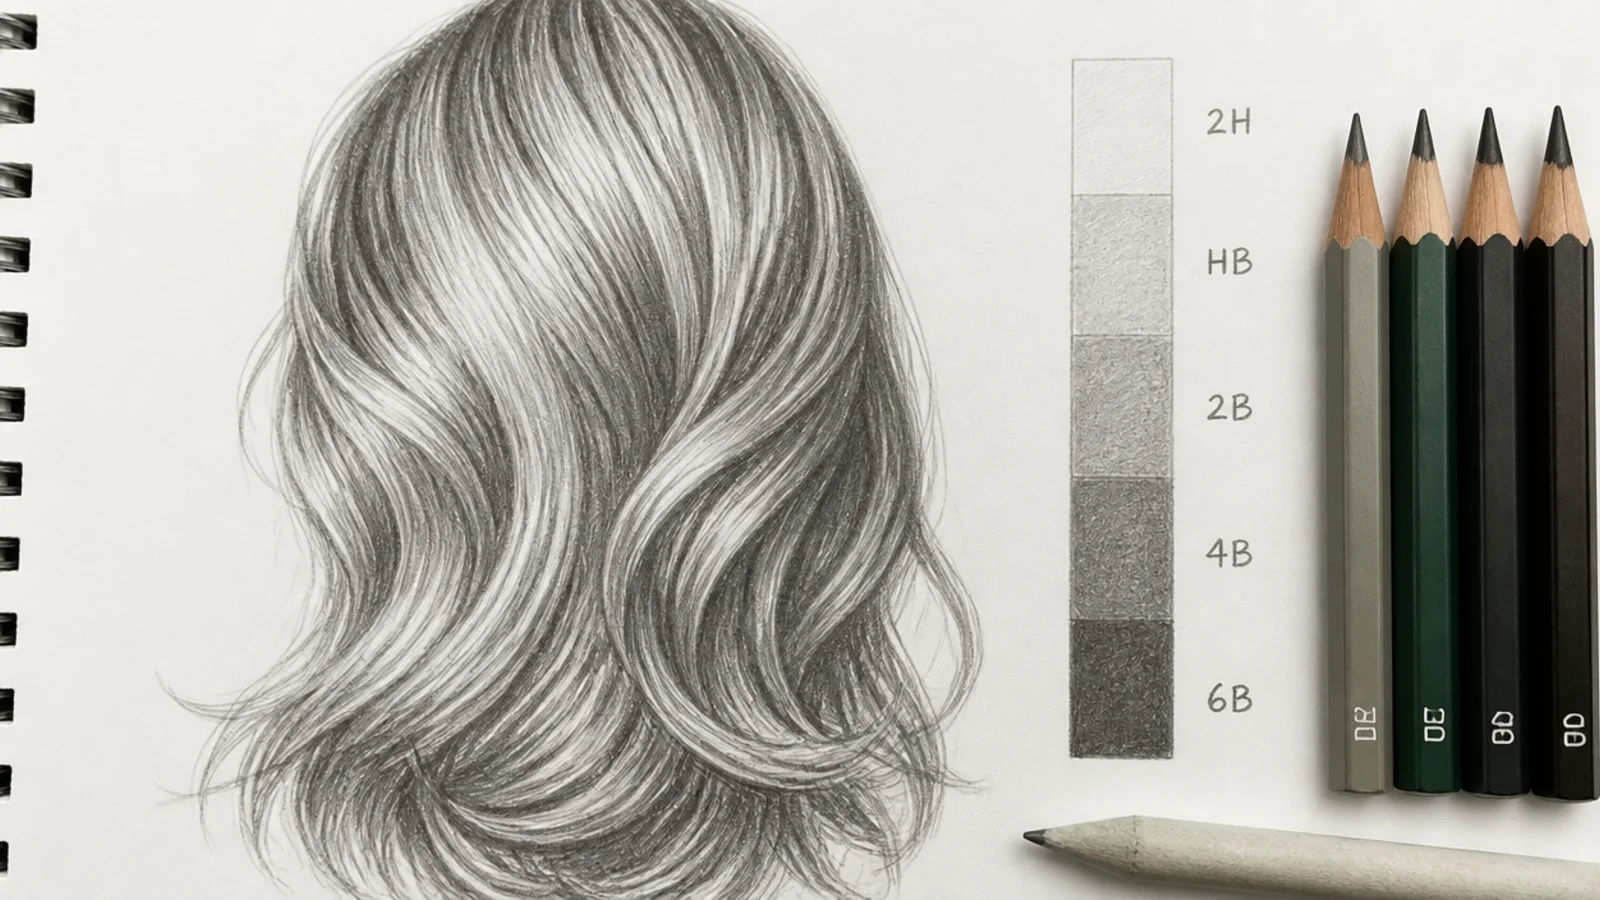
10. The Kneaded Eraser Lift
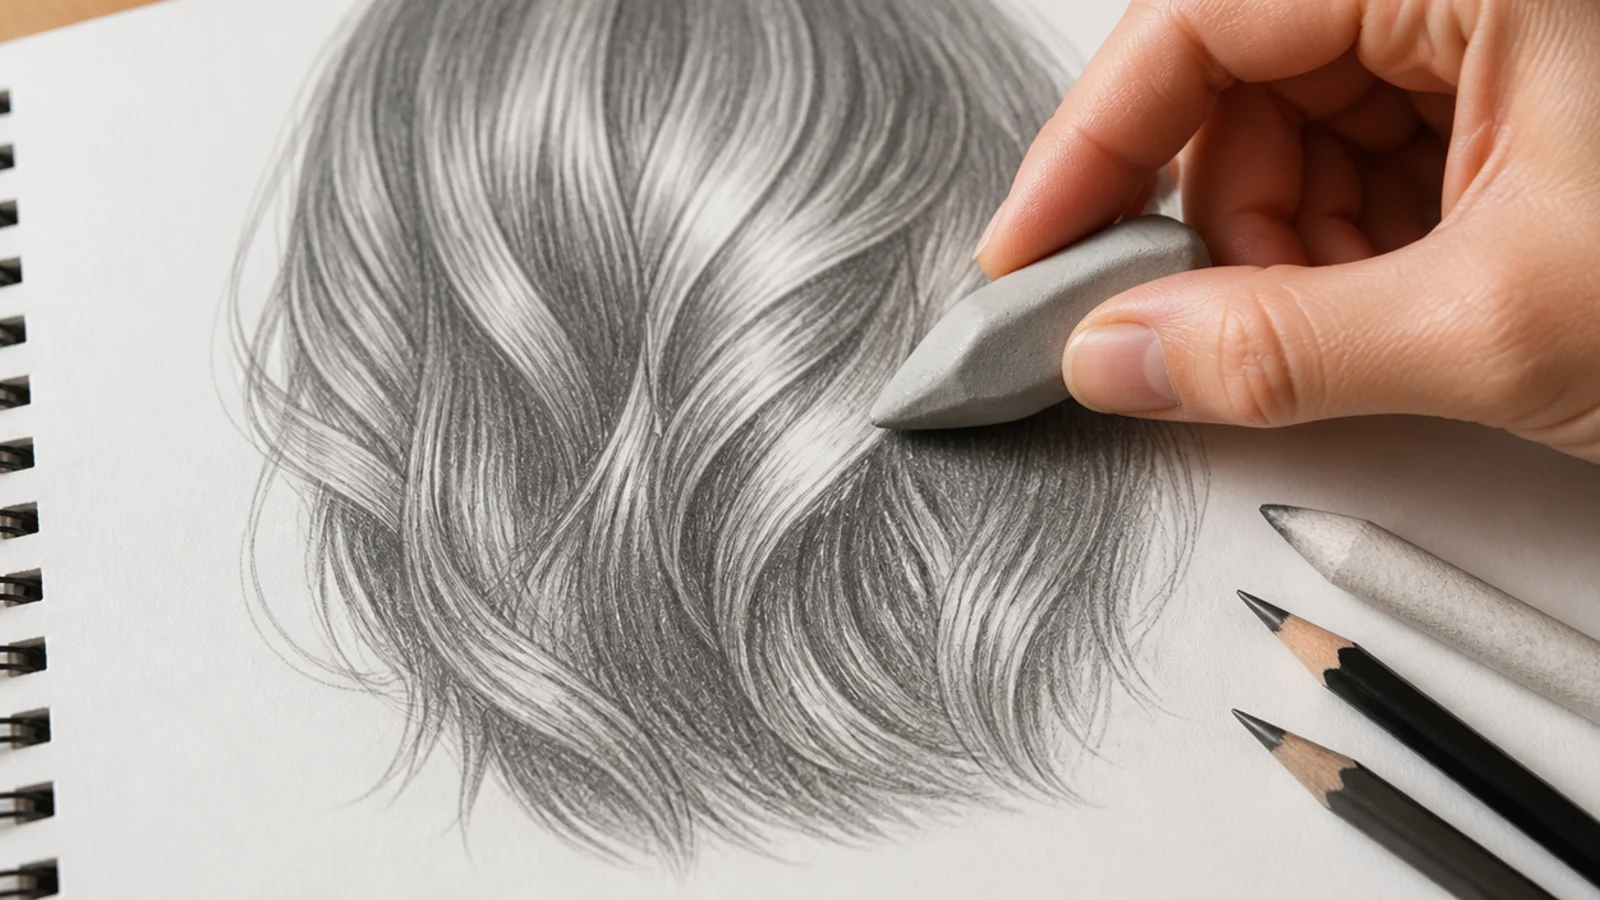
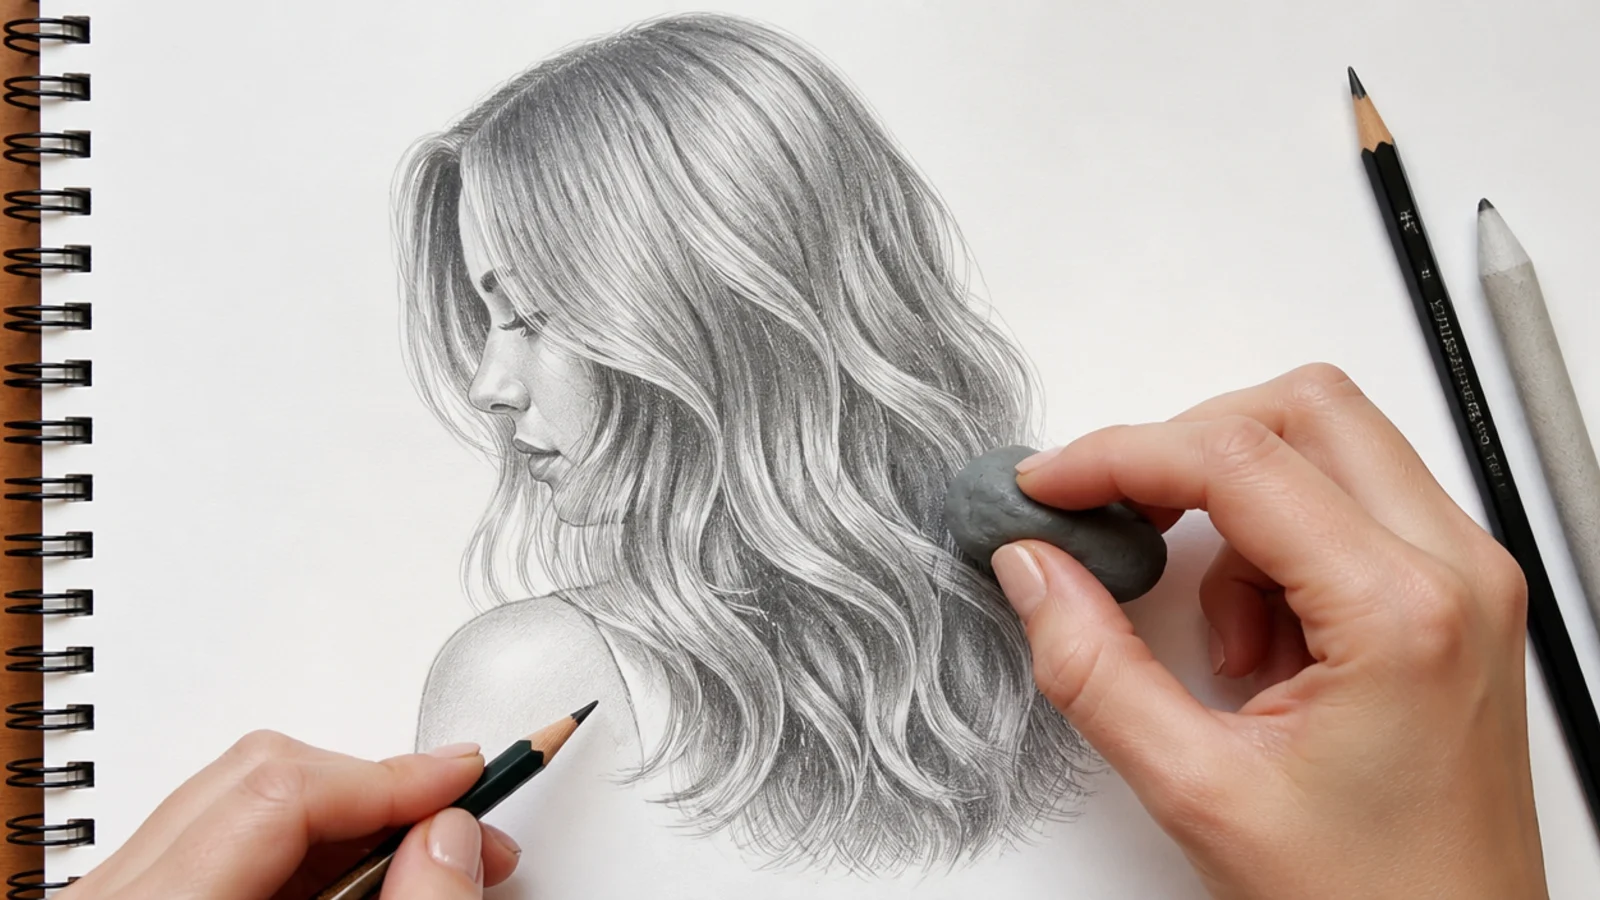
A kneaded eraser removes graphite by lifting rather than abrading, so a highlight pulled out of laid tone leaves the paper surface intact underneath. Pull the eraser into a thin wedge and drag it along the flow lines, and the lifted strands sit convincingly on top of the mass.
11. The Three Value Block
Hair reads on light, mid and dark alone, so block those three before adding anything else. Every additional value costs rendering time and narrows the gap between the extremes, and that gap is the entire mechanism by which a viewer perceives depth in graphite.
12. Dark Spaces
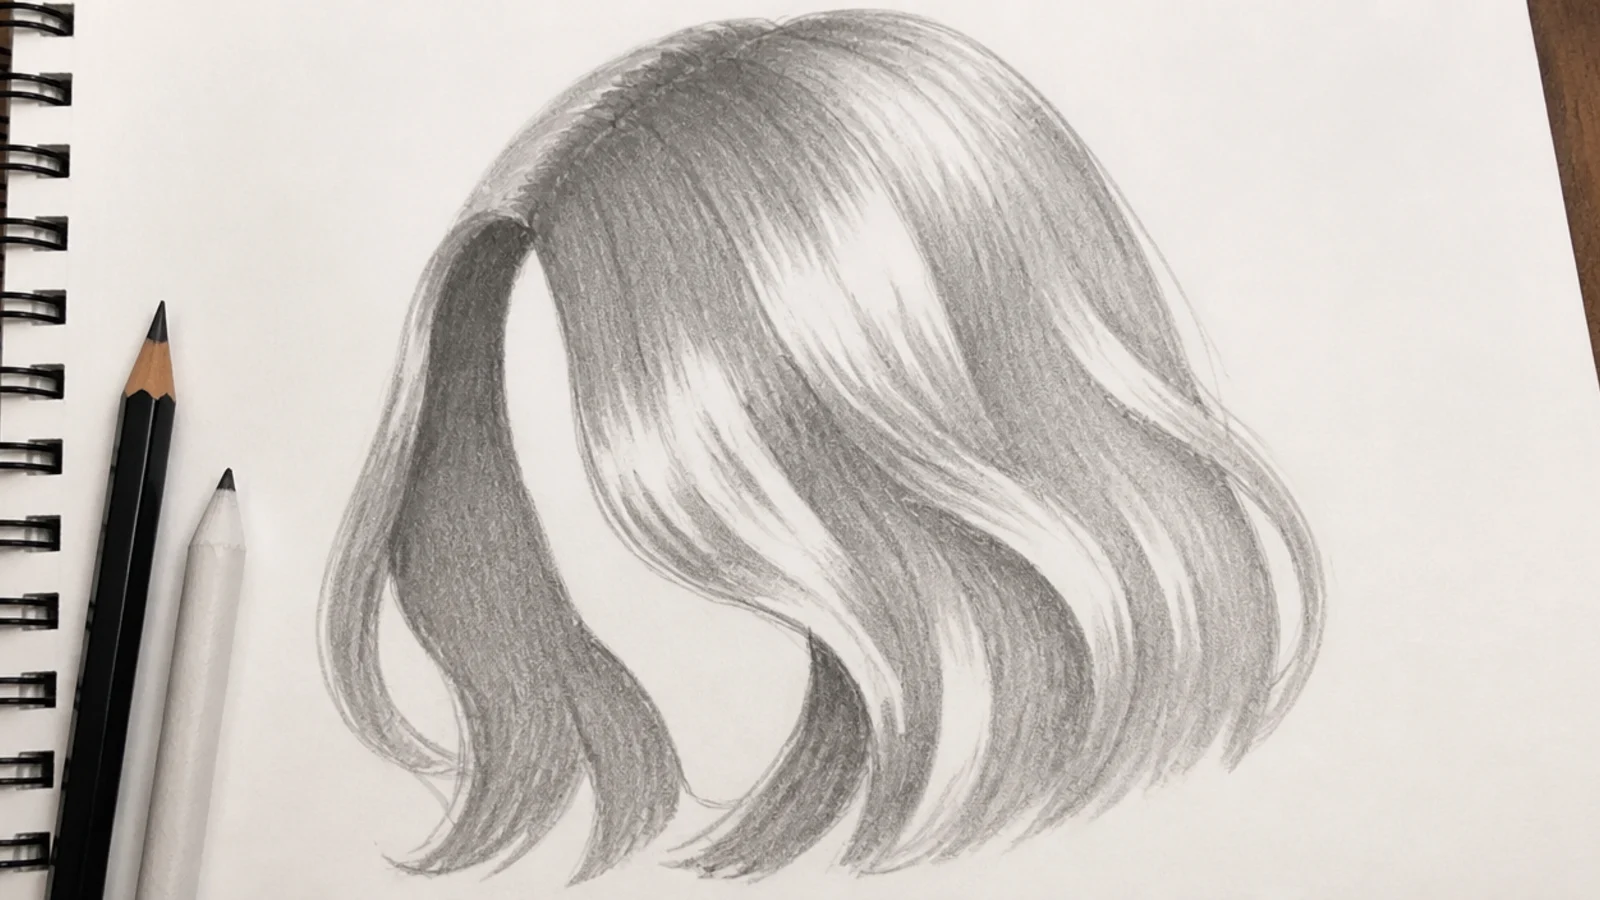
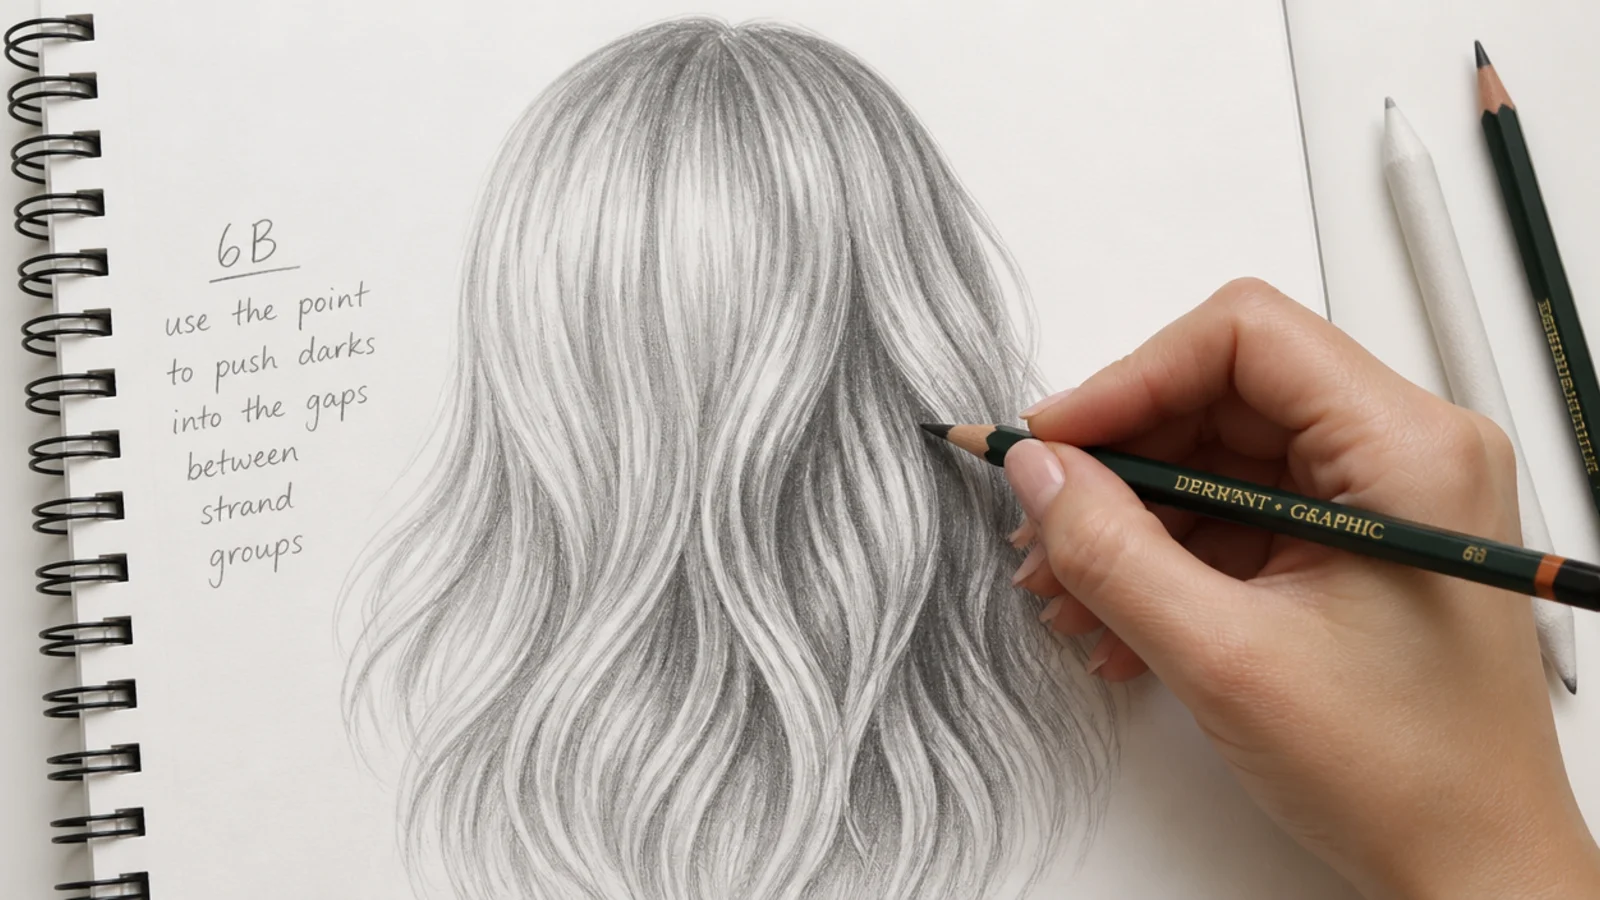
The most useful marks in a hair drawing are the gaps rather than the strands. Push the darkest value into the channels between groups, under every overlap and at the root beside a parting, because those recesses are where light genuinely fails to arrive.
13. Straight Hair
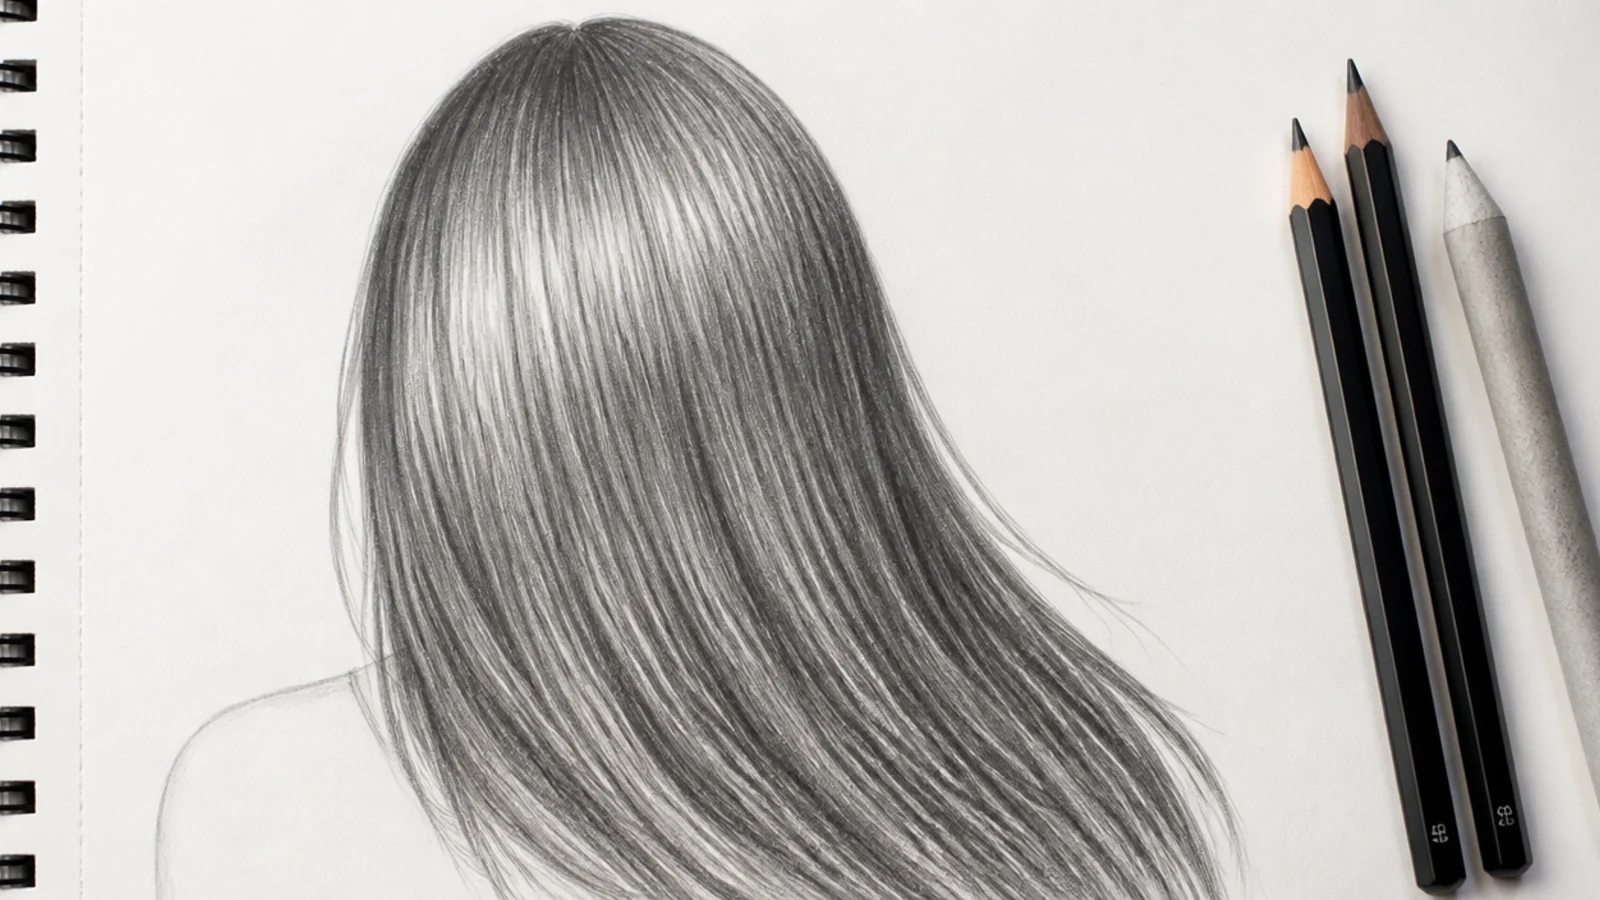
Straight hair holds one direction from root to end, which exposes every unsteady stroke you make. Draw from the shoulder rather than the wrist so the lines stay long and unbroken, and taper each one by lifting pressure at the finish so it ends in a point rather than a stop.
14. Wavy Hair
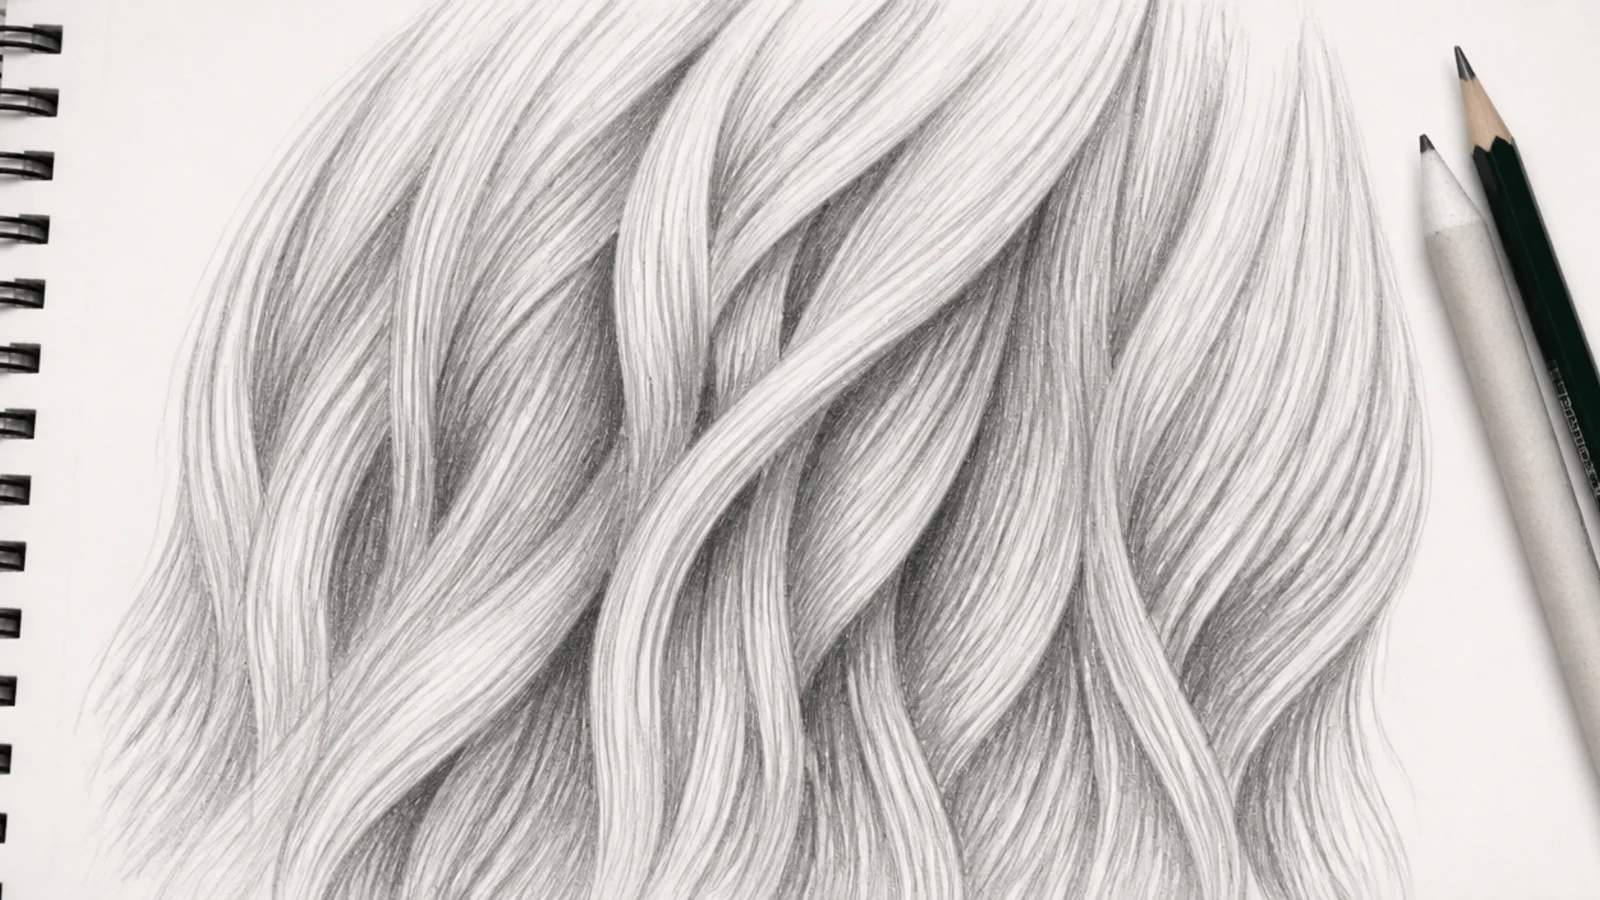
A wave turns the strand surface toward and away from the light in alternation, so value has to change at every bend instead of running evenly down the length. Keep the outer face of each curve light and the inner face dark, and the section begins describing a twisting ribbon.
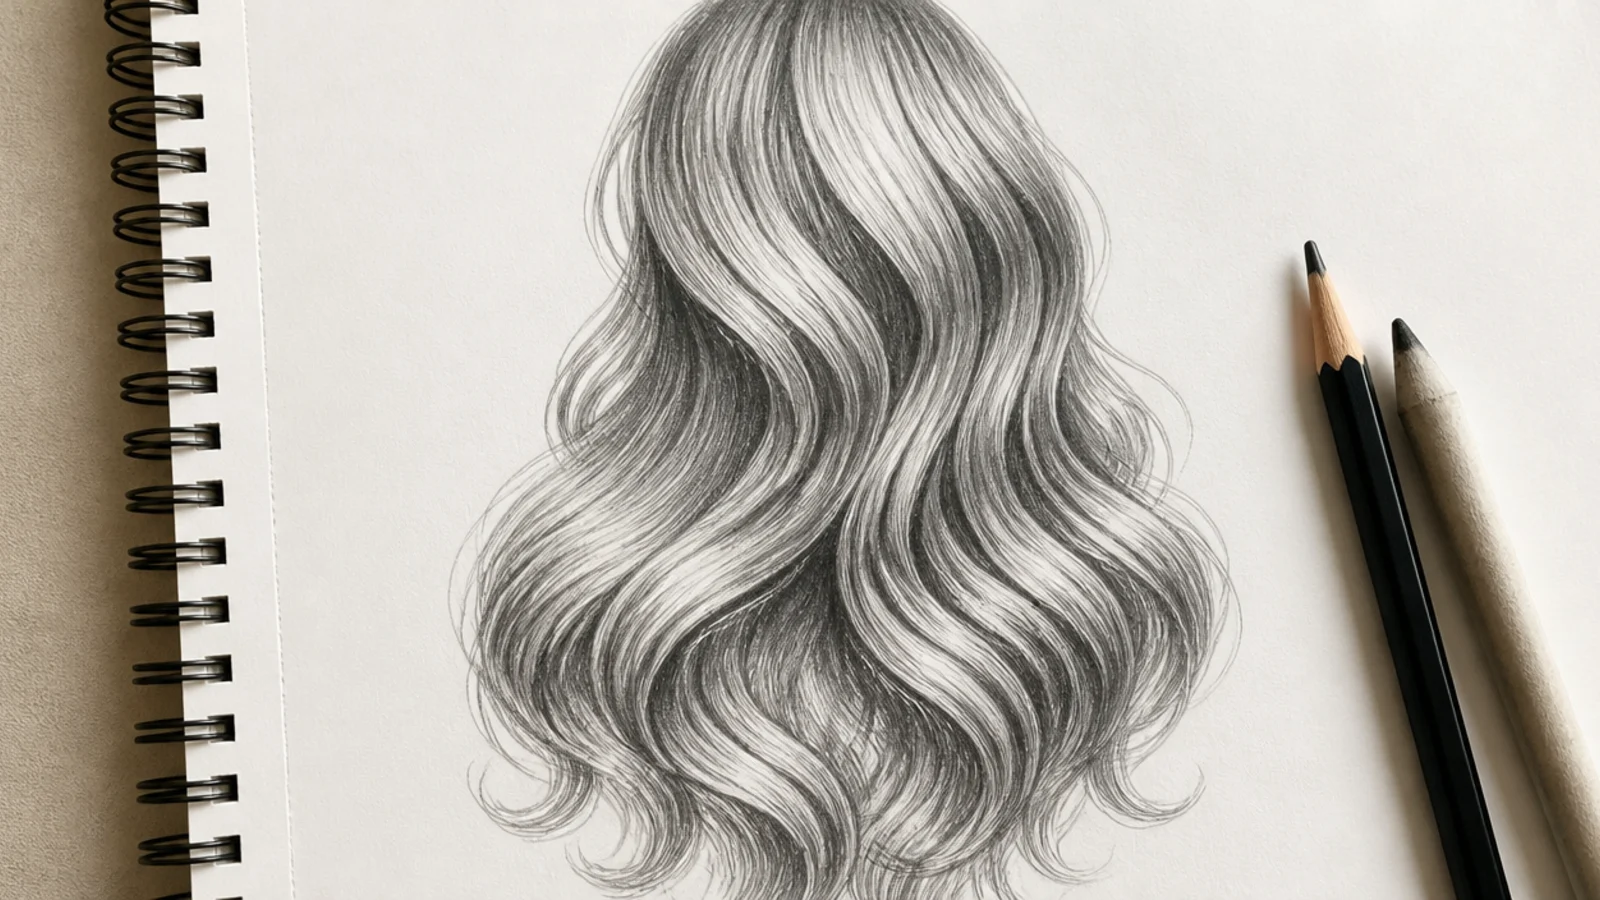
15. The Curl Ribbon
Treat a curl as a flat ribbon wound around an invisible cylinder rather than as a spiral line. You then always know which face is turned toward you, and giving the receding face the darkest value is what turns a flat spring into a curl with a front and a back.
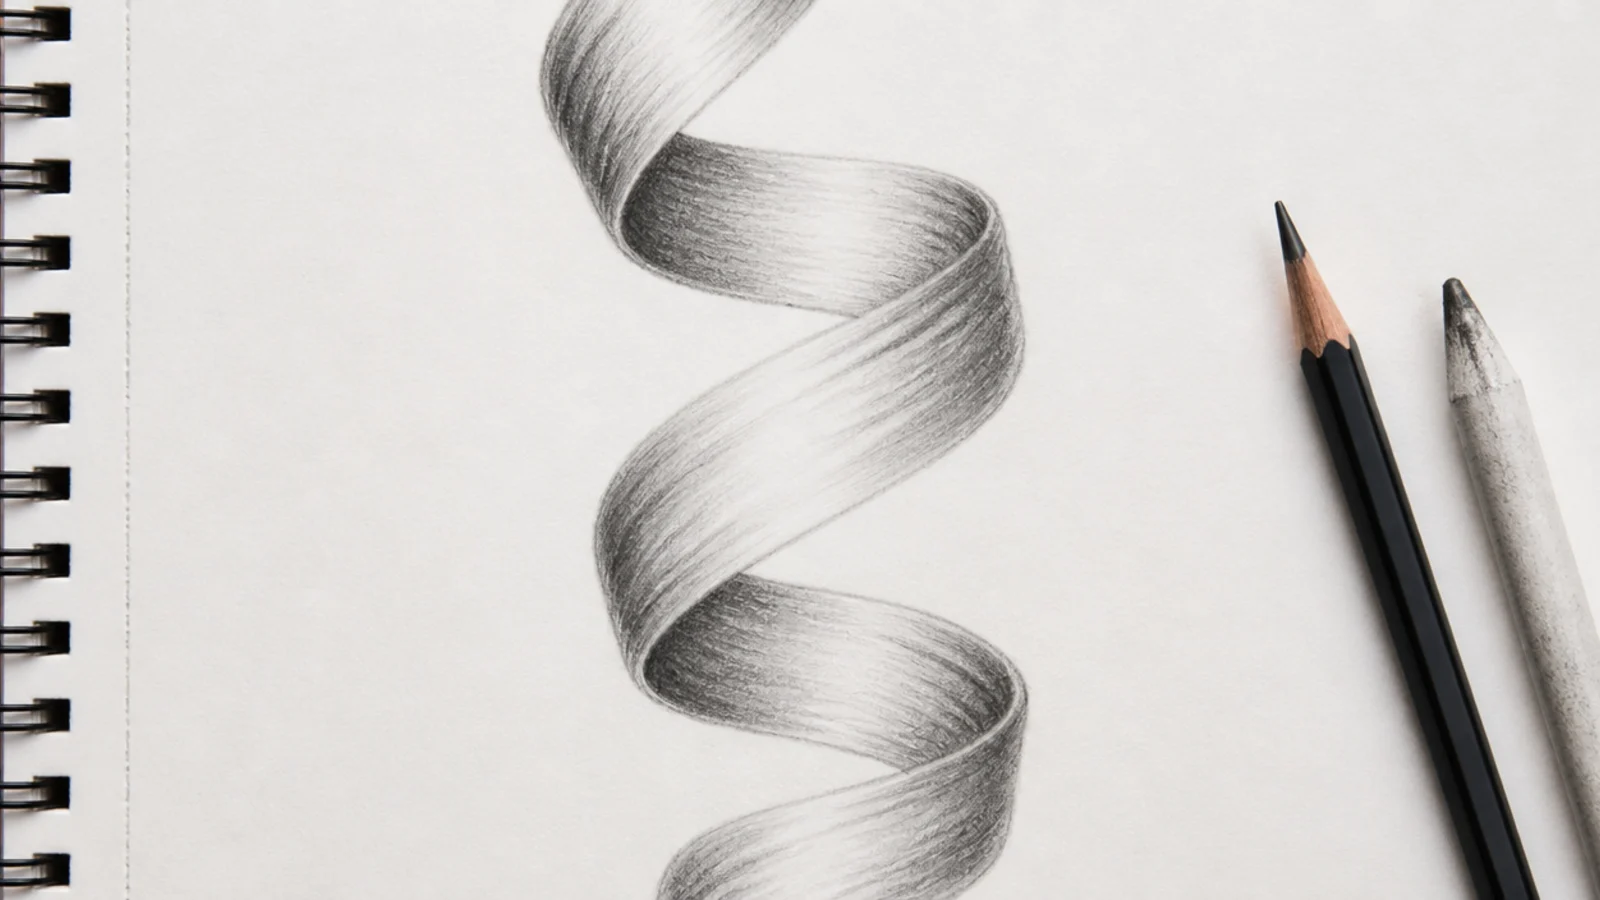
16. Coily 4C Hair
Coils are finer than the pencil can usefully describe at portrait scale, so shade the shape as a sphere and put the texture at the outline only. A fine irregular fuzz along the silhouette plus one broad soft highlight across the top does the whole job.
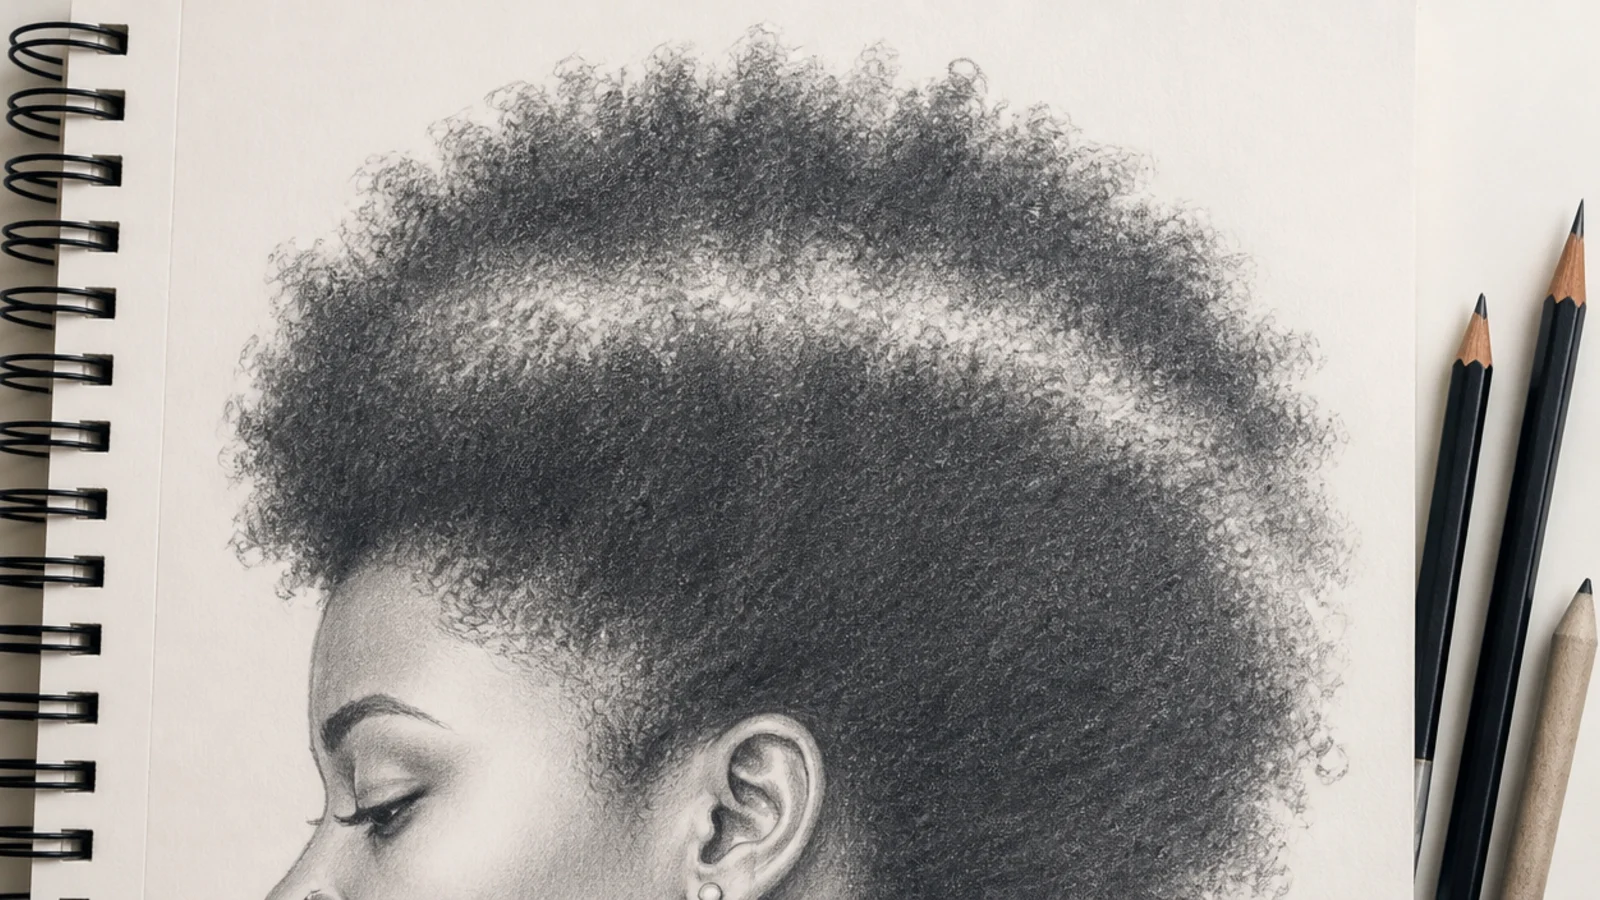
17. Braid Wedges
A braid is a stack of overlapping wedges rather than a woven cable, and drawing it as chevrons first gives you the structure immediately. Shade each seam where one wedge tucks under the next darkest, and shrink the wedges as they descend so the plait narrows toward the tail.
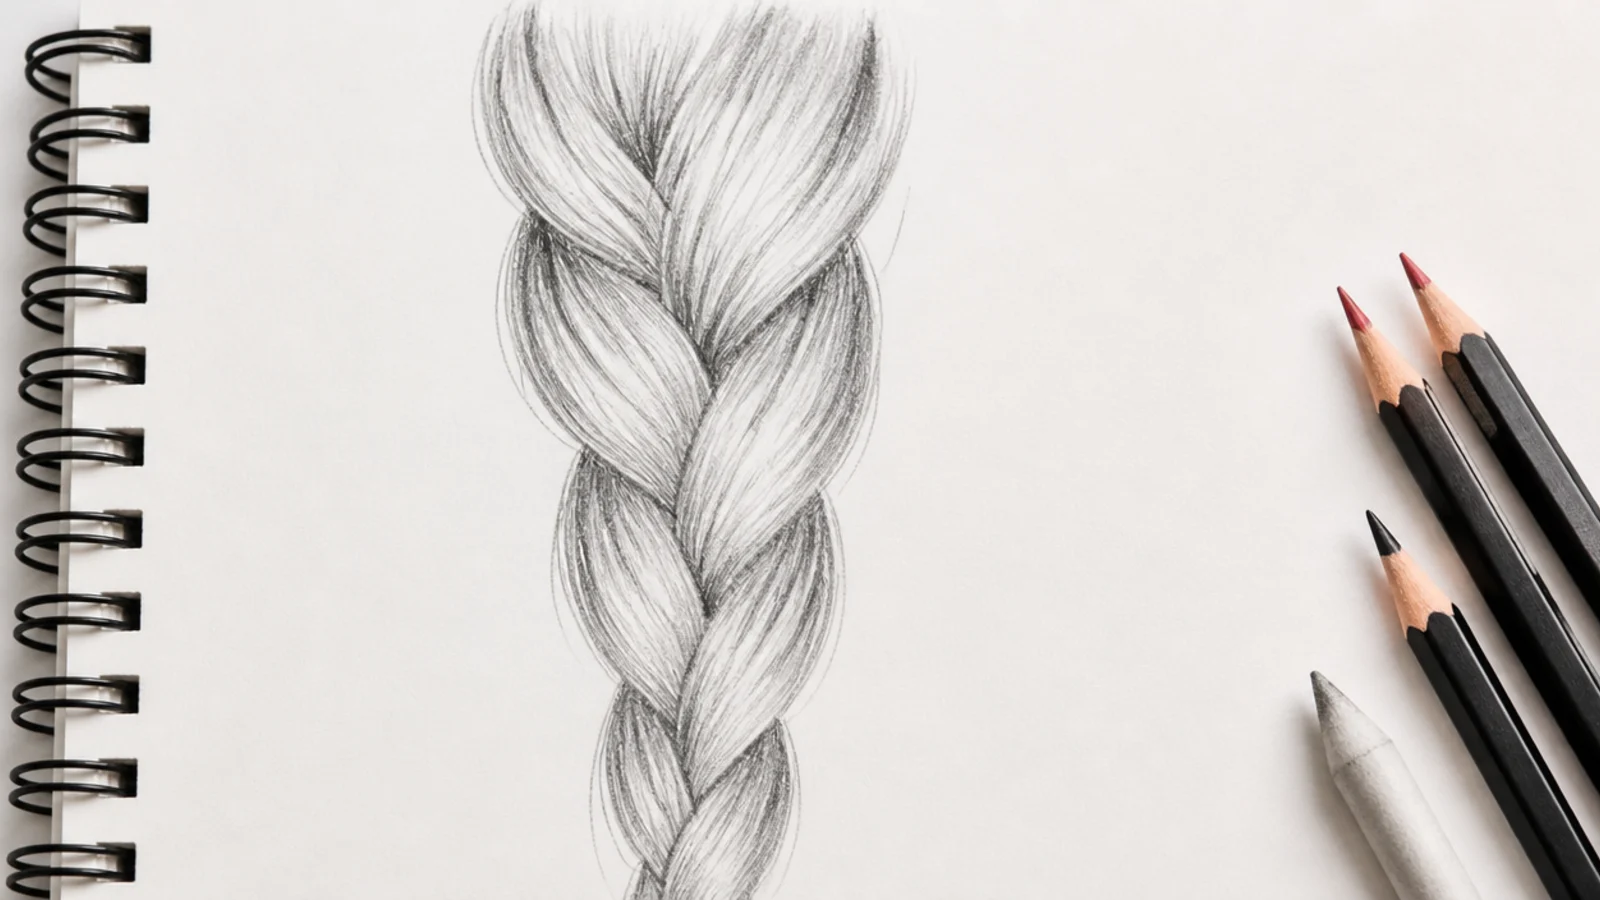
18. Short Hair Flicks
Short hair reads through its edge, because there is not enough length inside for anything else to happen. Break the outline into small irregular flicks that follow the growth direction, since a smooth contour on a crop reads as a moulded shape sitting on the skull.
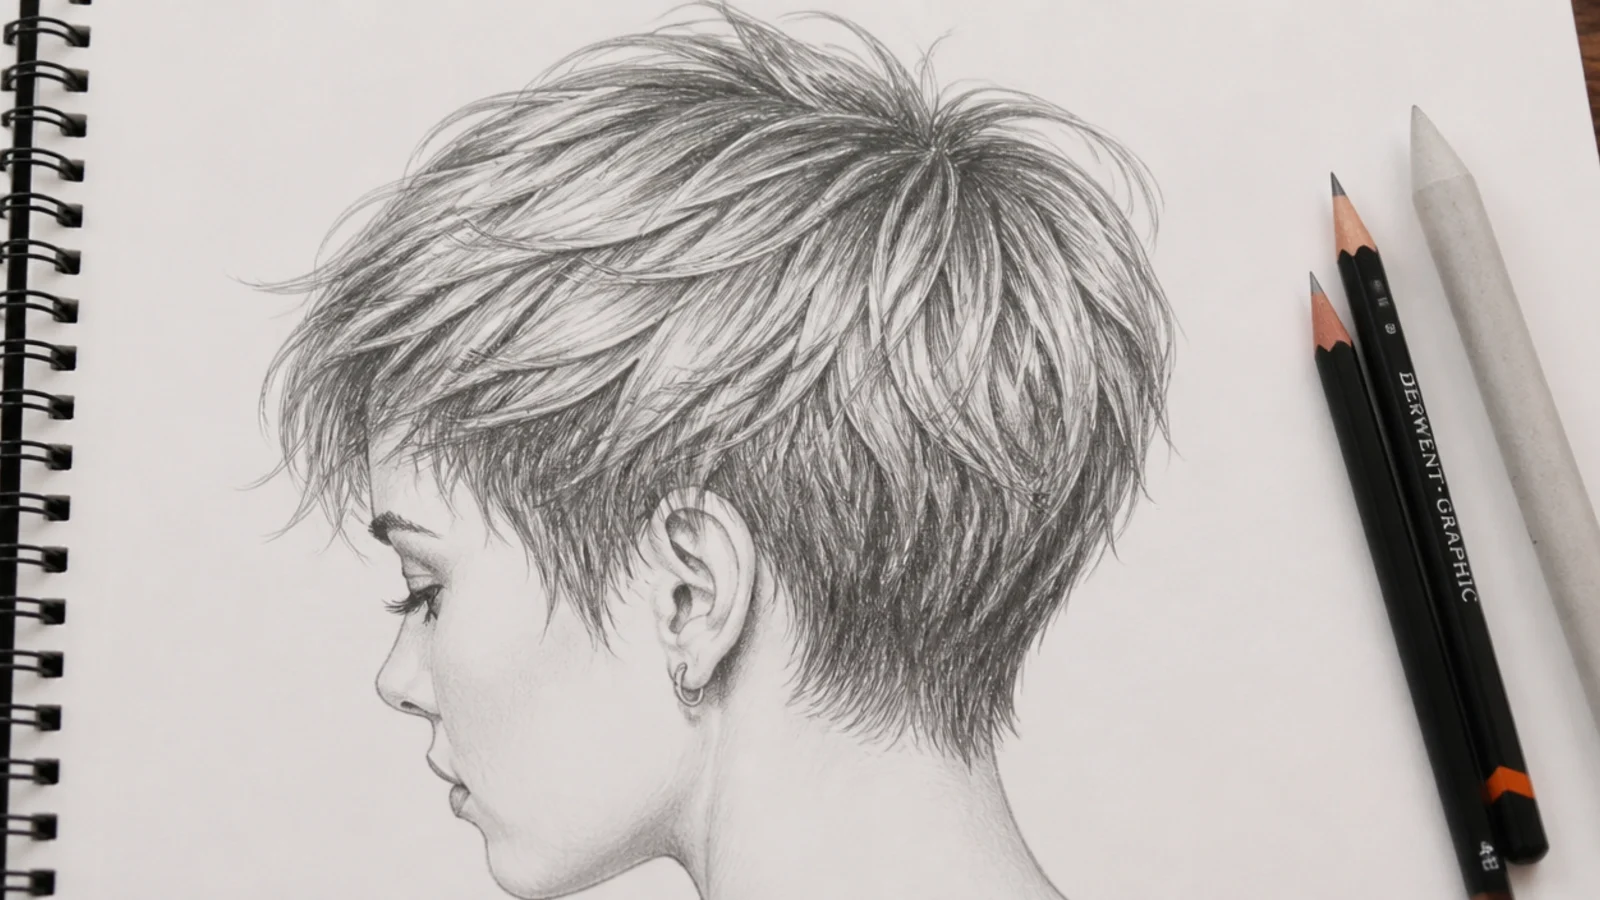
19. Hair in Motion
Moving hair trails behind the head, so the tips sit further round the arc than the roots and the whole mass lags. Curve every flow line in one shared direction and pull two or three strands clear of the bulk, because perfectly uniform movement reads as styling instead of motion.
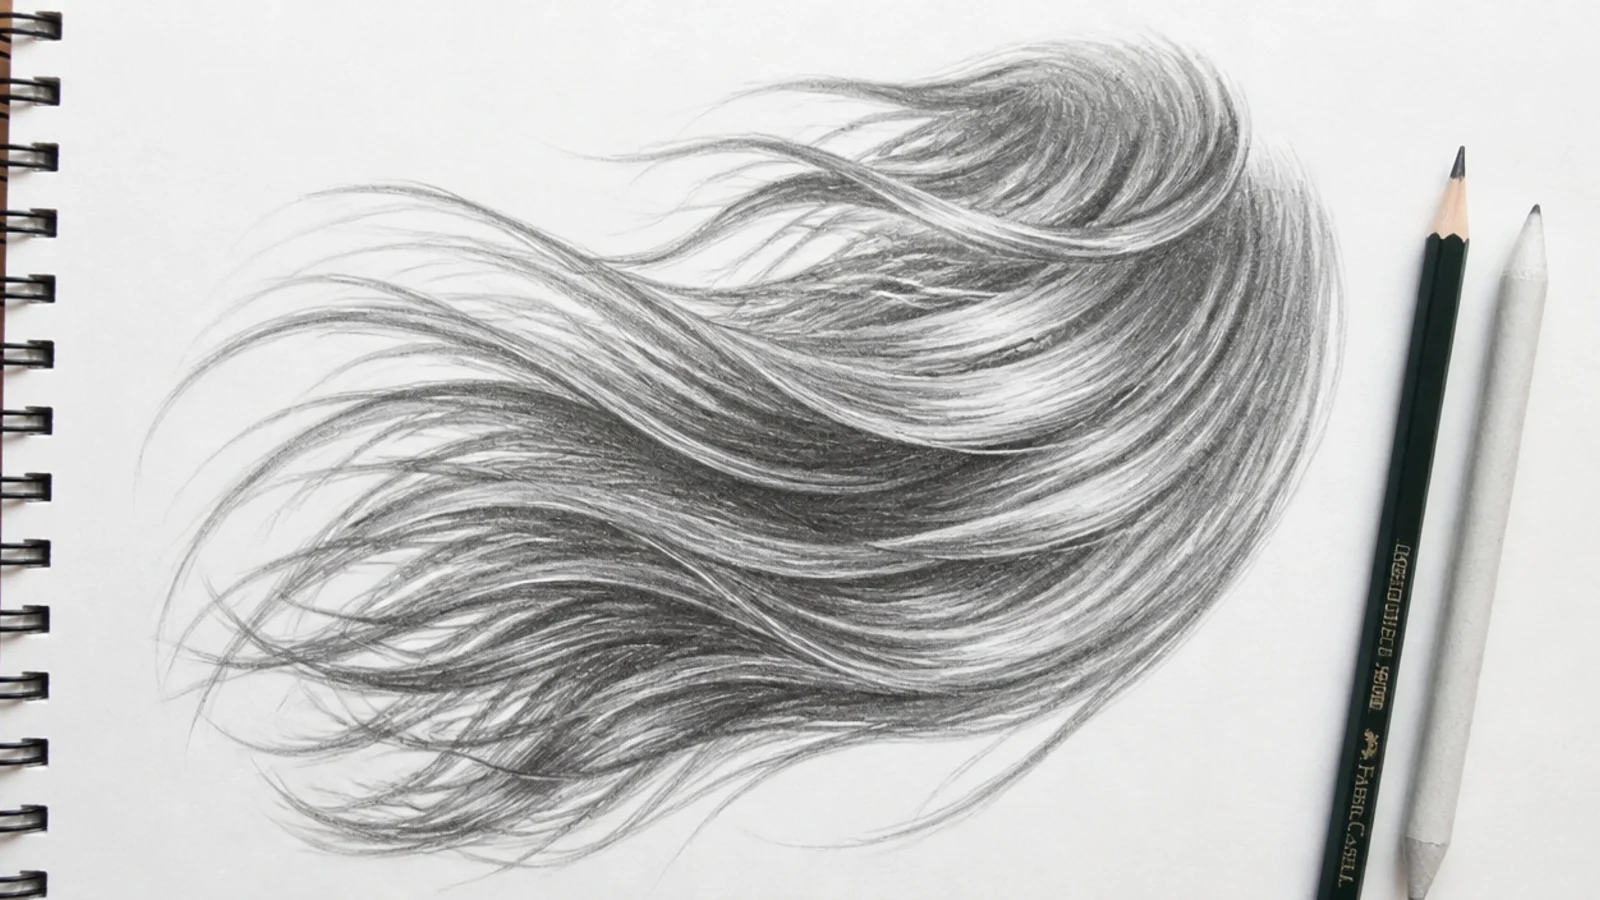
20. Small Scale Hair
Below a certain size an individual strand is finer than the pencil point and only muddies the shape. At thumbnail scale block the silhouette, lay two values, add four strands at the edge and stop, because shape and value are all the eye is reading at that size anyway.
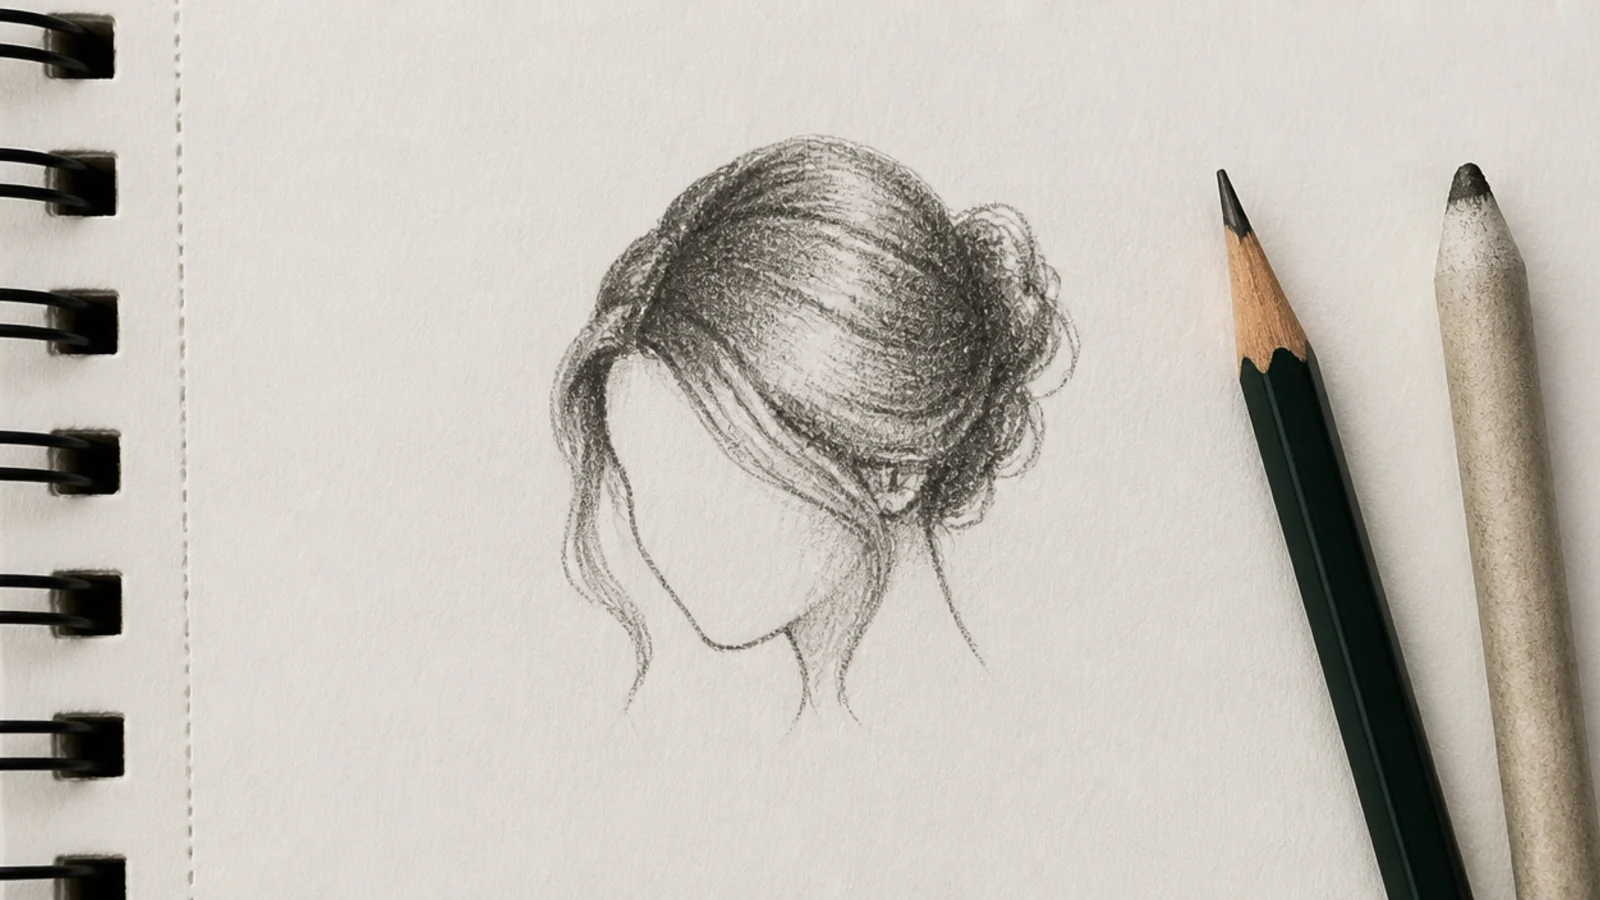
How to Sketch Hair Step by Step
Step 1. Skull and Hairline
Draw the cranium as a ball with the jaw hung beneath it, then set the hairline about a third of the way down from the top of the skull. Keep the line uneven, with a small central peak and softer corners at the temples, because it stays visible under everything you draw afterwards.
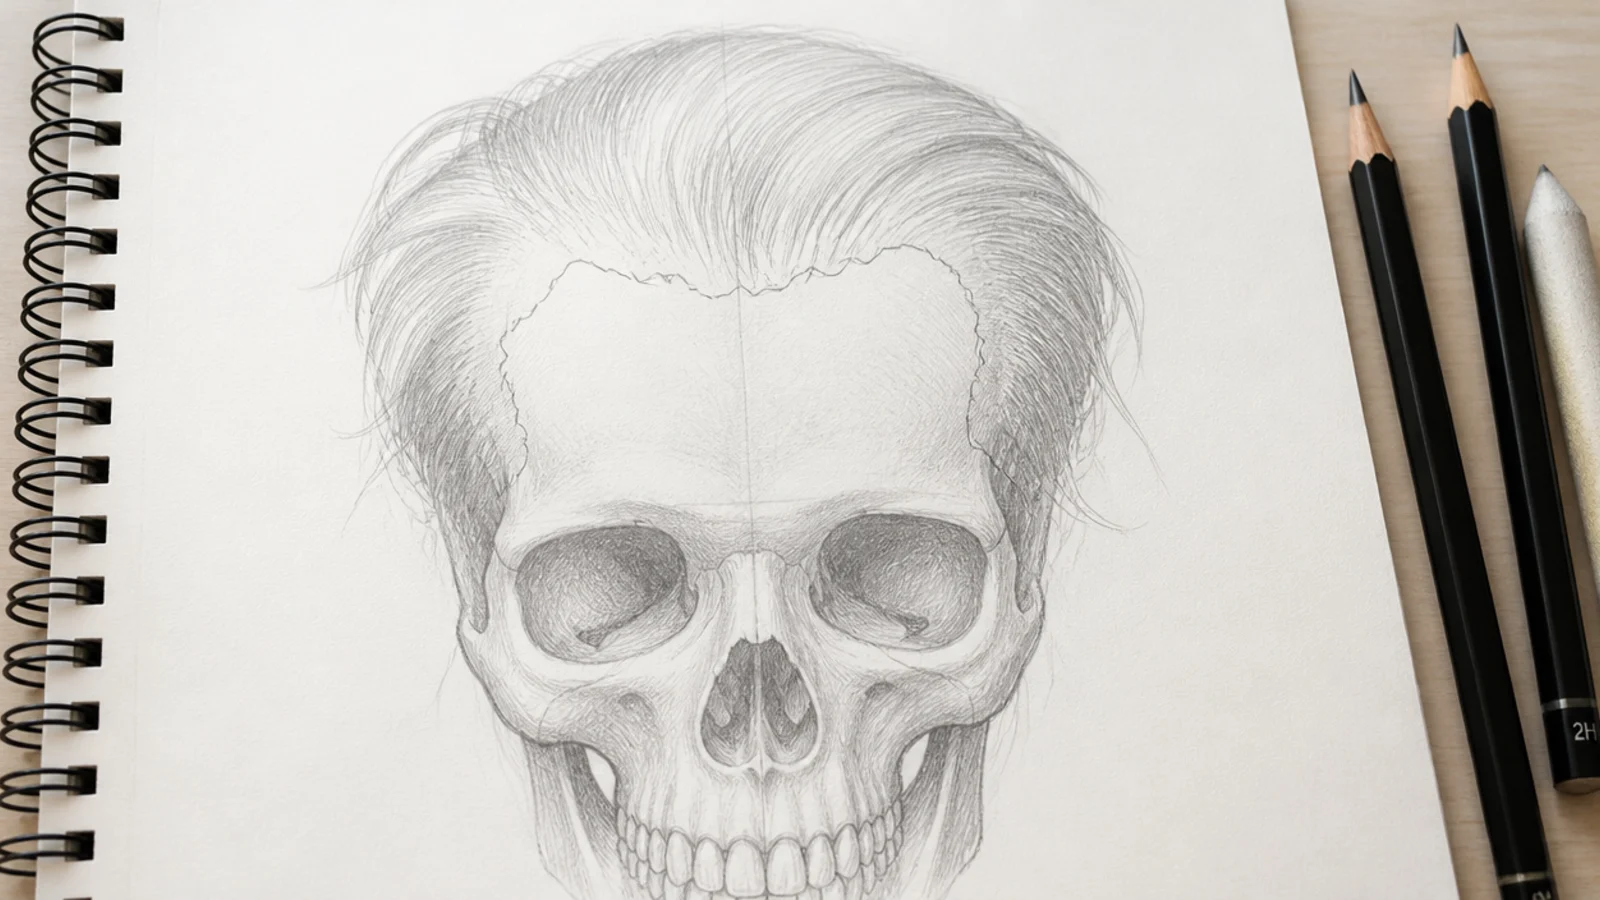
Step 2. Block the Silhouette
Outline the whole hair mass with one closed 2H line sitting clear of the skull by the thickness the style actually has. Nothing goes inside it yet. Turn the sketchbook upside down and check the shape still reads, which is the only honest test of an outline you have been staring at.
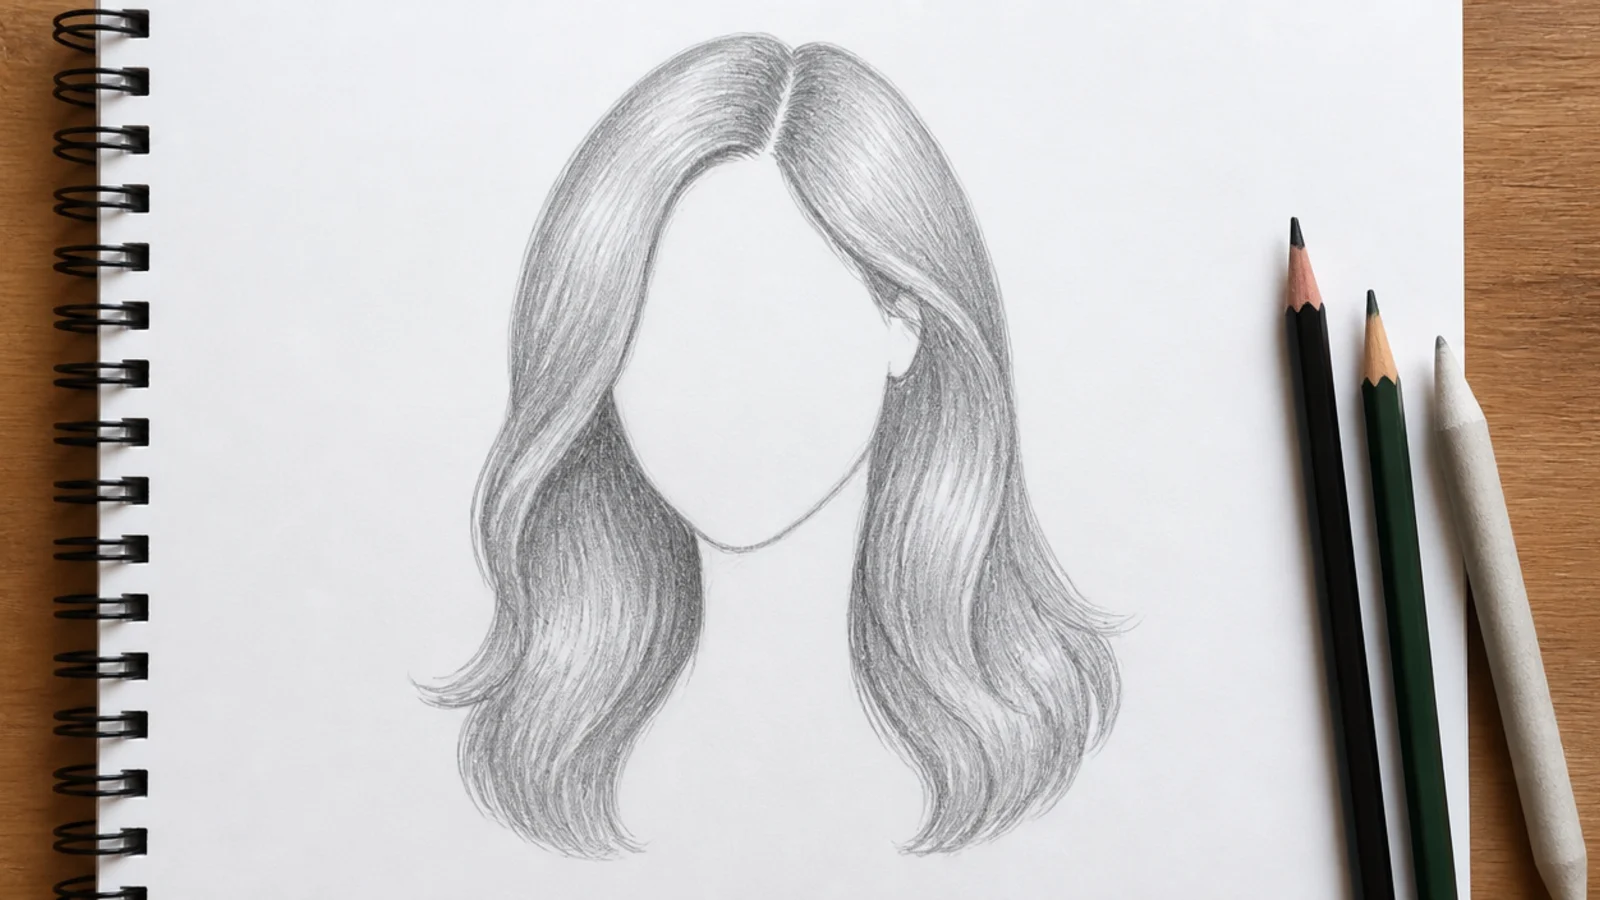
Step 3. Crown and Flow Lines
Mark the whorl, then run four or five long lines from it out to the ends of the hair. Vary the gaps and let a couple converge, because parallel guides produce parallel strands and parallel strands are the clearest signal of an inexperienced hair drawing there is.
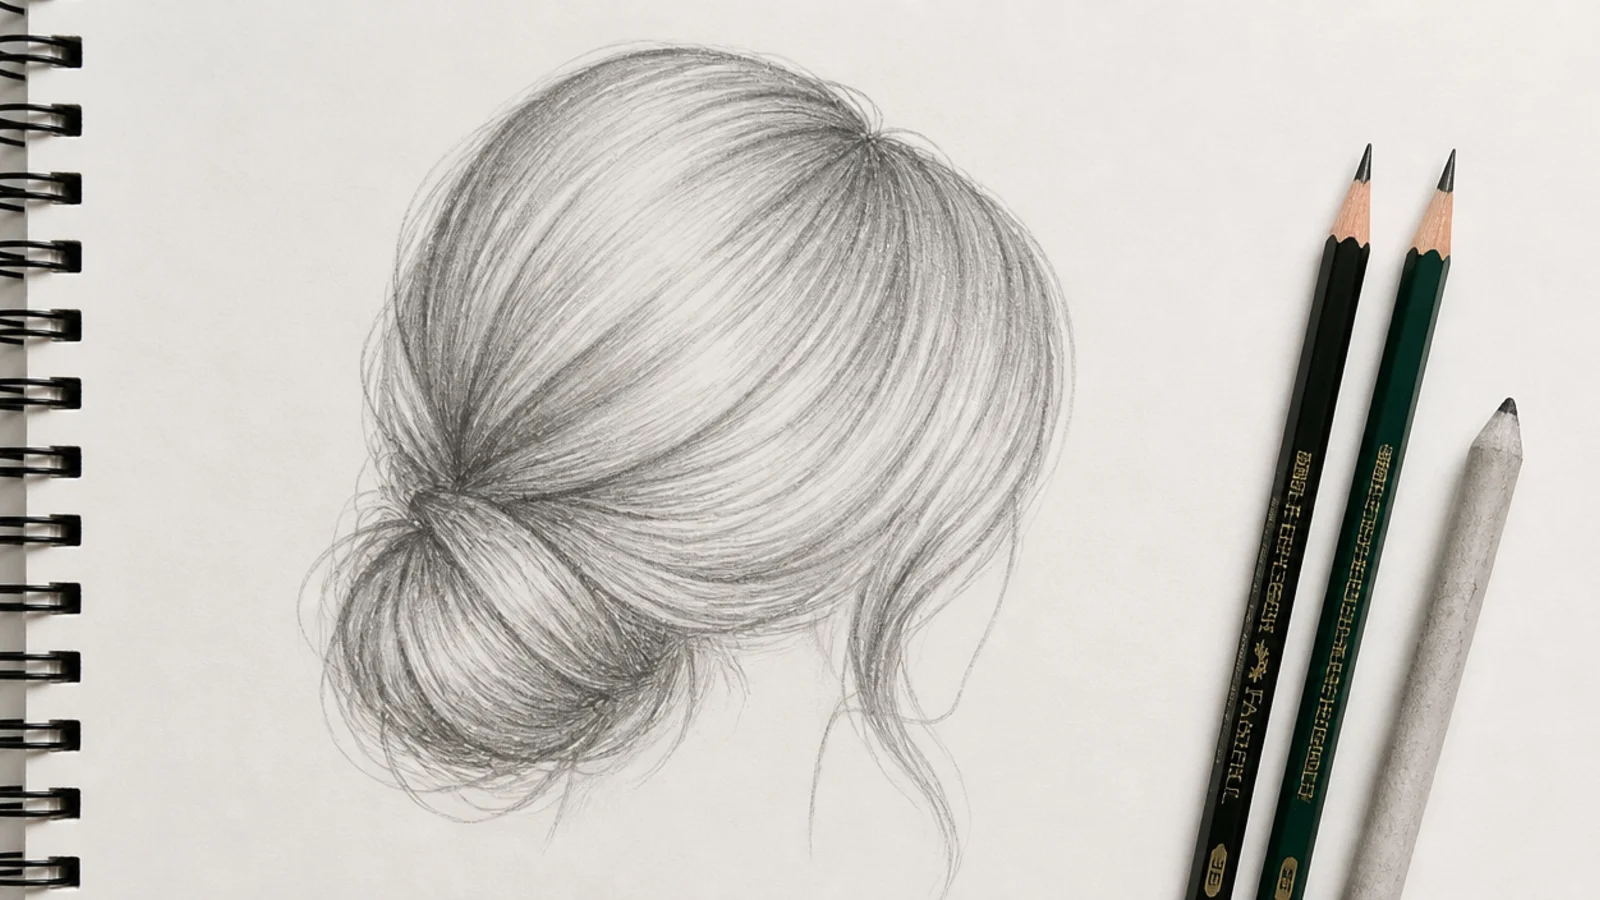
Step 4. Strand Groups
Bundle the mass into overlapping ribbons along those flow lines, each one a different width from its neighbours. These groups are what you will separate with shadow later, and a mass without them offers nowhere to put a dark value, which is why undivided hair always finishes flat.
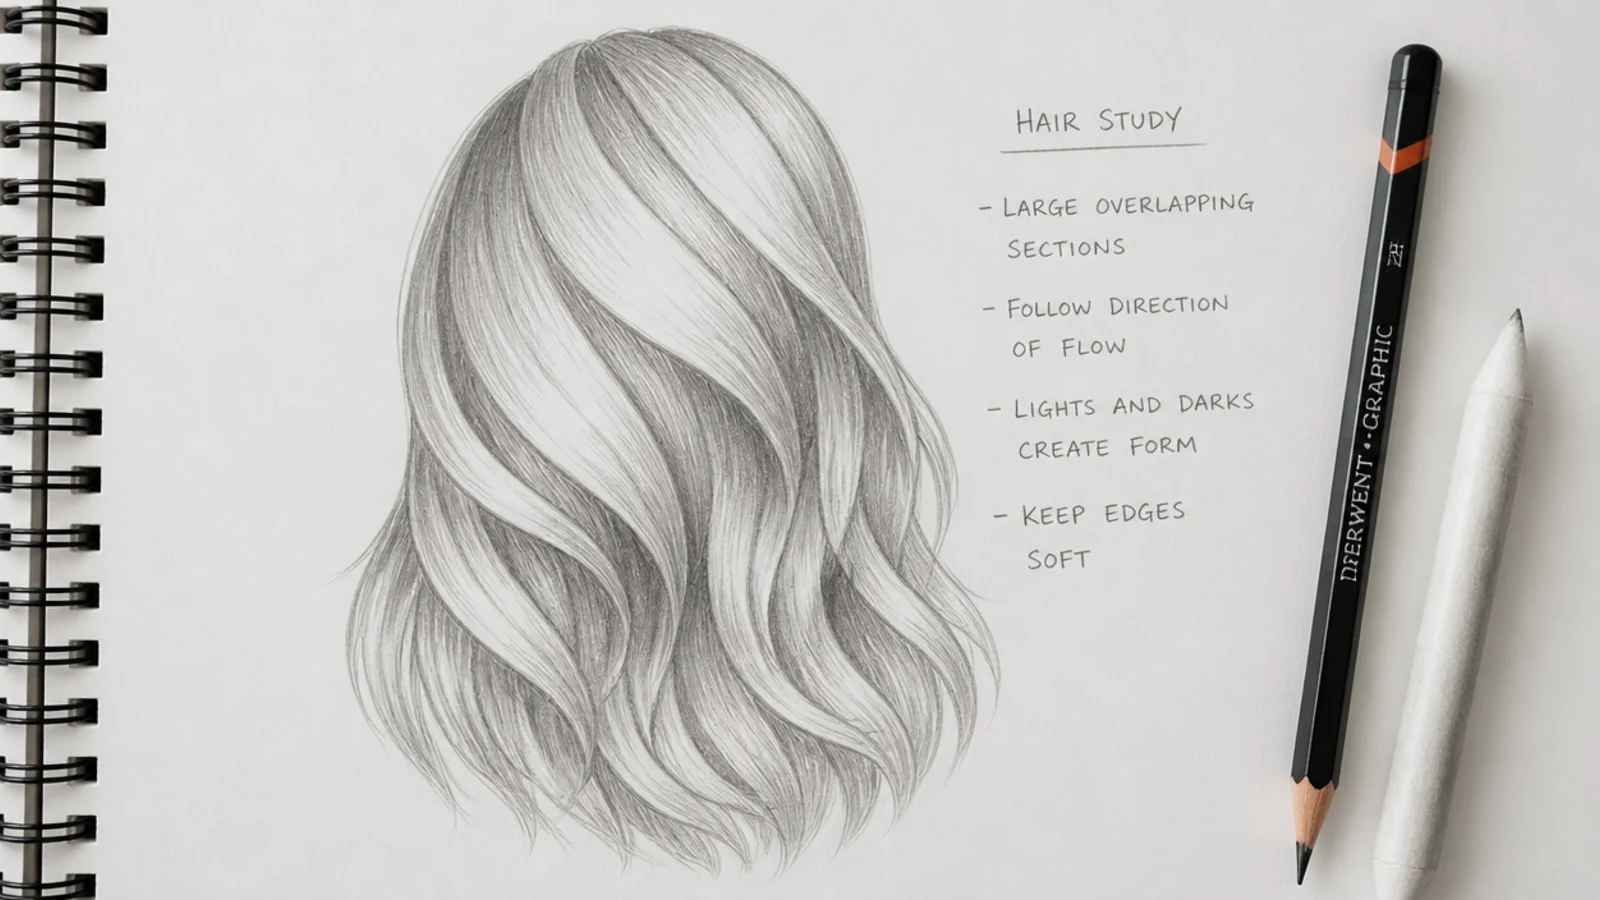
Step 5. Light Bands
Fix the light direction and draw the highlight as a band curving across the strands and around the round of the skull. Outline it lightly and protect that area from here on, because everything that follows is additive and this white paper is the brightest value the drawing will ever hold.
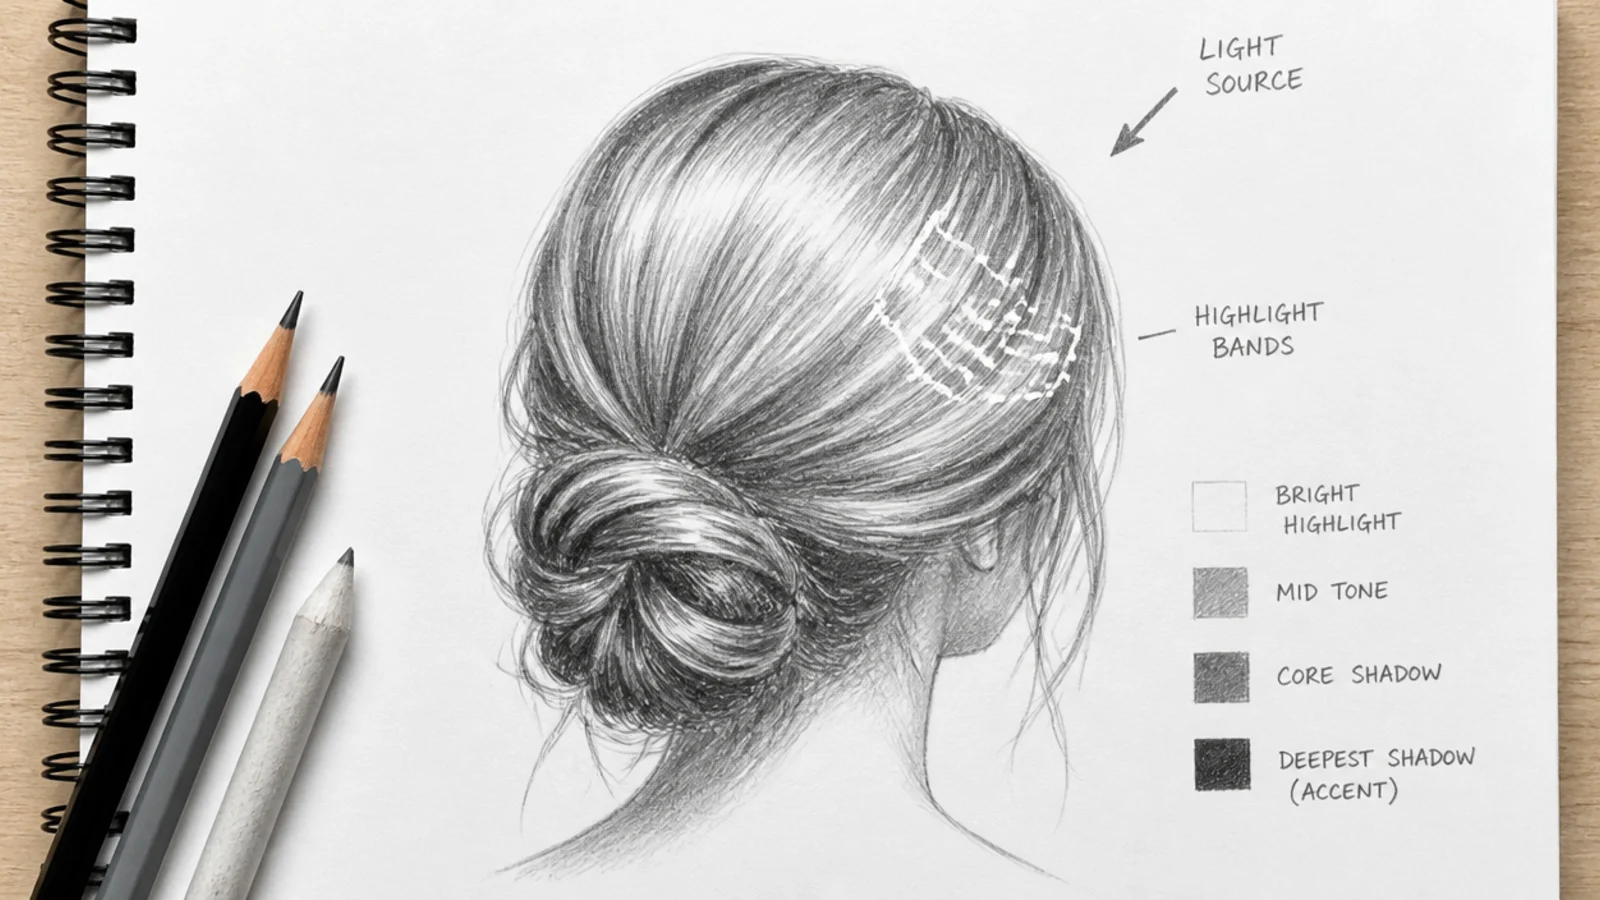
Step 6. Flat Mid Tone
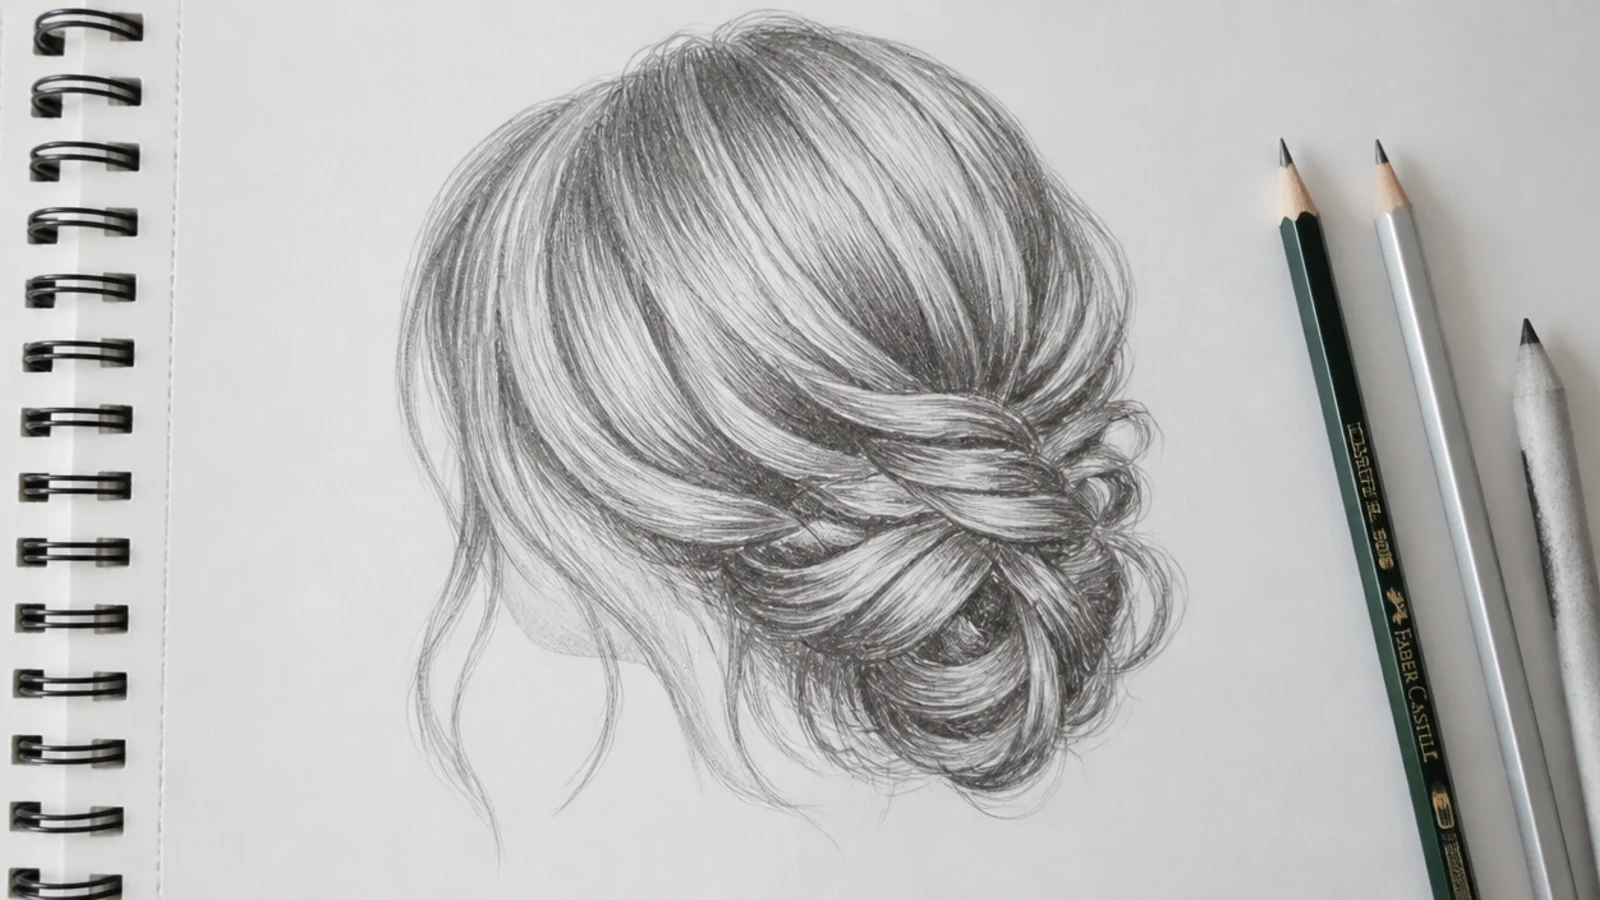
Cover everything except the highlight band with an even 2B tone, stroking along the flow lines so the grain already runs the right way. The drawing will look worse at this stage and it should, since the mid tone exists to make the darks readable rather than to look finished by itself.
Step 7. Dark Cores
Work a 6B into the channels between groups, beneath every overlap and at the roots beside the parting. This is the step where the drawing turns into hair, because depth is read from where the light fails to reach rather than from how many strands are on the page.
Step 8. Lift Flick and Finish
Pull highlights out with a wedge of kneaded eraser along the flow lines, then scatter a few fine flicks breaking the silhouette. Stop while some of the mid tone is still untouched, because a drawing detailed evenly across its whole surface gives the eye nowhere to settle.
Final Thoughts
If a sketch is not working, check the list in order rather than adding more strands. Nine times out of ten the fault is one of the first four rules — a silhouette that hugs the skull, flow lines that never got marked, groups that were never separated, or a mid tone laid without any dark channels underneath it. All four are cheap to fix early and expensive to fix late, which is the entire argument for working in the stated sequence.
Practise the rules in isolation before combining them. One page of nothing but flow lines, another of nothing but three value blocks, a third of dark channels alone — each takes ten minutes and each removes a specific failure from every drawing you make afterwards. For the texture that breaks the most rules at once see the curly version. More in Hair Drawing. See also the anime version.