

20 Steps to a Jellyfish Haircut That Comes Out Right
Twenty steps from the first decision to the follow up trim, and the eight passes that actually build the shape. Almost every disappointing jellyfish fails at the same point — the stylist blended the boundary the whole cut depends on.
In this article · 36
- What the Jellyfish Haircut Structure Is
- Asking for a Jellyfish Haircut
- Jellyfish Haircut Cost and Salon Choice
- Cutting a Jellyfish Haircut at Home
- Growing Out a Jellyfish Haircut
- The 20 Steps
- 1. Check Your Hair Texture
- 2. Match Face Shape to Bell Height
- 3. Measure Your Current Length
- 4. Work Out the Cost
- 5. Find the Right Stylist
- 6. Bring Front and Back Reference Photos
- 7. Choose Bell Height
- 8. Decide the Tentacle Length
- 9. Disconnection Level
- 10. Book the Appointment
- 11. Consultation Wording
- 12. Sectioning the Bell
- 13. Cut Tentacles First
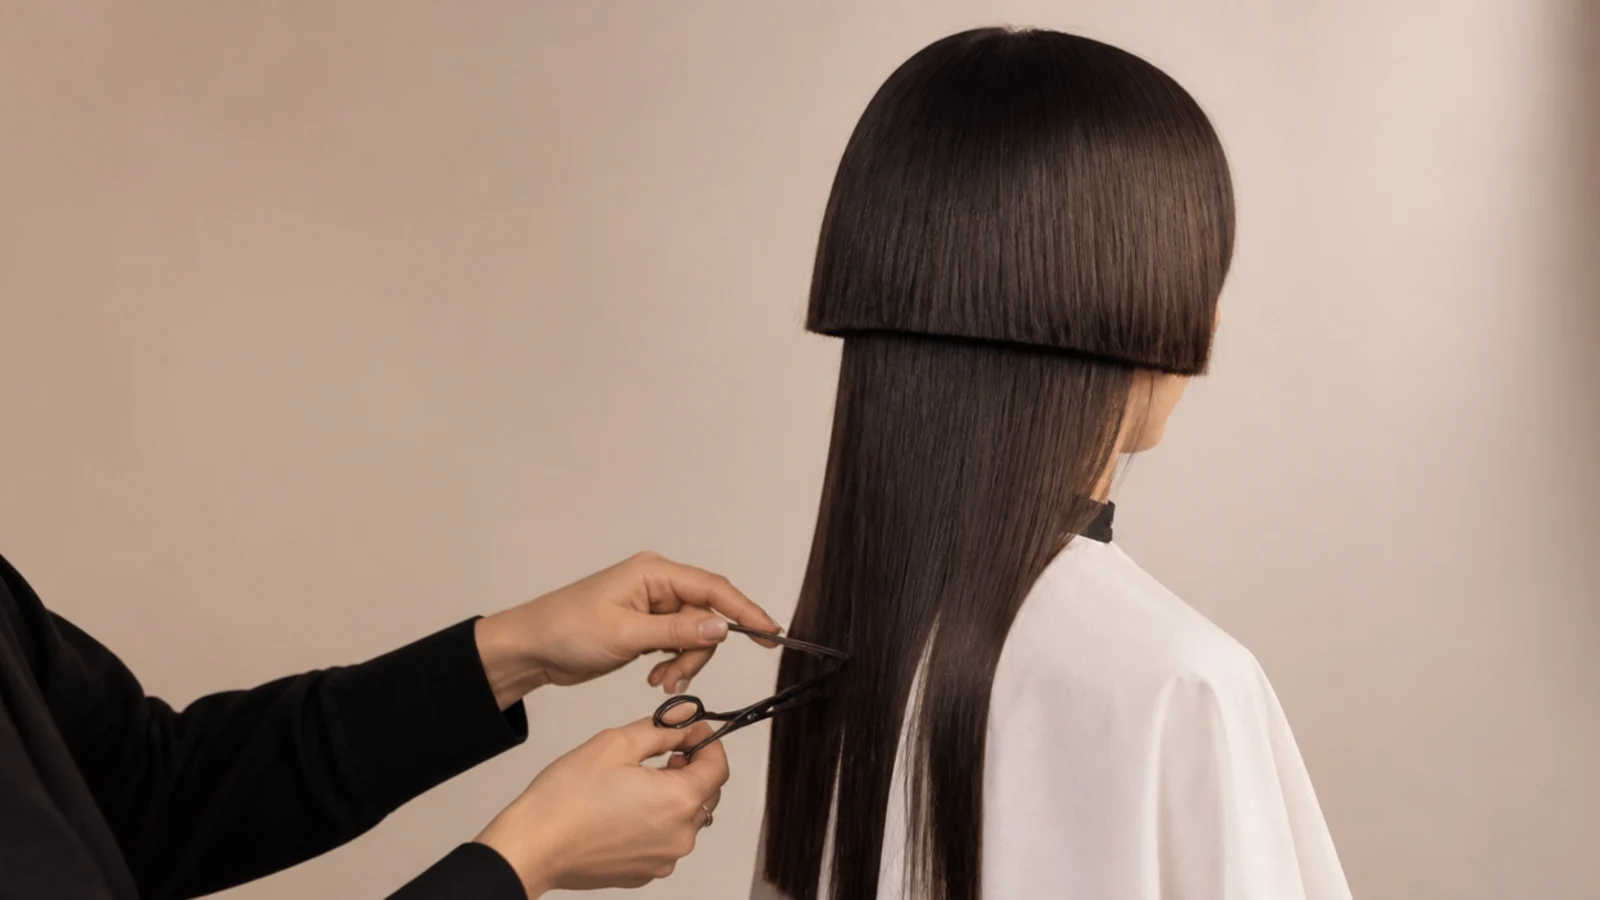
- 14. Cut the Bell Long
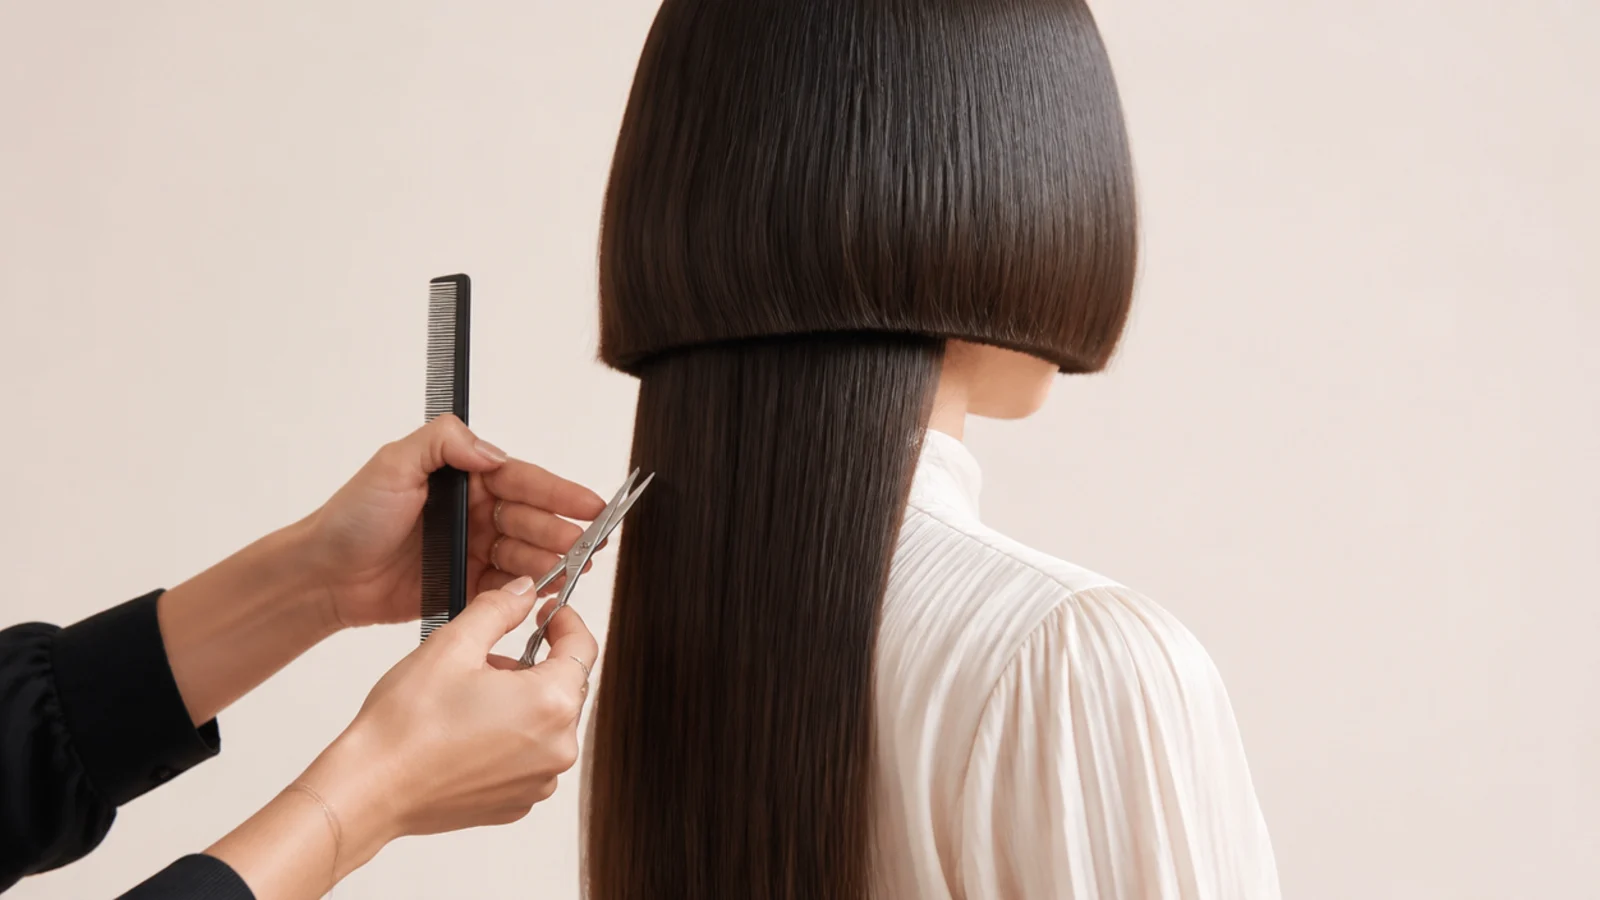
- 15. Refuse the Blend
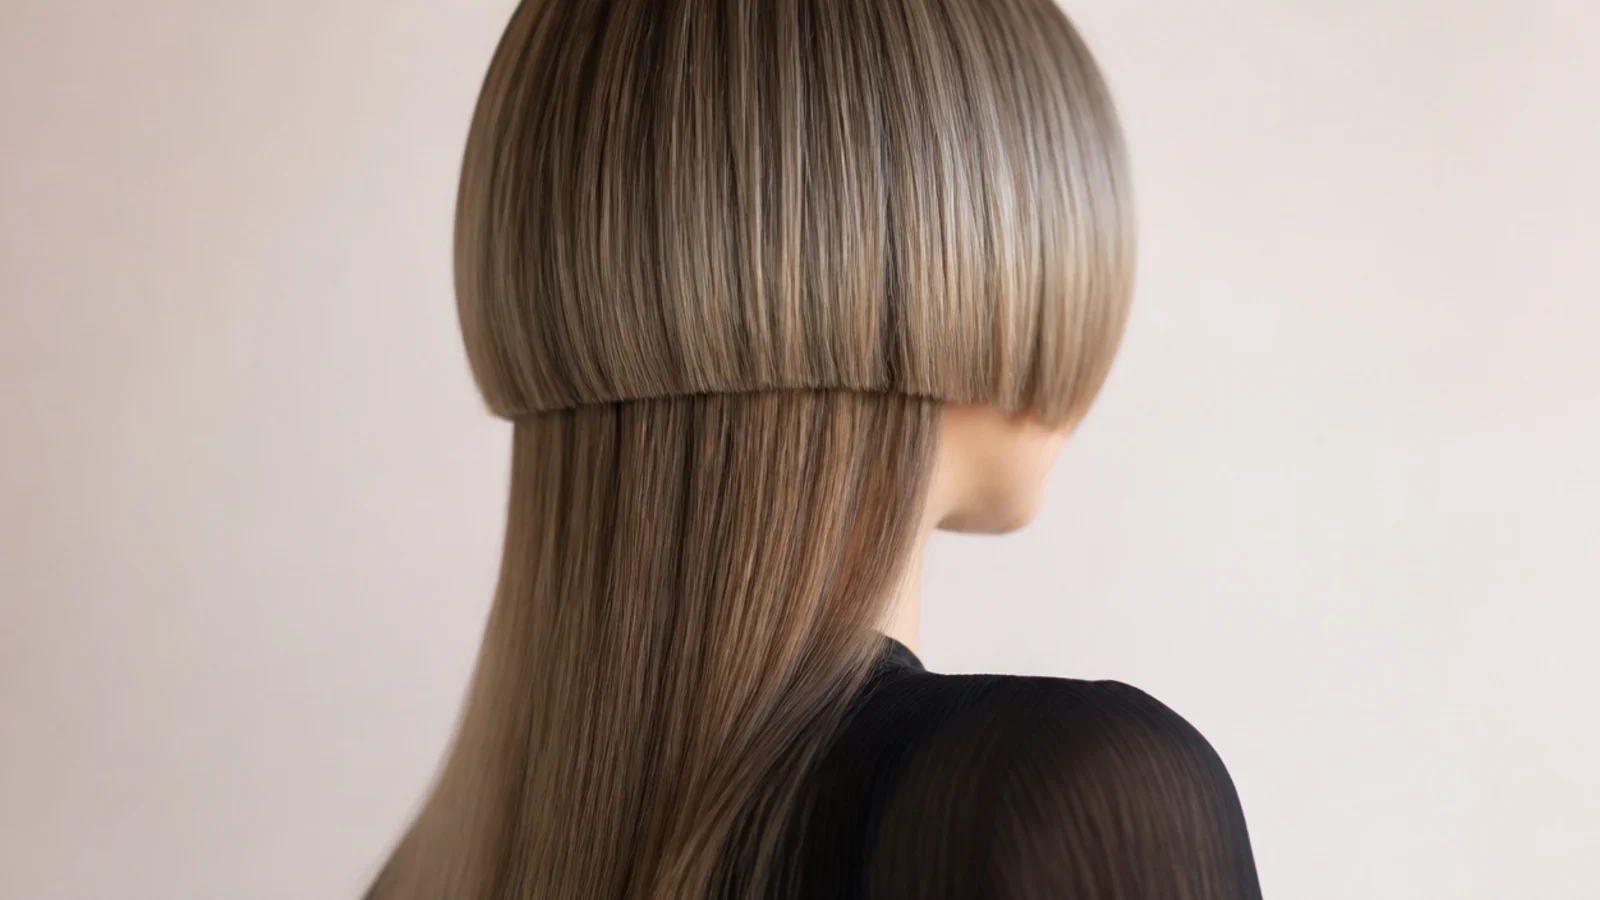
- 16. Check the Back View
- 17. Round Brush the Bell
- 18. Flat Iron a C Curve
- 19. Style the Tentacles
- 20. Book the Bell Trim
- How to Cut the Bell and Tentacles
- Step 1. Section the Bell Zone
- Step 2. Cut the Tentacle Perimeter
- Step 3. Interior Weight Removal
- Step 4. Bell Front Perimeter
- Step 5. Bowl Line Around the Back
- Step 6. Leave It Unblended
- Step 7. Dry and Refine
- Step 8. Set the Shape
- Final Thoughts
Almost every disappointing jellyfish fails in the same three seconds, when the stylist reaches for thinning shears at the boundary.
The shelf is the entire haircut. A blunt rounded bell over a long under section, with a hard step between them and nothing joining the two.
Everything else is a preference you can change later. Bell height, length underneath, colour, texture — all adjustable. A blended boundary is the one mistake you have to grow out.
What the Jellyfish Haircut Structure Is
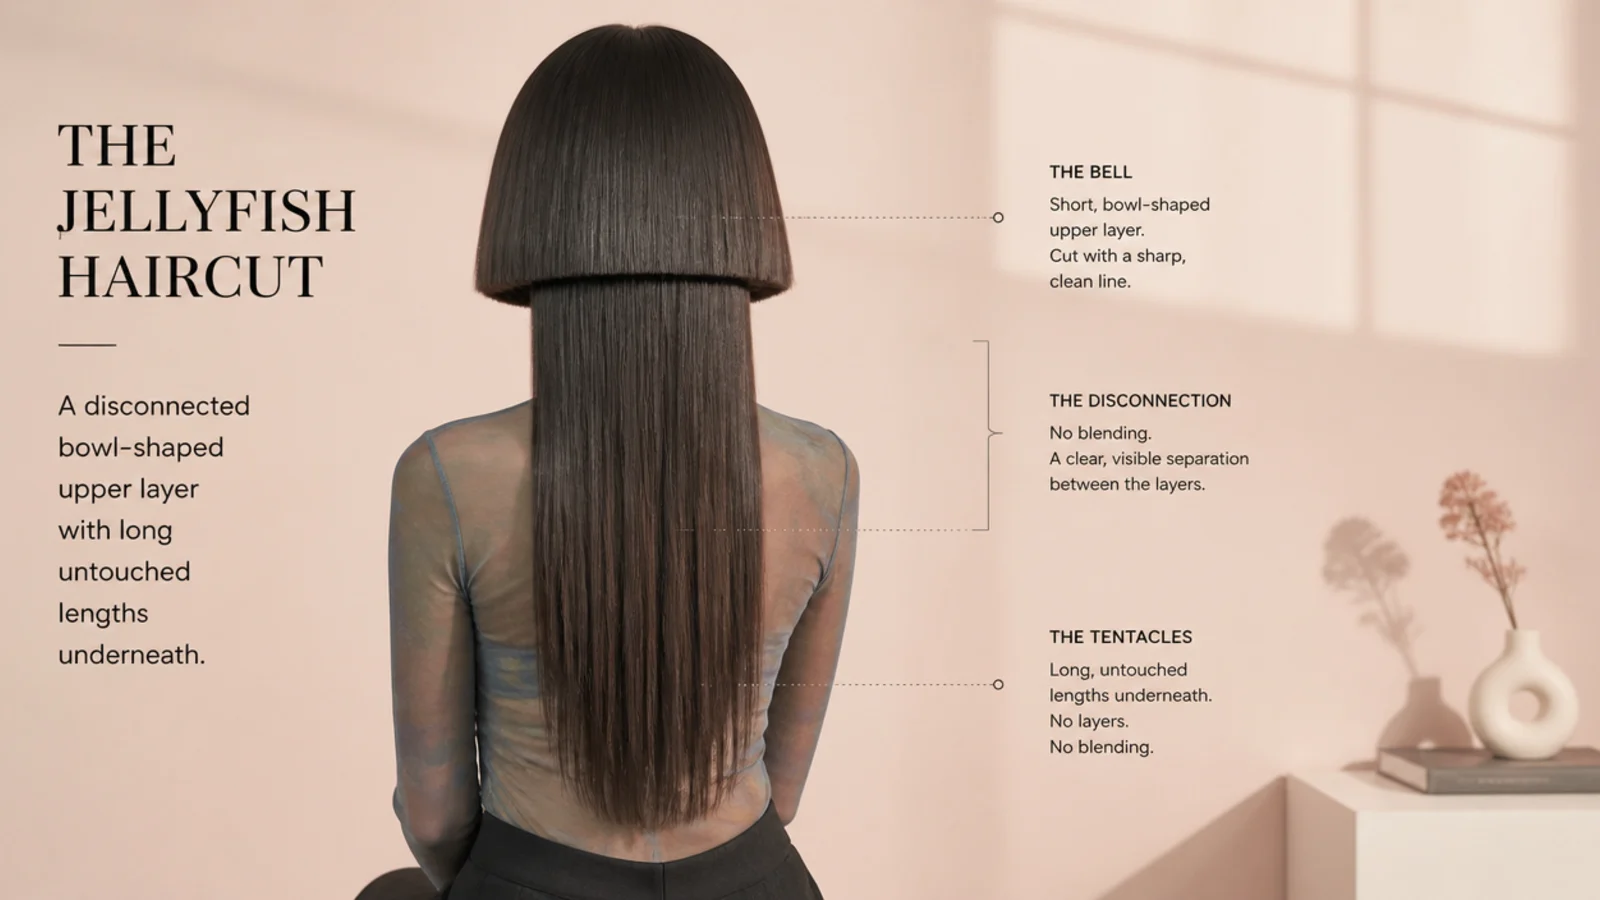
A bell and a long under section. The bell is a rounded blunt shape cut somewhere between the cheekbone and the jaw, and everything beneath it hangs free.
A shelf, not a gradient. The two sections meet at a step. There is no connecting length anywhere, which is what the word disconnected means in a salon.
The bell is a dome rather than a rim. It follows the curve of the skull, so from behind it reads as a rounded mass instead of a flat plate.
The under section is thinned from inside. Weight is removed internally so it hangs as a veil, because a full weight long section reads as a second haircut competing with the first.
Asking for a Jellyfish Haircut
Say disconnected, then say not blended. Two phrasings of one instruction, because the reflex you are working against is a strong one.
Give two length points, not one. Where the bell finishes and where the long section finishes, both described against your own face and body.
Bring a photograph of the back of somebody's head. A jellyfish photographed from the front looks like a bob, which is exactly the cut you do not want to be handed.
Ask for interior weight removal underneath. Not thinning at the ends, which frays and flicks at the point you want hanging flat and still.

Jellyfish Haircut Cost and Salon Choice
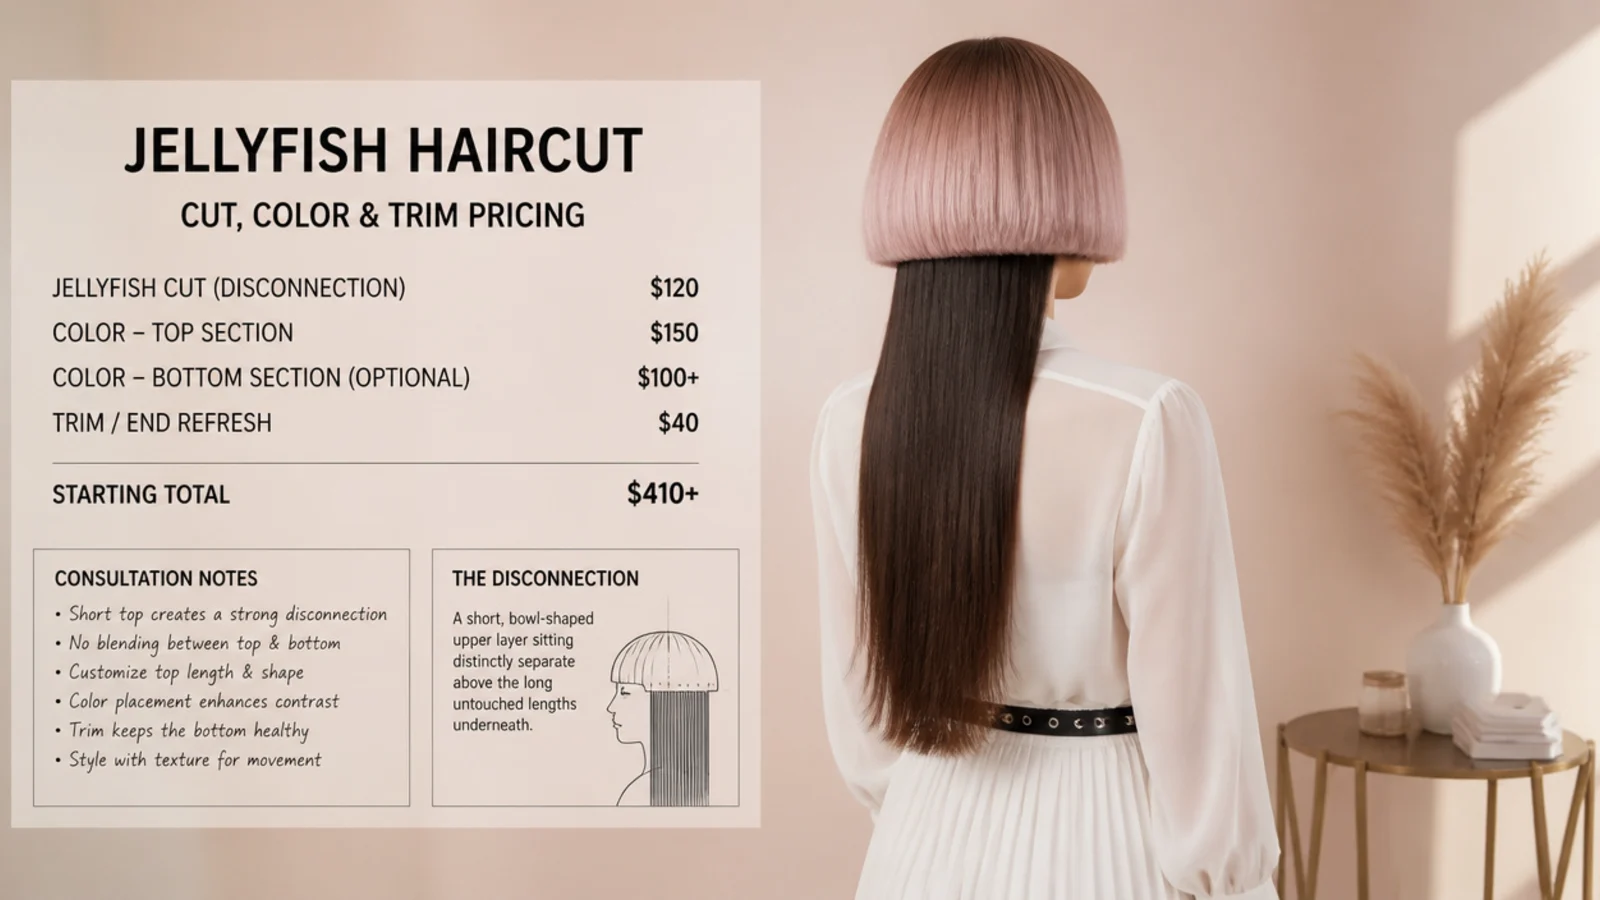
It is priced by chair time. The perimeter is cut slowly and checked level rather than blended quickly, so the appointment runs longer than a standard cut.
Ask whether the consultation is billed separately. Some salons charge for it and refund it against the cut, which is worth knowing before you sit down.
Colour is a second service. Bleaching a bell is a separate booking with its own timing, and combining the two into one visit is how appointments overrun.
A bell trim is not a full haircut. Book the follow up as a fringe or perimeter trim rather than a restyle, and the maintenance stops being expensive.
Cutting a Jellyfish Haircut at Home
You cannot see the back, and the back is the cut. Everything that makes this shape read sits where your own eyes never go without help.
Level to the floor, not to your ears. Ears are rarely a matched pair, and using them as a guide tilts the whole bowl line by however much they differ.
Cut the long section first. With the bell clipped away the perimeter underneath is far easier to see, and you can still change your mind about bell height afterwards.
Cut dry and take very little. Wet hair sits longer under tension and rises as it dries, so anything cut wet lands higher than intended.
Two mirrors, or a phone on a stand. Checking the back once at the end is not checking it. Check after every pass.

Growing Out a Jellyfish Haircut
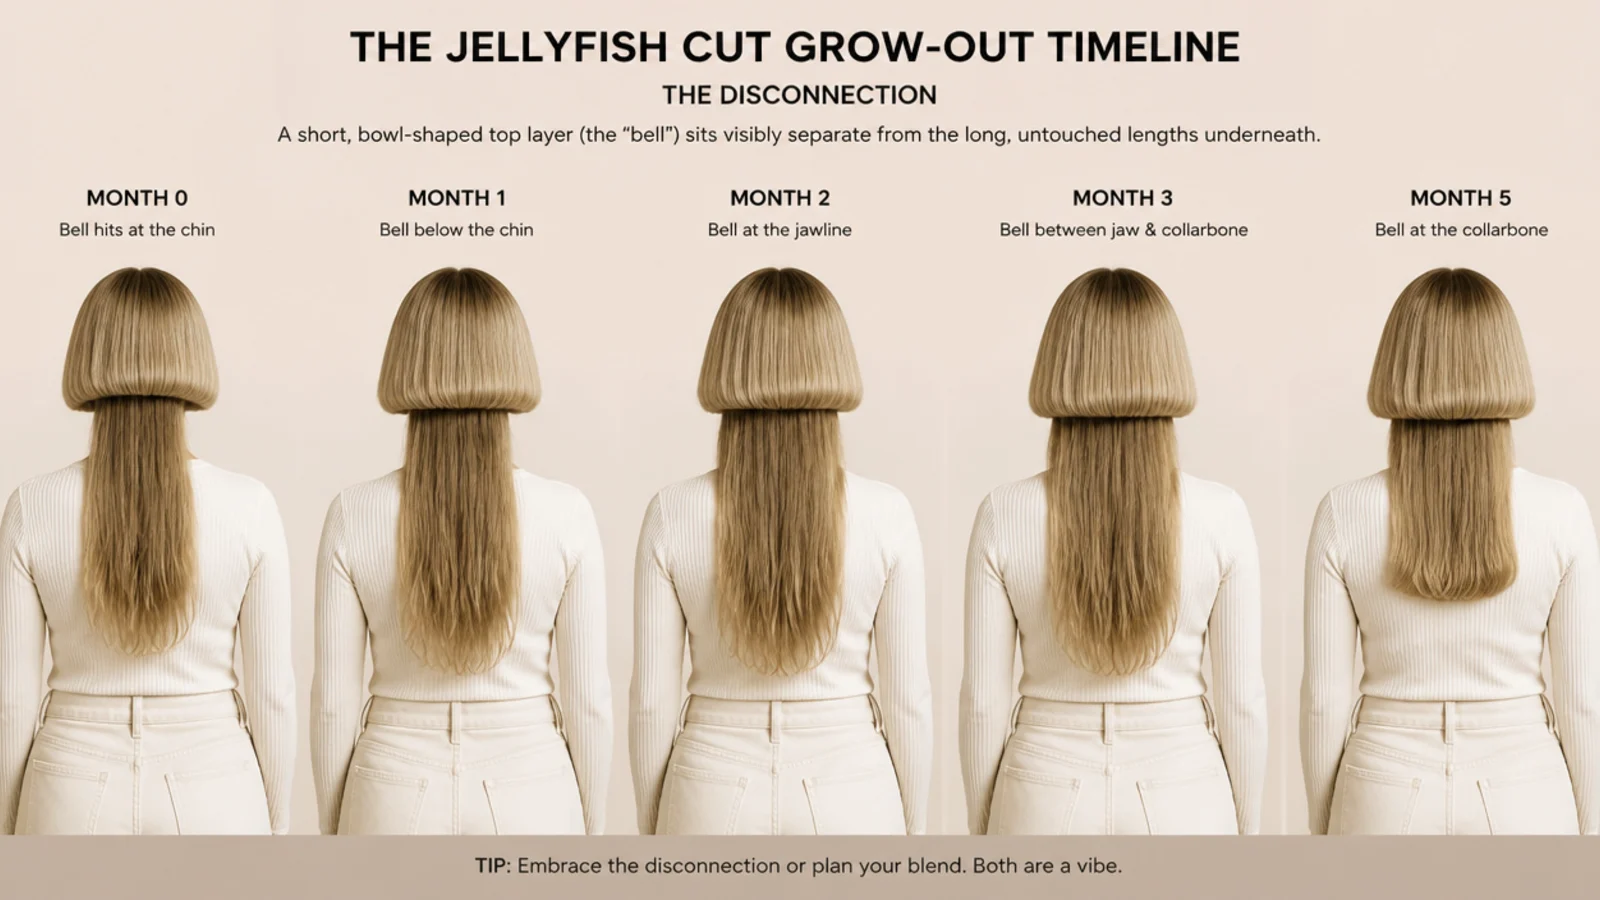
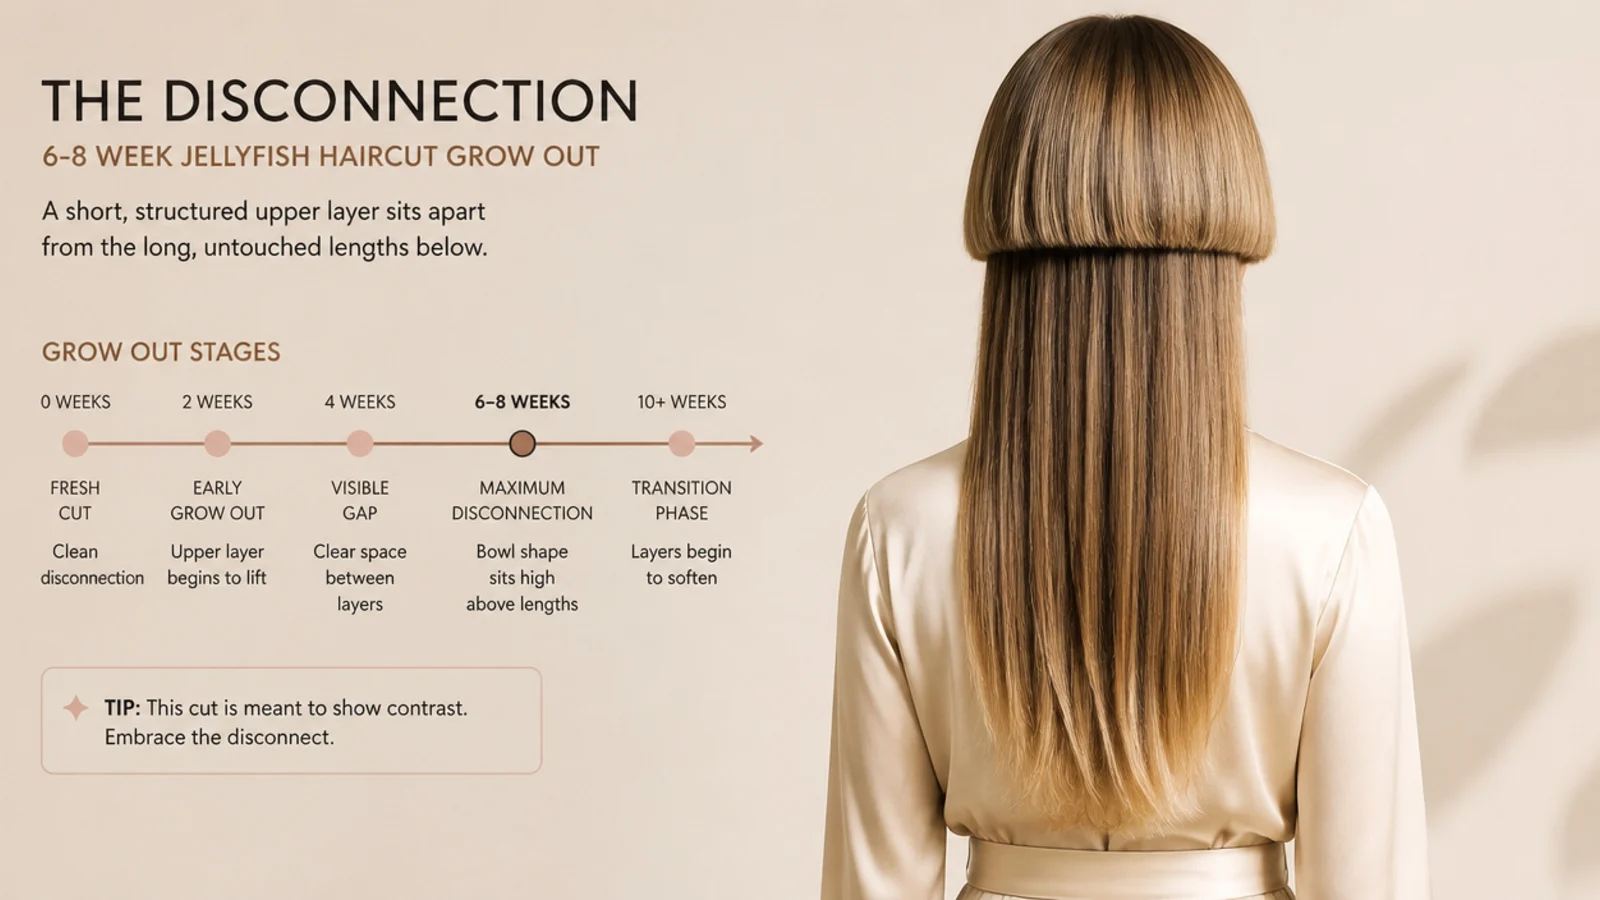
The gap stays and the dome goes. Both sections grow at roughly half an inch a month, so the drop keeps its length while the bell gains the weight that flattens its curve.
Four to five months is where the shelf stops reading. Two extra inches on the bell is enough for the perimeter to settle into the section below it.
Trim the bell to keep the cut. Six to eight weeks on the bell alone holds the shape, and the long section can be left alone for the best part of a year.
Stopping is a clean exit. Let the bell reach the lengths and you arrive at a butterfly or a heavy shag without needing a corrective appointment.
The 20 Steps
1. Check Your Hair Texture
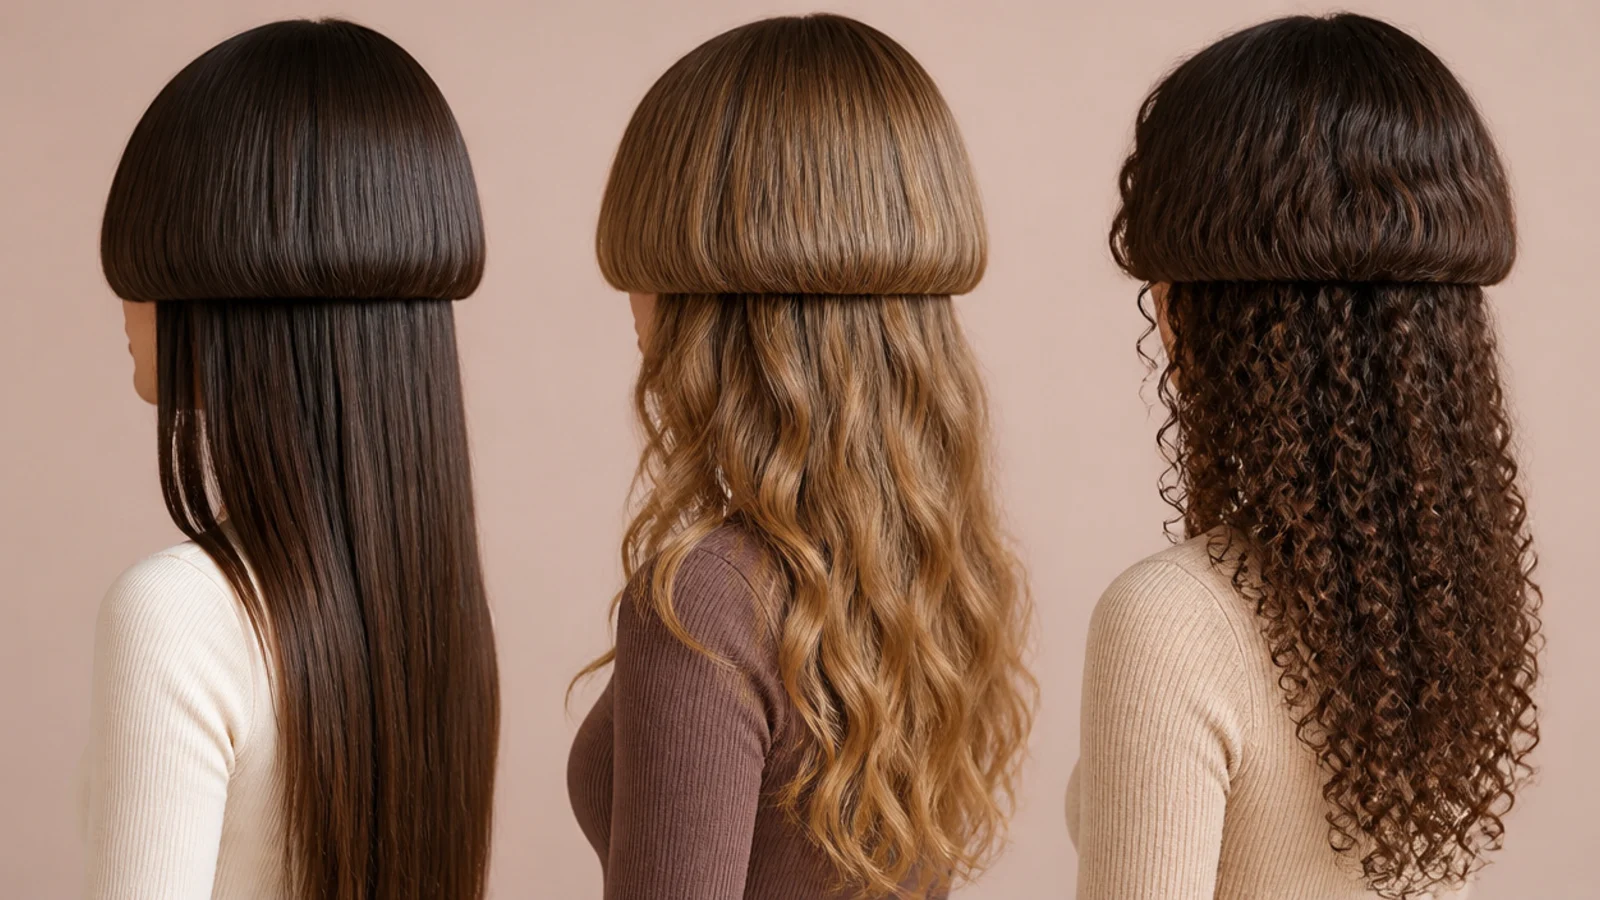
Texture decides two things before anything else. Straight and wavy hair gives the hardest shelf and needs a round brush to build the dome, while curls build the dome themselves but shrink as they dry and must therefore be cut dry rather than wet.
2. Match Face Shape to Bell Height
The hem of the bell is a horizontal line drawn across your face and it adds width wherever it lands. Round faces want it at the chin or below, long faces can carry it at the cheekbone, and heart shapes want it kept away from the temples.
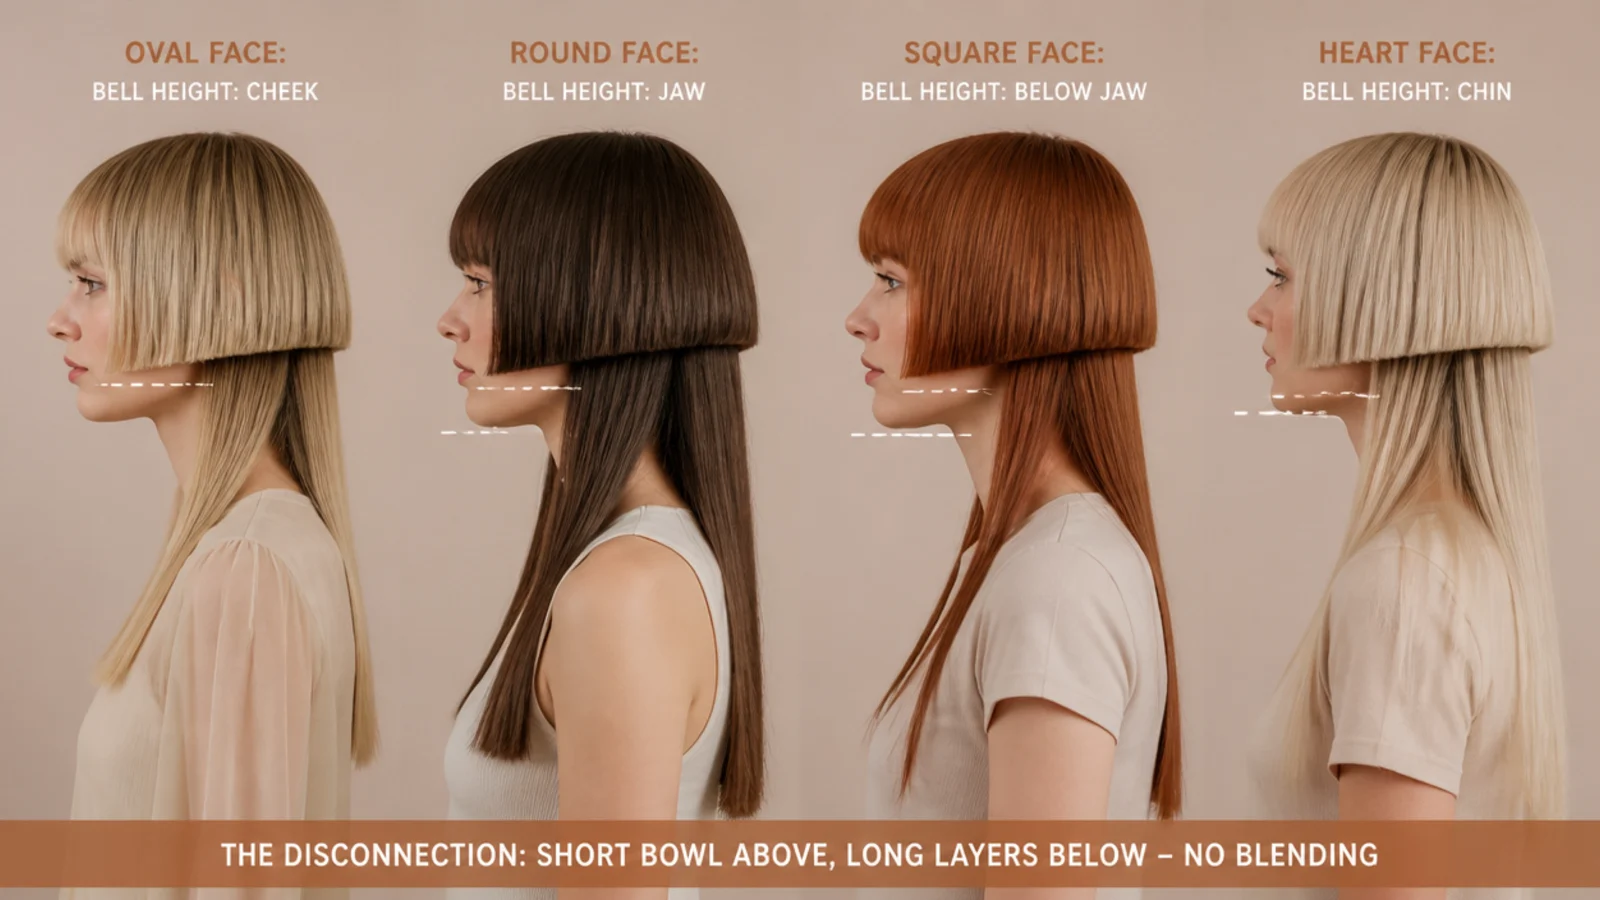
3. Measure Your Current Length
The drop between the two perimeters is what people actually see, so you need enough length underneath for it to register. Less than about six inches of gap and the result reads as a stacked bob rather than as a disconnected cut.

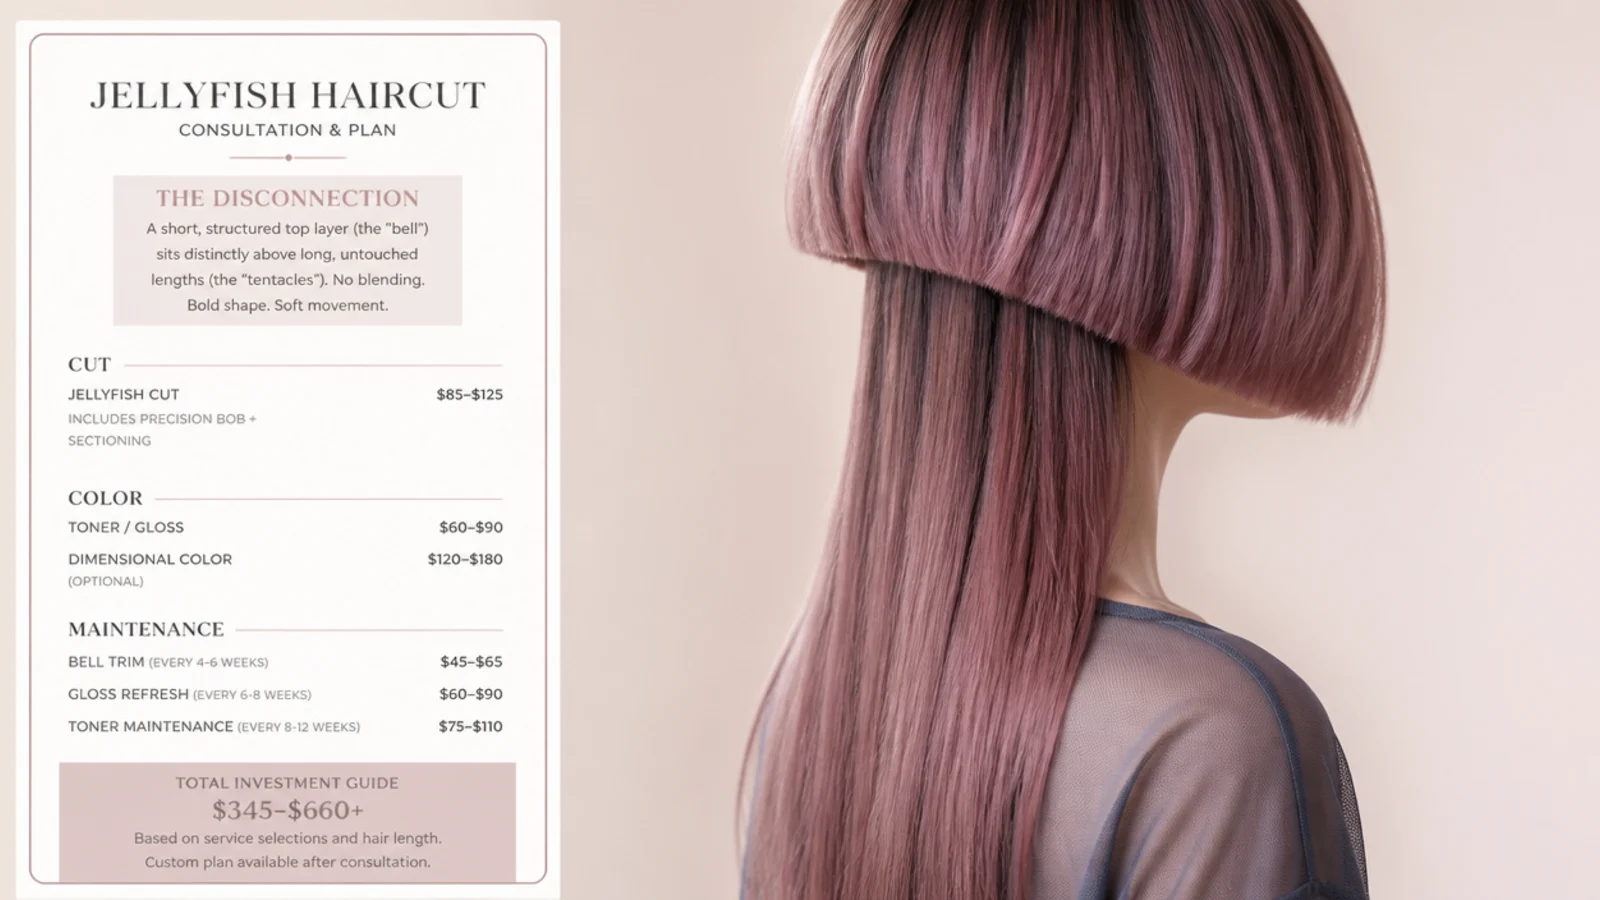
4. Work Out the Cost
Price follows chair time rather than product, and this cut takes longer than a standard one because the perimeter is checked level instead of blended. Ask whether colour, the consultation and the follow up trim are quoted separately before you commit.
5. Find the Right Stylist
Look through their portfolio for back views of disconnected cuts, not front views of bobs. A stylist whose work is all soft graduation will soften yours too, and they will be doing it because they think they are helping.
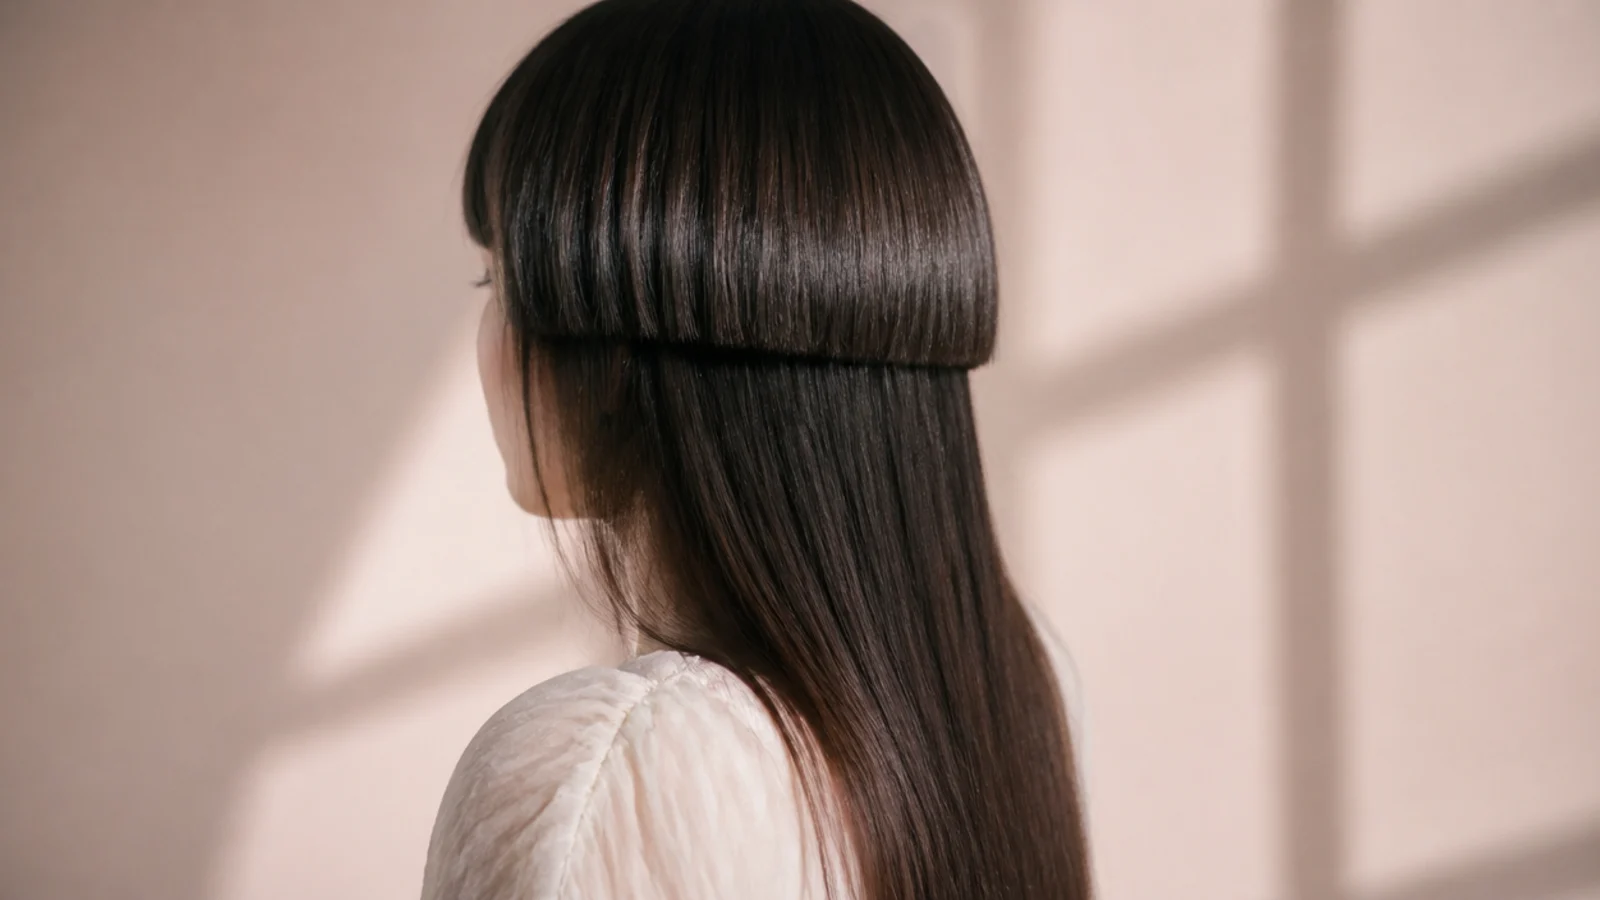
6. Bring Front and Back Reference Photos
A jellyfish photographed from the front is indistinguishable from a bob with long hair behind it, which means a front reference describes half the cut. The back view is the one carrying all the information about the shape.
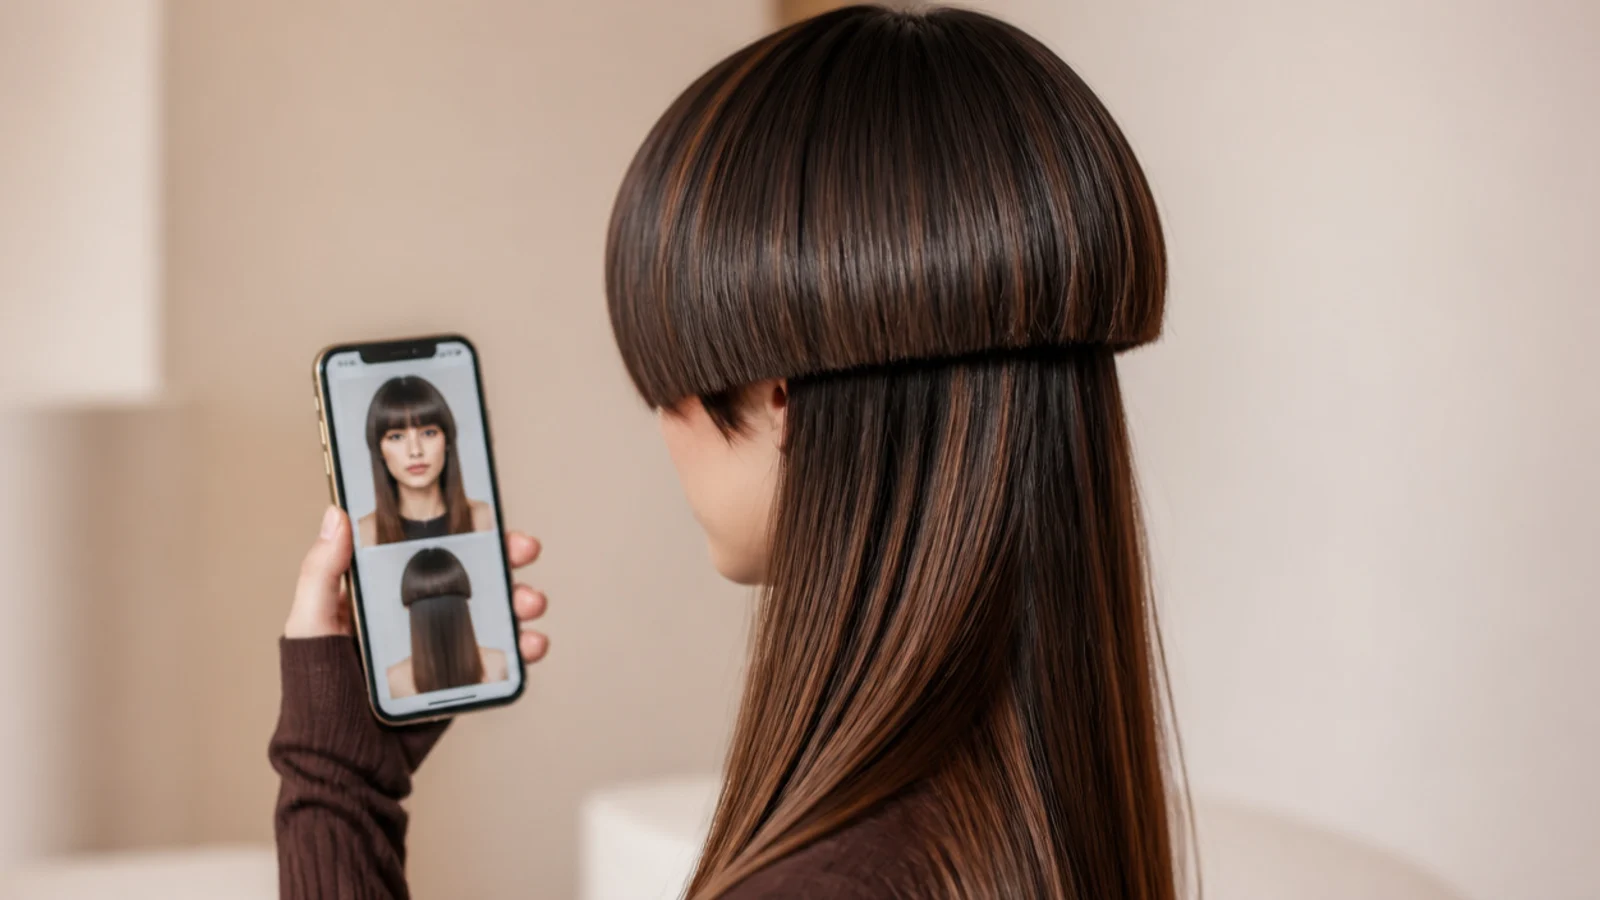
7. Choose Bell Height
Cheekbone, chin or jaw, and each one moves the horizontal to a different part of your face. It also fixes where a colour line would sit if you ever add one, so choosing high locks you into a high bleach line as well.
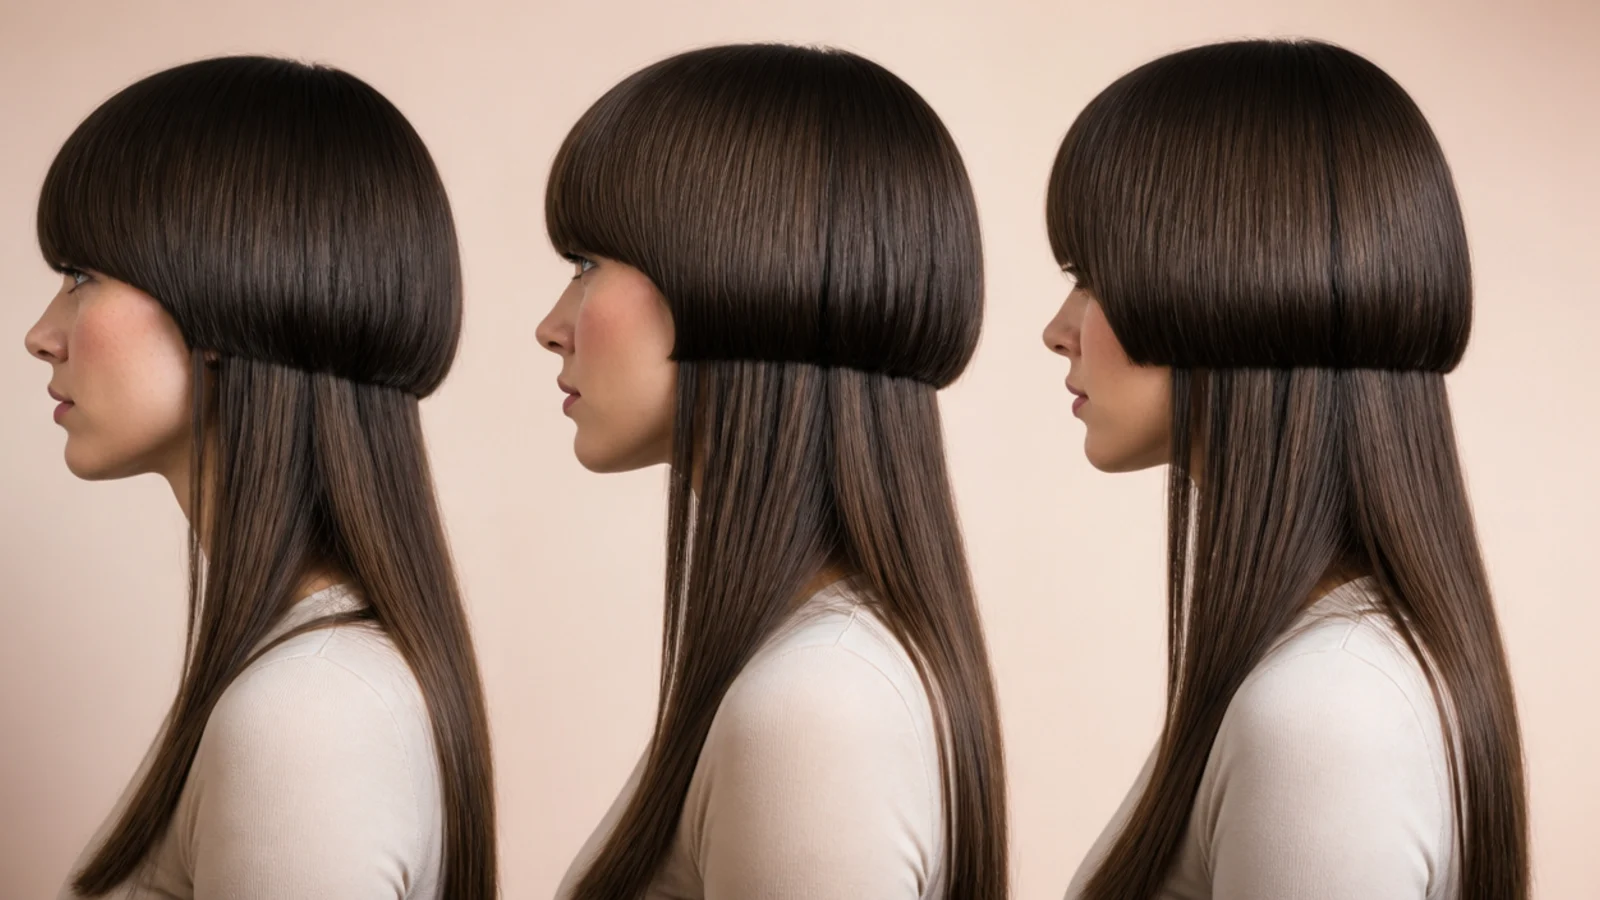
8. Decide the Tentacle Length
Collarbone is the smallest workable drop and waist is the largest, with everything between them a question of how loud you want the shape. The gap is what the eye reads, so the number that matters is the distance rather than the length.

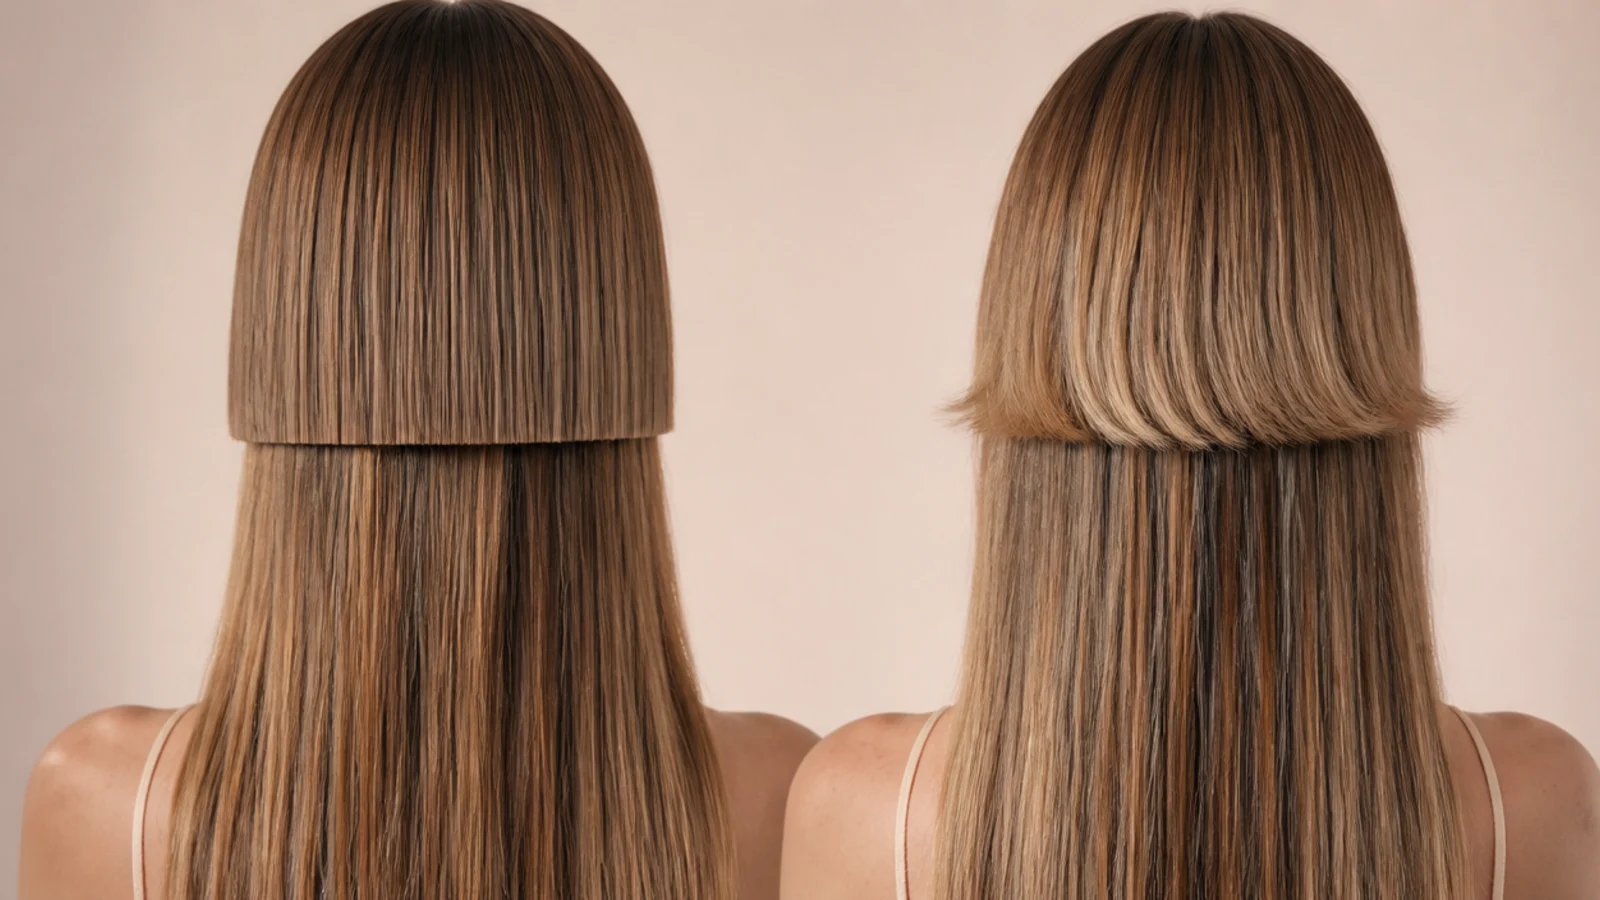
9. Disconnection Level
Total disconnection gives the hardest shelf, and leaving a small amount of connecting weight at the back softens it. Connection makes the cut easier to grow out and removes a good part of the effect, so decide which of those two matters more.
10. Book the Appointment
Ask for a longer slot than a standard cut takes, and say why when you book. A perimeter cut against the clock is a perimeter that ends up uneven, and unevenness is the one thing a blunt line cannot hide.

11. Consultation Wording
Two words, two measurements and one guard number cover it. Disconnected and not blended, where the bell finishes and where the lengths finish, and the guard for any clipper work at the nape if you are having it.
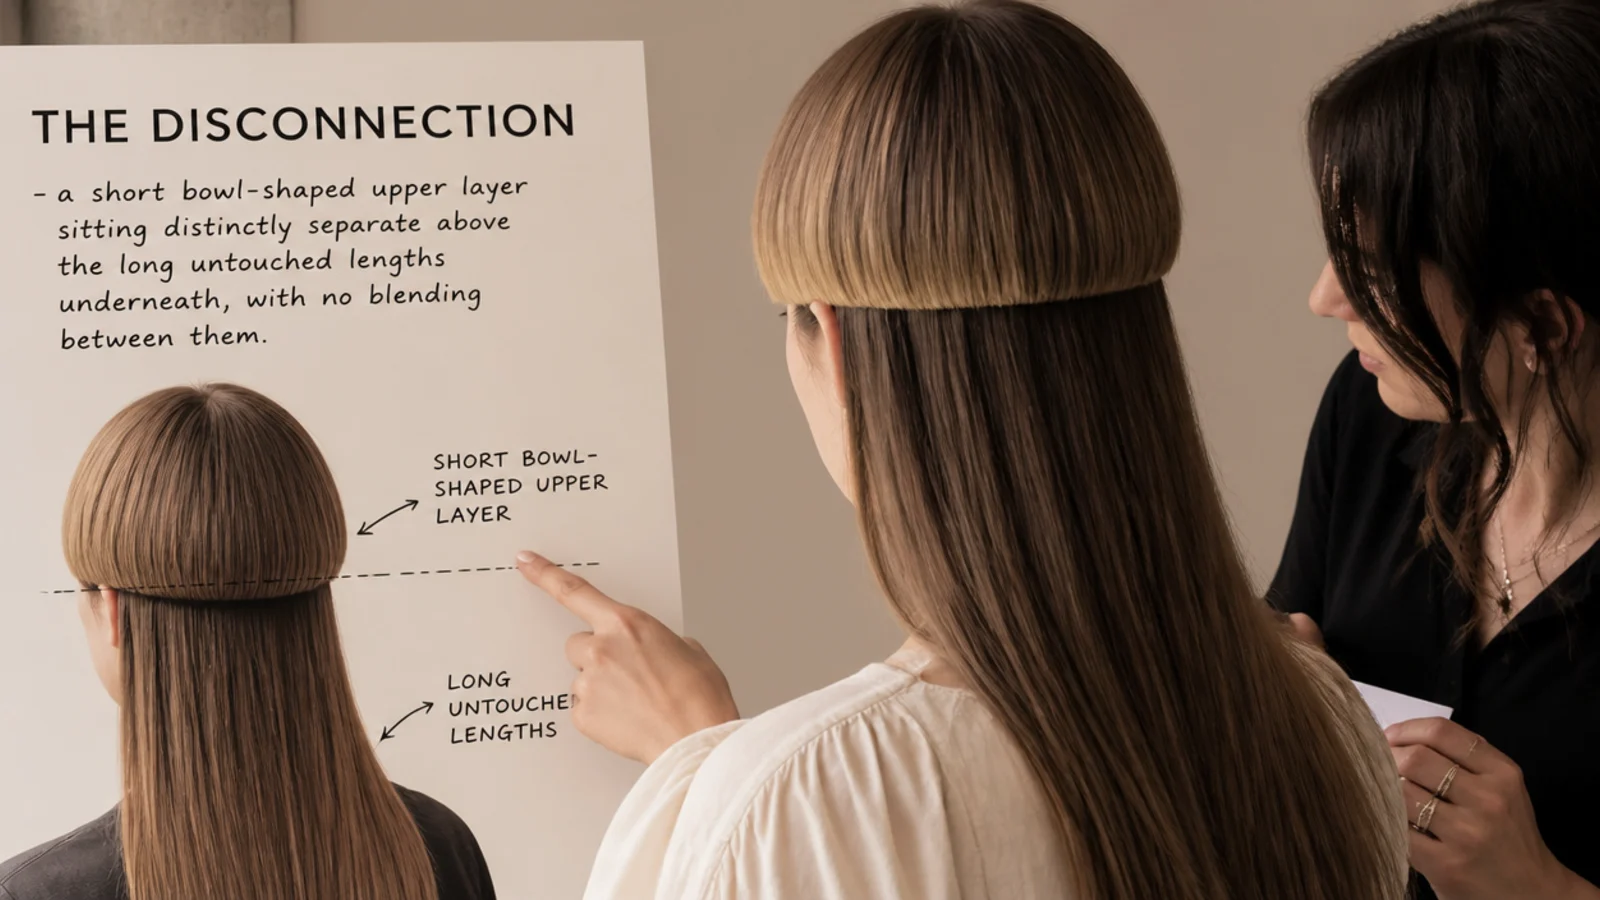
12. Sectioning the Bell
A radial parting runs from the front hairline down behind each ear to the occipital bone, and everything inside it belongs to the bell. Get that section wrong and the shape is already wrong before a single cut has been made.
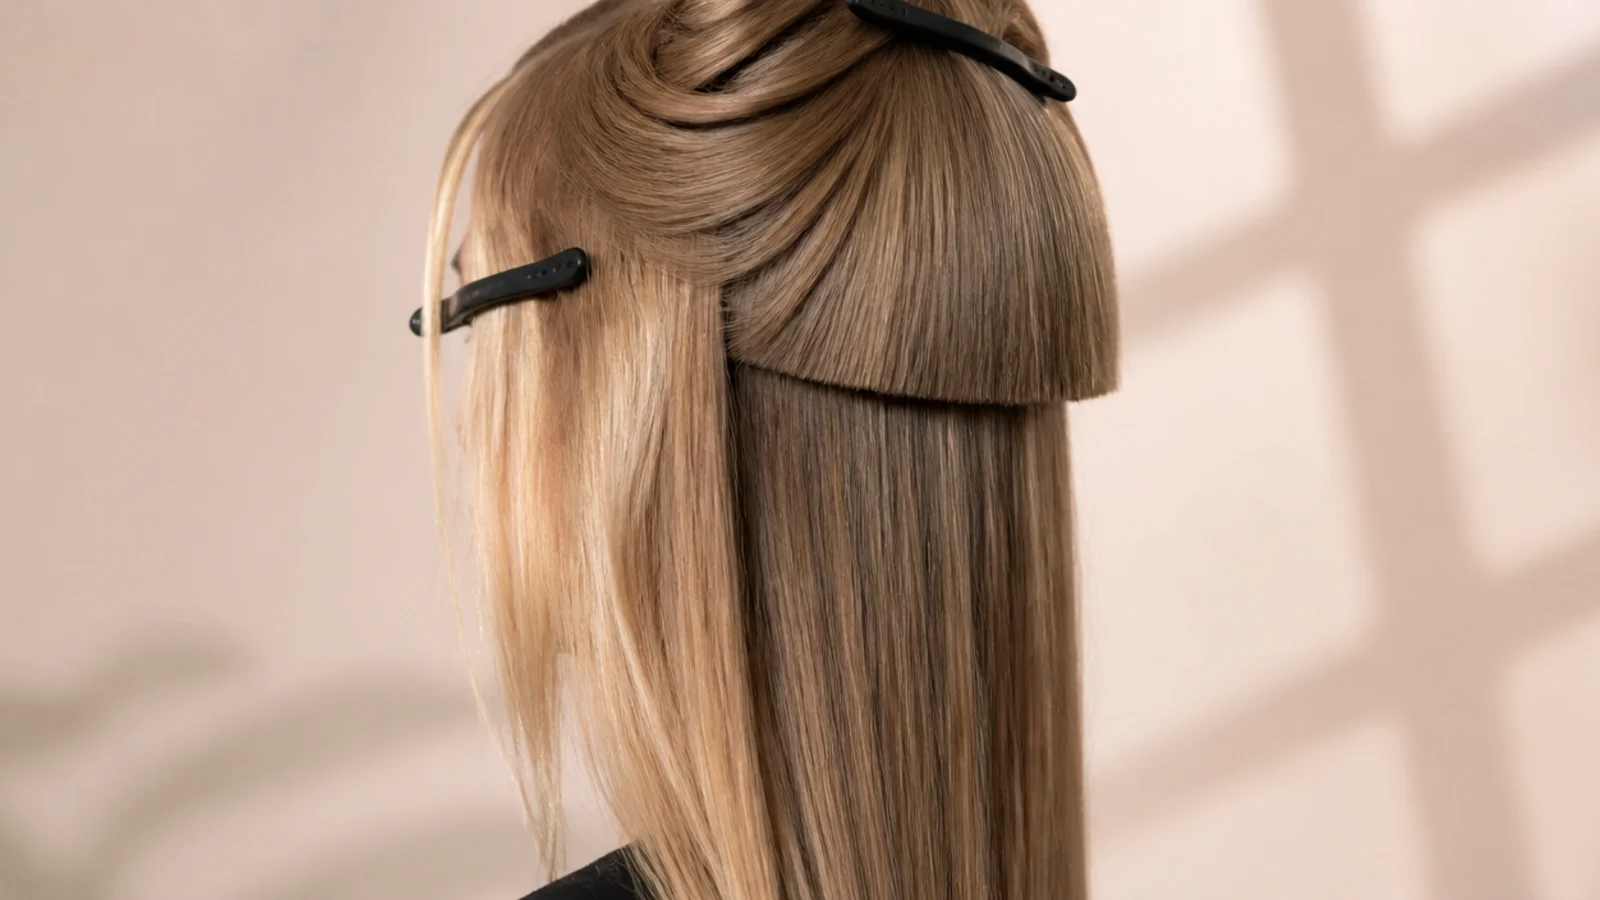
13. Cut Tentacles First
With the bell clipped out of the way the long perimeter is easy to see and easy to hold at even tension. It also leaves the bell height still open, so a change of mind at that stage costs nothing at all.
14. Cut the Bell Long
Cut the first pass a little longer than the target, because you can take more off but cannot put it back. Wet hair also sits lower under tension and rises as it dries, which means anything cut to the exact target lands short.
15. Refuse the Blend
The moment thinning shears approach the boundary, say no. This is the three seconds where the cut is either delivered or quietly turned into a wolf cut, and it happens fast enough to miss if you are looking at your phone.
16. Check the Back View
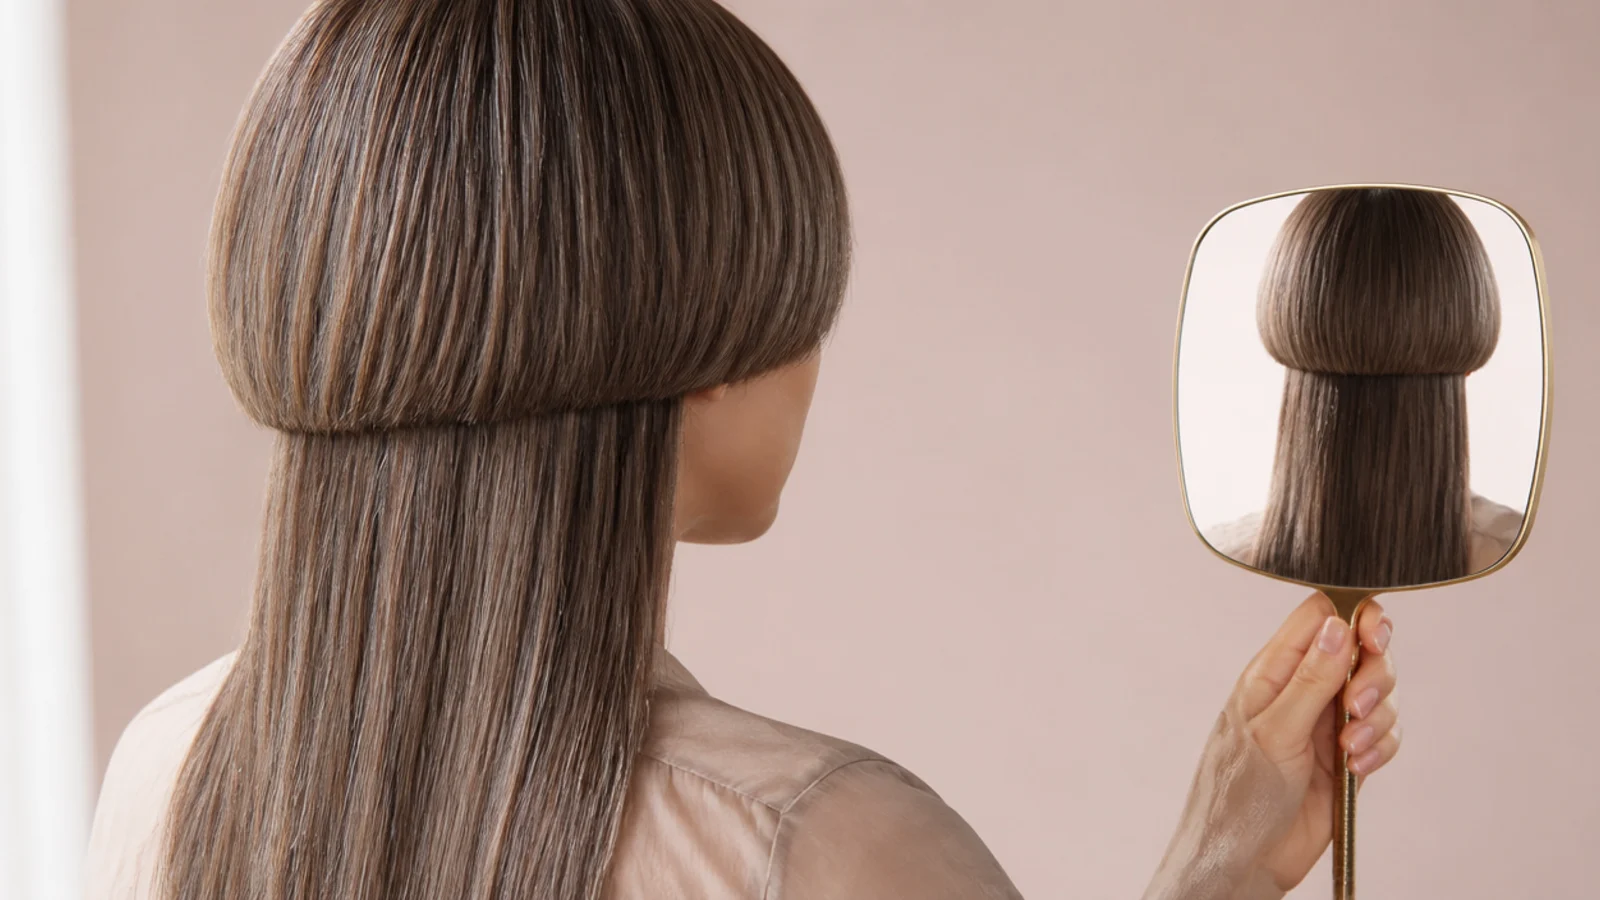
Ask for a hand mirror or take a photo before the cape comes off. The perimeter should run level to the floor all the way around, and a tilt of even half an inch is obvious once you know to look for it.
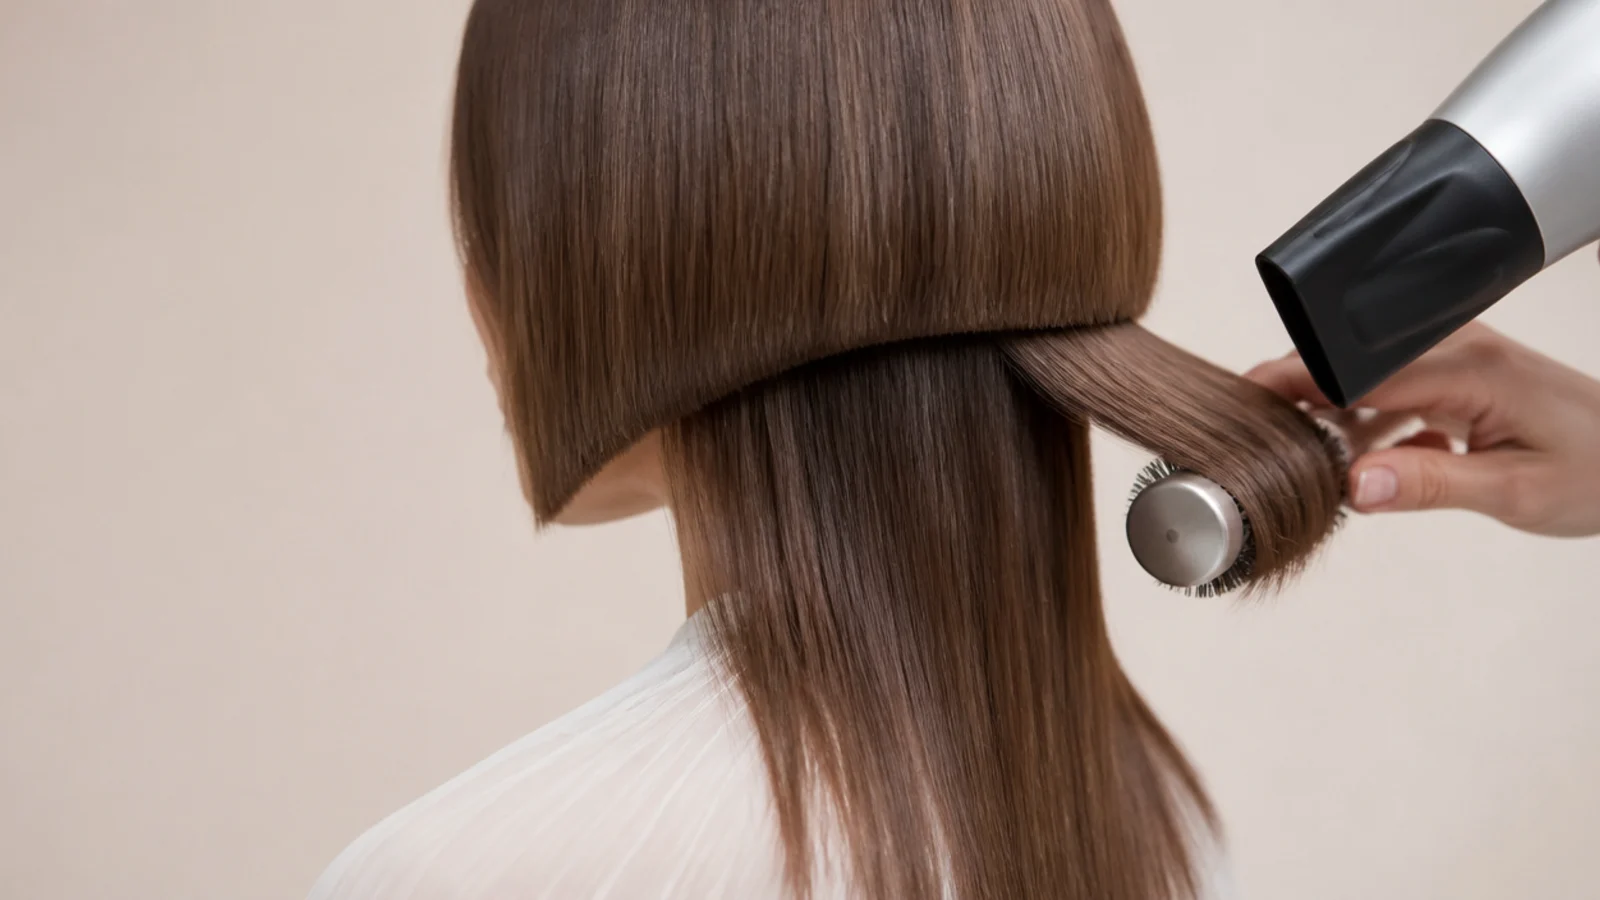
17. Round Brush the Bell
Turning the ends of the bell under is what makes the section read as a dome instead of as a short curtain hanging loose. Roll the brush under at the last inch and hold it there until the hair cools in position.
18. Flat Iron a C Curve
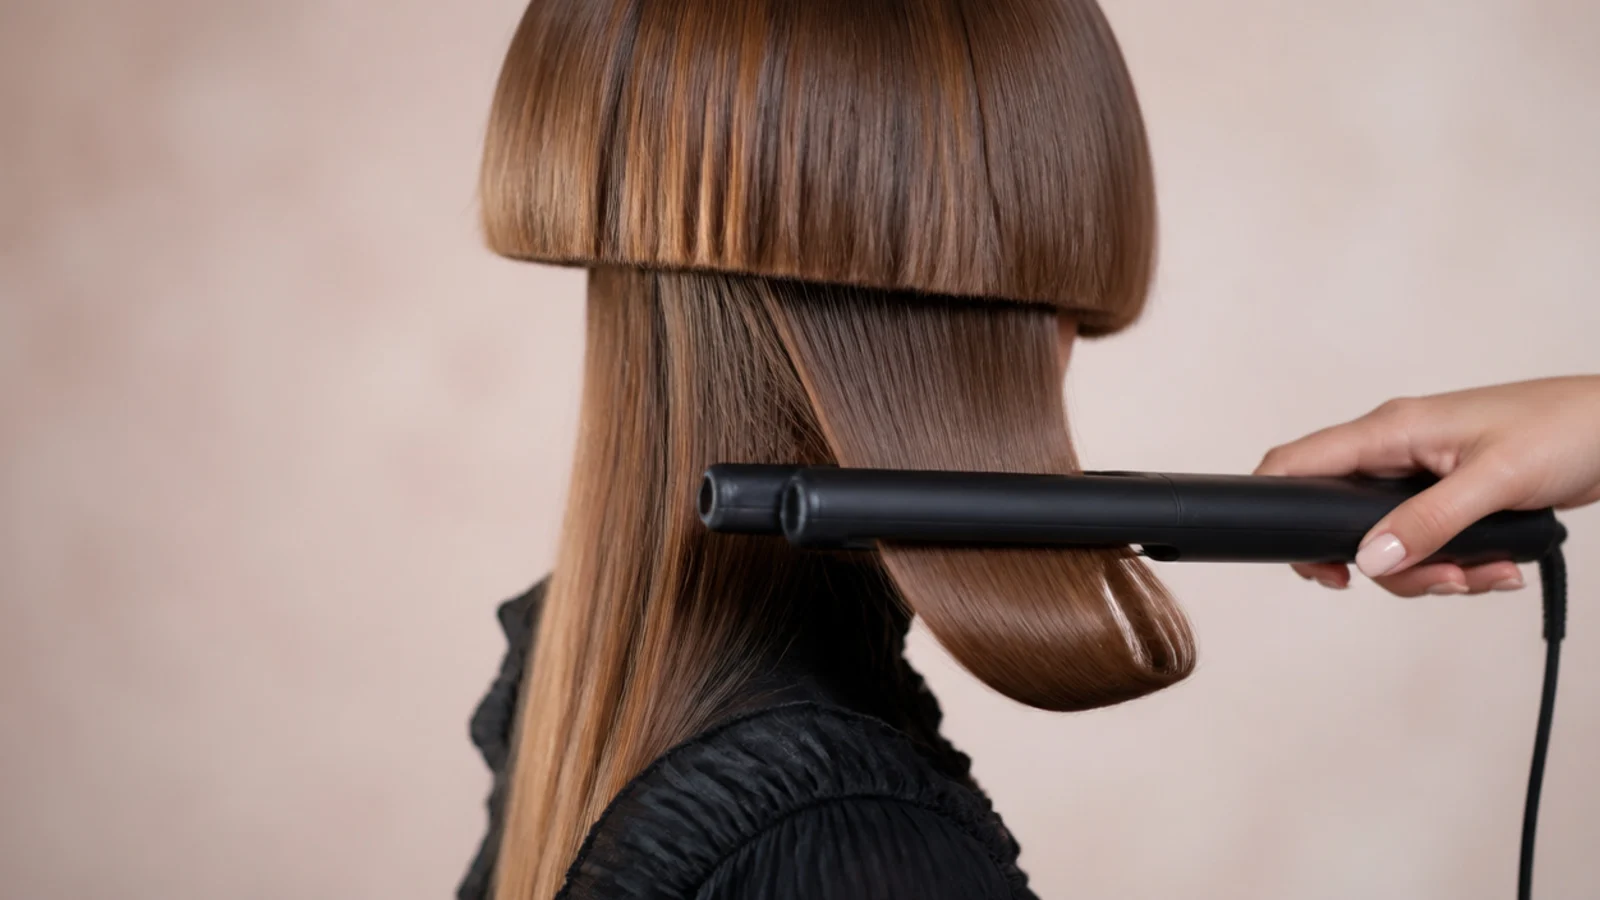
One slow pass through the last inch of the bell, bending it toward the neck rather than clamping it straight. That C shape is what stops the perimeter flicking outward, which is the single thing that makes a bell look accidental.
19. Style the Tentacles
Press the long section flat and leave it alone. Contrast in texture reinforces contrast in length, so a smooth fall underneath a shaped bell doubles the separation without touching either perimeter.

20. Book the Bell Trim
Six to eight weeks, bell only. The bell loses its dome long before the length looks overdue, so trimming the whole head on the same schedule pays for work that nothing on your head actually needed.
How to Cut the Bell and Tentacles
Step 1. Section the Bell Zone
Part radially from the front hairline down behind each ear to the occipital bone, and clip everything inside that section away. Where the parting lands decides how much hair the bell owns, which is the decision every later step inherits.
Step 2. Cut the Tentacle Perimeter
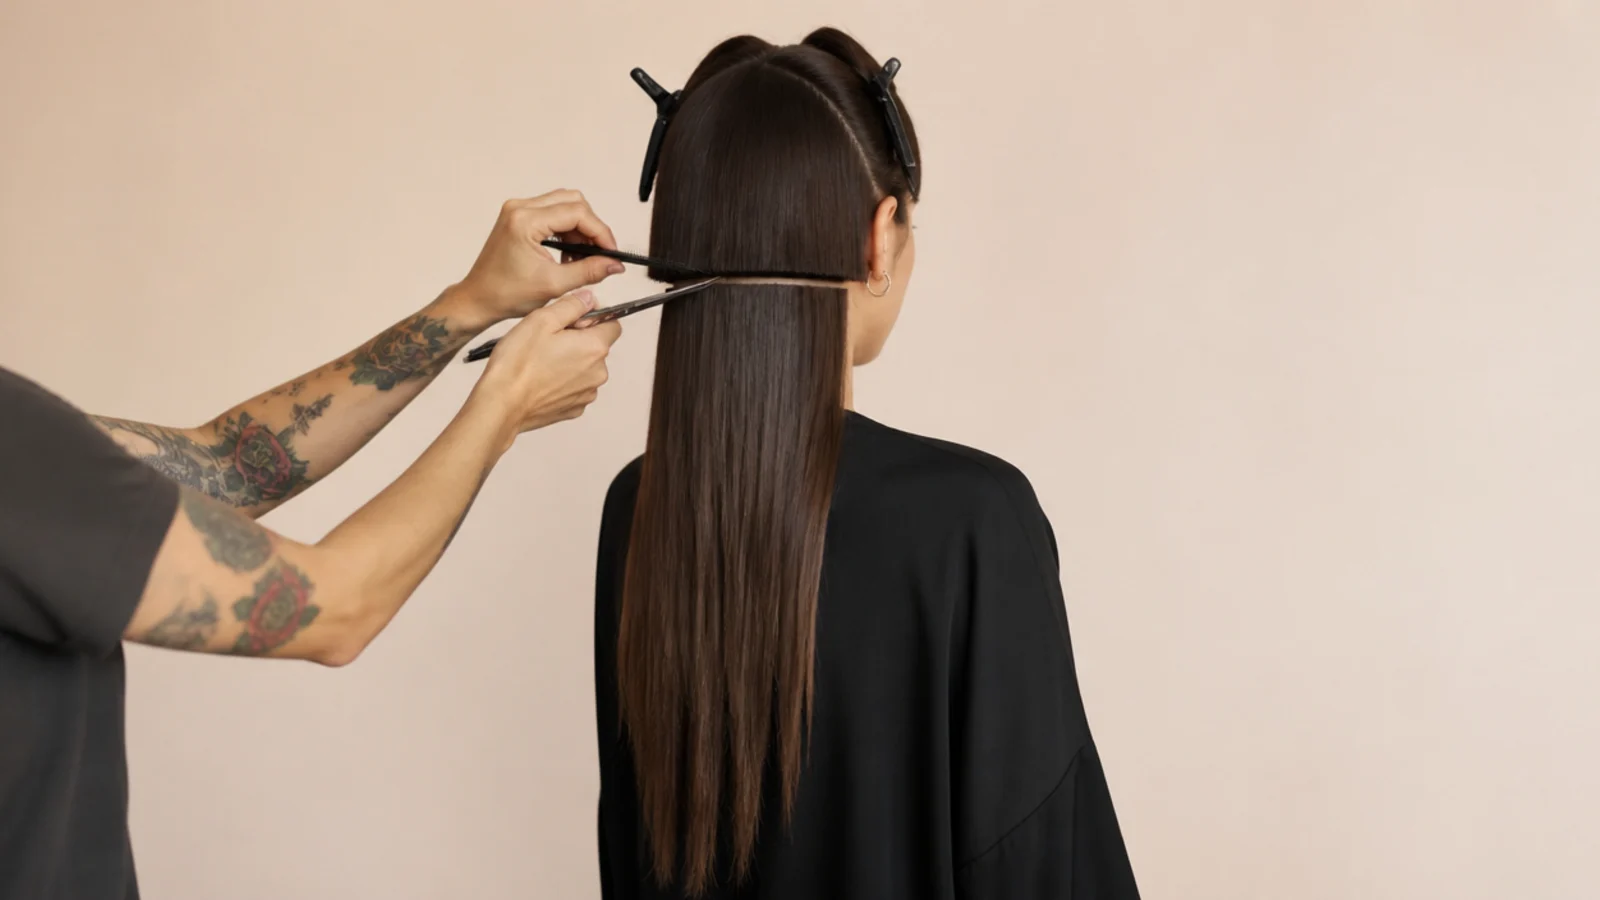
With the bell out of the way, comb the long section down and cut the hem at the chosen point using even tension throughout. Uneven tension pulls one side longer than the other and the difference only shows once the hair is released.

Step 3. Interior Weight Removal
Take weight out from inside the under section so it hangs as a thin veil rather than as a second solid haircut. The removal happens in the interior, never at the ends, because thinned ends fray and flick where you want stillness.

Step 4. Bell Front Perimeter
Drop the bell, comb it forward and cut the front line first at the chosen height. That line is the one you look at in the mirror every morning, so it earns the first and most careful pass of the whole cut.
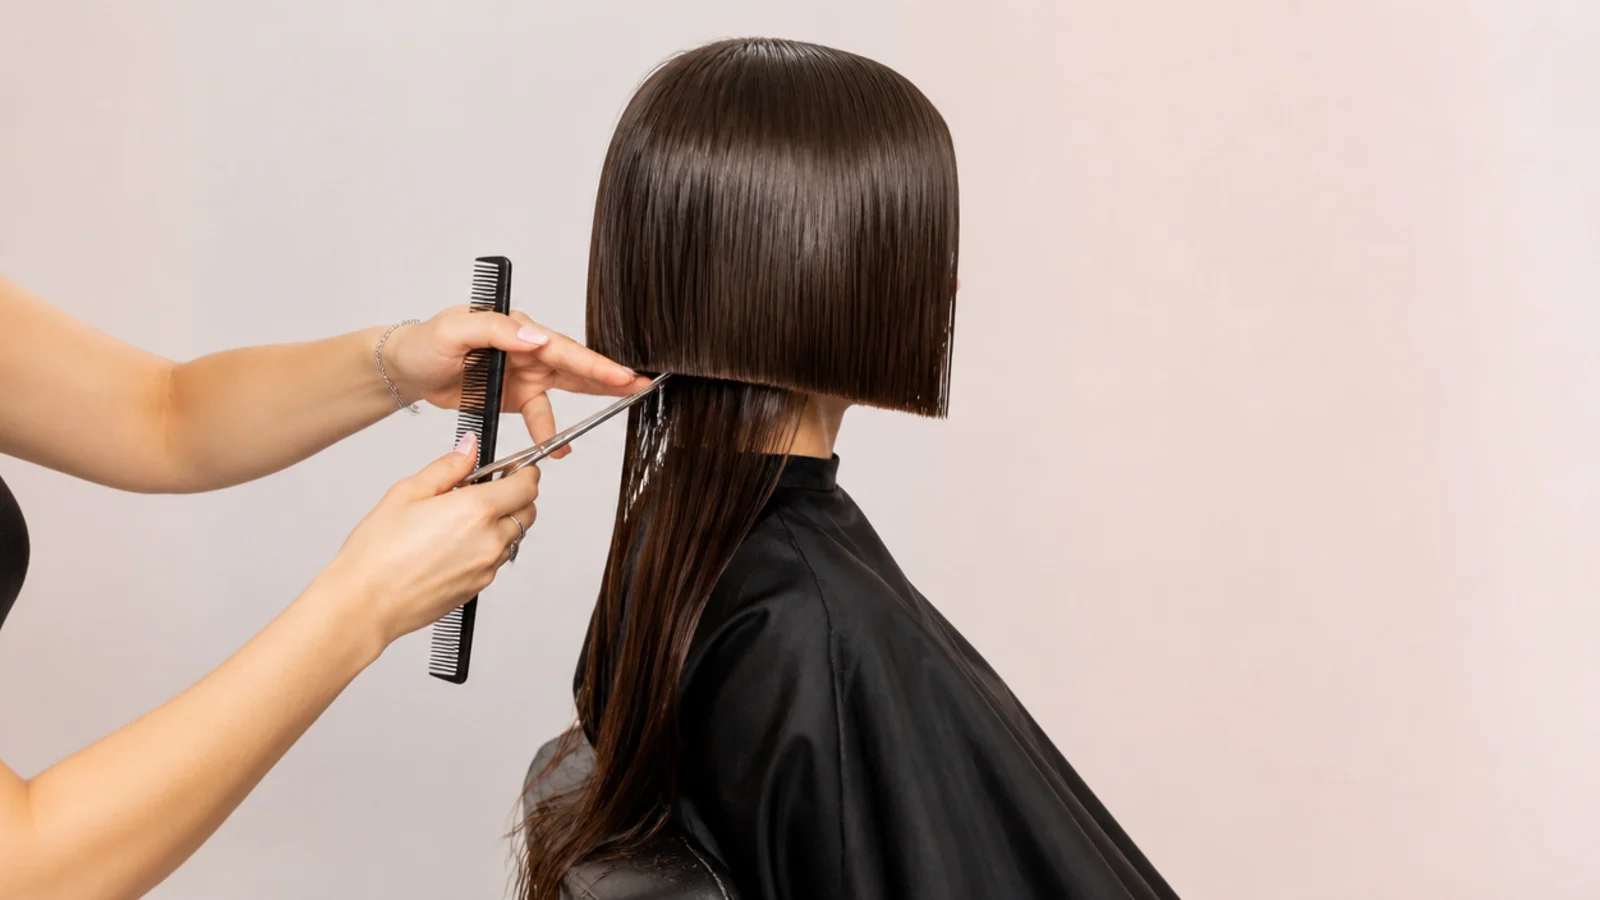
Step 5. Bowl Line Around the Back
Carry that front line around the head, checking it against a fixed horizontal rather than against the section just cut. A skull is a curve, so following the previous section rather than the floor is how a bowl line quietly spirals.
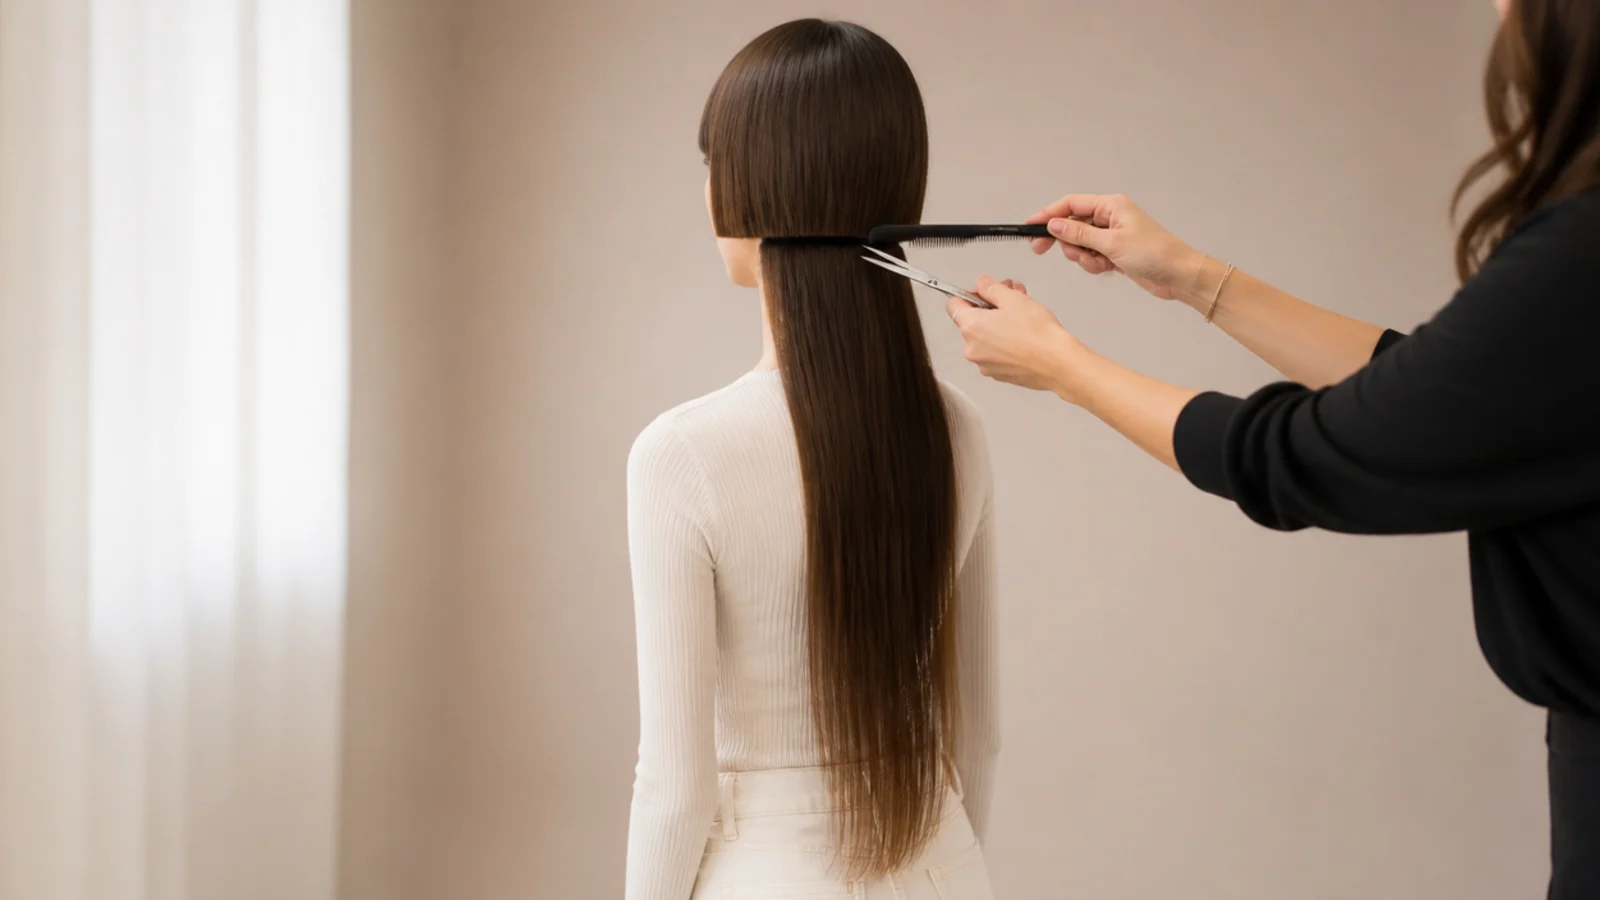
Step 6. Leave It Unblended
No thinning shears at the boundary, no connecting layers, no softening pass to make it look kinder. The step between the two sections is the product, and every tool that improves an ordinary haircut damages this one.
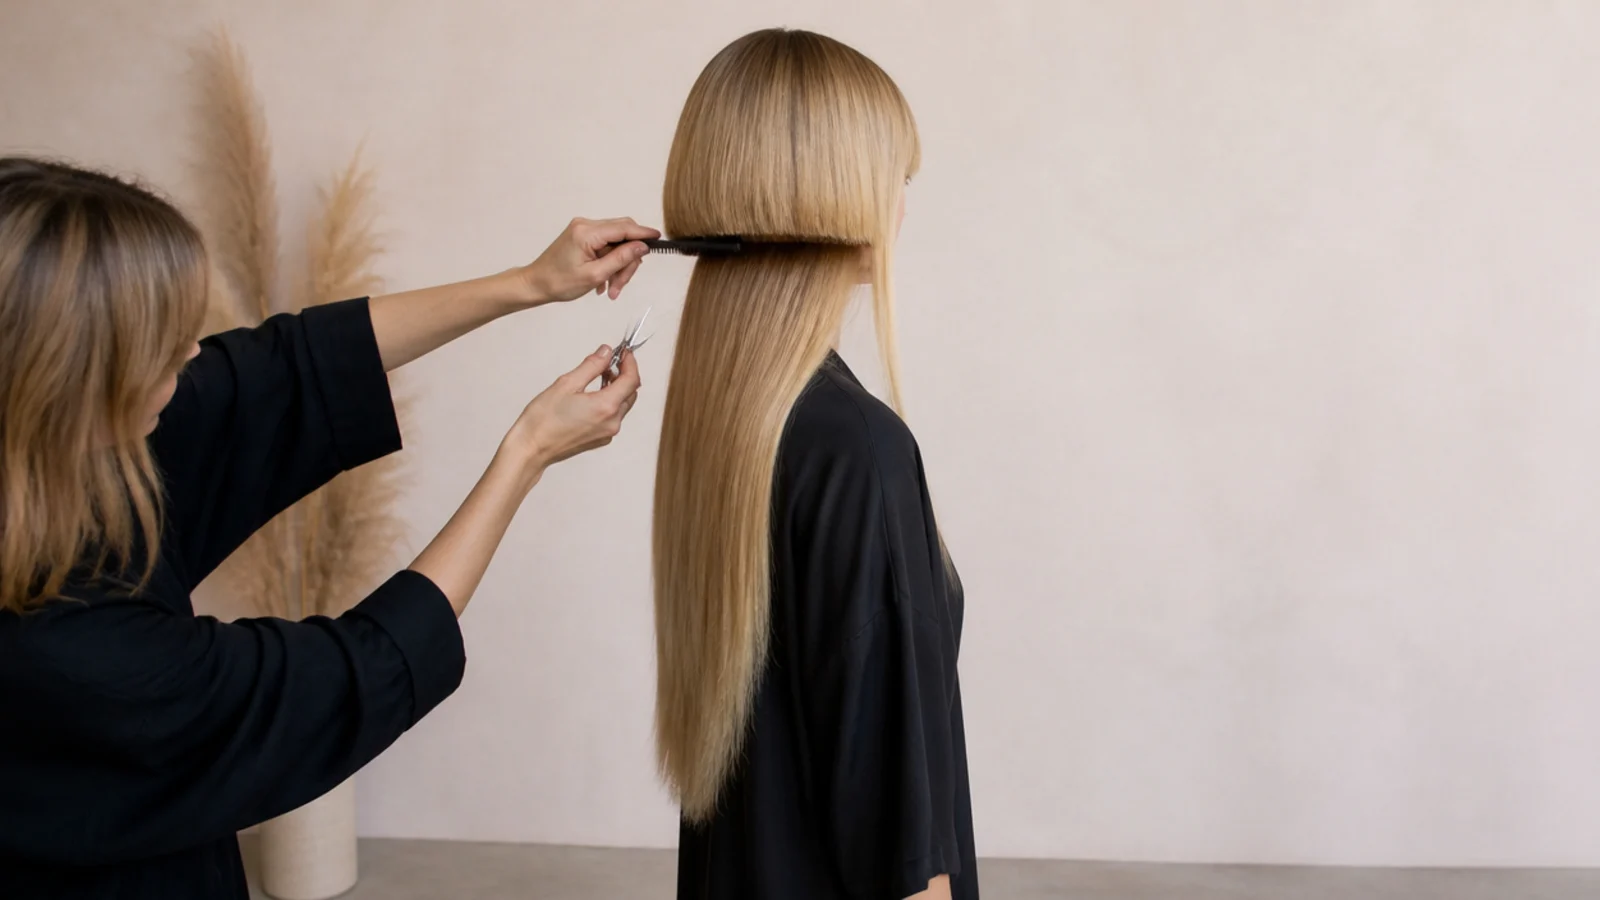
Step 7. Dry and Refine
Dry the whole head, then check the line again with the hair loose. Wet hair sits lower under tension and rises as it dries, so the perimeter you cut wet is never quite the perimeter you own dry.

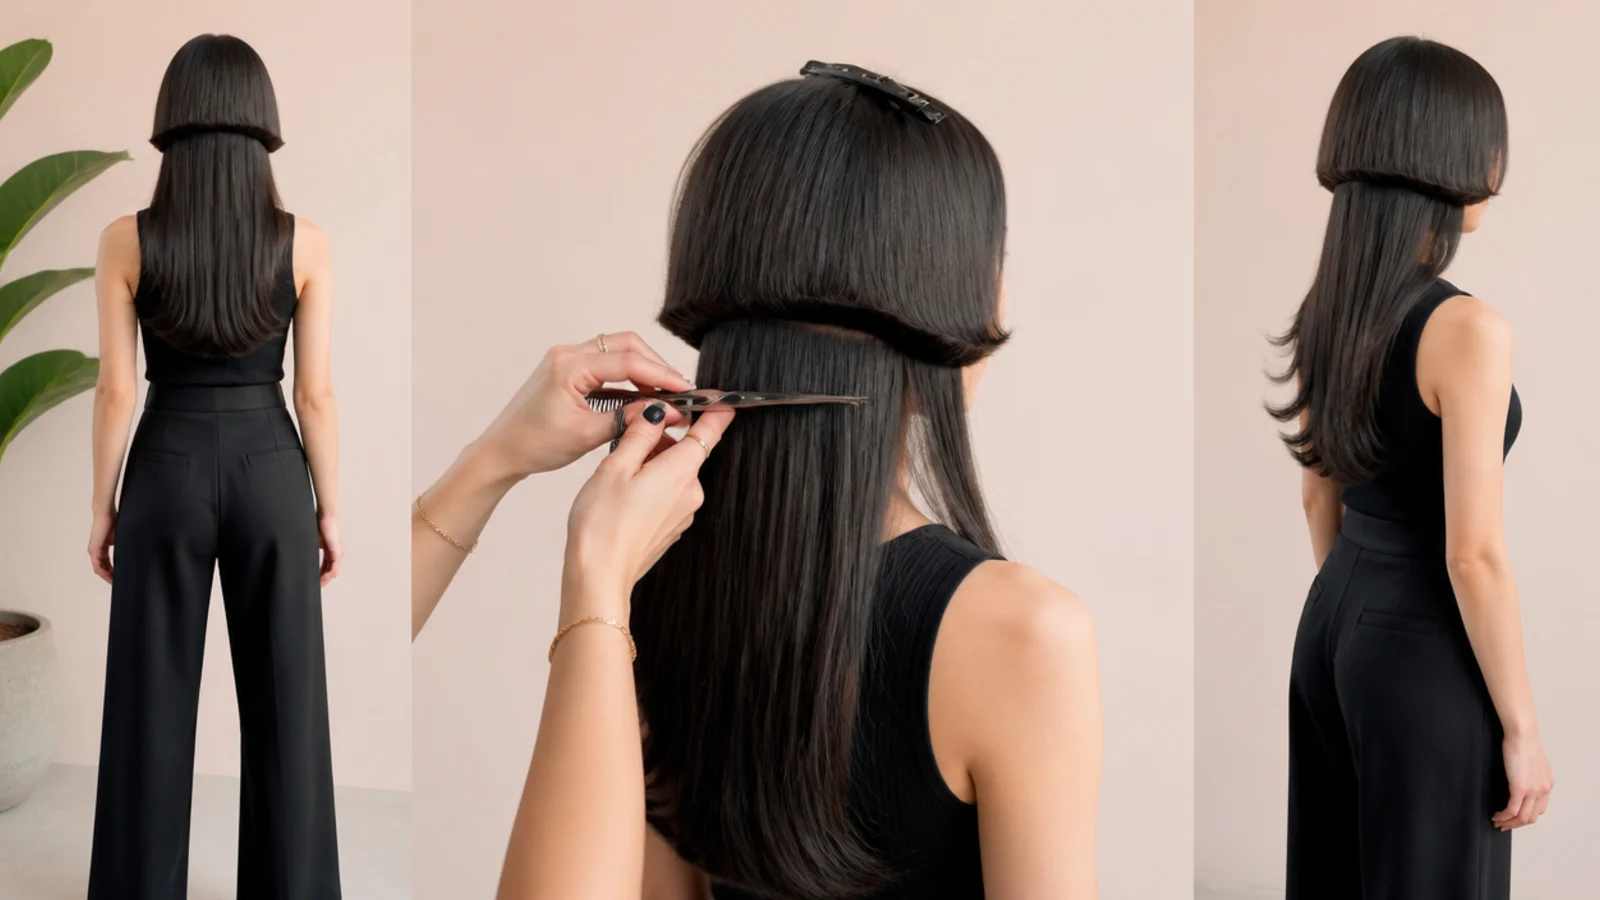
Step 8. Set the Shape
Round brush the bell under, press the long section flat, and finish with cold air. Hair only holds a shape once it cools in position, so a hot brush released too early undoes the curve it just built.
Final Thoughts
Protect the boundary and the rest of this list becomes preference. Bell height, drop, colour and clipper work are all reversible over a few months, but a blended shelf turns the appointment you booked into a wolf cut, and there is no way to put length back onto a section somebody has already softened.
For the full range of lengths, textures and variations see the jellyfish haircut guide. More in Mullet and Wolf Cuts. See also the aesthetic version.



